Breaking Down the Costs of Moving from Drupal to WordPress

Migrating from Drupal to WordPress is a significant decision for any business or website owner. While both platforms offer robust content management capabilities, WordPress has become the preferred choice for many due to its user-friendliness, extensive plugin ecosystem, and widespread community support. However, transitioning from Drupal to WordPress involves various cost factors, including development, hosting, design, and ongoing maintenance. In this article, we will break down the key cost components of a Drupal-to-WordPress migration to help you understand the investment required.

Cost Components of a Drupal-to-WordPress migration

Migrating from Drupal to WordPress involves more than just switching platforms—it requires careful planning and budgeting across several cost components. From WordPress development and design to data migration and plugin integration, each stage carries its own set of expenses. Understanding these components upfront helps you avoid unexpected costs and ensures a smoother transition. In this guide, we’ll break down the key factors that influence the total cost of WordPress migration, so you can make informed decisions that align with your budget and business goals.

Cost Components of a Drupal-to-WordPress migration

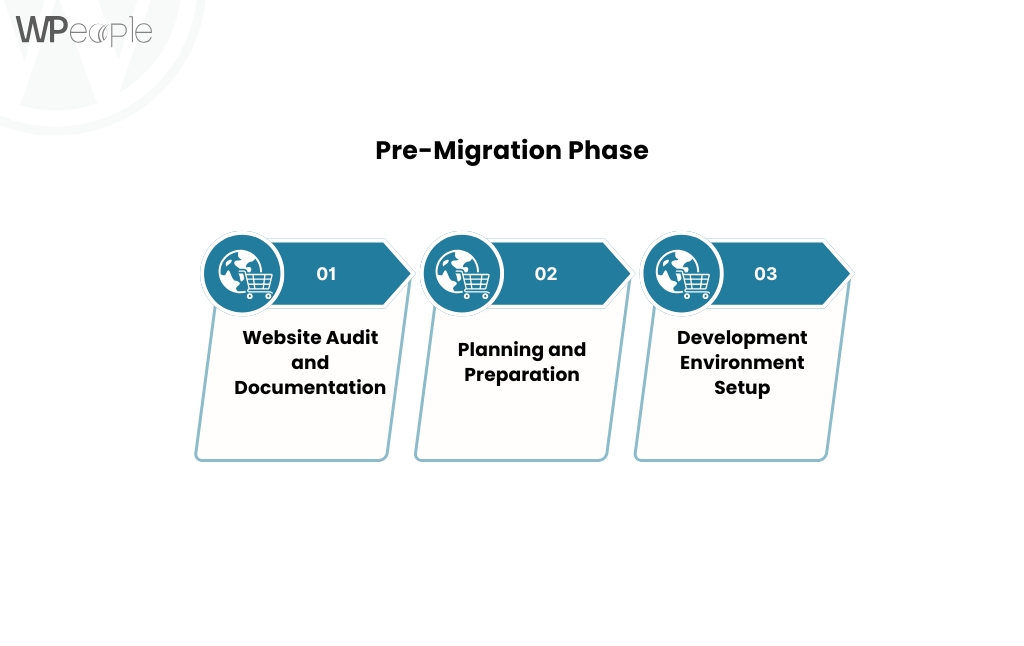
1. Planning and Strategy

Before diving into the migration process, a well-defined strategy is essential. A thorough assessment of your current Drupal website helps determine the scope of the migration, potential challenges, and the best approach for a seamless transition. Key considerations include:

  • Identifying essential content and functionalities to migrate
  • Evaluating WordPress themes and plugins that match existing Drupal features
  • Planning SEO preservation strategies to maintain search rankings
  • Setting a realistic timeline for the migration process

A clear migration strategy minimizes risks and ensures a smooth transition without data loss or performance issues.

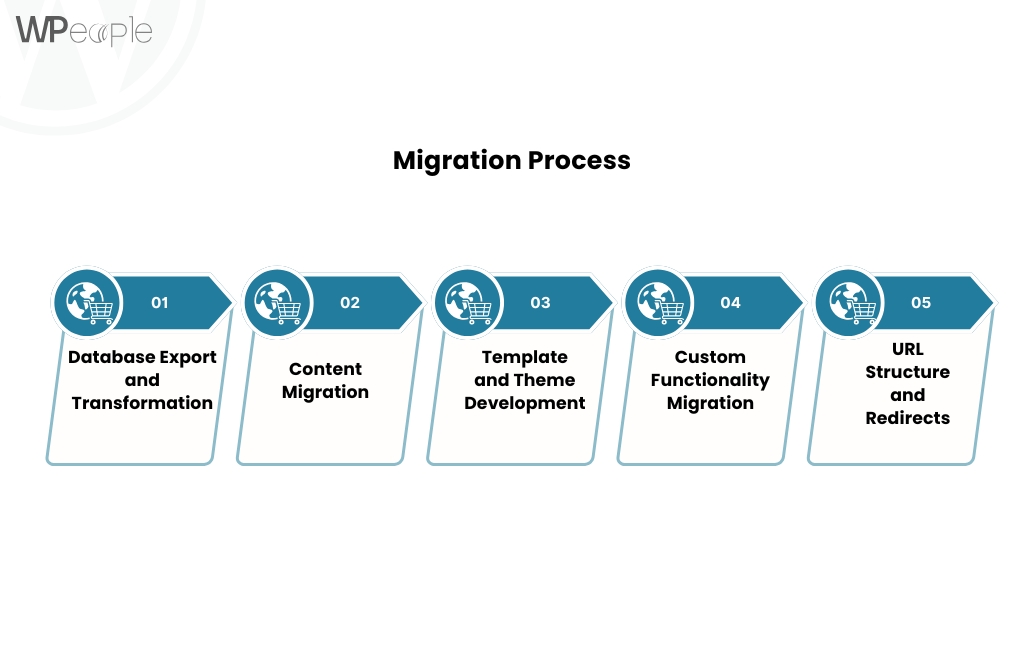
2. Website Audit and Data Migration

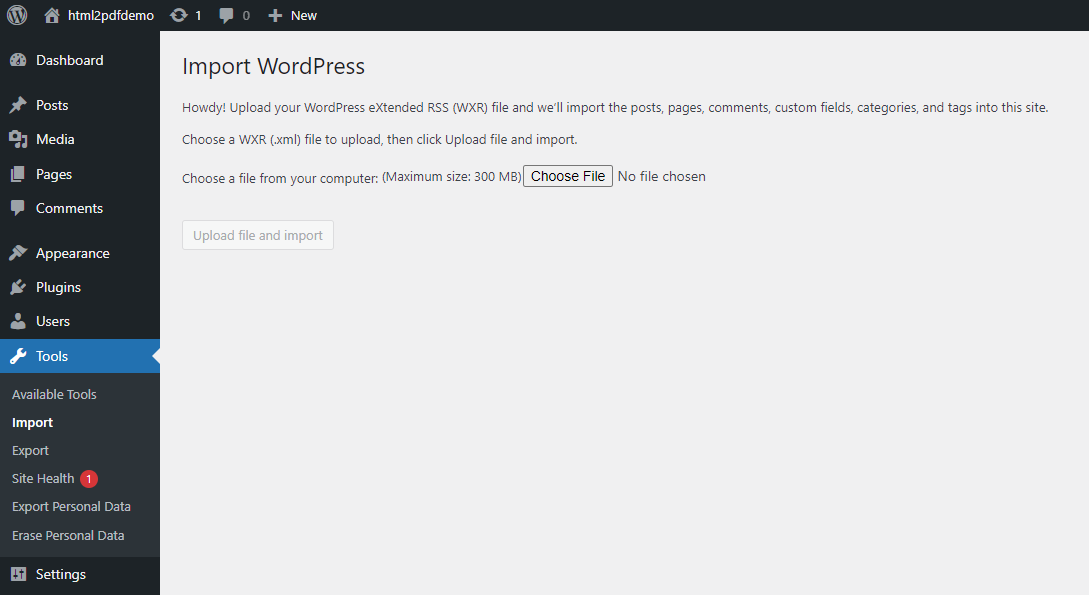
Data migration is one of the most critical aspects of the transition. Drupal and WordPress have different database structures, making it necessary to map content accurately. The data migration process involves:

  • Exporting content, including pages, posts, images, and metadata
  • Ensuring proper categorization and taxonomy mapping
  • Migrating user accounts and permissions
  • Handling custom post types and fields
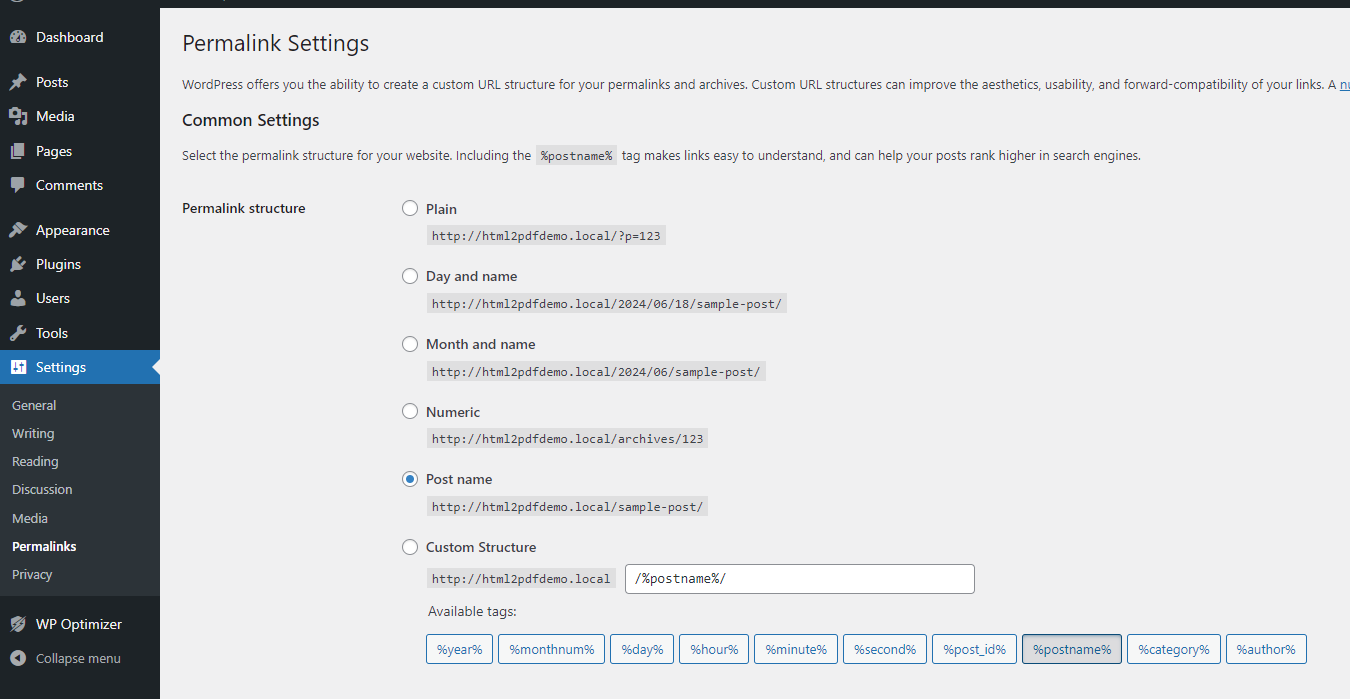
  • Addressing URL structures to prevent broken links

Using automated migration tools can simplify this process, but manual intervention may be required to ensure accuracy, especially for complex websites with custom features.

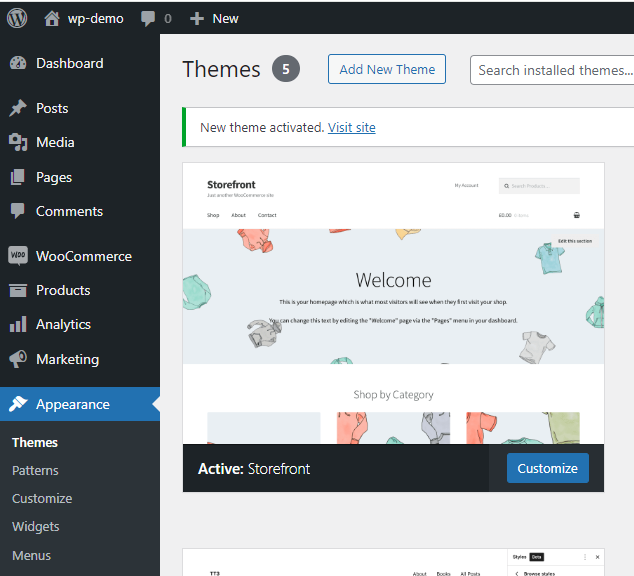
3. Theme and Design Adaptation

Drupal themes are not directly compatible with WordPress, so a new theme needs to be selected or developed. Options include:

  • Choosing a pre-built WordPress theme that closely matches the existing design
  • Customizing an existing theme to align with branding and functionality
  • Developing a bespoke WordPress theme from scratch for a unique design

Ensuring mobile responsiveness, accessibility, and performance optimization is crucial when adapting the design to WordPress.

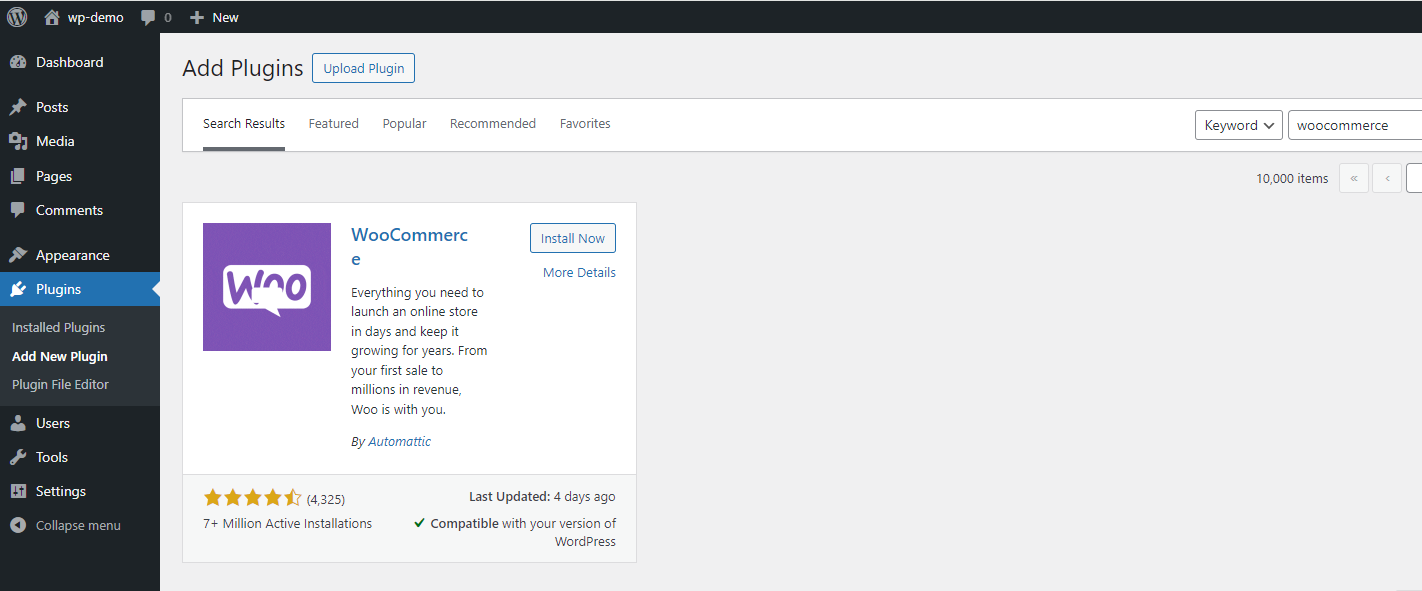
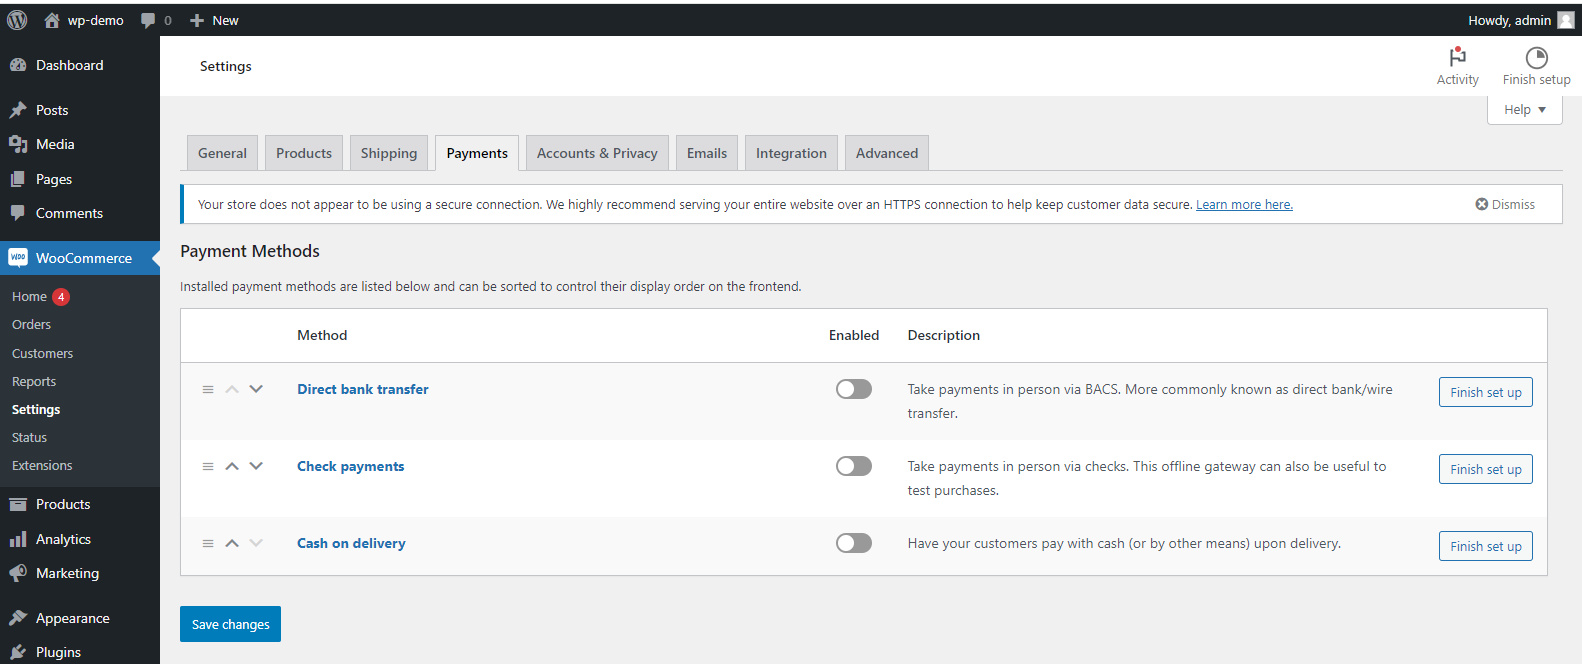
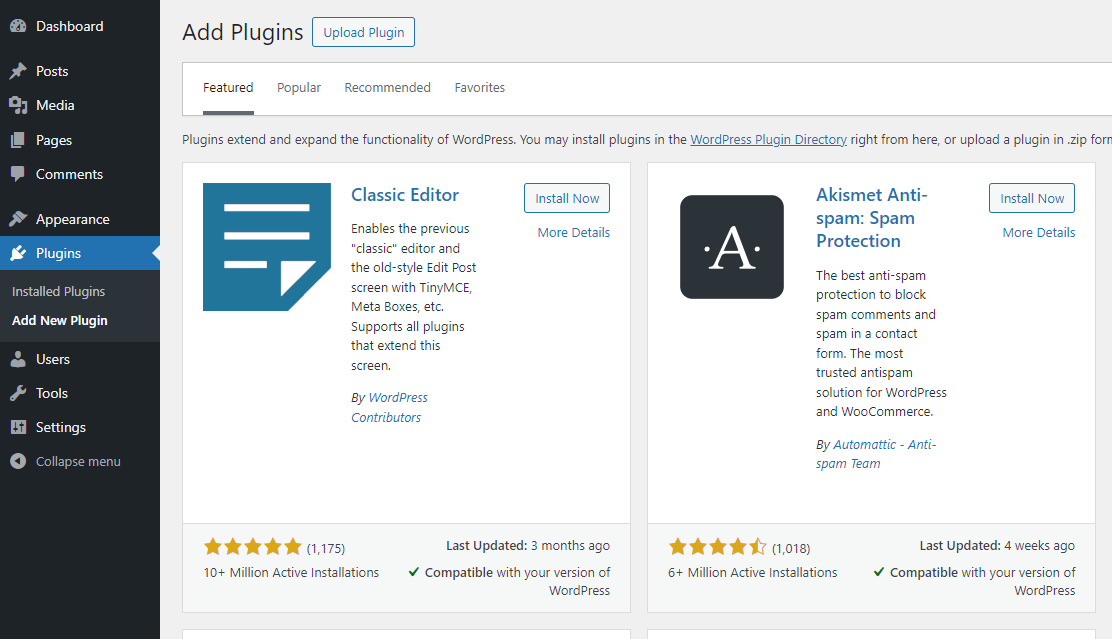
4. Plugin Selection and Functionality Replication

Drupal offers a wide range of modules for extending functionality, while WordPress relies on plugins. During migration, it’s important to find equivalent WordPress plugins for essential features such as:

  • SEO optimization
  • Contact forms and lead generation
  • E-commerce capabilities (if applicable)
  • Security enhancements
  • Performance optimization

Some Drupal functionalities may require custom development in WordPress, adding to the complexity of the migration.

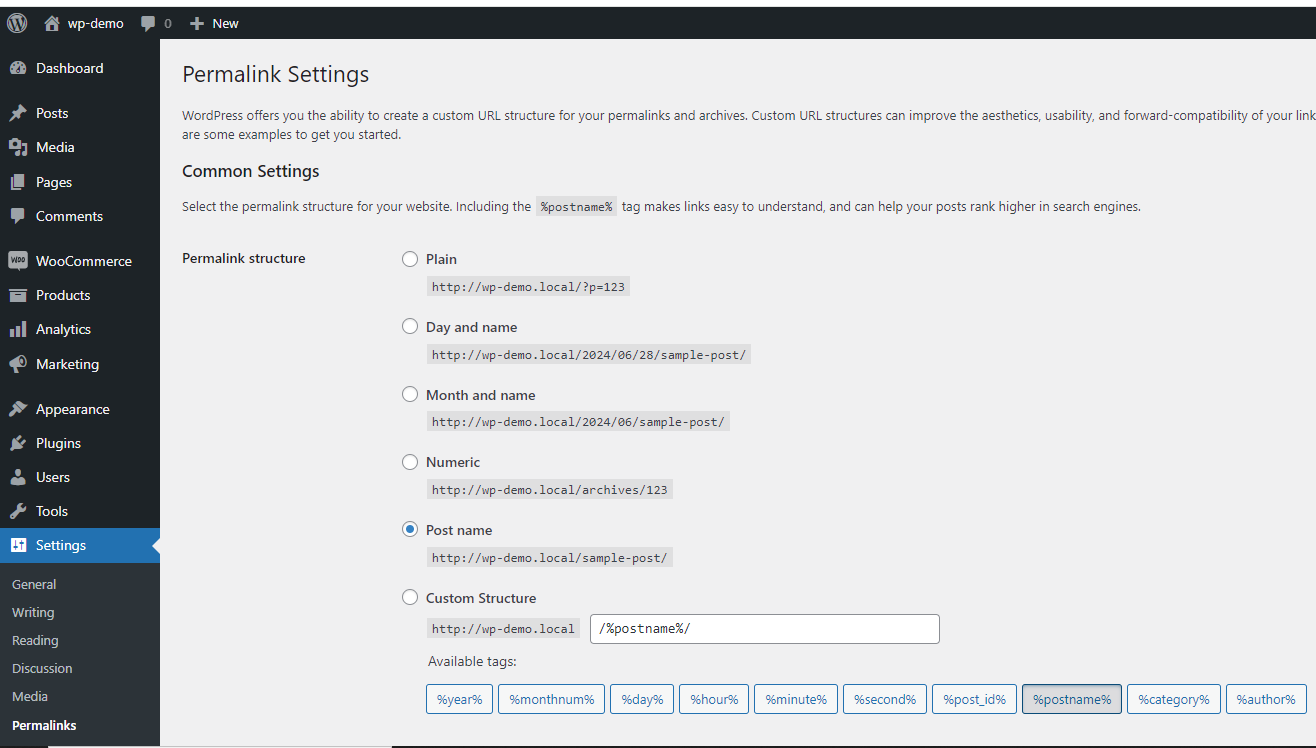
5. SEO and URL Redirection

Preserving SEO rankings during migration is a top priority. Key SEO considerations include:

  • Implementing 301 redirects for all old URLs to new WordPress URLs
  • Maintaining meta tags, alt texts, and structured data
  • Optimizing site speed and mobile-friendliness
  • Submitting an updated XML sitemap to search engines

A well-executed SEO strategy prevents traffic loss and ensures continued visibility in search results.

6. Testing and Quality Assurance

After migrating content and setting up the new WordPress site, rigorous testing is necessary to identify and fix any issues. The testing phase includes:

  • Checking content accuracy and formatting
  • Verifying website functionality across devices and browsers
  • Ensuring all links and redirects work correctly
  • Testing forms, e-commerce transactions, and user accounts

Thorough testing ensures a seamless user experience and prevents post-migration disruptions.

7. Training and Familiarization

WordPress has a different interface and workflow compared to Drupal. Training sessions for content managers, editors, and administrators help ensure a smooth transition. Key areas of training include:

  • Navigating the WordPress dashboard
  • Creating and managing content
  • Using plugins and widgets
  • Handling user roles and permissions

Providing adequate training empowers teams to make the most of WordPress’s capabilities.

8. Ongoing Maintenance and Support

Post-migration, ongoing maintenance is crucial for keeping the website secure and up to date. Regular tasks include:

  • Updating WordPress core, themes, and plugins
  • Monitoring website security and backups
  • Optimizing performance and resolving technical issues
  • Enhancing features based on evolving business needs

A dedicated support plan ensures the long-term success of your WordPress website.

Conclusion

Migrating from Drupal to WordPress is a multi-step process that requires careful planning, technical expertise, and ongoing maintenance. By understanding the key cost components involved, businesses can make informed decisions and ensure a smooth transition. Whether opting for a DIY approach or hiring professional developers, a well-executed migration strategy leads to a more manageable and scalable website in the long run. If you need assistance with your Drupal-to-WordPress migration, consider consulting a professional to streamline the process and achieve the best results.

FAQs

1. Why should I migrate from Drupal to WordPress?

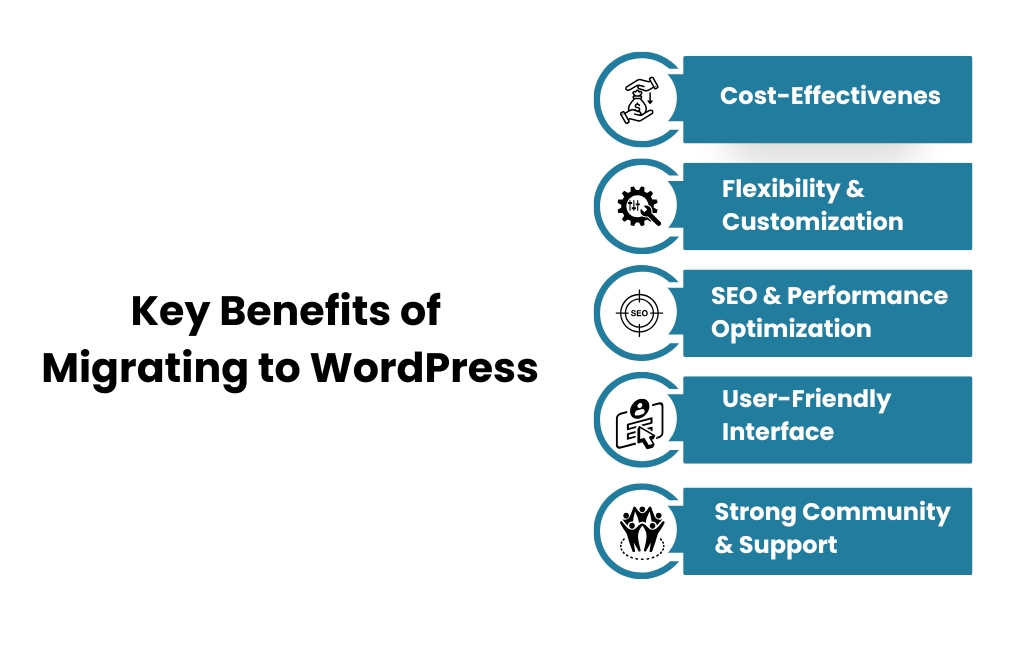
Migrating from Drupal to WordPress is beneficial if you want a more user-friendly interface, a vast selection of plugins, better content management flexibility, and a larger community for support. WordPress is also easier to maintain and customize without requiring extensive technical expertise.

2. Will I lose my website data during the migration?

No, if the migration is done correctly, all your data, including pages, posts, images, and metadata, can be transferred. Using migration tools and professional services ensures a seamless transition with minimal risk of data loss.

3. How long does it take to migrate from Drupal to WordPress?

The duration of the migration depends on the complexity of your website. A simple website with basic content may take a few days, while a complex site with custom features, e-commerce, or extensive content may take weeks. Proper planning and testing help streamline the process.

4. Will my website’s SEO be affected after migration?

If SEO best practices are followed during migration, your website rankings should remain stable. Key steps include setting up 301 redirects, preserving metadata, maintaining URL structures, and optimizing the new WordPress site for performance and mobile-friendliness.

5. Do I need professional help to migrate from Drupal to WordPress?

While it is possible to migrate on your own using plugins and tools, professional assistance is recommended for complex websites. Experts can handle database mapping, custom functionality replication, SEO preservation, and troubleshooting to ensure a smooth transition.

AEM to WordPress Migration: A Comprehensive Guide for Enterprises

Introduction: Why Migrate from AEM to WordPress?

Migrating from Adobe Experience Manager (AEM) to WordPress is a strategic decision for enterprises looking for a cost-effective, flexible, and user-friendly CMS alternative. WordPress has evolved into a powerful platform that supports enterprise solutions, offering robust custom development, security, and scalability. Whether you need a WordPress plugin to enhance functionality, a tailored WordPress theme for branding, this guide covers everything you need to know about an AEM to WordPress transition, including best practices, challenges, and the steps involved.

AEM vs. WordPress: A Quick Comparison

FeatureAdobe Experience Manager (AEM)WordPress
CostHigh licensing & maintenance feesOpen-source, lower costs
Ease of UseComplex, requires technical expertiseUser-friendly, no coding required
CustomizationLimited without extensive developmentHighly customizable with themes & plugins
ScalabilityScalable but costlyScalable with the right hosting
Community & SupportEnterprise-level supportLarge open-source community support

Key Benefits of Migrating to WordPress

key benefits of migrating to wordpress

1. Cost-Effectiveness

AEM’s licensing costs can be prohibitive, whereas WordPress is open-source, reducing expenses significantly. Enterprise WordPress solutions provide cost-effective alternatives with robust features.

2. Flexibility & Customization

With WordPress custom development, businesses can tailor their websites with custom themes, plugins, and integrations, which are limited in AEM without costly development work.

3. SEO & Performance Optimization

WordPress offers better SEO capabilities through plugins like Yoast SEO, improving search visibility compared to AEM’s built-in features.

4. User-Friendly Interface

WordPress’s intuitive dashboard allows non-technical users to manage content efficiently, unlike AEM’s steep learning curve.

5. Strong Community & Support

With a vast global community and enterprise support services, WordPress provides extensive resources for troubleshooting and enhancements.

Step-by-Step WordPress Migration Guide

Migrating from AEM to WordPress requires a structured approach to ensure a seamless transition without data loss or performance issues. Below is a detailed breakdown of each step involved in the migration process:

Step 1: Planning the Migration

The first and most crucial step is thorough planning. Start by assessing your current AEM website, identifying key components that need migration, including pages, media, metadata, and integrations. This phase also involves evaluating your business goals and determining whether you need custom WordPress development to replicate or enhance existing features. Additionally, selecting a reliable WordPress hosting provider is essential, ensuring that the new platform can handle your website’s traffic and performance requirements efficiently.

Step 2: Set Up a WordPress Environment

Once planning is complete, the next step is setting up a WordPress environment. Install the latest version of WordPress and configure essential settings. Choose an enterprise-grade theme that aligns with your branding and functionality needs. Security should be a top priority, so install necessary security plugins, configure SSL certificates, and establish role-based access for content managers. If your enterprise requires advanced customization, you may need WordPress developers to build tailored solutions.

Step 3: Content & Data Migration

Content migration involves transferring text, images, videos, and metadata from AEM to WordPress. There are automated migration tools that can streamline this process, but manual verification is still necessary to ensure all content appears correctly. URL structures may differ between the platforms, so proper 301 redirects should be implemented to preserve SEO rankings. Additionally, any interactive elements, forms, or custom scripts should be tested and rebuilt as needed to ensure functionality within the new WordPress environment.

Step 4: Custom Development & Testing

WordPress allows for extensive customization, making it easy to replicate or enhance AEM’s features. Work with developers to build or modify custom functionalities, such as dynamic content modules, integrations with third-party software, and personalized user experiences. After implementing these features, conduct rigorous testing, including user acceptance testing (UAT) and performance testing, to ensure compatibility across devices and browsers. Optimize website speed, improve database efficiency, and resolve any issues before proceeding to deployment.

Step 5: Deployment & Post-Migration Optimization

Once testing is complete, it’s time to launch your WordPress site. The deployment process should be carefully managed to minimize downtime and ensure a smooth transition for users. After the site goes live, monitor performance closely using analytics tools. Track SEO rankings, traffic, and user engagement to identify areas for further optimization. Ongoing maintenance, WordPress security, and WordPress maintenance should be part of your post-migration strategy to ensure long-term success.

Common AEM Migration Challenges & Solutions

ChallengeSolution
Data structure differencesUse automated migration tools or professional migration services
SEO impactImplement 301 redirects and optimize content for SEO
Security concernsUse enterprise-level security plugins and best practices
Custom functionalitiesLeverage WordPress custom development for tailored features
User trainingProvide WordPress training sessions for content managers

FAQs About AEM to WordPress Migration

1. How long does it take to migrate from AEM to WordPress?

The timeline varies depending on the complexity of the website, typically ranging from a few weeks to a few months.

2. Will I lose my SEO rankings during migration?

If best practices like 301 redirects, metadata migration, and on-page optimization are followed, SEO impact can be minimized or even improved.

3. Can WordPress handle enterprise-level websites?

Yes, with proper hosting, security measures, and custom development, WordPress is a viable CMS for enterprise websites.

4. What are the costs involved in migration?

Costs include development, hosting, security, and potential plugin purchases but remain significantly lower than AEM’s licensing and maintenance fees.

5. Is WordPress secure for large-scale businesses?

With the right security plugins, regular updates, and best practices, WordPress can be as secure as any enterprise CMS.

Conclusion: Make the Right Move for Your Business

Migrating from AEM to WordPress provides a cost-effective, flexible, and scalable solution for enterprise websites. By implementing the right strategy, you can achieve a seamless transition while enhancing SEO, performance, and user experience. If you’re planning to switch, investing in custom WordPress development or consulting a migration expert can help ensure a smooth and efficient process.

Migrating your website from HubSpot CMS to WordPress

Migrating your website from HubSpot CMS to WordPress is a strategic decision that can significantly enhance your site’s flexibility, scalability, and cost-effectiveness. This comprehensive guide provides a step-by-step checklist to ensure a seamless transition, preserving your site’s functionality and SEO integrity.

Introduction

  • Overview of HubSpot CMS and WordPress

HubSpot CMS: An all-in-one platform offering integrated marketing tools, user-friendly interface, but with certain limitations in customization and scalability.

WordPress: A versatile, open-source content management system powering over 40% of all websites, known for its extensive customization options and a vast library of plugins and themes.

  • Reasons for Migrating

Cost-Effectiveness: WordPress is free to use, with costs incurred only for hosting and premium features, making it more economical than HubSpot’s tiered pricing.

Customization and Flexibility: WordPress offers unparalleled customization through thousands of themes and plugins, allowing for a highly personalized website.

Scalability and Control: With WordPress, you have complete control over your site’s data and scalability, enabling you to adapt and grow without platform-imposed restrictions.

Pre-Migration Preparation

  • Content Audit

Inventory Existing Content: Compile a comprehensive list of all current website content, including pages, blog posts, images, and other media.

Evaluate Content Relevance: Determine which content is still valuable and aligns with your brand’s goals, identifying outdated or redundant content for removal or updating.

  • SEO Performance Analysis

Analyze Current SEO Metrics: Use tools like Google Analytics to assess your site’s performance, focusing on high-traffic pages and valuable keywords.

Document Backlinks and Rankings: Record existing backlinks and search engine rankings to ensure these are maintained post-migration.

  • Technical Assessment

Review Website Functionalities: List all current features, such as forms, e-commerce capabilities, and third-party integrations, to replicate them on WordPress.

Identify Necessary Plugins: Research WordPress plugins that can provide equivalent or enhanced functionality for your site’s features.

  • Choosing the Right WordPress Hosting

Performance Considerations: Select a hosting provider known for reliability and speed to ensure optimal site performance.

Security Features: Ensure the host offers robust security measures, including SSL certificates and regular backups.

Scalability Options: Choose a host that can accommodate your site’s growth, offering scalable resources as traffic increases.

Setting Up the WordPress Environment

  • Installing WordPress

Set Up Hosting Account: Register with your chosen hosting provider and set up your account.

Install WordPress: Use the hosting provider’s one-click installation feature or manually install WordPress to your server.

Create a Staging Environment: Establish a staging site to test changes and migrations without affecting the live site.

  • Selecting and Customizing a Theme

Choose a Theme: Select a WordPress theme that closely aligns with your brand’s aesthetics and functionality requirements.

Customize Design Elements: Utilize the WordPress Customizer or a page builder plugin to adjust colors, fonts, layouts, and other design aspects to match your brand identity.

  • Essential Plugins Installation

SEO Optimization: Install plugins like Yoast SEO or Rank Math to manage on-page SEO elements effectively.

Security Enhancements: Add security plugins such as Wordfence or Sucuri to protect your site from threats.

Performance Optimization: Use caching plugins like WP Rocket or W3 Total Cache to improve site loading times.

Backup Solutions: Implement backup plugins like UpdraftPlus to schedule regular backups of your site.

Content Migration

  • Exporting Data from HubSpot

Export Blog Posts and Pages: Use HubSpot’s export functionality to download your content, typically in CSV or XML format.

Download Media Files: Manually download images and other media assets from your HubSpot file manager.

  • Importing Data into WordPress

Import Content Files: Utilize WordPress import tools or plugins like WP All Import to upload your content files.

Upload Media Assets: Add media files to the WordPress media library, ensuring they are correctly linked within your content.

  • Manual Adjustments

Format Content Appropriately: Review each page and post to ensure proper formatting, adjusting headings, images, and links as necessary.

Set Up Categories and Tags: Organize your content by assigning relevant categories and tags to maintain site structure and improve navigation.

Recreating Functionalities

  • Forms and Lead Capture

Implement Form Plugins: Use plugins like Gravity Forms or Contact Form 7 to recreate existing forms, ensuring they capture necessary data.

Integrate with CRM Systems: Connect your forms to CRM tools, such as HubSpot’s free CRM, to maintain lead management workflows.

  • Analytics and Tracking

Set Up Google Analytics: Install the Google Analytics tracking code or use plugins like MonsterInsights to monitor site traffic and user behavior.

Configure Search Console: Verify your site with Google Search Console to monitor search performance and indexing status.

  • Third-Party Integrations

Email Marketing Services: Integrate with platforms like Mailchimp or Sendinblue using their respective plugins to manage newsletters and email campaigns.

Social Media Platforms: Add social sharing plugins to facilitate content sharing and integrate your social media profiles.

SEO Preservation and URL Redirection

  • Maintaining URL Structures

Replicate Existing URL Slugs: Ensure your new WordPress URLs match the structure of your old HubSpot URLs.

Set Up WordPress Permalinks: Go to Settings > Permalinks in WordPress and choose a format that aligns with your old URLs.

  • 301 Redirects Implementation

Map Old URLs to New URLs: Use a spreadsheet to list old and new URLs to prevent broken links.

Use a Redirection Plugin: Install the Redirection plugin or modify your .htaccess file to implement 301 redirects.

Test Redirects: Use tools like Screaming Frog or Google Search Console to confirm redirects are functioning properly.

  • Updating Sitemap and Robots.txt

Generate a New XML Sitemap: Use Yoast SEO or Rank Math to create an updated sitemap.

Submit Sitemap to Search Engines: Upload the new sitemap to Google Search Console and Bing Webmaster Tools.

Optimize Robots.txt: Ensure that search engines can crawl important pages while blocking unnecessary admin pages.

  • Testing and Quality Assurance

Cross-Browser and Device Testing

Test Across Browsers: Check website compatibility on Chrome, Firefox, Safari, and Edge.

Mobile Responsiveness: Use Google Mobile-Friendly Test to ensure your website displays correctly on mobile devices.

  • Functionality Checks

Verify Forms and CTA Buttons: Test contact forms, email opt-ins, and call-to-action buttons.

Check Site Navigation: Ensure menus, dropdowns, and internal links work properly.

Test Load Times: Use Google PageSpeed Insights and GTmetrix to analyze and optimize site performance.

  • Content Verification

Check for Formatting Issues: Ensure proper use of headings, images, and spacing.

Fix Broken Links: Use Broken Link Checker to identify and correct any dead links.

Launching the New Website

  • Final Preparations

Perform a Final Backup: Use UpdraftPlus or BackupBuddy to create a full backup before launch.

Communicate Launch Plans: Inform team members, stakeholders, and customers about the transition.

  • DNS and Domain Settings

Update DNS Records: Change your domain settings to point to your new WordPress hosting provider.

Enable SSL Certificate: Install an SSL certificate and enable HTTPS for secure browsing.

  • Post-Launch Monitoring

Monitor Traffic and Performance: Use Google Analytics to track changes in visitor behavior.

Address Issues Promptly: Watch for user reports and fix any problems that arise.

Post-Migration Optimization

  • Performance Enhancements

Enable Caching: Use WP Rocket or W3 Total Cache to improve loading speeds.

Optimize Images: Compress images using Smush or ShortPixel.

  • Ongoing SEO Strategies

Regularly Publish New Content: Keep your blog updated to maintain rankings.

Build High-Quality Backlinks: Reach out to relevant sites to restore lost backlinks.

  • Regular Maintenance

Update WordPress, Themes, and Plugins: Keep your site secure and functional by installing updates.

Schedule Backups: Automate backups to protect against data loss.

Conclusion

Migrating from HubSpot CMS to WordPress can unlock greater customization, lower costs, and improved scalability for your website. However, without a structured migration plan, you risk losing critical data, SEO rankings, and site functionality.

By following this complete migration checklist, you can ensure a smooth transition while maintaining your website’s performance and user experience.

Need expert help with your migration? Consider hiring a professional WordPress developer to handle the process seamlessly.

Step-by-Step Process for Migrating from Umbraco to WordPress

Migrating a website from Umbraco to WordPress requires careful planning and execution to ensure a smooth transition while maintaining your content, SEO value, and user experience. This comprehensive guide will walk you through the entire migration process, from initial preparation to post-migration tasks.

Understanding the Migration Challenge

Umbraco and WordPress are both powerful content management systems, but they have different architectures, data structures, and content models. The main challenges in migration include:

  • Preserving content hierarchy and relationships
  • Maintaining URL structures and redirects
  • Transferring media files and assets
  • Converting custom data types to WordPress equivalents
  • Preserving SEO rankings and metadata
  • Ensuring consistent user permissions and roles

Pre-Migration Phase

pre migration phase

1. Website Audit and Documentation

Before beginning the migration, conduct a thorough audit of your Umbraco website:

  • Document all content types and their properties
  • Map out the content structure and hierarchy
  • List all templates and their corresponding layouts
  • Inventory all media files and their usage
  • Document all URL structures and patterns
  • Catalog all forms and interactive elements
  • List all installed packages and their functionality
  • Document all custom functionality and integrations

2. Planning and Preparation

Create a detailed migration plan that includes:

  • Timeline and milestones
  • Content mapping strategy
  • URL redirect strategy
  • Testing methodology
  • Backup procedures
  • Rollback plan
  • Post-migration tasks

3. Development Environment Setup

Set up your development environment:

  • Install WordPress on a development server
  • Configure development tools and plugins
  • Set up version control
  • Create a staging environment
  • Install necessary WordPress plugins for migration

Migration Process

migration phase

1. Database Export and Transformation

Export your Umbraco database:

sql

— Export Umbraco content nodes

SELECT * FROM cmsContent

— Export document types

SELECT * FROM cmsContentType

— Export media items

SELECT * FROM cmsMedia

Transform the exported data:

  • Convert Umbraco document types to WordPress post types
  • Map Umbraco properties to WordPress meta fields
  • Transform content relationships
  • Convert date formats
  • Handle special characters and encodings

2. Content Migration

2.1 Migrating Pages and Posts

Create a migration script to:

  • Map Umbraco document types to appropriate WordPress post types
  • Convert Umbraco properties to WordPress custom fields
  • Preserve page hierarchy and order
  • Maintain content relationships
  • Transfer meta descriptions and SEO data

2.2 Media Migration

Handle media files:

  • Export media files from Umbraco media folder
  • Upload files to WordPress media library
  • Update media references in content
  • Preserve file names and metadata
  • Handle image sizes and thumbnails

2.3 User Migration

Transfer user data:

  • Map Umbraco user roles to WordPress roles
  • Export user accounts and profiles
  • Import users while maintaining passwords
  • Preserve user permissions and capabilities

3. Template and Theme Development

Create WordPress templates:

  • Analyze Umbraco templates and partial views
  • Design equivalent WordPress theme structure
  • Convert Umbraco macros to WordPress shortcodes
  • Implement responsive design patterns
  • Optimize for performance

4. Custom Functionality Migration

Handle custom features:

  • Identify WordPress plugins for standard functionality
  • Develop custom plugins for unique features
  • Convert Umbraco surface controllers to WordPress actions
  • Migrate custom forms and handlers
  • Implement API integrations

5. URL Structure and Redirects

Maintain SEO value:

  • Document all existing URLs
  • Create URL mapping table
  • Implement 301 redirects
  • Update internal links
  • Preserve URL parameters and query strings

Testing and Quality Assurance

1. Content Verification

Check migrated content:

  • Verify all pages and posts
  • Check formatting and styles
  • Validate media attachments
  • Test internal links
  • Verify meta descriptions and SEO data

2. Functionality Testing

Test all features:

  • Forms and interactive elements
  • Search functionality
  • User authentication
  • Custom functionality
  • API integrations
  • Performance and loading times

3. Cross-browser and Mobile Testing

Ensure compatibility:

  • Test on major browsers
  • Verify responsive design
  • Check mobile functionality
  • Validate forms on all devices
  • Test media playback

Post-Migration Tasks

post migration task

1. SEO Optimization

Maintain search rankings:

  • Update XML sitemap
  • Submit sitemap to search engines
  • Verify redirect implementation
  • Check robots.txt configuration
  • Monitor search console for errors

2. Performance Optimization

Optimize the website:

  • Configure caching
  • Optimize images
  • Minify CSS and JavaScript
  • Enable compression
  • Implement CDN if needed

3. Security Implementation

Secure the website:

  • Update WordPress core
  • Install security plugins
  • Configure SSL certificate
  • Set up firewall rules
  • Implement backup solution

4. Documentation and Training

Prepare documentation:

  • Create user guides
  • Document custom functionality
  • Provide training materials
  • Record video tutorials
  • Schedule training sessions

Common Challenges and Solutions

1. Content Type Differences

Challenge: Umbraco and WordPress handle content types differently.

Solution:

  • Use Custom Post Types in WordPress
  • Implement Advanced Custom Fields
  • Create custom taxonomies
  • Use meta fields for additional data

2. Template Conversion

Challenge: Converting Umbraco templates to WordPress themes.

Solution:

  • Use WordPress template hierarchy
  • Implement partial templates
  • Convert macros to shortcodes
  • Use template parts for reusable elements

3. Custom Data Types

Challenge: Handling Umbraco-specific data types.

Solution:

  • Map to WordPress custom fields
  • Use appropriate field types
  • Implement custom meta boxes
  • Create custom widgets if needed

Best Practices and Tips

  • Always work with a backup of your Umbraco site
    Backing up your site ensures you have a safety net in case something goes wrong during migration. It allows you to restore your site to its previous state without losing critical data.
  • Use a staging environment for testing
    A staging environment mirrors your live site, providing a safe space to test changes without affecting users. This helps identify and fix issues before they impact the production environment.
  • Implement progressive migration when possible
    Progressive migration involves moving parts of your site incrementally, reducing risks and allowing for easier troubleshooting. This approach minimizes downtime and ensures a smoother transition.
  • Document all changes and configurations
    Keeping detailed records of every change and configuration helps maintain clarity and accountability. It also serves as a reference for future updates or troubleshooting.
  • Monitor performance during migration
    Regularly monitoring performance helps detect bottlenecks or errors early in the process. This ensures the migration does not negatively impact site speed or user experience.
  • Keep stakeholders informed of progress
    Regular updates to stakeholders build trust and ensure everyone is aligned. Clear communication helps manage expectations and avoids misunderstandings.
  • Plan for a content freeze during final migration
    A content freeze prevents new updates from being made during the final stages of migration, ensuring data consistency. This reduces the risk of conflicts or data loss.
  • Test thoroughly before going live
    Comprehensive testing ensures all components of the site function as expected after migration. This step is critical to avoid post-launch issues and ensure a seamless user experience.

Monitoring and Maintenance

After migration:

  • Monitor website performance
  • Check for 404 errors
  • Review search console reports
  • Update redirects as needed
  • Optimize database regularly
  • Keep plugins updated
  • Monitor security logs
  • Backup regularly

Conclusion

Migrating from Umbraco to WordPress requires careful planning, attention to detail, and thorough testing. While the process can be complex, following this guide will help ensure a successful migration. Remember to:

  • Plan thoroughly before starting
  • Document everything
  • Test extensively
  • Monitor post-migration
  • Train users on the new system

With proper execution, your WordPress site will maintain all the functionality of your Umbraco site while providing the benefits of WordPress’s extensive ecosystem and user-friendly interface.

Essential Steps to Migrate Your Joomla Site to WordPress

Introduction

Joomla and WordPress are two of the most popular content management systems (CMS) available today. While Joomla is known for its flexibility and robustness, WordPress is celebrated for its user-friendly interface and extensive plugin ecosystem. Many website owners find themselves wanting to migrate from Joomla to WordPress to take advantage of WordPress’s ease of use and vast community support.

However, migrating a website from one CMS to another is not a simple copy-paste job. It involves careful planning, execution, and testing to ensure that your website’s content, design, and functionality are preserved. In this guide, we’ll cover all the essential steps to migrate your Joomla site to WordPress successfully.

Why Migrate from Joomla to WordPress?

Before diving into the migration process, it’s important to understand why you might want to switch from Joomla to WordPress. Here are some common reasons:

  • Ease of Use: WordPress is known for its intuitive interface, making it easier for non-technical users to manage their websites.
  • Extensive Plugin Ecosystem: WordPress offers a vast library of plugins that can extend the functionality of your website without the need for custom coding.
  • Themes and Customization: WordPress has a wide range of themes and customization options, allowing you to create a unique look for your site.
  • Community Support: WordPress has a large and active community, making it easier to find help, tutorials, and resources.
  • SEO-Friendly: WordPress is inherently SEO-friendly, with plugins like Yoast SEO that make it easy to optimize your site for search engines.

Pre-Migration Preparation

Backup Your Joomla Site

Before you start the migration process, it’s crucial to back up your Joomla site. This ensures that you have a copy of your data in case something goes wrong during the migration. You can use Joomla’s built-in backup feature or a third-party extension like Akeeba Backup to create a full backup of your site, including the database, files, and media.

Set Up a WordPress Environment

Next, you’ll need to set up a WordPress environment where you can import your Joomla content. This can be done on a local server or a staging site. Here’s how to set up a WordPress environment:

  1. Install WordPress: Download the latest version of WordPress from the official website and install it on your server. If you’re using a hosting provider, they may offer a one-click WordPress installation option.
  2. Choose a Theme: Select a WordPress theme that matches the design of your Joomla site. You can either choose a free theme from the WordPress repository or purchase a premium theme.
  3. Install Essential Plugins: Install plugins that will help with the migration process, such as an SEO plugin, a backup plugin, and a redirection plugin.

Migrating Content from Joomla to WordPress

Export Joomla Content

The first step in migrating your content is to export it from Joomla. Joomla does not have a built-in export feature, so you’ll need to use a third-party extension or manually export the content from the database.

  1. Using an Extension: There are several Joomla extensions available that can help you export your content to WordPress. One popular option is the “J2XML” extension, which allows you to export your Joomla content in XML format.
  2. Manual Export: If you prefer to export your content manually, you can do so by accessing your Joomla database via phpMyAdmin and exporting the relevant tables (e.g., jos_content, jos_categories, etc.).

Import Content into WordPress

Once you’ve exported your Joomla content, the next step is to import it into WordPress. WordPress has a built-in import tool that can handle XML files, making it easy to import your Joomla content.

  1. Install the WordPress Importer Plugin: Go to your WordPress dashboard, navigate to “Tools” > “Import,” and install the “WordPress Importer” plugin.
  2. Upload the XML File: After installing the plugin, click on “Run Importer” and upload the XML file you exported from Joomla.
  3. Map Authors and Categories: During the import process, you’ll be prompted to map authors and categories from your Joomla site to WordPress. You can either create new authors and categories or map them to existing ones.
  4. Import Attachments: If your Joomla site includes media files, you can choose to import them during this step. Note that this may take some time, depending on the number of media files.

Migrating Media Files

If your Joomla site includes a large number of media files (images, videos, etc.), you’ll need to migrate these files to your WordPress site. Here’s how to do it:

  1. Download Media Files: Access your Joomla site via FTP and download the media files from the images directory.
  2. Upload Media Files to WordPress: Upload the media files to the wp-content/uploads directory on your WordPress site. You can do this via FTP or through the WordPress media library.
  3. Update Links: After uploading the media files, you’ll need to update the links in your content to point to the new location. You can use a plugin like “Better Search Replace” to search for old URLs and replace them with the new ones.

Setting Up Permalinks and Redirects

One of the most important aspects of migrating your site is ensuring that your URLs are preserved or properly redirected. This is crucial for maintaining your site’s SEO rankings and ensuring that visitors can still access your content.

  1. Set Up Permalinks: Go to your WordPress dashboard, navigate to “Settings” > “Permalinks,” and choose a permalink structure that matches your Joomla site’s URL structure.
  2. Create Redirects: If your URLs have changed during the migration, you’ll need to set up 301 redirects to ensure that visitors are redirected to the correct pages. You can use a plugin like “Redirection” to create and manage redirects.

Design and Theme Customization

Once your content is migrated, the next step is to customize your WordPress theme to match the design of your Joomla site. Here’s how to do it:

  1. Choose a Similar Theme: Select a WordPress theme that closely matches the design of your Joomla site. You can either choose a free theme or purchase a premium theme.
  2. Customize the Theme: Use the WordPress Customizer to customize the theme’s colors, fonts, and layout. You can also use a page builder plugin like Elementor or Beaver Builder to create custom page layouts.
  3. Add Widgets and Menus: Set up your WordPress widgets and menus to match the functionality of your Joomla site. You can add widgets to your sidebar, footer, and other widget-ready areas.

Migrating Extensions and Functionality

Joomla extensions provide additional functionality to your site, such as contact forms, galleries, and e-commerce features. When migrating to WordPress, you’ll need to find equivalent plugins to replace these extensions.

  1. Identify Joomla Extensions: Make a list of all the Joomla extensions you’re currently using and their functionality.
  2. Find WordPress Plugins: Search for WordPress plugins that offer similar functionality. For example, if you’re using a Joomla contact form extension, you can replace it with a WordPress plugin like Contact Form 7 or WPForms.
  3. Install and Configure Plugins: Install the WordPress plugins and configure them to match the functionality of your Joomla extensions.

Testing and Quality Assurance

Before going live with your new WordPress site, it’s crucial to thoroughly test everything to ensure that the migration was successful. Here’s what to check:

  1. Content: Verify that all your content has been migrated correctly and that there are no missing or broken pages.
  2. Media Files: Check that all media files have been uploaded and are displaying correctly.
  3. Links and Redirects: Test all internal and external links to ensure they are working correctly. Verify that your redirects are functioning as expected.
  4. Functionality: Test all forms, galleries, and other functionality to ensure they are working correctly.
  5. Design: Review your site’s design on different devices and browsers to ensure it looks good and is responsive.

Going Live

Once you’ve completed testing and are satisfied with your new WordPress site, it’s time to go live. Here’s how to do it:

  1. Update DNS Settings: If you’re moving to a new domain or hosting provider, update your DNS settings to point to your new WordPress site.
  2. Switch to Live Mode: If you’ve been working on a staging site, switch to your live site by updating the site URL in WordPress settings.
  3. Clear Cache: Clear any caching plugins or server-side caching to ensure that visitors see the latest version of your site.

Post-Migration Tasks

After your site is live, there are a few additional tasks you should complete to ensure everything runs smoothly:

  1. Monitor for Errors: Keep an eye on your site for any errors or issues that may arise after the migration. Use tools like Google Search Console to monitor for 404 errors and other issues.
  2. Update Sitemap: Submit your new sitemap to search engines to ensure they index your site correctly.
  3. Inform Users: If your site has registered users, inform them of the migration and any changes they need to be aware of.
  4. Optimize Performance: Use caching plugins, optimize images, and implement other performance optimizations to ensure your site loads quickly.

Conclusion

Migrating from Joomla to WordPress may seem like a complex process, but with careful planning and execution, it can be done smoothly and efficiently. By following the steps outlined in this guide, you can ensure that your content, design, and functionality are preserved throughout the migration process.

Remember to back up your Joomla site before starting the migration, and take the time to thoroughly test your new WordPress site before going live. With the right tools and a bit of patience, you’ll be able to enjoy all the benefits that WordPress has to offer, from its user-friendly interface to its extensive plugin ecosystem.

Whether you’re looking to improve your site’s SEO, enhance its functionality, or simply make it easier to manage, migrating to WordPress can be a great decision. Good luck with your migration, and enjoy your new WordPress site!

Migrate with Confidence: A Step-by-Step Guide from Shopify to WooCommerce

The relevance and significance of selecting the right platform for your business can make a significant difference especially in the broad and fast-paced environment of e-commerce. Shopify has proven to be a consistent option for many online retailers because of its easy to use interface and feature set but WooCommerce is gradually becoming a force to reckon with because of its measurably superior flexibility, control, and the cost structure. If you are about to switch to WooCommerce from Shopify, you are going to venture into a process that has the potential to vastly improve your online business offerings. In this guide on how to switch banks, we cover the rationale for making the change, important factors to consider before switching, as well as general steps to follow in the transition process.

Why Consider Moving from Shopify to WooCommerce?

Lower Cost

Probably one of the biggest reasons to consider migrating from Shopify to WooCommerce is that the latter is cheaper. Shopify works on the business model of offering the subscriptions in the packages that are basic, standard and the premium to help the client in different ways. As well, Shopify includes general transaction fees with payment gateway fees unless using Shopify Payments. These costs can really add up; especially if the company in question is pushing large quantities of stock.

On the other hand, WooCommerce is an open source plugin for WordPress. That said, hosting, domain registration, premium themes, and plugins are not free services; however, total expenses can still be significantly lower than Shopify’s monthly payment and transaction fees. Also, WooCommerce does not take commission on the transactions that are made thus the chances of making more profits are high.

More Control and Ownership

WooCommerce gives you total management over your web presence when you make that option, and that is a huge plus. WooCommerce being an open source plugin is self hosted, which means you own all your site information and you can control your server space fully. Organizations that require advanced levels of control or that have to deploy certain solutions find this level of control useful. Unlike other platforms, if using WooCommerce, it is possible to extend or change virtually any detail of the site as wanted, without the restriction of the platform.

Open Source and Customization

Additionally, because WooCommerce is an open-source platform, users seeking to make extensive modifications to their online store’s functionality will benefit greatly from this technology. This is the main significance of being open source; the code is open for public access and can be adapted to the business environment. Things which one sometimes may require when working with WooCommerce are custom extensions, or interactions with external service providers and or modifications to the default behaviours of the system and WooCommerce offers this to users. This is in contrast with Shopify. com where one is restricted by these possibilities and the degree of open API.

The only drawback is that for companies with an available development team or a company willing to hire a WooCommerce developer, the options are endless. It may also be noted that the kind of shopping experience you offer your customers will be closely tuned to your brand and ideal business model.

SEO and Speed Optimization

Search Engine Optimization (SEO) is an important parameter which determines organic traffic to your online store. WordPress based WooCommerce has a highly searchable structure which is more friendly to SEO systems. You can get many SEO tools as plugins such as Yoast SEO and Rank Math to support optimizing content, meta description, and keywords. In addition, WordPress code base does not intrude in the processes and is quite permissive when it comes to various SEO approaches, and this is an advantage for WooCommerce.

Speed is the other factor that impacts both users and search engine ranking systems mainly due to the fact that they prefer websites that respond quickly. Unlike other platforms, WooCommerce does not specify the hosting provider that you should use thus providing an opportunity to go for a high performance hosting service that meets your requirements. One advantage is that in this design, WooCommerce is free to implement better caching solutions, optimize images, and use Content Delivery Networks (CDNs) and therefore WooCommerce could beat Shopify’s hosted speeds.

Considerations Before Migrating

It is therefore important to find a web host that is friendly on WordPress to avoid disappointment, especially if this is the primary platform used on your site.

Choosing the right host to host your website is critical when shifting from Shopify to WooCommerce. This means your web host should be one that is friendly to WordPress since this will determine whether your website is run efficiently or otherwise. WordPress and WooCommerce are both popular which can be hosted on different hosting services, however if one goes for managed WordPress hosting services then they will find some of the best hosting services providers such as SiteGround, Bluehost and WP Engine as these are especially designed for WordPress and WooCommerce which offer faster load times, better security and dedicated support services.

Such hosts are provided with additional options, for example, updates, daily backups, staging environments and others that will help to manage your site. Some of the features to look for when choosing a host include uptime promises, customer support, and flexibility in the services to cater for the business’ evolving needs.

Backing Up Your Shopify Store

Before proceeding to the actual migration method, it is crucial to create a backup of your Shopify store. It should contain all product informational content, customers’ data, orders’ records, and other pertinent data. Shopify comes with native features which enable back-ups, and there are apps, which enable back-ups with even more enhanced magnitude. Taking a full backup is important during the WooCommerce migration process in case something goes wrong since you are assured that your store can be restored in its current state.

Read more – BigCommerce To WooCommerce Migration

Easy Steps to Migrate from Shopify to WooCommerce

Migration from Shopify to WooCommerce can be a game changer for your e-commerce business. It allows for greater control, flexibility  and cost savings. Here’s a detailed guide to help you transition smoothly and make the most of WooCommerce’s powerful features.

Step 1: Set Up WordPress

Choose a Hosting Provider

It is important to choose the right hosting provider for the website. Opt for a managed WordPress hosting service like

– SiteGround: These combine good customer relations and consistent work performance.

– Bluehost: Provides value for its customers with easy plans that are relatively cheaper compared to competition.

– WP Engine: Achieves superior rating in terms of performance and has enhanced security elements.

Install WordPress

1. One-Click Installation:

– In as much as wordpress is another type of hosting, most managed hosting providers have the WordPress installation tools that can be installed in a single click. This feature makes packing very easy as compared to other methods that might require some level of special knowledge to perform.

2. Access Your Dashboard:

– Upon installation, navigate to the WordPress administration interface, here we come known as the WordPress back end. This is where you’ll build your site’s layout and design, as well as have access to content and options.

Step 2: Install WooCommerce

 Navigate to Plugins

1. Access Woocommerce Plugins Section:

   – From your WordPress dashboard, go to Plugins > Add New.

 Search and Install WooCommerce

1. Find WooCommerce:

   – Type “WooCommerce” in the search, whether it is in the search bar or the search box.

   – I repeated it by clicking ‘Install Now’ and once installed clicked ‘Activate’.

2. Run Setup Wizard:

   – When installing WooCommerce, it will ask you a set of questions to initiate the ‘Initial Setup Wizard’. Below is the procedure to set up basic settings of your website like currency, payment method and different gateway and method of shipping.

Step 3: Export Products from Shopify

 Log In to Shopify

1. Access Admin Dashboard:

   – Create your Shopify store account and open the admin panel for it to work on.

 Export Product Data

1. Navigate to Products:

   – Navigate to the Products tab under the Shopify administration panel.

2. Export Data:

   – Click on the export icon given at the right side of your screen to export all your product information to a CSV file format. Make sure the fields being provided include all requirements like descriptions, prices, and pictures.

 Step 4: Import Products into WooCommerce

Option 1: WooCommerce Product Importer, that has to be used

1. Access Import Tool:

   – The process of importing the products into the WordPress dashboard should start at woo commerce products, then select import.

2. Upload CSV File:

   – Click on the first file icon and navigate to where you saved the CSV file exported from Shopify.

3. Map Data Fields:

   – Proceed and do as it is instructed when it tells you how it’s mapping and transferring your product information to WooCommerce.

Option 2: Use a Migration Service

1. Select a Migration Tool:

   – If you are in a hurry to shift your store data to a new platform or want to perform regular data transfers, you should better check Cart2Cart or LitExtension services.

2. Automate the Migration:

   – This is helpful as these services deal with all the migration of the products, customers, and orders to ensure the conversions are correct and work on your behalf.

Step 5: Point Your Domain to WooCommerce

Update DNS Settings

1. Access Domain Registrar:

   – Go to your domain registrar control panel. This is the website where you manage your domain e. g GoDaddy Name cheap etc.

2. Change DNS Records:

   – Go to your WordPress hosting company’s instructions provided to change your DNS settings on your domain to its new WooCommerce store location.

Step 6: Configure WordPress Permalinks

Set SEO-Friendly URLs

1. Access Permalink Settings:

   – Go to the WordPress widgets and click on the Settings and then click on the Permalinks.

2. Select Permalink Structure:

   – Choose a structure that includes your post name (e. g. , `https:It needs to hint at the post’s topic with words like ‘read more’ and link to the full piece on its website (e. g. , `www. yourstore. com/sample-post/`). This is something that has a positive impact on SEO since the URLs will be more descriptive, and keyword friendly.

 Step 7: Design Your Woocommerce Store

Choose a WooCommerce-Compatible Theme

1. Select a Theme:

   – Pick the most appropriate theme for your WooCommerce site from the list of compatible themes. This way, it’s possible to choose the overall layout that would fit the majority of clients or the section where people spend the most time – CTA or header.

2. Customize Your Theme:

   – Select the default theme or any other pre-designed theme and apply changes to your store using custom tools, or use visual page builders such as Elementor. This makes it easy for an individual to change the outlook of a website without requiring programming skills.

 Step 8: Configure WooCommerce Settings

 Set Up Payment Gateways

1. Configure Payment Options:

   – Implement payment solutions like Paypal, strip, credit card integrations or other solutions.

 Define Shipping Options

1. Set Shipping Rates and Methods:

   – Navigate to your WordPress admin area and find WooCommerce > Settings > Shipping.

   – For those specific domains define the shipping zones, methods, and the rates which must satisfy all your business requirements.

 Configure Tax Settings

1. Set Up Tax Rates:

   – To address the setting, go to WooCommerce > Settings > Tax.

   – Set all Your tax rates and rules according to the current tax laws of Your location.

Enable Additional Features

1. Extend WooCommerce Functionality:

   – Discover more WooCommerce add-ons to improve a store . Such choices may range from where the concerned product is to be filtered by its advanced features to receiving emails on certain products among others.

woocommerce to woocommerce migration

Additional Considerations After Shopify to Woocommerce Migration

Testing

1. Thoroughly Test Your Store:

   – Check on the verification of all the products, customer information and orders to confirm they’ve been transferred correctly.

   – Check the performance of features like payment gateways, shipping modules, and others before framing a strategy for going live.

   – Order some test products to make sure that the checkouts are intact and the process is as smooth as it should.

Redirections

1. Set Up 301 Redirects:

   – Redirect your old shopify URLs to your new woocommerce ones using a plugin called Redirection and ensure that the redirection type is 301.

   – This is helpful to retain higher rankings with search engines for your website as well as to avoid making mistakes that will frustrate users.

Conclusion

Although transferring from Shopify to WooCommerce may sound like a challenge, the advantages of opting for WooCommerce as a platform make it a worthy undertaking because of the reduced costs, ability to control more features and amass more benefits through customization. With applying all the steps and recommendations described in this guide and using the migration tools and services, you can easily transfer to the more flexible and powerful e-commerce platform. WooCommerce will give you the flexibility to attain exactly what you want for your web store, enabling long-term innovativeness and profitability of your commercial enterprise.

Whether your company needs to cut costs, have more control over your online store, or want a strong, open source software selling product, WooCommerce delivers. It’s crucial to take a strategic approach to your WordPress migration process so that you can harness a world of opportunities with your e-commerce business on the other side.

How to Migrate From Webflow to WordPress: A Step-By-Step Guide

Webflow is the web design tool, while WordPress is the CMS system for the website. Webflow is a WYSIWYG (What You See Is What You Get) interface for building websites with no coding involved while using WordPress, you can use HTML and it also provides flexibility in so many aspects and a humongous collection of plugins. Nevertheless, the constant development of web development has contributed to the appearance of new trends and technologies that may indicate the desire of some Webflow users to migrate to WordPress.

Understanding the Current Landscape

Before deciding to convert Webflow to WordPress, it’s crucial to understand the latest trends in web development:

Headless CMS

By definition, a headless CMS operates on the principle of dividing the CMS with regard to how content is delivered through a website, which enables developers to freely deliver content in one package for consumption across different devices.

JAMstack

JAMstack concept is a modern approach to web development, which is based on the use of Javascript, APIs, and Markup and such principles as pre-rendering, separation of various parts of the website, and static website generation for better speed and security.

SEO Considerations

SEO (Search Engine Optimization) is a vital element in common and particularly on WordPress, effective ranking in the search engine results can be achieved with special plugins and measured rules.

Deciding if the Move is Right for You

Before deciding to move from Webflow to WordPress, you need to evaluate your website goals, technical expertise, and content management needs

Website Goals: 

The following is a checklist that can be used as a guideline to help you determine whether WordPress is more suitable for your long-term site goals, including scalability, expandability or compatibility with other services.

Technical Expertise: 

Despite being designed for easy use, some WordPress customization features might need the user to have special technical skills or request the assistance of a professional.

Content Management Needs: 

However, if content generation is the primary focus of your website or if your site follows a complicated structure or if content is created by multiple people then WordPress is more suitable.

Planning the Move

Once you’ve decided to export Webflow to WordPress, it’s essential to plan the process carefully

Content Export: 

Preparing text, images, and other types of media for import Transfer of your content from Webflow as a first step before transfer to WordPress means that all the text, images, and other types of the media are now ready to be imported.

Theme Selection: 

In this post, you will find how WordPress has a huge array of choices of themes, and either for free or for a paid price tag, that can cater to what your ideal website should look as well as function like.

Plugin Selection: 

it will help you determine the new plug-ins that are necessary for additional conveniences, for example, the shop, forms, or certain individuals’ conveniences.

Step-by-Step Guide for the Webflow to WordPress Migration

You have created the plan and prepared for the migration, and now it is time to proceed with the migration process itself – from Webflow to WordPress. 

Follow these steps to ensure a smooth and successful transition

Content Import

Converting such content into your platform is the initial and fundamental step. WordPress offers several options to import your content from Webflow

WordPress Importer:

This appears to include from various sources and may not integrate well with other sources like Webflow exports.

Third-Party Plugins

Webflow importers for WordPress can even further simplify the transfer by identifying the parts of Webflow and importing them as WordPress elements using “Webflow to WordPress”.

Manual Import

If all else fails, export your content from Webflow manually by using XML or CSV files and import whatever is left to WordPress.

However, no matter the method adopted, make sure to check the imported content for any issues in converting the tags and displaying the information.

Theme Customization

After importing your content, you’ll need to customize your chosen WordPress theme to match your brand’s look and feel

Theme Settings

There are various options for the format of text such as colour, fonts and layout within the theme settings provided.

Child Theme

It also recommended creating a child theme which enables us to make the necessary changes without directly modifying the parent theme, meaning that any changes made will not be lost in future updates, if and when the parent theme is updated.

Custom CSS

To tweak styles of elements contained in the theme, make your custom CSS edits in WordPress with its dedicated editor.

Page Builders

Often it synchronises with such elements as Elementor or beaver builder for added options of the page design.

Professional Services

You might want to consider hiring a WP developer or designer if you have specific changes to make that go beyond simple formatting.

Plugin Integration

WordPress plugin is tools or software add-ons for enhancing and adding specific features to your website. Install the necessary plugins to replicate (or enhance) the features you had on your Webflow site

E-commerce

WooCommerce or Easy Digital Downloads or others for an online store .

Forms

Pages: Contact and Lead Generation Forms: It is ‘free’ to install and use so it is highly recommended over the other expensive premium plugins such as Ninja Forms and Gravity Forms as well as the robust yet overly complicated Contact Form 7.

SEO

Translate website, Yoast SEO, Rank Math or All in SEO for search engine optimization.

Security

Wordfence is one of the best plugins for website protection while Sucuri can be used for website backups and security.

Performance

Some of the best caching plugins include W3 total Cache, WP Super Cache, or WP rocket to enhance the speed of the website.

Functionality-specific

Galleries and sliders, social networking and subscription, as well as opportunities for paid content.

It is also recommended to compare the compatibility of research plugins to the chosen platform, its rating, and update frequency to work with reliable and frequently updated tools.

Headless CMS Integration

If you’re adopting a headless CMS approach, integrate your WordPress installation with your chosen solution

Contentful

Official selection that can be utilized is the Contentful WP plugin, and other plugins such as Contensive.

Strapi

Strapi can be integrated using the plugin-Strapi Source WordPress or writing custom code.

Agility CMS

WordPress and Agility cms are integrated using Agility CMS WordPress integration plugin.

Custom Integration

Develop a new website where you will create a separate Content Management System and integrate it with WordPress via Application Programming Interfaces or APIs.

The process of implementing a head-head CMS is a basic process which includes the installation of the headless CMS system, integrating it and finally content distribution and bi-directional synchronization between two systems. In case of any help needed, one may consult a developer that is specialized in WordPress or is familiar with the integration of headless CMS.

By the end of this tutorial you will have moved your Webflow-built site to WordPress while staying updated with the modern tendencies, like headless CMSs and JAMstack.

Maintaining Your WordPress Site

After successfully moving to WordPress, it’s crucial to maintain your website’s security, performance, and overall health

Security Updates

It is crucial to update WordPress core, themes, and plugins because it will reduce the likelihood of having weak points in your site.

Backups

Backup your website data and settings frequently in order to ensure that the site content and design as well as other important info can be restored in case of a breach by the hacker or accidental loss.

Performance Optimization

Check out caching plugins, content delivery networks (CDNs), and many strategies aimed to improve your website’s loading time and more.

Conclusion

Webflow to WordPress migration can be a wise business step for website owners who are willing to have a more extensive and customizable website and are aimed at using WordPress and following the tendencies in web design. It outlines the need for goal setting, an effective plan for the move and, importantly, leveraging on what WordPress is and what exists in the WordPress world to ensure you are always ahead of the game.

However, if you’re hesitant about a complete transition away from WordPress, you can explore a hybrid approach. This involves adopting a headless CMS alongside your existing Webflow web design software. This allows a web designer to leverage Webflow’s strengths in website structure design while utilizing a headless CMS for content creation and management. This approach can be particularly attractive if you’re considering a WordPress migration but want to maintain some of the design flexibility offered by Webflow.

In either case, it is important to be up to date with the current trends and available technologies to ensure that a website is established with the newest design to be of benefit for the users.

Squarespace to WordPress Migration? It’s Easier Than You Think

Selecting the perfect platform for your website is of paramount importance in the constantly changing digital world. Squarespace has been a top website builder for beginners and small businesses that crave an easy-to-use platform with smooth layouts. But as you grow your online business, you might end up outgrowing Squarespace. This is where WordPress, the world’s most popular CMS.

Reasons why almost 40% of all websites on the internet use WordPress. Open-source software with unparalleled flexibility and customization for any scale When you are a blogger, an e-commerce entrepreneur, or a small business owner, WordPress could be used to take care of your individual interests, and increase along with you.

Throughout this ultimate guide, we will show you how to migrate your Squarespace site to WordPress. From learning the rewards of using WordPress to putting the final finishes on your fresh new website, we have you all covered. We knew it was going to be a difficult and complicated arrangement but our plan is to make this as seamless as it can be on your end so you don’t miss anything or lose any traction as we transition this.

Step 1: Understanding the Benefits of WordPress vs Squarespace

But before that let me explain to you why we use WordPress over Squarespace, since most of the website owners prefer switching over WordPress.

1. Customization: 

Squarespace has beautiful templates, but if more design customization is important to you, WordPress helps you to tinker with HTML and CSS to get the exact look you want. There are thousands of WordPress themes & plugins available for you to easily make a functional website your own. From a basic blog, to an e-commerce powerhouse – or to allow members access to exclusive content, WordPress can handle it all.

2. Search Engine Optimization (SEO)

 is important for you to be visible online. SEO – WordPress is SEO-friendly by default with your way of permalinks, defaults on metadata, etc. Throw in some powerful plugins such as Yoast SEO or All in One SEO and you’re on your way ranking! While Squarespace is no slouch when it comes to SEO, it simply doesn’t give you quite as much granular control.

3. E-commerce Flexibility: 

If you are selling WooCommerce a WordPress plugin, workings turn your site into a comprehensive e-Commerce store. You have the functionality of options like multiple payment methods, various shipping options, and numerous old or new ones related to WooCommerce extensions such as subscriptions or dynamic prices.

4. Community and Support: 

WordPress, as software that has been developed and released under open-source licence, is supported by a large number of developers, designers, and users around the world. This means that we would provide frequent updates, many resources to share, and easily accessible platforms to seek help at all times. If you ever get stuck there are various forums filled with individuals who had the same issue and found a solution.

5. Cost-Effectiveness: 

In contrast to Squarespace, which uses a subscription plan, WordPress has quite limited ‘entrance fee’ that consists of hosting services and any paid themes or plugins. This can be far more expensive over the long-term especially when your site is beginning to gain more traffic.

Step 2: Backing Up Your Squarespace Content

First of all, any content of Squarespace should be backed up in order to ensure its presence after the migration process occurs. This includes all the content that you will be uploading; text, image, blogs, product descriptions and any account code you may have. One of the key advantages of Squarespace is that you can back up your content for transferability, which means you are not going to lose the files while transferring to a different web creator.

To export your Squarespace content:

1. If you have not signed up yet then go and sign up or if you already have an account, then go to your Squarespace account.

2. To follow it, switch to the Settings tab and then choose Advanced, where you have access to the Import/Export option.

3. Click on “Export. “

4. Instead, you will receive an XML file with your site content to place on your hosting service provider’s web space.

Save this file, it’s very important for further steps in this tutorial to transfer your content to WordPress.

Step 3: Finding a WordPress Web Host

It should also be noted that your selection of wordpress web hosting that you use can greatly define your WordPress experience. A good host is the basis of a fast, secure and reliable website since it is what contains all the elements that make up the site. Here’s what to look for

1. Managed WordPress Hosting: 

WordPress-specific hosts are WP Engine, Kinsta, and Flywheel if you prefer a WordPress-exclusive experience. They deal with essential advancements, security steps, and day-to-day backup procedures. They do this to ensure that you can still concentrate on what is really important to each of you – your content and the business you are in.

2. Performance: 

You should prioritise hosts that utilize SSDs to store data, runs PHP 7 or a later version and supports CDN. A CDN, such as Cloudflare, stores your material on servers across the globe, meaning people from around the world will not have to wait long for access.

3. Security: 

Security is also another important factor to consider when choosing a WordPress host. Opt for a host which scans your site automatically for malware, backup frequently for your site, and provide you with a free SSL certificate. An SSL that could be identified by the appearance of an ‘S’ in the letters of the URL, does not only guarantee the encryption of data but it also is a factor for consideration by search engines.

4. Scalability

If your site has vast amounts of visitors and various guests, you will require more of other resources. The upgrade approach should have minimal impact on the availability and preferably, the hosts you choose should allow easy upgrading with least disruption.

5. Support

In today’s society, people seek assistance and often require prompt services and support of the highest quality. WP tailored hosting services provide one-click installation, coupled with customer support available round the clock by WordPress gurus. This can be a lifesaver especially during such times like launch period or perhaps the time when they will be holding a sales promotion.

Step 4: Installing WordPress

Any professional hosting provider always provides a WordPress autoinstaller function, which can be accessed in just one click. If yours does not, then don’t worry. The famous “5-minute installation” is pretty straightforward:

1. Go to WordPress and download the most current version of this popular blog developing application. org.

2. Transfer the files to the hosting account, in most cases the use of FTP or File Manager is allowed.

3. Order a hosting plan to get a hosting control panel where you can create a MySQL database.

4. To do this, you must run the WordPress installation by using the site address.

5. Fill in the required information: site title, which you need to input as your admin username, and the password.

For a more detailed walkthrough, check out our WordPress installation guide. Remember, a strong password and unique admin username are your first lines of defence in WordPress security.

Step 5: Exporting Your Squarespace Content

We have discussed this in Step 1, but let me reiterate it in brief here As you can notice Already Mentioned Above in Step 1 Your XML file for Squarespace is the critical link between the prior and current sites. It stores your created web pages and blog posts, as well as some parts of your site’s architecture.

Step 6: Importing Your Squarespace Content into WordPress

Now that you have WordPress set up and your Squarespace content exported, it’s time to bring them together

1. You can read more about the latest update in the official blog or go to: WordPress > Plugins > Add New.

2. Go to the search bar of the wordpress admin dashboard and type WordPress Importer then install and activate it.

3. Select Tools from the dropdown menu and then Import, WordPress will be the option you have to choose.

4. Next to the “Squarespace XML” field, click on the “Choose File” button, navigate to the downloaded file and choose it.

5. Firstly, to identify the Squarespace authors, map these to WordPress users.

6. Choose the option import attachments if you are willing to transfer pictures with a person (further discussed in the next stage).

7. The importer starts once you hit on the ‘Submit’ button and gives you the results in a few minutes.

Importing Squarespace Content to WordPress

Step 7: Importing Your Squarespace Images

Images are significant for any site and not all of them operate smoothly in terms of XML export. If you realise that some of your posts do not contain images, it is okay not to fret. There are WordPress plugins designed to help

1. Auto Upload Images: 

This plugin simply searches for image links within your posts and then uploads those images into your WordPress media library.

2. Import External Images: 

Similar to the above, this plugin skips the process of uploading images manually to your media library, instead, it imports them directly.

The following plugin should be installed and then navigate to the imported posts you want to edit. It will import images and their associated links from your Squarespace site to your WordPress site properly through the plugins.

Importing Your Squarespace Images

Step 8: Pointing Your Domain Towards WordPress

Despite your having the content in place, people are still visiting your Squarespace site . Let’s fix that:

1. Now go and look for the DNS Settings either in your domain registrar for example GoDaddy or Namecheap among others.

2. Some of the recommended changes include changing the nameservers or A records to point to the new WordPress hosting provider. The website host will supply the correct values.

3. Save the changes. A DNS record can sometimes take up to 48 hours to propagate, so don’t rush here.

Step 9: Update Your WordPress Permalink Structure

Unlike the minimalist approach, WordPress by default uses a not very SEO friendly URL structure. 

Let’s change that:

1. Click on WordPress in your Dashboard Area and then navigate to Settings click on Permalinks.

2. Select “Post name. ” The slug structure will utilize your post titles in the URL to make it easy for SEO as well the users.

WordPress Permalink Structure

Step 10: Choosing a Theme for Your WordPress Website

The content is still intact, but your homepage may seem somewhat barren. Time to dress it up with a WordPress theme

1. This part is simple; log in to your WordPress dashboard or the wp-admin, go to Appearance and then click on the Themes and finally click on the Add New button.

2. You will find over 10000 free themes or you can upload the premium one if you have got this theme.

3. When you make your selection you should consider finding business apps with themes that reflect your brand, and that offer the features you require. If you’re an e-commerce site, make sure your shopping cart integrates with WooCommerce.

4. A few of the most popular sites that offer theme stores include ThemeForest, StudioPress, and WordPress Theme directory.

So remember don’t just think about the look even though it counts, think of the site speed, is the page optimized for mobile, how often is the content updated. Just think about the positive effect a well coded theme might make to your site.

Step 11: Further Develop Your WordPress Website

After you moved your content and got a fresh-looking theme for your blog, you’re ready to go on WordPress! Now it’s time to leverage WordPress’s vast ecosystem to enhance your site

Essential WordPress Plugins:

   1. Yoast SEO or All in One SEO package to make the process of SEO easy and manageable for everyone.

   2.  Sucuri or Wordfence for WordPress security.

   3.  Plants suggest implementing WP Rocket or W3 Total Cache for improving the speed of work.

   4.  It can be used for lead generation using forms like contact form 7 or WPForms.

   5.  A good choice is UpdraftPlus or BackupBuddy to perform regular backups.

E-commerce Setup:

   1. WordPress is also an open source software and noticed that there is a plugin for woocommerce, install and configure it.

   2. Development includes creating more product pages, installation of payment gateways, and setting up payment processing.

   3. If you require extensions, consider using tools such as WooCommerce Subscriptions or WooCommerce Dynamic Pricing.

Custom Development:

   1. Certainly, themes and plugins do the trick, but what if you need something special? This is where you may consider hiring a WordPress developer for instance.

   2. They can design and develop the post types that are not available in the default package or install the plugins of their choice or even tweak the themes to match one’s brand.

Ongoing Maintenance:

   1. Nothing in WordPress is set in stone and themes, and plugins require constant updates for security and new features.

   2. WordPress support service or using a managed host is the best way to deal with this problem.

   3. Backups are your back up or what most simply refer to as an insurance. Schedules The processes put in the queue should be arranged to run on their own.

Conclusion: 

Importing from Squarespace to WordPress is not just transitioning from platform but is a bet on the future. You have now transitioned from website builder to a full blown CMS which means the sky’s the limit when it comes to expansion and touch ups.

Introducing the concept might be complex, but do not stress; it has steps, and you’re not the only one doing it. WordPress is actually a large community of users and there are so many friendly people out there. No one is ever left without options; be it forums or any WordPress development agency you can turn to. In case you do not have so much time at your disposal or wish to steer clear of any pitfalls, it may be wiser to entrust your WordPress migration to the professionals.

That is all for now, so happy blogging and keep on learning more on WordPress and blogging. Check new plugins, play with themes, and follow WordPress news. This software is open source, meaning that there is a continuous following of new updates providing new features to increase the functionality, security, and experience on your site.

This decision is not merely a platform shift, you are shifting a world, a world of new potential is what you have done. It all begins with your WordPress website, which is your launching pad, no matter if you as a blogger want to expand and reach new heights, if you are an e-Store owner looking forward to developing your business to newer levels or as a business firm who wants to establish a unique online presence.

Sitecore to WordPress Migration: A Comprehensive Step-by-Step Guide (2024)

Established in 2001, Sitecore stands out as an integrated CMS platform based on the .NET Framework, often favored by enterprise-level websites seeking to deliver personalized, multi-channel customer experiences.

The most recent iteration, Sitecore Experience Platform 10.3 Update-1, built on .NET Core 3.1, boasts swift security updates, simplified platform extensions, and seamless integration with various marketing tech applications. It introduces enhanced capabilities for creating memorable experiences with heightened ease and convenience.

While this might sound impressive, the question arises: is Sitecore truly worth the additional expense and complexity, especially when considering a more cost-effective alternative like WordPress 6.1?

WordPress not only presents a more budget-friendly and straightforward installation but also provides greater flexibility and customization options. The robust community of developers and users actively fosters innovation, ensuring timely and reliable support.

Contrary to prevailing beliefs, WordPress proves to be an enterprise-ready CMS, offering all of Sitecore’s integrated enterprise features at a fraction of the cost.

Are you an enterprise user contemplating a seamless transition from Sitecore to WordPress? Making strategic decisions about your web platform is crucial. Sitecore to WordPress Migration is a move many businesses consider for its user-friendly interface, extensive plugin ecosystem, and SEO-friendly architecture. This comprehensive guide will walk you through the essential steps and considerations for a successful migration. From high-level strategy to content preparation, setup, and the switch and deployment phase, we’ve got you covered.

Also Read :- Drupal to WordPress Migration Guide

Strategic Planning for Sitecore to WordPress Migration

Strategic Planning for Sitecore to WordPress Migration

Strategic Timeline Planning

Discover the art of determining migration timelines and selecting non-busy business periods for optimal execution. A well-thought-out timeline serves as the backbone of a successful migration, ensuring minimal disruption to regular operations.

Choosing WordPress: A Strategic Decision

Explore the reasons why WordPress stands out as the superior choice for your website. Delve into its user-friendly interface, extensive plugin ecosystem, and SEO-friendly architecture, setting the stage for an informed and strategic wordpress migration.

Redesign Considerations for Transformation

Unlock the potential of migration by considering specific outcomes you aim to achieve. Whether it’s an enhanced user interface, improved experience, or a redefined brand identity, strategic redesign decisions can elevate your website’s impact.

Strategic Selection of Sitecore Features

Navigate through Sitecore’s features, strategically identifying and prioritizing the ones essential for your WordPress site. This strategic approach streamlines the migration, ensuring a focused transition aligned with your business goals.

Strategic Third-Party Integration Planning

Craft a meticulous list of third-party integrations required for your new WordPress site. This strategic planning ensures a seamless incorporation of necessary plugins, enhancing functionality and user experience.

Selecting Robust Hosting Infrastructure

Embark on a journey to select a secure hosting partner capable of handling bulk traffic. This strategic decision directly influences the performance and reliability of your WordPress site post-migration, laying the foundation for a successful online presence.

Building a Competent Migration Team

Assemble a competent migration team, each member bringing unique expertise to ensure a smooth and efficient transition. A well-rounded team enhances coordination and efficiency throughout the migration journey.

Comprehensive Content Preparation and Pre-Migration Checklist

Safeguarding Your Website: Complete Backup

Explore the importance of taking a comprehensive backup of your Sitecore website as a precautionary measure. This strategic move ensures a reliable fallback in case of unforeseen issues during migration.

In-Depth Content Inventory

Conduct a detailed evaluation of your current Sitecore website to understand its structure, content, and functionality. This comprehensive content inventory sets the stage for effective migration and optimization in the new WordPress environment.

Goal-Oriented Planning

Determine specific outcomes and goals for the migration process. This strategic clarity ensures that every step aligns with overarching objectives, enhancing the overall success of the migration.

SEO Preservation Strategies

Navigate through strategies to export Content XML from Sitecore while prioritizing SEO preservation. Meticulous attention to metadata, URL structures, and other SEO elements ensures the maintenance and enhancement of your website’s search engine rankings post-migration.

Taxonomy Preparation for Integration

Strategically prepare your taxonomies to seamlessly integrate into WordPress. This involves structuring and organizing your content to align seamlessly with WordPress’s taxonomy system, optimizing the user experience and site navigation.

Recommended Blog:-

Migrate with Confidence: A Step-by-Step Guide from Shopify to WooCommerce

Crafting the WordPress Environment and Development

Single Site or Multisite Dilemma

Delve into the decision-making process of choosing between a single site or multisite WordPress installation. This strategic choice influences subsequent decisions related to content organization and management.

Defining Roles and Permissions

Establish a structured access framework by defining user roles and permissions for your WordPress site. This strategic decision safeguards your website’s integrity and security.

Template Mastery for Consistent Design

Unlock the secrets of creating page templates to maintain a consistent design and layout across your WordPress site. This strategic step involves translating existing design elements from Sitecore into WordPress-compatible templates.

Gutenberg Empowerment: Content Block Creation

Leverage Gutenberg to create reusable content blocks and enhance content management efficiency. This strategic use of Gutenberg streamlines the content creation process and maintains a cohesive design.

Plugin Magic: Mapping Features

Identify WordPress plugins strategically to map Sitecore features, ensuring a smooth transition. This involves selecting plugins that replicate or enhance the functionalities provided by Sitecore, optimizing your WordPress site for performance and user experience.

Seamless Integrations: Mapping Sitecore Integrations

Select WordPress plugins strategically to replicate Sitecore integrations. This involves a meticulous evaluation of available options, ensuring that third-party integrations crucial for your business seamlessly transition to the WordPress environment.

Precision in Switching and Deployment

XML Mastery: Content Export from Sitecore

Master the art of exporting content XML from Sitecore, a critical step for a successful migration. This involves extracting content, metadata, and structure from Sitecore in a format compatible with WordPress.

Media Assets Preparedness

Prepare your media assets strategically for migration to WordPress. Optimize and organize images, videos, and multimedia elements to seamlessly integrate into the new WordPress media library, enhancing overall site performance.

Deployment Precautions: Security, DNS, and Testing

Explore crucial considerations before the final deployment, including WordPress security measures, DNS switching, media assets migration, and thorough testing. This strategic section provides a comprehensive guide to mitigating potential issues and ensuring a smooth transition.

Timeline Precision: Planning for Success

Strategically schedule the timeline for migration, including freeze mode during content migration and DNS switching. This step involves coordinating various tasks and ensuring that the migration process aligns with business objectives and operational timelines.

Rigorous Testing: Ensuring Success

Thoroughly test your new WordPress website strategically for security, user-friendliness, and SEO. Rigorous testing ensures that the migrated website meets or exceeds expectations, providing a positive user experience.

Conclusion

Sitecore To WordPress Migration is not just a shift in platforms; it’s a strategic decision that, when executed with precision, can transform your web presence. The comprehensive insights provided in this guide will not only ensure a smooth transition but set the stage for sustained success in the digital landscape. Embrace the journey, and let WordPress propel your online presence to new heights.

Covering essential considerations and steps for a seamless Migration from Sitecore to WordPress for enterprise users. For a more in-depth understanding of each phase, further research and consultation with migration experts are recommended.

A Quick Guide To Migrating From Drupal To WordPress in 2024

Introduction:

Website owners and developers often find the need to adapt and migrate their content management systems (CMS) to align with the latest trends and technologies. In 2024, if you’re considering migrating from Drupal to WordPress, you’re in the right place. The pre-migration checklist ensures thorough preparation, and step-by-step instructions cover setting up a WordPress environment, content import, and post-migration considerations. The blog concludes by emphasizing the strategic advantages of transitioning to WordPress Development in the evolving digital landscape

Why Migrate from Drupal to WordPress?

Drupal and WordPress are both robust CMS platforms, each with its strengths and use cases. However, there are compelling reasons you might be considering a switch:

UserFriendly Interface:

Drupal:

Drupal, while recognized for its robust capabilities, presents a relatively steeper learning curve that can prove challenging for nontechnical users. The intricate architecture may demand a more profound understanding, making content management a task requiring specialized skills.

WordPress:

WordPress stands out with its renowned user-friendly interface, catering to individuals across a spectrum of technical expertise. The intuitive dashboard empowers users, regardless of their technical background, to effortlessly create, edit, and manage content. The simplicity inherent in WordPress makes it an optimal choice for those placing a premium on accessibility and ease of use.

Vast Plugin Ecosystem:

Drupal:

Drupal incorporates a range of modules, akin to plugins in WordPress. However, the selection might not match the extensive variety available in the WordPress ecosystem. Moreover, integrating and configuring Drupal modules may necessitate a higher degree of technical proficiency.

WordPress:

WordPress boasts an expansive and diverse plugin ecosystem, surpassing 58,000 plugins in the official WordPress Plugin Directory. This extensive collection covers an array of functionalities, from SEO optimization to e-commerce, providing users the ability to augment their websites without delving into intricate custom development. The user-friendly nature of WordPress further facilitates the seamless integration of plugins, enabling users to enhance their sites with specific features effortlessly.

Large Community Support:

Drupal:

Drupal enjoys an active community, although not as expansive as the WordPress community. The support and resources available may vary, and finding solutions to specific issues could require more time.

WordPress:

WordPress boasts one of the largest and most dynamic communities in the open-source CMS realm. This extensive community ensures regular updates, a plethora of documentation, and reliable support forums. The robust support network within the WordPress community contributes significantly to the overall stability and dependability of the platform, offering a quick and effective resolution to challenges that users may encounter.

CostEfficiency:

Drupal:

Drupal’s strength lies in its ability to cater to large and intricate websites, but this comes with associated development and maintenance costs. Customizations, particularly for complex projects, can escalate expenses.

WordPress:

WordPress is frequently perceived as a more cost-effective solution, particularly for smaller to medium-sized projects. The wealth of themes and plugins, coupled with the user-friendly interface, minimizes the necessity for extensive custom development. This can result in reduced development costs and faster project turnaround times, positioning WordPress as an attractive option for businesses mindful of budget constraints.

PreMigration Checklist:

Before diving into the migration process, it’s crucial to perform a thorough assessment and preparation:

Back Up Your Drupal Site:

Create a complete backup of your Drupal site, including databases, files, and configurations.

Audit Your Content:

Take inventory of your existing content, noting any custom post types, taxonomies, or specific features.

Evaluate Themes and Plugins:

Identify the equivalent themes and plugins in the WordPress ecosystem that match or replicate the functionalities of your Drupal setup.

Check SEO Elements:

Ensure to carry over essential SEO elements such as meta tags, URLs, and image alt text during the migration process.

Migration Steps:

Now, let’s delve into the step-by-step process of migrating from Drupal to WordPress:

Set Up a WordPress Environment:

Install WordPress on your server or choose a reliable hosting provider. Configure your settings and install essential plugins.

Import Content:

Utilize the WordPress CMS migration tools or third-party plugins to import your Drupal content, including posts, pages, media, and categories.

Recreate Custom Post Types and Taxonomies:

If your Drupal site utilizes custom post types or taxonomies, recreate them in WordPress using custom post type plugins or manual coding.

Adjust Themes and Templates:

Adapt your existing theme or choose a new one that aligns with your design preferences. Modify templates to suit your needs.

Migrate Users and Permissions:

Transfer user accounts and permissions to ensure a seamless transition for your site’s audience.

Update Internal and External Links:

Perform a comprehensive check and update internal and external links to maintain SEO integrity.

Configure SEO Settings:

Install a reputable SEO plugin and configure settings to replicate your Drupal site’s SEO structure.

Test Functionality:

Thoroughly test the functionality of your migrated site, checking forms, navigation, and any interactive elements.

Monitor Performance:

Monitor your site’s performance postmigration, addressing any issues promptly.

PostMigration Tips:

1. 301 Redirects:

Implement 301 redirects for old URLs to preserve SEO rankings and ensure a smooth transition for visitors.

2. Update Sitemaps:

Submit an updated XML sitemap to search engines to facilitate reindexing.

3. Engage Users:

Notify your audience about the migration and provide guidance for any changes in user interaction.

Conclusion:

Migrating from Drupal to WordPress in 2024 is a strategic move to leverage the user-friendly interface, extensive plugin ecosystem, and community support that WordPress offers. Following this comprehensive guide will help you navigate the migration process efficiently, ensuring a seamless transition for both your content and your audience. Remember to stay informed about the latest updates and best practices, and consult with experts if needed. With careful planning and execution, your Drupal to WordPress migration can open up new possibilities for your website in the ever-evolving digital landscape.

Some Other Migration Guide:-

Wix Site to WordPress Migration

Shopify to WooCommerce Migration

Webflow to WordPress Migration

Squarespace to WordPress Migration

Sitecore to WordPress Migration