Managing your WooCommerce store is not an ‘if needed’ activity, it is a necessity on the way towards the store’s success. Similar to the conventional mall needs cleaning, repainting, and fixing after some time, your digital mall needs similar attention to remain efficient, free from hackers’ intrusions and attractive to the consumers. This WooCommerce maintenance guide will focus on the need for WooCommerce site maintenance, how to determine if it’s time to get your store some attention, and how to enable WooCommerce maintenance mode among other factors that will help you in choosing the best WooCommerce maintenance services as well as an effective WooCommerce maintenance checklist, recommended WooCommerce maintenance frequency, and WooCommerce maintenance pricing strategies. Oh, let me take you on this tour of developing your WooCommerce store into greater heights of progress.
The Significance of WooCommerce Maintenance
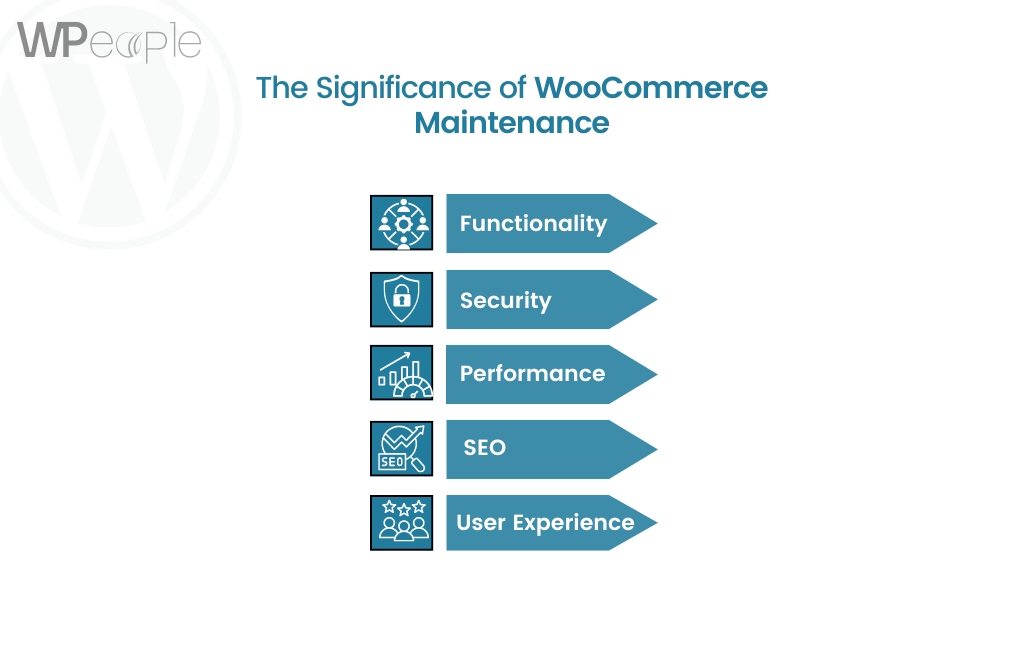
WooCommerce is a popular e-commerce platform that powers millions of online stores worldwide. As with any website or software, regular maintenance is crucial to ensure smooth operations, security, and optimal performance. Here’s the significance of WooCommerce maintenance
Functionality:
It involves ensuring that all aspects within the WooCommerce store are working as expected to minimize problems associated with neglecting site upkeep. This involves products and catalog, the cart structure and payment options, plus any addons you may be using. WooCommerce maintenance best practices act as a checklist and outline possible problems to solve to avoid or mitigate them so that they do not affect customers during their shopping.
Security:
Security plays a crucial role in e-commerce due the nature of business which involves transfer of valuable and personal information including details of payment. The maintenance in WooCommerce implies the updating of the software, plug-ins, and themes with the purpose to fix security issues. Further to this, security checks and surveillance that are routinely conducted would allow the detection and prevention of any threats or incursions into the business thus protecting both the business and clients’ data and information.
Performance:
WooCommerce website and performance strongly affect the speed and responsiveness of the site, which in turn defines other factors such as usability and the rate of sold products. Maintenance activities in WooCommerce guides like image optimisation, database management, working on caching strategies, etc will assist enhance speed of the site. This can be made sure that the store is offering a fabulous browsing experience that is fast and will help to drive down bounce rate as well as help boost sales.
SEO:
SEO or Search Engine Optimization is incredibly important, it is to drive organic traffic to WooCommerce stores. Some of the routine jobs include updating WooCommerce meta tags, tweaking site content, and repairing damaged links all of which combine to enhance the likelihood of the WooCommerce store appeal to the search engine. If the SEO changes and updates are maintained continually, then there will be significant conversions from the leads which will enable a site to rank high on SERPs.
User Experience:
It is devastating to understand the overall user experience of the WooCommerce store you own or manage as it plays a crucial part regarding the customers’ satisfaction and engagement. Specific maintenance activities such as testing site functionality, could be crucial for a WooCommerce website in that it enhances the user experience. Here are a few ideas: By creating a more efficient shopping experience, the customer satisfaction can be improved and the chances of additional purchases can be increased, and thus the brand loyalty is developed.
Signs That Your WooCommerce Store Requires Maintenance
A well-maintained WooCommerce store is essential for ensuring a smooth and secure online shopping experience for your customers. Here are some signs that indicate your WooCommerce store requires maintenance
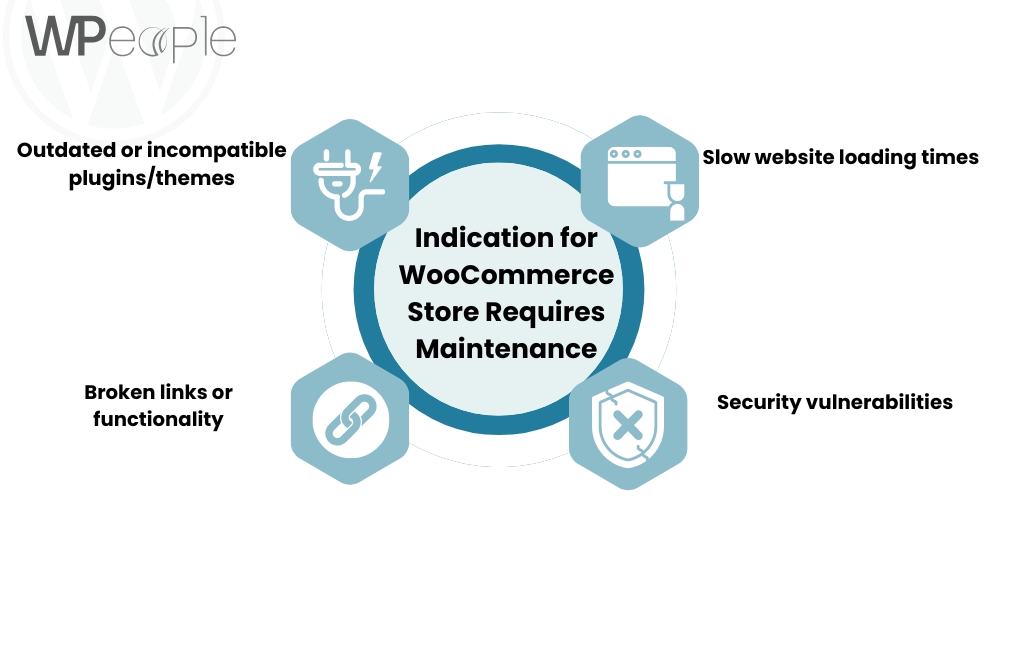
1. Slow website loading times:
In this article, you will understand why your WooCommerce store needs to load faster, what a slow-loading store is costing you, and how to speed up your WooCommerce store. Unfavorable loading speed may result from the updated or even the old plugins, themes, and server problems, which need the attention of WooCommerce.
2. Security vulnerabilities:
This article will be useful to guide WooCommerce store owners to keep the site secure for their business and customer information. This may range from hacking attempts or cases of unauthorized access to your website information system; this is a sure sign that you need to revise your security features and your WooCommerce plugin updates as well.
3. Broken links or functionality:
Even if you link every page of your website to a new page, link, or feature and add functionalities, they may become broken over time. Such problems might have arisen and lingered unnoticed since people rarely engage in WooCommerce maintenance frequently enough.
4. Outdated or incompatible plugins/themes:
As with any digital platform, WooCommerce and WordPress can release updates to the platform to enhance functionality and also to prevent security threats from awfully bad hackers. This happens in instances where your plugins or themes are not updated, or do not support the latest version and they end up interfering with your store.
Reasons to Enable WooCommerce Maintenance Mode
WooCommerce maintenance mode is a crucial step in ensuring a smooth and uninterrupted experience for your online store’s visitors. Here are the key reasons to enable WooCommerce maintenance mode
1. Performing updates or maintenance tasks:
WooCommerce maintenance mode is very important to turn on in case when you’re going to apply updates or perform any maintenance tasks on your WooCommerce store. This mode can be used as a kind of ‘temporary out of order’ option to avoid traffic to your site during the transition. In this way, you can prevent possible problems or problems that may occur when updating due to interruption, so that your customers do not have to face any problems or errors during their use once the site is restored or the service is resumed after the maintenance is complete.
2. Site migration or major changes:
Enabling the WooCommerce maintenance mode is crucial if you intend to shift your WooCommerce online store on a new server, switching the hosting company, or making a structure change to your site. During these processes some of your site may be stopped or mean that some pages are showing errors through the browser which makes up a non-interrupted user experience, and could lead to loss or corruption of data. All these mean that when you activate WooCommerce maintenance mode, it becomes safe to perform these major changes allowing only the site administrators to access the site, and this prevents visitors from being exposed to the site in its raw form.
3. Security threats or hacking attempts:
When Woocommece is attacked by hackers or undergoes hacking attempts and other cyber threats, enabling the Woocommerce maintenance mode is an important measure. This way, at least the site is turned off and could actually provide the opportunity to stop further deterioration and possibly leakage of the confidential data stored within it. This is an advantage because it offers the best mode through which you can address the security aspect without compromising your website prospects, or information. Furthermore, WooCommerce maintenance mode is also very useful in minimizing the risk and blocking suspicious activity if you are in the process of updating or applying bug fixes, cleaning up corrupted scripts, or removing a virus.
4. Extensive code changes or testing:
If you are making large modifications to the files in your WooCommerce store like core files, or adding new features or extending from existing features, or including third party plugins or themes, the best way to proceed is to use WooCommerce maintenance mode. This enables you to develop the new changes or modifications and once you are confident they work, then you can transfer them to the live website without affecting the flow of the operations or risking the visitors to encounter errors as seen in the example below. WooCommece has a neat option called the ‘maintenance mode’ and activating it is extremely useful when you want to carry out experiments, or diagnose problems and want the site visitors to notice or be affected by the problems you are trying to solve, besides, any coding changes that you make will be best tested in this environment before pushing them to the live site.
5. Database maintenance and optimization:
Indexing or re-indexing, archive or backup table clearing, table structure changes or unnecessary records deletion and other routine database maintenance and optimization activities are very inconvenient on a real, production server. Due to working on the Woocommerce maintenance mode, you can perform these activities while ensuring that there is no interruption in service and chances of data loss or corruption. As a result, your database stays clean, optimized and free of those extra bulky tables that can slow down your store’s overall speed.
6. Content staging and preview:
However, if you have massive changes, like updating many descriptions, creating new pages, or further, reconstructing the navigation menus, you need WooCommerce maintenance mode if you already have a protected staging website. This enables a user to see what he or she has changed and removed, and ensure that any changes made are complete before updating the design and enabling visitors to view them. After making the necessary updates, as mentioned above, you can easily turn off WooCommerce maintenance mode and update the changes on the live site.
Pre-Maintenance Checklist for WooCommerce
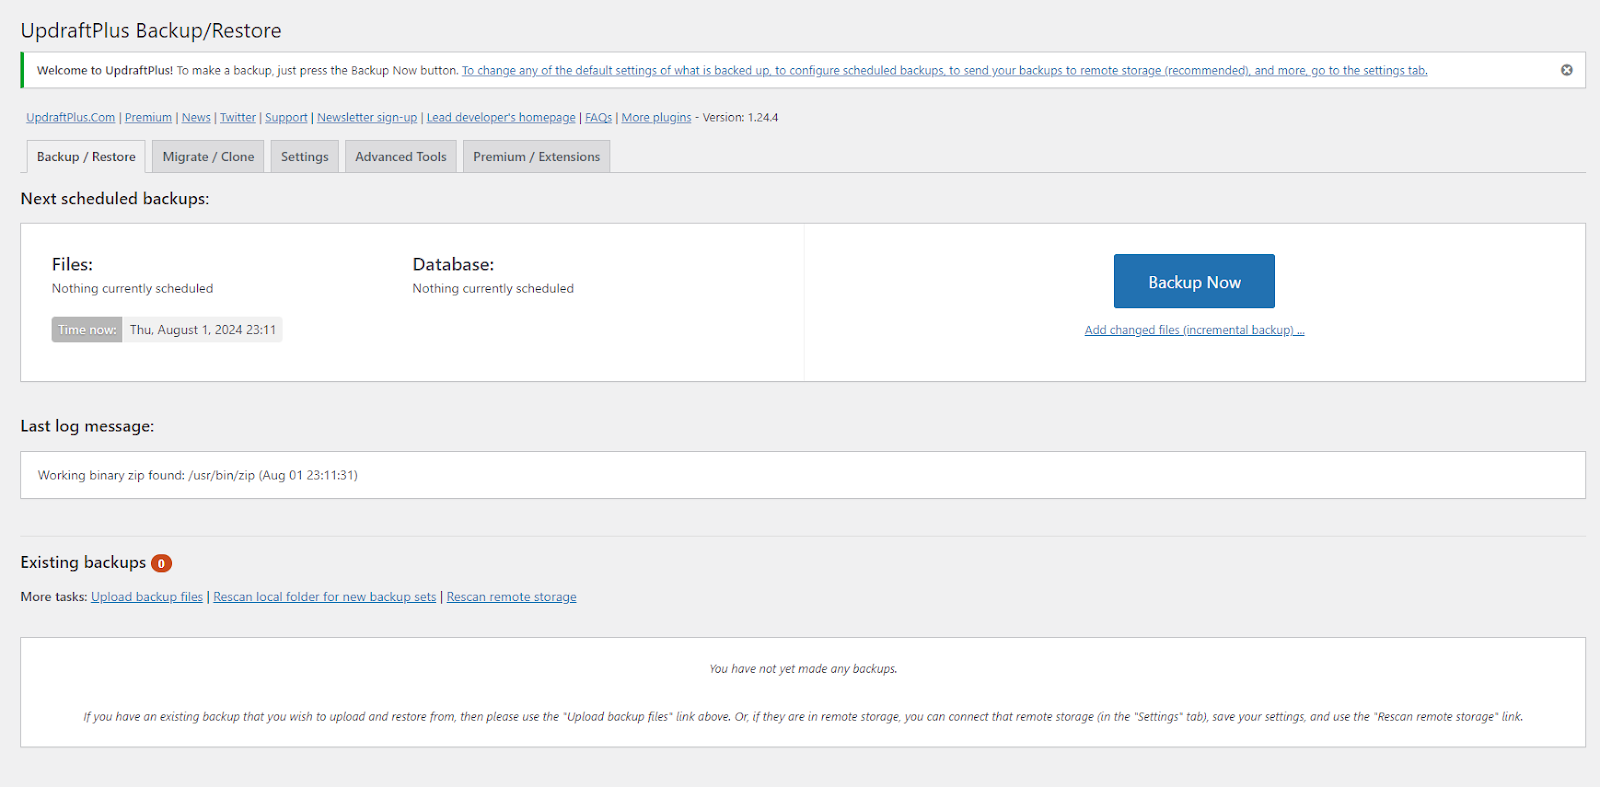
1. Create a complete backup:
When preparing to work on any WooCommerce maintenance task, the first thing you should do is always make a full backup of the WooCommerce store. This backup ought to be on everything that is on the site including; files, databases, media libraries and any other relevant data. It is important to make sure you have a full and updated backup with you at all times because this is your insurance during your WooCommerce maintenance process that everything you did could be undone if something worse happens. This is very crucial to avoid as it leads to loss or even corruption of important data that is vital to an online business.
2. Update plugins and themes:
Some of the problems associated with WordPress and WooCommerce updates include; Maintainability of security, for it is crucial to always update to ensure compatibility with other elements, and increase in service quality. Before that starts executing WooCommerce maintenance tasks, it is crucial to perform a full assessment of the whole tech stack, WooCommerce security, core WordPress files, plugins, and even third-party plugins or add-ons if used. Updating all available software versions in the system in the manner similar to the AD top-down approach helps to prevent possible conflicts and compatibility issues with the rolling updates method. This basically entails running the same test each time there is an update to prevent new changes from interfering or damaging previous functionalities.
3. Test compatibility:
Whenever there is a plan to implement major updates including plugins such as WooCommerce or even the WordPress core, I always advise that you carry out a series of compatibility tests on the development environment before rolling out the updates to your live production environment. Create another staging site; it is a copy of your real store that is not linked to the primary site and can be used for testing. This is the environment to give extensive testing to the updates you are about to release, ensuring you do not introduce new problems such as conflicts or breakage in compatibility with other installed plugins, themes, and customization. This approach assists in early detection of some issues that may hinder normal operations in the live store, thus reducing disruptions and leaving little room for transition.
4. Inform your customers:
The clear communication and transparency are critical when executing WooCommerce maintenance work that can result in service interruptions.
Making WooCommerce maintenance works that can interrupt services is crucial for clear communication and transparency. Inform your clients and the visitors of your website about the planned WooCommerce maintenance work through the use of both email bulletins, social network pages, and banners on the website. , give them the information concerning the WooCommerce maintenance window, the work we plan to do, and the possible duration of the outage or any other breakdowns. It not only considers the expectations of the customers but also shows the organization’s concern and its intention of keeping the audience informed about the quality they are likely to receive.
5. Prepare a maintenance mode strategy:
The initial preparation for WooCommerce website maintenance includes the activation of the Woo maintenance mode, which is necessary to perform before starting the WooCommerce maintenance. This mode effectively closes your site and puts it into a state where visitors to your business site cannot access your WooCommerce store while you are performing the updates or any WooCommerce maintenance tasks. Mention in detail how to properly enable and disable WooCommerce maintenance mode so that it is easily integrated into maintenance routines. Furthermore, ensure that for the WooCommerce websites that are in maintenance mode, create specific maintenance pages that will keep on informing the clients on what is being undertaken and the expected time of completion.
6. Assemble your WooCommerce maintenance toolkit:
Preparation is the key to success for any kind of work, so it is crucial to collect all the necessary tools, resources, and documentation that will be needed in the WooCommerce maintenance process. Some of these may include; staging servers, version controlling systems, scripts for deploying WooCommerce, Woo documentation and setup guide, and any other related material. It is strategic to always ensure that the toolkit is well arranged and easily accessible in a way that would allow one to promptly rectify any problems that may occur during the maintenance process and similarly, in order to enhance smoothness of the whole process.
7. Collaborate with your team:
But if you are running a Woocommerce store and have multiple developers, designers, or other staff or parties involved, communication is the key. It is necessary to establish a clear division of tasks, their distribution by the timelines, and the assignees of specific teams participating in the WooCommerce maintenance. Please create working communication threads in relation to the identified project to ensure constant updates and coordination. This means that those involved in WooCommerce maintenance are fully aware of the situation, thereby avoiding misunderstandings that may come with change requests.
Cost-Effective WooCommerce Maintenance Packages
No entrepreneur wants to see their WooCommerce store suffer losses while they struggle with constant technical problems and glitches; therefore, affordable WooCommerce maintenance service packages can be the ideal solution for any online business. Consider the following factors when evaluating WooCommerce maintenance service packages
1. Frequency and scope of updates:
Search for invitations for WooCommerce maintenance service that provide: frequent updates of the WooCommerce and WordPress files as well as plugins and themes development. Security is one of the main aspects, which has to be included in the WooCommerce maintenance service package, it should also have bug fixes and compatibility updates.
2. Backup and restore services:
Make sure the WooCommerce maintenance service package provides options for automated backups and easy restoration. Ensure that the WooCommerce maintenance service package offers backup options in addition to an easy restoration field. Backing up is an important necessity to make sure that if the store has some problems, it can be returned quickly to its previous state.
3. Security monitoring and scans: Security is crucial in any online business to ensure that the store from which the products are being sold is secure. The maintenance package selected for WooCommerce should contain such important services as continuous security supervision, malware checking, and inspection of potential dangers and risks.
4. Performance optimization: Ensure that the WooCommerce maintenance service packages to consider include performance optimization services, caching, image compression, and database optimization services. It is another set of measures that can go a long way in helping boost the loading time of your store and thereby the general performance of the store and in by WooCommerce extension updates improving the general usability of the store.
5. Support and assistance: Make sure that in the WooCommerce maintenance service package you get access to the Maintenance support service in case of any problems or questions related to technical details. Qualitative assistance reduces the effort required to fix issues and customer support guys should be reactive and have good knowledge.
6. Customizable options: When it comes to WooCommerce maintenance service packages, this company has designed services that are generalized with a provision for customization to suit the needs of the client. Depending on the specific WooCommerce maintenance service provider, you may have add-ons you can choose from, or tiered levels of services which let you select the specific service you want according to your needs and funds.
Key Steps for WooCommerce Maintenance
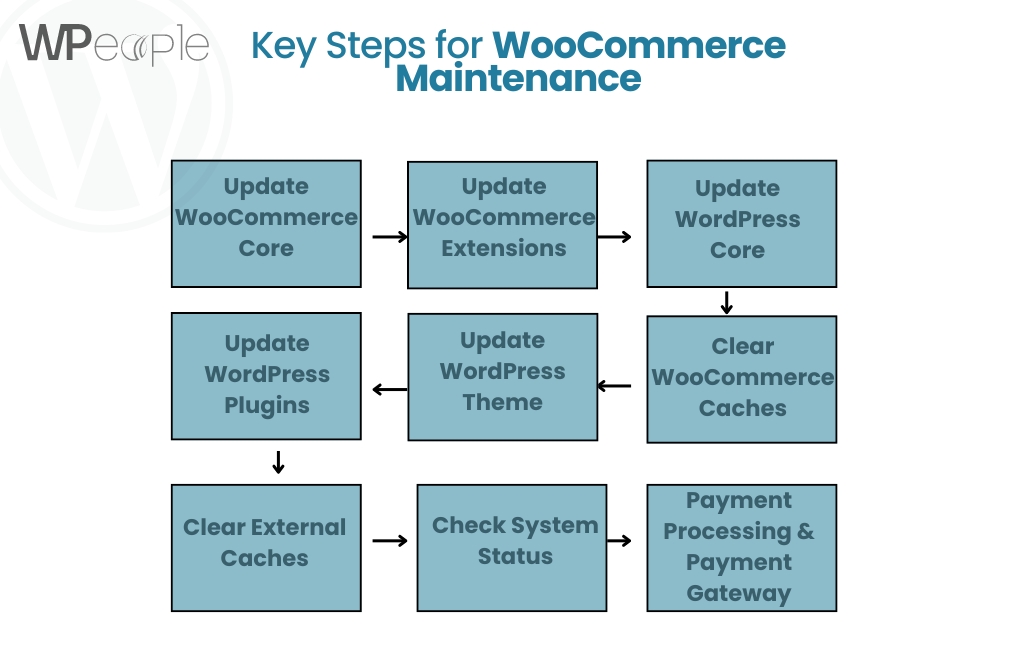
WooCommerce store constant has to be maintained and updated to ensure the store is fully functional, secure, and optimally performing. Failure to update your software can likely result in compatibility problems, security risks, and poor performance. Here’s a simple breakdown of the instructions you need to follow in order to maintain your WooCommerce site effectively.
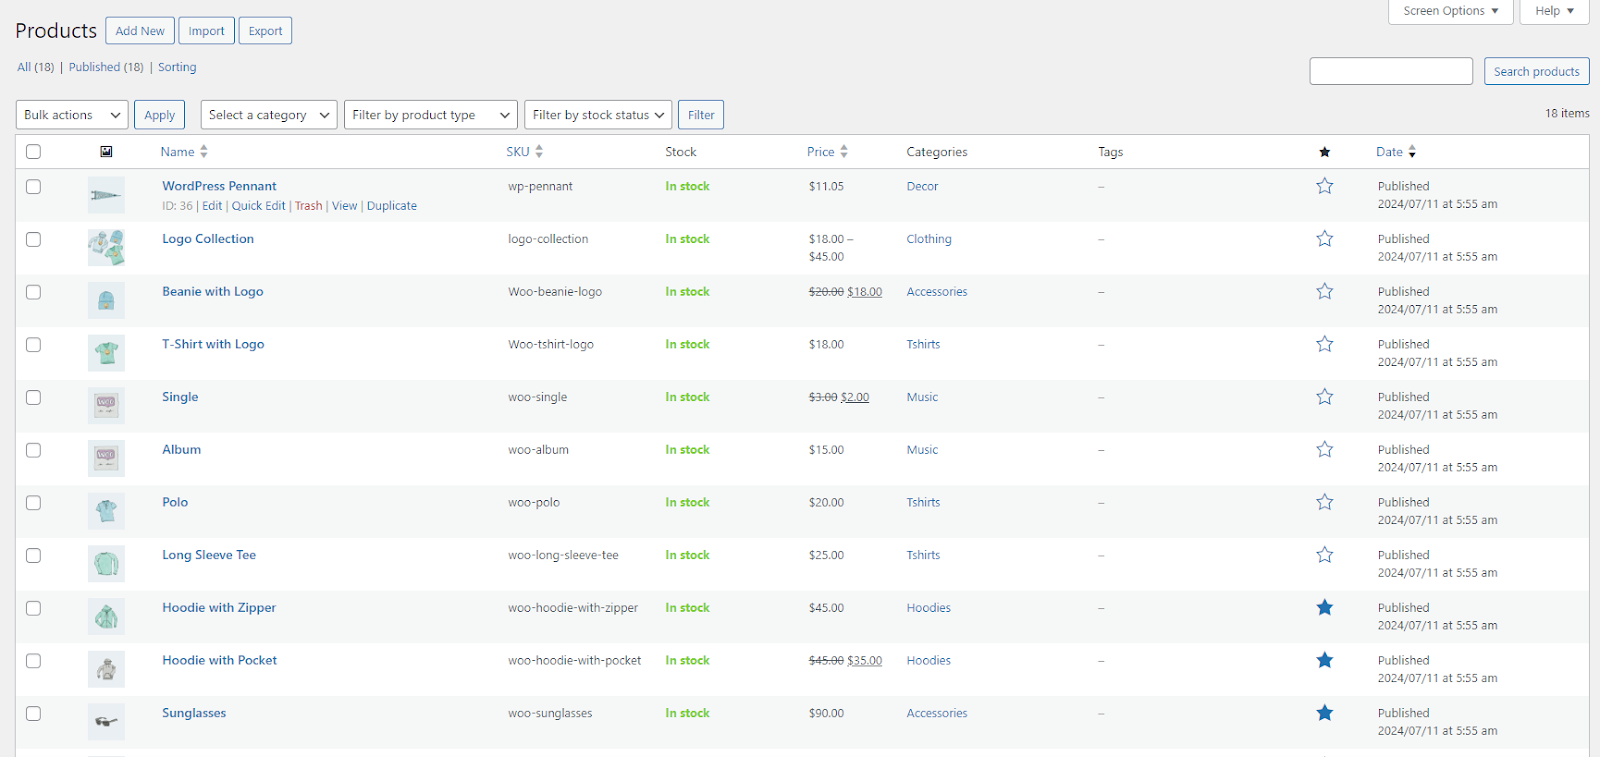
1. Update WooCommerce Core
Regular updating of the Woo-commerce plugin is essential, mainly because it provides updates with new features, and fixes on bugs or weaknesses in the system. To update WooCommerce, go to your WordPress admin area, click on Plugins -> Installed Plugins and search for the “WooCommerce” plugin; if there is a newer version of the plugin available, you will see a button “Update Now” next to it.
2. Update WooCommerce Extensions/Addons
Besides the main plugin, WooCommerce, you most likely have installed some extensions or addons for improving your store function. These extensions also need updates and a fresh installation is done more frequently. Navigate to WooCommerce > Extensions, and you will see any installed extensions that require an update marked with an ‘Update Available’ link. If there is any extension that needs updating, click the ‘Update Now’ button next to the extension name.
3. Update WordPress Core
Keeping your WordPress installation up-to-date is just as important as updating WooCommerce itself. WordPress core updates often include critical security patches and bug fixes. To update WordPress, go to Dashboard > Updates, and if a new version is available, you’ll see an option to update. Click “Update Now” to update WordPress to the latest version.
4. Update WordPress Plugins
In addition to WooCommerce and its extensions, you may have other plugins installed on your WordPress site. These plugins also require regular updates to ensure compatibility, security, and functionality. Go to Plugins > Installed Plugins, and any plugins with updates available will show an “Update Now” link. Click “Update Now” for each plugin that needs updating.
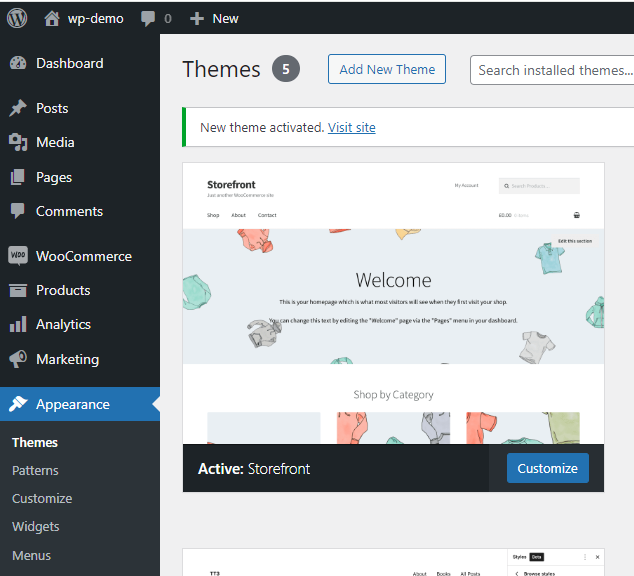
5. Update WordPress Theme
Another essential part of wordpress is your wordpress theme; you might need to update it periodically. Visit the Appearance section and select Themes to find your active theme with an update available, there is usually a link for ‘Update Now for this particular theme. Finally, you have the possibility to click the button ‘Update Now’ and update your theme to a new version, if it is necessary.
6. Clear WooCommerce Caches
By default, WooCommerce has integrated caching that is helpful in boosting performance, but these caches can sometimes be old or contain some errors. The following steps will lead to the cache clearing in WooCommerce: Hover over Tools found in the WooCommerce status section and select “Clear cache. ”
7. Clear External Caches
Sometimes if you are using plugins like W3 Total Cache or WP Super Cache etc then you will have to clear the cache which these plugins make. Locate the plugin to your site and ensure you should find an option that clears cache.
8. Check System Status
Through the WooComm store that is opened, users get to see a system status check that can be used to solve possible problems that can hinder the functioning of the online store. To do this navigate to WooCommerce => Status and check the latest report for any problem or suggestion.
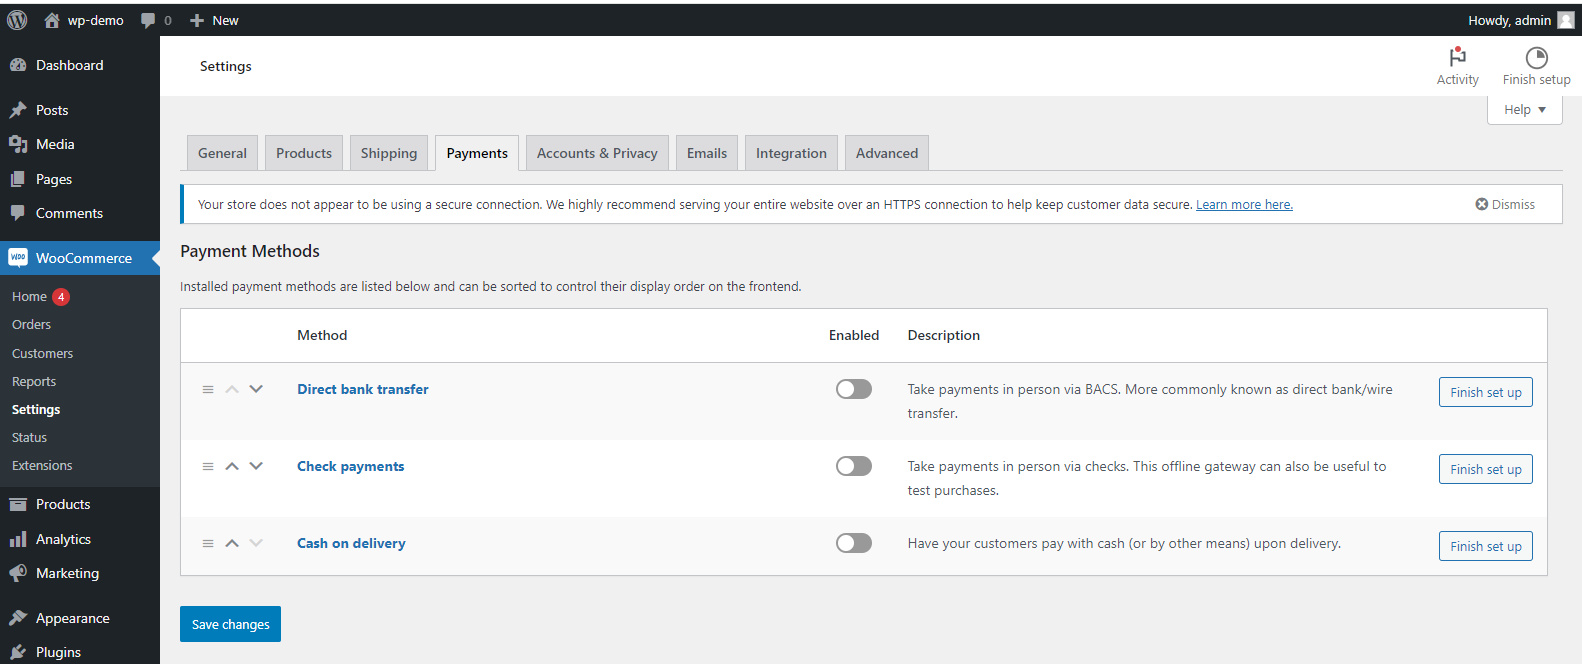
9. Payment Processing & Payment Gateway
Payment gateways need to be a part of WooCommerce store maintenance and should be updated and configured whenever possible. Navigate to WooCommerce -> Settings -> Payments and check payment types used or any payment gateways used are properly configured.
Conclusion
Running a WooCommerce store may not have an ending; it is a constant process in which you need to constantly work to ensure the success of your business. Of course, as you have seen, choosing functional priorities, security, performance, SEO, and UX creates a solid framework for development and positive customer experience. Some of the common WooCommerce maintenance activities that can be undertaken alongside customers include; It is therefore important to perform the following WooCommerce maintenance activities regularly to help you attend to any problem that may arise without necessarily inconveniencing your customers. At the same time, regardless of whether you engage a WooCommence Maintenance service in-house or look for affordable WooCommence Maintenance services packages the investment will prove worthwhile as a properly maintained WooCommerce Store can significantly enhance the stability of your business.