WordPress is the world’s most popular content management system (CMS), powering over 40% of websites. However, its popularity makes it a prime target for cybercriminals. Weak security measures can expose your site to hacking, malware, and data breaches, leading to loss of data, reputational damage, and even financial losses.
To maintain a secure and trustworthy website, implementing proper WordPress security measures is essential. This guide will walk you through how to secure a WordPress site effectively and prevent attacks.
Common WordPress Security Threats
What Is Hacking?
Hacking refers to the unauthorized access or manipulation of a website’s data, often for malicious purposes. Cybercriminals exploit security vulnerabilities in WordPress to steal sensitive information, deface websites, redirect visitors to harmful sites, or inject malicious code. Hackers use various techniques, including exploiting outdated plugins, weak passwords, and security misconfigurations, to gain control over a website.
Malware and Its Impact
Malware (malicious software) is designed to infiltrate, damage, or gain unauthorized control over a system. In the context of WordPress, malware can manifest in various forms, including trojans, ransomware, and backdoor scripts. Some common indicators of a malware infection include:
Slow website performance due to excessive resource consumption.
Unwanted pop-ups or redirects that harm user experience.
Unauthorized file modifications that inject malicious scripts into your codebase.
Search engine blacklisting if Google or other search engines detect malware on your site.
WordPress malware removal involves identifying the infected files, removing harmful scripts, and securing the website against future threats.
Brute Force Attacks
Brute force attacks involve automated bots repeatedly attempting to guess login credentials by trying multiple username and password combinations. Websites with weak passwords or default login pages are particularly vulnerable to these attacks. To mitigate the risk, consider:
Implementing two-factor authentication (2FA) for an additional security layer.
Using strong, complex passwords and changing them regularly.
Limiting login attempts to block repeated failed logins from the same IP address.
Hiding the default wp-login.php page or renaming it to something unique.
Comment Spam and Bots
Spam comments, often generated by bots, can flood your WordPress site with irrelevant or malicious links. This not only affects user experience but also poses security risks, such as phishing attempts or malware infections. Combat spam effectively by:
Enabling CAPTCHAs to verify human users.
Using anti-spam plugins like Akismet to filter out malicious comments.
Moderating comments manually to prevent suspicious links from being posted.
Disabling anonymous comments to ensure only registered users can post.
SQL Injections and Cross-Site Scripting (XSS)
These are two of the most dangerous web application vulnerabilities:
SQL Injections: Attackers manipulate website database queries by injecting malicious SQL code via input fields or URL parameters. This can lead to unauthorized data access, database corruption, or even full website takeover.
Cross-Site Scripting (XSS): Hackers inject malicious JavaScript into website forms or comment sections. When unsuspecting users interact with the compromised page, their session cookies or sensitive data may be stolen.
To protect against these attacks:
Use firewalls and Web Application Firewalls (WAFs) to filter malicious requests.
Sanitize and validate all user inputs to prevent harmful script execution.
Keep WordPress core, themes, and plugins updated to patch security vulnerabilities.
Essential WordPress Security Best Practices
Ensuring the WordPress security of your website is crucial to protecting your data, maintaining user trust, and preventing cyberattacks. Regular WordPress maintenance is key to staying ahead of potential threats. Below are key security best practices to fortify your WordPress site against common threats.
A. Secure Your WordPress Login
1. Use Strong, Unique Passwords
Your WordPress login credentials act as the first line of defense against unauthorized access. A weak password makes it easier for attackers to gain access through brute force attacks. To create a strong password:
Use a mix of uppercase and lowercase letters, numbers, and special characters.
Avoid using easily guessable words, birthdays, or sequential numbers (e.g., “password123” or “admin2024”).
Consider using a password manager to generate and store complex passwords securely.
2. Enable Two-Factor Authentication (2FA)
Two-factor authentication (2FA) adds an additional security layer by requiring a second verification step when logging in. Even if an attacker gets your password, they won’t be able to access your site without the second authentication factor, such as:
A one-time code sent via SMS or email.
An authentication app like Google Authenticator or Authy.
Hardware-based security keys for maximum protection.
3. Limit Failed Login Attempts
Brute force attacks involve automated bots attempting thousands of username-password combinations to gain access. Limiting failed login attempts can prevent these attacks by temporarily locking out users after multiple failed attempts. You can:
Use security plugins like Limit Login Attempts Reloaded or Wordfence to set login attempt restrictions.
Enable IP-based blocking to prevent repeated unauthorized access attempts.
4. Change Your WordPress Login URL
By default, WordPress login URLs follow a predictable pattern (e.g., yoursite.com/wp-admin). This makes it easy for attackers to locate your login page and attempt brute force attacks. Changing the login URL to something unique reduces this risk. Plugins like WPS Hide Login can help you modify the login URL easily.
5. Password Protect the WordPress Admin Page
Adding an additional password layer to your wp-admin directory ensures that even if someone finds the login page, they must enter another password before accessing it. This can be done using cPanel or .htaccess file protection settings.
B. Strengthen Your WordPress Installation
6. Keep WordPress, Themes, and Plugins Updated
Outdated WordPress core files, plugins, or themes are among the leading causes of website breaches. Developers regularly release security updates to fix vulnerabilities. To stay protected:
Enable automatic updates for minor WordPress releases.
Manually check and update plugins/themes regularly.
Avoid using unmaintained or abandoned plugins.
7. Remove Unused and Outdated Themes/Plugins
Inactive themes and plugins can still pose security threats, as they may contain unpatched vulnerabilities. Remove any plugins or themes that you’re not actively using.
8. Change the WordPress Database Table Prefix
By default, WordPress database tables use the wp_ prefix, making them an easy target for SQL injection attacks. Changing this prefix to something unique (e.g., wpsecure_ or mysite_) reduces the risk of database exploitation.
9. Disable File Editing in the WordPress Dashboard
The WordPress theme allows administrators to edit theme and plugin files directly from the dashboard. If a hacker gains access to your site, they can inject malicious code into these files. To prevent this:
Add the following line to your wp-config.php file:
10. Disable PHP File Execution in Sensitive Directories
Hackers often place malicious PHP files in directories like /wp-content/uploads/ to execute unauthorized commands. You can prevent this by adding the following rule to your .htaccess file:
C. Protect Your WordPress Site from Malware and Attacks
Install a Reputable WordPress Security Plugin Security plugins are a crucial part of WordPress development, offering essential protections such as malware scanning, firewall protection, and brute force prevention. Popular choices include:
Sucuri Security (website monitoring and malware removal).
iThemes Security (two-factor authentication, brute force protection).
12. Use a Web Application Firewall (WAF)
A Web Application Firewall (WAF) helps filter and block malicious traffic before it reaches your site. Services like Cloudflare, Sucuri, and Astra Security provide real-time protection against hackers and DDoS attacks.
13. Scan WordPress for Malware and Vulnerabilities Regularly
Regular malware scans help detect and remove security threats before they cause harm. Many security plugins offer scheduled scanning features to automate this process.
14. Disable XML-RPC to Prevent DDoS Attacks
XML-RPC is an API that allows remote access to WordPress. However, it is commonly exploited in brute force and DDoS attacks. To disable XML-RPC, add this line to your .htaccess file:
15. Enable Automatic Logout for Inactive Users
Idle users on your site increase the risk of session hijacking. To automatically log out inactive users, you can use a plugin like Inactive Logout, ensuring users are logged out after a set period of inactivity.
D. Secure Your WordPress Hosting Environment
16. Choose a Reliable and Secure Hosting Provider
A secure hosting provider should offer:
Regular malware scanning and firewalls.
Automatic backups and DDoS protection.
Secure server configurations and uptime monitoring. Recommended hosting providers include SiteGround, Kinsta, WP Engine, and Cloudways for their security-focused features.
17. Use the Latest Version of PHP
WordPress relies on PHP, and outdated PHP versions contain security vulnerabilities. Always upgrade to the latest stable PHP version supported by your hosting provider.
18. Implement an SSL Certificate for HTTPS Encryption
An SSL certificate encrypts data exchanged between your site and visitors, protecting sensitive information such as login credentials and payment details. Many hosting providers offer free SSL certificates via Let’s Encrypt.
19. Secure Your wp-config.php File
The wp-config.php file contains sensitive database credentials. To secure it:
Move it to a higher directory than the root folder.
Set file permissions to 400 or 440 to prevent unauthorized access.
20. Enable a WordPress Security Lockdown Feature
Security lockdown features temporarily block access after multiple failed login attempts, preventing brute force attacks. Security plugins like Wordfence and iThemes Security provide this feature.
E. Backup and Recovery Strategies
21. Install an Automated Backup Solution
Regular backups ensure that you can restore your site in case of an attack, hosting failure, or accidental data loss. Recommended backup solutions include:
UpdraftPlus (automated cloud backups).
BlogVault (incremental backups and staging features).
VaultPress (Jetpack Backup) (real-time backups).
22. How to Restore Your Site in Case of an Attack
Having a disaster recovery plan helps reduce downtime. If your website is compromised:
Restore a clean backup from your backup solution.
Scan and remove malware before reactivating your site.
Update all passwords and security settings to prevent re-infection.
Securing your WordPress site requires proactive measures. From using WordPress security best practices to leveraging WordPress security plugins, every step enhances your site’s resilience against attacks. If managing security seems overwhelming, hiring a professional security service can provide peace of mind.
FAQs on WordPress Security
How Do I Know If My WordPress Site Has Been Hacked?
Common signs include sudden slowdowns, unauthorized redirects, unknown admin accounts, and flagged security alerts. A WordPress security audithelps identify security issues.
Can Free Security Plugins Protect My Site?
While free security plugins offer basic protection, premium versions provide advanced features such as real-time malware scanning, WordPress firewall protection, and automated backups.
Should I Switch to Managed WordPress Hosting for Better Security?
Managed hosting providers handle updates, backups, and security optimizations, reducing security risks. If you lack technical expertise, managed hosting can be a great option.
By following these WordPress hardening steps, you significantly reduce your site’s vulnerability to cyber threats. Stay vigilant, keep everything updated, and conduct regular WordPress security audits to maintain a safe and secure website.
Running a WordPress Multisite network can be incredibly useful for managing multiple sites under one installation. However, there may come a time when you need to convert your multisite setup into a standalone WordPress site. Whether due to performance concerns, maintenance difficulties, or business restructuring, the process requires careful execution to avoid data loss and downtime.
In this guide, we’ll walk you through how to revert a WordPress Multisite to a single site step by step. You’ll learn the key differences between WordPress Multisite and single-site installations, essential preparations before conversion, and detailed instructions on how to migrate your content, users, and settings seamlessly.
Understanding WordPress Multisite vs. Single Site
Before diving into the conversion process, it’s crucial to understand the fundamental differences between a WordPress Multisite network and a standard single-site WordPress installation. This understanding will help you make informed decisions throughout the migration process.
What is WordPress Multisite?
WordPress Multisite is a feature that allows you to run multiple websites under a single WordPress installation. This setup is ideal for organizations that need to manage a network of related sites, such as universities with multiple departments, businesses with regional websites, or content networks with multiple blogs.
Key features of WordPress Multisite include:
Centralized User Management: Users can be managed across all sites in the network, with different roles and permissions for each site.
Shared Themes and Plugins:Themes and plugins can be activated network-wide or on individual sites, allowing for consistent branding and functionality across the network.
Subdomains or Subdirectories: Sites in a Multisite network can be set up as subdomains (e.g., site1.example.com) or subdirectories (e.g., example.com/site1).
What is a Single Site WordPress Installation?
A single-site WordPress installation is the standard setup where one WordPress instance manages only one website. This is the most common type of WordPress installation and is suitable for most individual bloggers, small businesses, and organizations that only need to manage a single site.
Key features of a single-site WordPress installation include:
Greater Flexibility in Customization: Since there’s only one site to manage, you have more freedom to customize themes, wordpress plugins, and settings without affecting other sites.
Easier Maintenance: Managing a single site is generally simpler and less resource-intensive than managing a Multisite network, making WordPress maintenance more straightforward and efficient. With fewer technical complexities, tasks like updates, backups, and security checks become easier to handle, ensuring your site remains stable and secure over time.
Fewer Technical Complexities: Single-site installations are less complex than Multisite networks, making them easier to troubleshoot and maintain.
When Should You Convert a Multisite to a Single Site?
There are several scenarios where converting a WordPress Multisite to a single site might be necessary:
Only One Subsite Remains Active: If most of the subsites in your Multisite network are no longer in use, it may make sense to convert the remaining active subsite into a standalone site.
Performance Issues: Multisite networks can be resource-intensive, especially if you have a large number of subsites. Converting to a single site can improve performance and reduce server load.
Customization Needs: If the customization needs of your subsites differ significantly, it may be easier to manage them as separate single-site installations.
Simplified Backups and Security: Managing backups and security for a single site is generally simpler and more straightforward than managing them for an entire Multisite network.
Preparing for the Migration
A successful migration from a WordPress Multisite to a single site requires careful planning and preparation. Here are the essential steps you need to take before starting the conversion process.
Step 1: Backup Your Entire WordPress Multisite
Before making any changes to your WordPress Multisite network, it’s crucial to create a full backup of your entire installation. This includes both the database and the files. A backup ensures that you can restore your site in case something goes wrong during the migration process.
Use Backup Plugins: Plugins like UpdraftPlus or Duplicator can help you create a full backup of your Multisite network. These plugins allow you to back up both the database and files with just a few clicks.
Store the Backup Securely: Once the backup is complete, store it in a secure location, such as Google Drive, Dropbox, or an external hard drive. Make sure you have multiple copies of the backup in case one becomes corrupted.
Step 2: Identify the Subsite to Convert
If your Multisite network has multiple subsites, you’ll need to identify which subsite you want to convert into a standalone site. This is typically the subsite that you want to keep active after the migration.
Log in to Your WordPress Dashboard: Access the WordPress admin dashboard for your Multisite network.
Navigate to Sites: Under the Network Admin section, go to Sites. Here, you’ll see a list of all the subsites in your network.
Choose the Specific Subsite: Select the subsite you want to extract and convert into a standalone site.
Step 3: Set Up a Fresh WordPress Installation
Once you’ve identified the subsite you want to convert, you’ll need to set up a fresh WordPress installation on a new hosting account (if necessary). This will serve as the new home for your standalone site.
Purchase a New Hosting Account: If you don’t already have a hosting account for the new site, purchase one from a reliable hosting provider.
Install WordPress: Most hosting providers offer one-click WordPress installation, making it easy to set up a new WordPress site.
Secure the New Site: Once WordPress is installed, secure the new site with SSL (Secure Sockets Layer) and essential security measures, such as strong passwords and security plugins.
Extracting the Subsite Data
With the preparations complete, the next step is to extract the data from the subsite you want to convert. This includes the content, database tables, and theme/plugin files.
Step 1: Export the Subsite Content
The first step in extracting the subsite data is to export the content from the subsite. This includes posts, pages, comments, and other content types.
Navigate to Tools > Export: In the subsite’s dashboard, go to Tools > Export.
Select All Content: Choose the option to export all content. This will generate an XML file containing all the content from the subsite.
Download the XML File: Once the export is complete, download the XML file to your computer.
Step 2: Export the Database Tables
In addition to the content, you’ll also need to export the database tables associated with the subsite. These tables contain important information, such as user data, settings, and plugin configurations.
Access phpMyAdmin: Log in to your hosting control panel and access phpMyAdmin, a tool for managing MySQL databases.
Locate the Database: Find the database associated with your Multisite network. The database will contain tables prefixed with wp_XX_, where XX is the subsite ID.
Export the Tables: Select the tables associated with the subsite you want to convert and export them in SQL format.
Step 3: Download Theme and Plugin Files
Finally, you’ll need to download the theme and plugin files associated with the subsite. These files are stored in the wp-content directory on your server.
Connect to the Server: Use FTP (File Transfer Protocol) or your hosting provider’s File Manager to connect to your server.
Download Theme and Plugin Files: Navigate to the wp-content/themes and wp-content/plugins directories and download the folders for the themes and plugins used by the subsite.
Importing Data to the New WordPress Installation
With the data extracted from the subsite, the next step is to import it into the new single-site WordPress installation.
Step 1: Import Content
The first step in importing the data is to import the content from the XML file you exported earlier.
Go to Tools > Import: In the new WordPress dashboard, navigate to Tools > Import.
Install the WordPress Importer Plugin: If you haven’t already, install the WordPress Importer plugin. This plugin allows you to import content from an XML file.
Upload the XML File: Upload the XML file you exported from the subsite and assign the content to an existing user.
Step 2: Import the Database Tables
Next, you’ll need to import the database tables you exported earlier. This step is crucial for ensuring that all the settings, user data, and plugin configurations are transferred to the new site.
Access phpMyAdmin: Log in to your hosting control panel and access phpMyAdmin for the new WordPress installation.
Import the SQL File: Select the database for the new site and import the SQL file containing the subsite tables.
Update the wp_options Table: After importing the tables, update the wp_options table to reflect the new URL of the site.
Step 3: Upload Theme and Plugins
With the content and database tables imported, the final step is to upload the theme and plugin files to the new site.
Use FTP or File Manager: Connect to the new site’s server using FTP or File Manager.
Upload Theme and Plugin Files: Upload the theme and plugin files you downloaded earlier to the wp-content/themes and wp-content/plugins directories.
Activate the Theme and Plugins: Once the files are uploaded, go to the WordPress dashboard and activate the theme and plugins.
Adjusting URLs and Fixing Broken Links
After importing the data, you’ll need to update the URLs and fix any broken links. This is necessary because the URL structure of the subsite may differ from the new single-site installation.
Step 1: Update Site URLs
The first step in adjusting URLs is to update the site URLs in the WordPress settings.
Go to Settings > General: In the WordPress dashboard, navigate to Settings > General.
Update WordPress Address (URL) and Site Address (URL): Update these fields to reflect the new URL of the site.
Use the Better Search Replace Plugin: To update internal links, use the Better Search Replace plugin to find and replace old URLs with the new ones.
Step 2: Redirect Old URLs (If Necessary)
If you want to ensure that visitors to the old subsite URL are redirected to the new site, you can set up 301 redirects.
Add 301 Redirects: You can add 301 redirects using the .htaccess file or a plugin like Redirection.
Example .htaccess Rule: To redirect an old subsite URL to the new domain, add the following rule to your .htaccess file:
After completing the migration, it’s essential to perform thorough testing to ensure that everything is functioning correctly.
Step 1: Check Website Functionality
Navigate through different pages on the new site to confirm that they load properly. Test contact forms, search functions, and any interactive elements to ensure they work as expected.
Step 2: Test for Broken Links
Use tools like the Broken Link Checker plugin or Screaming Frog SEO Spider to check for broken links on the new site. Fix any broken links that are found.
Step 3: Optimize Performance
Finally, optimize the performance of the new site to ensure it loads quickly and efficiently.
Install Caching Plugins: Use caching plugins like WP Rocket or W3 Total Cache to improve site speed.
Optimize Images: Optimize images using plugins like Smush or ShortPixel to reduce file sizes and improve load times.
Enable a CDN: Consider enabling a Content Delivery Network (CDN) to further improve load times for visitors around the world.
Conclusion
Reverting a WordPress Multisite to a single site is a complex process that requires careful planning and execution. However, by following this step-by-step guide, you can achieve a smooth transition with minimal downtime and data loss. From backing up your data and extracting the necessary files to importing content and fixing URLs, each step is crucial to ensuring that your new single-site setup runs efficiently.
If you’re not confident in handling the migration yourself, consider hiring a professional WordPress developer to assist with the process. A well-executed migration will improve site performance, simplify management, and ensure long-term stability for your WordPress site.
A slow WordPress site can significantly impact your online presence in multiple ways. Users expect pages to load in under 2 seconds, with studies showing that 40% of visitors abandon sites that take longer than 3 seconds to load. This immediate loss of traffic directly affects your conversion rates, with each additional second of load time reducing conversions by an average of 7%.
Search engines, particularly Google, have made site speed a critical ranking factor. With the introduction of Core Web Vitals as ranking signals, speed metrics now directly influence your SEO performance. In 2025, Google has further refined these metrics, placing even greater emphasis on mobile performance and user interaction measurements.
Current benchmarks for WordPress sites in 2025 suggest that high-performing sites should achieve:
Time to First Byte (TTFB) under 200ms
Largest Contentful Paint (LCP) under 1.5 seconds
First Input Delay (FID) under 100ms
Cumulative Layout Shift (CLS) under 0.1
Total page size under 1MB
HTTP requests under 50
To measure your WordPress site’s performance, several reliable tools are available:
Google PageSpeed Insights provides detailed speed metrics and optimization suggestions based on real-world user data
GTmetrix offers comprehensive performance reports and waterfall charts to identify bottlenecks
WebPageTest allows for testing from different locations and devices
Lighthouse (built into Chrome DevTools) provides performance audits
New Relic offers real-time performance monitoring for enterprise sites
Before implementing optimization strategies, establish your baseline performance using these tools and set clear performance goals. Let’s explore the 25 most effective WordPress optimization techniques for 2025.
Foundation Optimization
Selecting Performance-Optimized Hosting
Your hosting choice forms the foundation of your site’s performance. In 2025, the difference between shared and managed WordPress hosting is more pronounced than ever.
Managed WordPress Hosting vs. Shared Hosting
Shared hosting places multiple websites on a single server with shared resources, often resulting in the “noisy neighbor” effect where other sites impact your performance. While affordable ($3-10/month), shared hosting typically delivers slower TTFB and inconsistent performance during traffic spikes.
Managed WordPress hosting provides optimized environments specifically configured for WordPress. Though more expensive ($20-200/month), these specialized platforms offer superior performance through:
TinyPNG/TinyJPG: Excellent compression API with WordPress integration
Implementing Lazy Loading
Lazy loading defers off-screen images until users scroll to them, significantly improving initial page load times. Since WordPress 5.5, native lazy loading is available using the loading=”lazy” attribute, but plugins like WP Rocket enhance this functionality with JavaScript-based solutions for broader browser support.
Implementing Effective Caching
Caching creates static versions of your dynamic content, dramatically reducing server processing time and database queries.
Browser Caching
Browser caching instructs visitors’ browsers to store static assets locally, reducing repeat downloads. Implement it by adding expires headers to your server configuration or through caching plugins. For optimal performance, set appropriate cache durations:
Images and static assets: 1 year
CSS and JS files: 1 month
HTML: Varies based on content update frequency
Page Caching
Page caching generates HTML files of your pages, eliminating PHP execution and database queries for repeat visitors. This can reduce load times by 2-5x. Top solutions include:
WP Rocket
WP Super Cache
W3 Total Cache
LiteSpeed Cache
Object Caching
Object caching stores the results of complex database queries, reducing database load. For small to medium sites, transients API provides basic object caching. For high-traffic sites, persistent object caching using Redis or Memcached delivers superior performance.
Content Delivery Network (CDN) Implementation
CDNs distribute your site’s static files across a global network of servers, delivering content from locations closest to each visitor.
How CDNs Improve WordPress Performance
CDNs enhance performance by:
Reducing server load by offloading static file delivery
Decreasing latency through geographic distribution
Providing an additional layer of caching
Offering built-in DDoS protection
Optimizing assets automatically (on some platforms)
Top CDN Options and Integration Methods
Leading CDN providers for WordPress include:
Cloudflare: Offers free tier with comprehensive features
BunnyCDN: Cost-effective with excellent performance
KeyCDN: Pay-as-you-go pricing with WordPress integration
Cloudinary: Specialized in image and video optimization
Fastly: Enterprise-level solution with advanced features
Most CDNs integrate with WordPress through plugins or DNS changes, with many caching plugins offering built-in CDN support.
Technical Optimization Strategies
Database Optimization Techniques
The WordPress database powers every page load, making its optimization critical for site performance.
Cleaning and Optimizing WordPress Database
Regular maintenance should include:
Removing post revisions (limit to 3-5 per post)
Cleaning up trackbacks and pingbacks
Deleting spam and trashed comments
Removing transients
Optimizing database tables
Reducing Database Calls
Minimize database queries by:
Using object caching
Implementing fragment caching for common elements
Limiting dynamic widgets in sidebars
Using query monitoring tools to identify inefficient queries
Optimizing custom SQL queries
Database Caching Solutions
For high-traffic sites, implement:
Redis for object caching
MySQL query cache configuration
Database replication for read/write splitting
Database indexing for frequently queried tables
Code Minification and Compression
Minification and compression reduce file sizes without affecting functionality.
Minifying CSS, JavaScript, and HTML
Minification removes unnecessary characters (whitespace, comments, etc.) from code files, reducing file sizes by 10-20%. Tools like WP Rocket, Autoptimize, and Asset CleanUp handle minification automatically.
GZIP and Brotli Compression
Server-level compression further reduces file transfer sizes:
GZIP: Standard compression reducing file sizes by 60-70%
Brotli: Next-gen compression offering 15-25% better compression than GZIP
Both can be enabled via server configuration or through plugins.
Using HTTP/2 and HTTP/3
Modern HTTP protocols enable:
Multiplexing (multiple requests over a single connection)
Server push for critical resources
Binary data transfer instead of text
Header compression
HTTP/3 (QUIC) further improves performance with UDP instead of TCP, reducing connection establishment time.
Each resource (CSS, JS, images) requires a separate HTTP request. Reduce these by:
Combining CSS/JS files
Using CSS sprites for multiple small images
Implementing icon fonts or SVGs
Removing unnecessary plugins
Eliminating render-blocking resources
Deferring Non-Critical CSS and JavaScript
Load only critical resources initially, then defer non-essential ones:
Extract and inline critical CSS
Defer non-critical JavaScript with defer or async attributes
Load JavaScript modules with type=”module”
Use dynamic imports for conditional code
Removing Unused Code
Unused CSS and JavaScript add unnecessary weight. Tools like PurgeCSS, UnCSS, and Coverage in Chrome DevTools help identify and remove unused code.
Combining Files Strategically
While combining files reduces HTTP requests, it can impact caching efficiency. In 2025, with HTTP/2/3 adoption, strategic combination works best:
Combine rarely changing files
Keep frequently updated files separate
Balance request reduction with cache efficiency
Core Web Vitals Optimization
Google’s Core Web Vitals have become essential performance metrics.
Improving LCP, FID, and CLS
Largest Contentful Paint (LCP): Optimize by prioritizing above-the-fold content loading, preloading key resources, and implementing critical CSS
First Input Delay (FID): Improve by breaking up long tasks, deferring non-critical JavaScript, and using web workers for complex operations
Cumulative Layout Shift (CLS): Reduce by specifying image dimensions, reserving space for ads and embeds, and avoiding injecting content above existing content
Mobile Optimization Techniques
With mobile-first indexing, mobile performance is paramount:
Use responsive design principles
Implement AMP (Accelerated Mobile Pages) for content-heavy sites
PHP 8.3 delivers substantial performance improvements over previous versions:
JIT compiler for faster execution
Improved type system and error handling
Reduced memory usage
Enhanced opcode caching
PHP Memory Limits and Configuration
Optimize PHP settings:
Increase memory_limit to 256M-512M
Configure opcache for production environments
Set appropriate max_execution_time
Optimize realpath_cache_size and realpath_cache_ttl
Disable unnecessary PHP modules
Advanced Techniques
Implementing Redis or Memcached for Object Caching
For high-traffic sites, persistent object caching is essential. Redis and Memcached store database query results in memory, dramatically reducing database load and improving response times.
Redis generally outperforms Memcached for WordPress with better data persistence and more data types. Implementation requires server access or managed hosting that supports these technologies.
Optimizing WordPress Core Functionality
Heartbeat API Management
WordPress Heartbeat API facilitates real-time updates but can consume resources. Optimize by:
Limiting Heartbeat frequency
Disabling it on frontend
Restricting it to specific admin pages
Post Revisions Control
Limit post revisions by adding define(‘WP_POST_REVISIONS’, 3); to wp-config.php or using plugins.
Autoloaded Data Optimization
Minimize autoloaded options in wp_options table, as these load on every page request. Use tools like Query Monitor to identify and clean bloated options.
HTTPS Optimization and Security Enhancements
HTTPS is standard in 2025, but requires optimization:
Use OCSP stapling to reduce TLS handshake time
Implement proper HTTP to HTTPS redirects
Configure HSTS headers
Use TLS 1.3 for faster encryption
Optimize SSL certificate chain
Using AI-Powered Optimization Tools
AI optimization tools automatically analyze and enhance WordPress performance:
Preload critical resources with <link rel=”preload”>
Prefetch likely-needed resources with <link rel=”prefetch”>
DNS-prefetch external domains with <link rel=”dns-prefetch”>
Preconnect to critical origins with <link rel=”preconnect”>
Maintenance Strategies
Ongoing Optimization Practices
Maintain performance through consistent practices:
Regular updates to WordPress core, themes, and plugins.
Scheduled performance testing using tools like Google PageSpeed Insights
Quarterly plugin audits to remove unnecessary or poorly performing plugins
Monthly database optimization routines
Continuous image optimization workflow for new content
Plugin and Tool Recommendations for 2025
Essential Performance Tools
Top Caching Solutions:
WP Rocket: Comprehensive caching with excellent ease of use
NitroPack: AI-powered all-in-one optimization
LiteSpeed Cache: Superior performance for LiteSpeed servers
WP Super Cache: Reliable, free caching solution
Image Optimization Tools:
ShortPixel: Excellent compression quality
Optimole: Real-time optimization and CDN
EWWW Image Optimizer: Comprehensive image toolset
Performance Monitoring:
Query Monitor: Development-focused debugging
New Relic: Enterprise-level monitoring
GTmetrix Pro: Detailed performance tracking
Conclusion
WordPress performance optimization is an ongoing journey, not a destination. The 25 techniques outlined in this guide provide a roadmap to faster loading times, better user experience, and improved search rankings. Start with the fundamentals—quality hosting, lightweight themes, and proper image optimization—before progressing to more advanced WordPress development strategies. Remember that each improvement, however small, contributes to overall site performance. In 2025’s competitive digital landscape, speed isn’t just a technical metric—it’s a business advantage. Implement these strategies methodically, measure your progress, and enjoy the benefits of a lightning-fast WordPress site.
Mobile-first design isn’t just a trend—it’s a necessity. With over 60% of web traffic coming from mobile devices, optimizing your WordPress website for mobile users has become crucial for success. This comprehensive guide will walk you through the essential strategies and best practices for creating mobile-first WordPress websites that deliver exceptional user experiences across all devices.
Understanding Mobile-First design
Mobile-first design is an approach that prioritizes designing for smaller screens first, then progressively enhancing the experience for larger screens. This methodology ensures that your website’s core content and functionality work flawlessly on mobile devices before adding more complex features for desktop users.
Why Mobile-First Matters
The shift towards mobile-first design is driven by several factors:
Mobile traffic continues to dominate desktop traffic across most industries
Google’s mobile-first indexing means your mobile site determines your search rankings
Mobile users have different behavioral patterns and expectations compared to desktop users
Conversion rates on mobile devices are heavily influenced by user experience
Essential Mobile-First WordPress Strategies
1. Choose a Responsive Theme Framework
The foundation of a mobile-first WordPress website starts withselecting the right theme. Consider these factors:
Your theme should be built on a modern, responsive framework that implements mobile-first principles. Look for themes that:
Use fluid grids and flexible layouts
Implement proper viewport settings
Support modern CSS features like Flexbox and Grid
Have clean, lightweight code
Recommended frameworks include:
GeneratePress
Astra
OceanWP
Kadence
These frameworks are specifically designed with mobile-first principles and offer excellent performance characteristics.
2. Optimize Images for Mobile
Image optimization is crucial for mobile performance. Implement these practices:
Use responsive images with srcset and sizes attributes
Compress images without sacrificing quality
Implement lazy loading for images below the fold
Consider using WebP format with fallbacks
Use appropriate image dimensions for different viewport sizes
Example WordPress code for responsive images:
3. Implement Progressive Enhancement
Start with a basic, functional mobile experience and progressively add features for larger screens:
Begin with essential content and functionality
Add enhanced interactions for tablet users
Implement more complex features for desktop users
Use feature detection to ensure compatibility
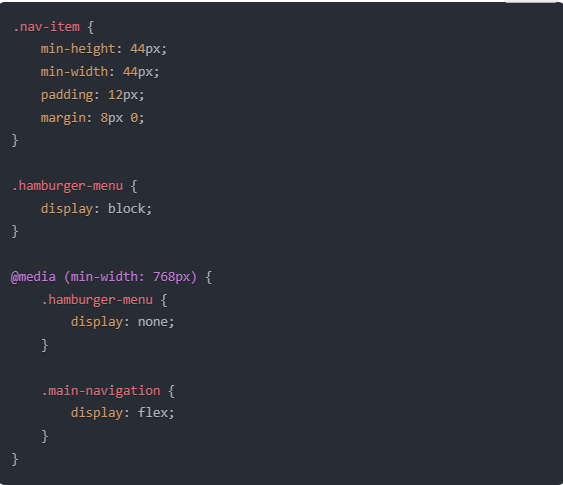
4. Mobile-First Navigation Patterns
Navigation is particularly challenging on mobile devices. Consider these approaches:
Use hamburger menus judiciously
Implement bottom navigation for frequently accessed items
Create clear visual hierarchies
Ensure touch targets are at least 44×44 pixels
Maintain consistent navigation patterns
Example CSS for mobile navigation:
5. Performance Optimization
Mobile users often face bandwidth and processing power constraints. Optimize your site by:
Minimizing HTTP requests
Implementing effective caching strategies
Reducing JavaScript and CSS file sizes
Using a content delivery network (CDN)
Optimizing database queries
Recommended WordPress plugins for performance:
WP Rocket
Flying Press
Swift Performance
W3 Total Cache
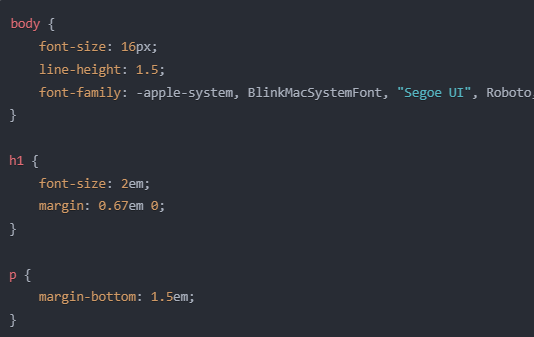
6. Typography and Readability
Mobile typography requires special attention:
Use a minimum font size of 16px for body text
Maintain appropriate line heights (1.5 to 1.6)
Ensure sufficient contrast ratios
Use system fonts when possible
Implement proper spacing for touch interactions
Example typography CSS:
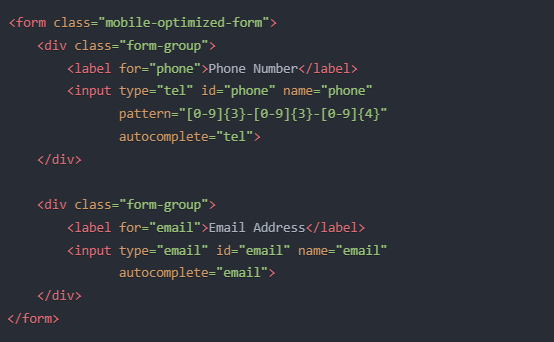
7. Form Design for Mobile
Forms are critical touch points for user interaction:
Use appropriate input types (tel, email, etc.)
Implement auto-fill where possible
Show/hide password toggles
Use clear error messages
Minimize form fields
Implement proper keyboard behaviors
Example form markup:
Testing and Validation
1. Cross-Device Testing
Implement a comprehensive testing strategy:
Use real devices for testing
Leverage browser developer tools
Implement automated testing where possible
Test on different network conditions
Verify touch interactions
2. Performance Metrics
Monitor key performance indicators:
First Contentful Paint (FCP)
Largest Contentful Paint (LCP)
First Input Delay (FID)
Cumulative Layout Shift (CLS)
Time to Interactive (TTI)
Use tools like:
Google PageSpeed Insights
WebPageTest
Chrome DevTools
Google Search Console
Common Mobile-First Pitfalls to Avoid
Blocking JavaScript and CSS
Unoptimized images
Poor touch target sizing
Complex animations on mobile
Horizontal scrolling
Intrusive interstitials
Unreadable font sizes
Recommended WordPress Plugins for Mobile Optimization
AMP for WP
Mobile Menu
WP Touch
Lazy Load by WP Rocket
WebP Express
Future-Proofing Your Mobile-First Design
Stay ahead of mobile design trends:
Monitor Core Web Vitals
Implement Progressive Web App features
Consider AI-powered optimizations
Plan for emerging mobile technologies
Regular testing and updates
Conclusion
Creating a mobile-first WordPress website requires careful planning, implementation, and ongoing optimization. By following these best practices and regularly testing your site’s performance, you can ensure an excellent mobile experience for your users while maintaining strong search engine rankings.
Remember that mobile-first design is an iterative process. Regularly collect user feedback, monitor analytics, and make data-driven improvements to your mobile experience. As mobile technology continues to evolve, staying current with best practices and emerging trends will help ensure your WordPress site remains effective and competitive.
Additional Resources
WordPress Developer Documentation
Google’s Mobile-First Indexing Guidelines
Web Content Accessibility Guidelines (WCAG)
WordPress Theme Handbook
Google’s Mobile-Friendly Test Tool
By implementing these strategies and best practices, you’ll be well-equipped to create WordPress websites that not only meet but exceed mobile users’ expectations while maintaining excellent performance and user experience across all devices.
Choosing the right content management system (CMS) is a critical decision for enterprises. It can affect everything from website performance and scalability to marketing efficiency and operational costs. Two major players in the CMS market are WordPress and Sitecore. While Sitecore is often seen as a premium choice, WordPress consistently proves to be the better option for enterprises. Let’s break down six compelling reasons why WordPress outshines Sitecore.
1. Cost-Effectiveness
WordPress: The Budget-Friendly Solution WordPress is an open-source platform, meaning it’s free to use. Enterprises only need to cover the costs of hosting, premium themes, plugins, and any custom development they may require. Even with these additional expenses, the overall cost of running a WordPress-powered site remains significantly lower than Sitecore.
Sitecore: A Premium CMS with Premium Costs Sitecore operates on a licensing model that can cost tens or even hundreds of thousands of dollars annually. On top of that, enterprises must budget for implementation, ongoing maintenance, and specialized developers, which adds to the total cost of ownership. For organizations looking to maximize ROI, WordPress offers a far more economical solution.
2. Ease of Use
WordPress: Designed for Everyone WordPress is renowned for its user-friendly interface. Its intuitive dashboard allows non-technical users to manage content, update pages, and even install plugins with minimal training. Whether it’s a marketing team or a site administrator, WordPress empowers users at all levels to take control of their website.
Sitecore: Complexity at a Cost Sitecore, while powerful, has a steep learning curve. Its interface is tailored for developers and technical users, making it less accessible to marketing teams or non-technical staff. This reliance on specialists can slow down workflows and increase operational costs, making WordPress a more efficient choice.
3. Scalability and Flexibility
WordPress: Unlimited Possibilities WordPress offers unmatched scalability and flexibility. With over 60,000 plugins and thousands of themes, enterprises can customize their websites to meet specific needs. From e-commerce solutions like WooCommerce to advanced SEO tools, WordPress provides a modular approach that grows with your business.
Sitecore: Limited by Design While Sitecore is scalable, its architecture is rigid, requiring significant custom development for modifications. This makes it less adaptable to changing business needs. In contrast, WordPress allows enterprises to pivot quickly, adding new features or redesigning the site without extensive redevelopment.
4. Global Community and Support
WordPress: Powered by a Thriving Ecosystem WordPress boasts a massive global community of developers, designers, and enthusiasts. This community ensures constant innovation, regular updates, and a wealth of free resources like forums, tutorials, and guides. If enterprises encounter issues, they can quickly find solutions or hire experts from a vast talent pool.
Sitecore: Limited Expertise and Resources Sitecore support primarily comes from its vendor and certified partners. While this ensures quality, it also limits options and increases costs. Finding experienced Sitecore developers can be challenging and expensive, whereas WordPress experts are widely available and more affordable.
5. SEO and Marketing Capabilities
WordPress: A Marketer’s Dream WordPress is built with SEO in mind. Its structure ensures clean code and fast load times, both critical for search engine rankings. Additionally, plugins like Yoast SEO and Rank Math make optimizing content effortless, providing real-time suggestions for improving keywords, meta descriptions, and readability.
Sitecore: Complex and Resource-Intensive While Sitecore offers advanced marketing tools, its SEO capabilities often require additional configurations or integrations. This complexity can slow down marketing efforts, making WordPress the better choice for enterprises prioritizing digital marketing and organic growth.
6. Faster Time-to-Market
WordPress: Speed and Efficiency WordPress enables rapid deployment of websites, thanks to its pre-built themes and plugins. Enterprises can launch new sites or features in weeks rather than months. This speed is crucial in today’s fast-paced digital landscape, where being first to market can provide a competitive edge.
Sitecore: Lengthy Development Cycles Sitecore projects often involve lengthy planning, development, and testing phases. While this can result in highly customized solutions, it delays time-to-market, which can be detrimental for enterprises needing quick turnarounds. WordPress, with its ready-to-use solutions, eliminates these bottlenecks.
Conclusion
While both WordPress and Sitecore offer robust CMS capabilities, WordPress stands out for its cost-efficiency, user-friendliness, scalability, vibrant developer community, and SEO-readiness. For enterprises aiming to streamline content operations, reduce overhead, and accelerate time-to-market, migrating from Sitecore to WordPress is a strategic move. If you’re considering making the switch, our Sitecore to WordPress migration service ensures a seamless transition with minimal disruption—empowering your team with a flexible, future-ready platform.
FAQs
1. What makes WordPress more cost-effective than Sitecore? WordPress is open-source, eliminating licensing fees, while Sitecore’s premium model involves significant costs for licensing, implementation, and maintenance.
2. Can WordPress handle enterprise-level traffic? Yes, WordPress can handle millions of visitors with the right hosting and optimization strategies, such as using a content delivery network (CDN) and caching plugins.
3. How does WordPress ensure security for enterprises? WordPress offers robust security measures, including plugins like Wordfence and Sucuri, regular updates, and best practices like two-factor authentication and SSL encryption.
4. Is Sitecore better for specific industries? Sitecore may suit industries requiring complex personalization and marketing automation, but its high costs and complexity make it less appealing for most enterprises.
5. How can enterprises migrate from Sitecore to WordPress? Migrating from Sitecore to WordPress involves data transfer, theme development, and plugin integration. Hiring a WordPress migration expert can ensure a smooth and efficient transition.
WordPress powers over 40% of websites globally, making it a cornerstone of the online world. Its flexibility, user-friendly interface, and extensive plugin ecosystem make it a top choice for businesses and individuals alike. However, even the best systems are not immune to challenges. Common WordPress errors can disrupt your site’s functionality, reduce performance, and hinder the user experience.
Imagine this: your website goes down during a product launch, or pages load so slowly that visitors leave before exploring. These issues can stem from seemingly minor errors that escalate if left unaddressed. While these problems are frustrating, they’re often solvable with the right knowledge and tools.
Why a Smooth WordPress Experience Matters
A well-functioning WordPress site isn’t just a technical achievement—it’s a necessity for business success. Whether you’re running an e-commerce platform, a personal blog, or a corporate website, every second of downtime or lag could mean lost revenue, reduced user engagement, and diminished trust. Addressing common errors proactively ensures your site remains fast, secure, and user-friendly.
Common Errors: The Hidden Roadblocks to Efficiency
Many WordPress errors, like database connection failures or plugin conflicts, may seem like minor hiccups. However, these issues can snowball, leading to poor SEO rankings, security vulnerabilities, or even a complete site crash. By identifying the root causes and implementing best practices, you can minimize disruptions and maintain a high-performing site.
Who This Guide Is For
Whether you’re a WordPress beginner trying to understand the basics or a seasoned site administrator looking to refine your troubleshooting skills, this guide is tailored for you. Each section offers step-by-step instructions, real-world examples, and recommendations for tools or professional assistance when needed.
Let’s dive into the most common WordPress errors, how to fix them, and how to future-proof your site for optimal efficiency.
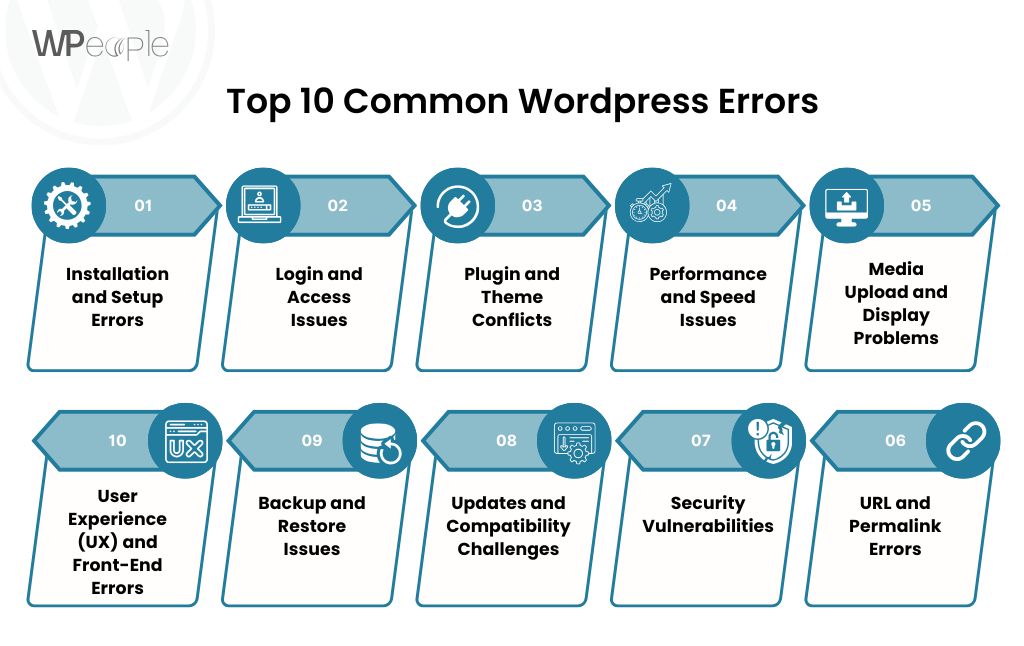
1. Installation and Setup Errors
Setting up WordPress should be a seamless process, but errors during installation can disrupt your workflow. These issues are often caused by server misconfigurations, incorrect settings, or overlooked prerequisites. Below, we’ll address three common setup errors and guide you through resolving them.
1.1. “Error Establishing a Database Connection”
This error occurs when WordPress fails to connect to the database, halting your site’s functionality entirely. It’s one of the most common issues during installation or migrations.
Causes:
Incorrect database credentials in the wp-config.php file.
Database server issues or downtime.
Corrupted database files.
Step-by-Step Solutions:
Check Database Credentials:
Access the wp-config.php file in your site’s root directory.
Verify the following credentials:
DB_NAME (database name)
DB_USER (database username)
DB_PASSWORD (database password)
DB_HOST (usually localhost or a specific host address provided by your hosting provider).
Correct any discrepancies and save the file.
Test Database Connectivity:
Use a tool like phpMyAdmin to log in to the database with the credentials in wp-config.php.
If login fails, update the username and password in your hosting control panel or contact your hosting provider.
Repair the Database:
Add the following line to wp-config.php: define(‘WP_ALLOW_REPAIR’, true);
Visit http://yoursite.com/wp-admin/maint/repair.php and follow the on-screen instructions to repair the database.
Remove the repair line from wp-config.php after completion.
Contact Hosting Support: If the issue persists, your hosting provider may be experiencing server problems. Provide them with the error details for resolution.
1.2. Missing wp-config.php File
Without the wp-config.php file, WordPress cannot communicate with your database, halting the installation process.
How to Generate and Configure a New File:
Generate the File:
Use the sample configuration file included in WordPress. Rename wp-config-sample.php to wp-config.php.
Edit Configuration:
Open the file in a text editor and update the database credentials: define(‘DB_NAME’, ‘your_database_name’);
define(‘DB_USER’, ‘your_database_user’);
define(‘DB_PASSWORD’, ‘your_database_password’);
define(‘DB_HOST’, ‘localhost’); // Or your host’s address
Upload the File:
Save and upload wp-config.php to the root directory of your WordPress installation.
Preventative Measures:
Always back up the wp-config.php file before making changes.
Use strong database passwords to prevent unauthorized access.
1.3. Memory Limit Exhaustion
This error often manifests as a white screen or an error message stating, “Allowed memory size of X bytes exhausted.”
Signs Your Site Has Reached Its Memory Limit:
Intermittent crashes or failure to load certain pages.
Plugins or themes failing to install or update.
How to Increase PHP Memory:
Edit the wp-config.php File:
Add the following line: define(‘WP_MEMORY_LIMIT’, ‘256M’);
Update the .htaccess File:
Add this code to increase memory: php_value memory_limit 256M
Modify the php.ini File (If Accessible):
Locate the php.ini file and increase the memory limit: memory_limit = 256M
Contact Your Host: If these steps don’t work, ask your hosting provider to increase the PHP memory limit for your account.
Each of these errors can feel overwhelming, especially for beginners. If troubleshooting doesn’t resolve the issue or feels too technical, consider hiring a professional WordPress developer. A skilled developer can not only fix errors efficiently but also set up preventative measures to avoid future issues.
2. Login and Access Issues
Being locked out of your WordPress site is a frustrating experience that can disrupt workflows and prevent critical updates. These login problems often arise due to forgotten credentials, misconfigured settings, or conflicts with plugins. Below, we’ll address common login issues and their resolutions.
2.1. Locked Out of Admin Dashboard
This issue can occur for several reasons, such as forgotten passwords, incorrect user roles, or plugin conflicts.
Reasons:
Forgotten password or username.
Plugins causing access restrictions.
User role changes or account deletion.
Solutions:
Reset Password via Email:
Go to your WordPress login page and click “Lost your password?”.
Enter your username or email address and follow the email instructions to reset your password.
If you don’t receive the email, check your spam folder or proceed to the next steps.
Manually Reset Password via phpMyAdmin:
Log in to your hosting control panel and access phpMyAdmin.
Navigate to the database associated with your WordPress site.
Locate the wp_users table and find your username.
Edit the row and update the user_pass field using the MD5 encryption method: NewPassword123
Save the changes and log in with the new password.
Deactivate Problematic Plugins via File Manager:
Access your site’s files using FTP or your hosting control panel’s File Manager.
Navigate to wp-content/plugins/.
Rename the suspected plugin folder (e.g., from plugin-name to plugin-name_disabled).
Check if you can log in. If successful, deactivate or update the conflicting plugin.
Restore User Account via SQL Query:
If your admin account is missing, use an SQL query in phpMyAdmin to restore it: INSERT INTO `wp_users` (`ID`, `user_login`, `user_pass`, `user_nicename`, `user_email`, `user_status`)
This error results in an infinite loop of redirections, typically caused by URL misconfigurations or HTTPS conflicts.
Diagnosing the Problem:
Incorrect settings in WordPress or .htaccess files.
HTTPS conflicts due to mismatched site URLs in settings.
Quick Fixes:
Check WordPress URL Settings:
Log in to your hosting control panel or use FTP to access your wp-config.php file.
Add the following lines to hardcode your site URLs: define(‘WP_HOME’, ‘https://yourdomain.com’);
define(‘WP_SITEURL’, ‘https://yourdomain.com’);
Ensure the URLs match your actual domain setup (with or without “www” or HTTPS).
Clear Browser and Site Caches:
Clear your browser cache or try accessing the site in incognito mode.
If you use caching plugins (e.g., WP Rocket or W3 Total Cache), clear the plugin’s cache via FTP by deleting cached files in wp-content/cache/.
Reset .htaccess File:
Rename the .htaccess file in your site’s root directory to .htaccess_backup.
Log in to your WordPress dashboard (if accessible) and navigate to Settings > Permalinks.
Save the permalinks settings to generate a new .htaccess file.
Verify SSL/HTTPS Configuration:
Use a plugin like Really Simple SSL to handle HTTPS configurations and redirect issues.
Ensure your SSL certificate is properly installed.
These login and access solutions are designed to get you back into your WordPress dashboard as quickly as possible. For complex issues or persistent errors, hiring a WordPress developer can save you time and prevent accidental data loss during troubleshooting.
3. Plugin and Theme Conflicts
Plugins and themes are the backbone of WordPress’s flexibility, but they can also introduce conflicts that disrupt your site. These conflicts often lead to errors, broken functionality, or even complete site crashes. Below, we’ll explore two common issues: the infamous “White Screen of Death” and problems caused by incompatible plugin or theme updates.
3.1. The “White Screen of Death”
The “White Screen of Death” (WSOD) is a blank page with no error messages, leaving users without any immediate clues about the problem.
Causes:
Conflicting plugins or themes.
Exhausted memory limit.
Corrupted WordPress core files.
Steps to Identify and Fix the Issue:
Enable Debugging Mode:
Edit your wp-config.php file and enable debugging by adding: define(‘WP_DEBUG’, true);
define(‘WP_DEBUG_LOG’, true);
define(‘WP_DEBUG_DISPLAY’, false);
Check the debug log in wp-content/debug.log for detailed error messages.
Deactivate All Plugins:
Use FTP or your hosting control panel to rename the wp-content/plugins/ folder to plugins_disabled.
Refresh your site to check if the issue is resolved.
If it works, reactivate plugins one by one to identify the culprit.
Switch to a Default Theme:
Temporarily replace your active theme with a defaultWordPress theme (e.g., Twenty Twenty-Three):
Rename your current theme folder in wp-content/themes/.
Activate the default theme from your dashboard or by manually uploading its files.
Increase PHP Memory Limit:
Follow the steps from Section 1.3 to increase the memory limit in your wp-config.php file.
Replace the wp-admin and wp-includes folders on your server with the new versions.
Be careful not to overwrite your wp-content folder or wp-config.php file.
3.2. Incompatible Plugin or Theme Updates
Sometimes, updating a plugin or theme introduces compatibility issues with your WordPress version or other installed components.
Signs of Incompatibility:
Site errors immediately after an update.
Features stop functioning correctly.
Dashboard becomes inaccessible.
How to Safely Update Plugins and Themes:
Backup Your Site First:
Use plugins like UpdraftPlus or BackupBuddy to create a full backup before applying updates.
Test Updates in a Staging Environment:
Create a staging site using your hosting provider’s tools or plugins like WP Staging.
Test all updates in the staging environment to identify potential issues.
Use Compatibility Tools:
Check plugin compatibility reports in the WordPress repository.
Use tools like WP Rollback to revert to a previous version of a problematic plugin or theme.
Rolling Back Updates:
Install and activate WP Rollback.
Navigate to the plugin or theme in your dashboard and click the “Rollback” option.
Select the version you want to restore and follow the instructions.
Preventative Measures:
Avoid bulk updates; update plugins and themes one at a time.
Regularly update WordPress core to ensure compatibility with the latest plugins and themes.
Choose well-maintained plugins and themes with high ratings and frequent updates.
Plugin and theme conflicts can be tricky to resolve, but a structured troubleshooting approach can save you time and prevent site downtime. If resolving these issues becomes overwhelming, a professional WordPress developer can diagnose and fix conflicts efficiently.
4. Performance and Speed Issues
Website performance is crucial for user experience, search engine rankings, and overall site success. Slow loading times or high resource usage can deter visitors and even lead to server crashes. Below, we address two common performance challenges: slow page load times and high CPU usage.
4.1. Slow Page Load Times
A sluggish site can frustrate users, increase bounce rates, and hurt SEO rankings.
Common Causes:
Inadequate hosting resources.
Large images or unoptimized media files.
Absence of caching mechanisms.
Excessive HTTP requests.
Optimization Techniques:
Choose Reliable Hosting:
Invest in quality hosting providers like SiteGround, Kinsta, or WP Engine, which offer managed WordPress hosting optimized for performance.
Optimize Images and Media:
Use tools like Smush or ShortPixel to compress images without sacrificing quality.
Convert images to modern formats like WebP using plugins such as Imagify.
Implement Caching:
Use caching plugins like WP Rocket, W3 Total Cache, or LiteSpeed Cache to store static versions of your pages.
Enable browser caching to reduce load times for returning visitors.
Minify CSS, JavaScript, and HTML:
Use plugins like Autoptimize or Asset CleanUp to minify and combine CSS and JS files, reducing their size and load time.
Reduce HTTP Requests:
Remove unnecessary plugins and scripts.
Use a content delivery network (CDN) like Cloudflare or StackPath to deliver static resources from servers closer to your users.
Run Performance Tests:
Regularly test your site’s speed using tools like Google PageSpeed Insights, GTmetrix, or Pingdom Tools.
4.2. High CPU Usage
Excessive CPU usage can slow down or crash your website, especially during traffic spikes.
Common Culprits:
Bots and spam traffic overwhelming server resources.
Poorly coded or outdated plugins.
Lack of resource optimization.
Steps to Resolve Server Overload:
Block Malicious Bots:
Install security plugins like Wordfence or Sucuri to block bots and reduce unnecessary traffic.
Use a CDN with built-in bot protection, like Cloudflare.
Optimize Plugins and Themes:
Audit installed plugins and deactivate those not in use.
Replace resource-heavy plugins with lightweight alternatives (e.g., replace Jetpack with more specific tools for analytics or social sharing).
Enable Database Optimization:
Use plugins like WP-Optimize to clean up your database by removing old revisions, spam comments, and transient data.
Monitor Resource Usage:
Use hosting tools or plugins like Query Monitor to identify resource-heavy plugins or scripts.
Upgrade your hosting plan if traffic consistently exceeds server capabilities.
Schedule Cron Jobs Efficiently:
Use a plugin like WP Crontrol to manage WordPress cron jobs and avoid resource-heavy tasks running simultaneously.
Upgrade Server Resources:
If high CPU usage persists, upgrade to a higher-tier hosting plan or switch to a VPS (Virtual Private Server) or dedicated server for more resources.
By addressing performance and speed issues, you can ensure a faster, more reliable website for your visitors. Remember, regular monitoring and proactive maintenance are essential to sustaining optimal performance.
5. Media Upload and Display Problems
Media is a vital component of any WordPress site, enhancing user engagement and visual appeal. However, issues like upload errors or broken image links can disrupt the user experience and affect site performance. Below, we’ll examine two common media-related issues and their solutions.
5.1. Image Upload Errors
Sometimes, uploading images in WordPress results in errors such as “HTTP Error” or failed uploads.
Common Causes:
Server-side restrictions or timeouts.
Incorrect file permissions.
Memory or storage limits.
Solutions:
Check File Permissions:
Use FTP or your hosting control panel to verify the permissions for the wp-content/uploads folder.
Set folder permissions to 755 and file permissions to 644.
Increase PHP Memory Limit:
Add the following to your wp-config.php file to increase the memory limit: define(‘WP_MEMORY_LIMIT’, ‘256M’);
Change PHP Settings in .htaccess:
Add these lines to your .htaccess file to extend upload limits and execution time: php_value upload_max_filesize 64M
php_value post_max_size 64M
php_value max_execution_time 300
php_value max_input_time 300
Rename Image Files:
Avoid using special characters or spaces in file names. Use underscores or dashes instead. For example: my-image-2024.jpg.
Use a Plugin for Upload Management:
If issues persist, install plugins like Enable Media Replace to troubleshoot or re-upload images without conflicts.
5.2. Broken Image Links
Broken image links can occur after migrating a site, changing domains, or due to file path errors.
Common Causes:
Images not properly migrated to the new server.
Incorrect file paths in the database.
File deletions from the media library.
Fixing Broken Image Links:
Regenerate Image Thumbnails:
Install the Regenerate Thumbnails plugin to recreate missing image sizes based on your theme’s requirements.
Verify and Correct File Paths:
Use tools like Better Search Replace to update URLs in the database:
Search for the old domain (e.g., http://oldsite.com) and replace it with the new domain (e.g., https://newsite.com).
Back up your database before performing this action.
Check .htaccess Rules:
Ensure there are no misconfigured rules in the .htaccess file that block media access.
Restore Missing Files:
If images were accidentally deleted, re-upload them via FTP to the wp-content/uploads folder while maintaining the original folder structure.
Use Plugins for Automated Fixes:
Install Media File Renamer to correct file names and paths automatically.
Use Broken Link Checker to identify and fix broken image links across your site.
Preventative Measures for Media Issues:
Regularly back up your site, including media files, to avoid data loss.
Use a CDN like Cloudflare or Jetpack’s Site Accelerator to serve images faster and reduce server load.
Optimize images during upload with plugins like Smush or EWWW Image Optimizer.
Media-related issues can significantly impact your site’s usability and aesthetics. If problems persist after trying these solutions, a WordPress developer can offer in-depth troubleshooting and support.
6. URL and Permalink Errors
URLs and permalinks are critical for navigation, SEO, and user experience. Misconfigured permalinks or broken URLs can lead to frustrating errors such as 404 Not Found pages or SEO penalties. Below, we’ll address two common issues: 404 errors and canonical URL misconfigurations, along with their solutions.
6.1. 404 Errors on Pages
A 404 Error occurs when users try to access a page that doesn’t exist or has a broken link. This can happen after changes to your site structure, permalink settings, or content deletions.
Common Causes:
Changes to permalink settings.
Deleted or moved pages/posts.
Incorrect redirections.
How to Fix 404 Errors:
Flush Permalink Settings:
Log in to your WordPress dashboard and navigate to: Settings > Permalinks
Without making changes, click Save Changes to regenerate your .htaccess file and flush permalink settings.
Check and Update URLs:
Identify broken links using plugins like Broken Link Checker.
Update or remove outdated URLs from your pages, menus, and widgets.
Create Redirects:
Use a redirection plugin like Redirection to map old URLs to the correct pages.
For example, redirect http://yourdomain.com/old-page to http://yourdomain.com/new-page.
Restore Deleted Content:
If a page was deleted unintentionally, check the Trash in Pages or Posts to restore it.
Verify File and Folder Structure:
Ensure the required files exist in the wp-content/uploads folder and haven’t been moved or renamed.
6.2. Canonical URL Misconfigurations
Canonical URLs signal to search engines the preferred version of a webpage. Misconfigured canonical tags can lead to duplicate content issues or indexing problems.
Impact of Canonical Errors:
Search engines might index incorrect pages, harming SEO rankings.
Users could land on unintended or outdated pages.
Steps to Fix Canonical URL Issues:
Verify Canonical Tags:
Use a tool like Screaming Frog SEO Spider or Ahrefs to crawl your site and identify incorrect canonical tags.
Manually Edit Canonical Tags:
For individual pages, edit the canonical URL in your SEO plugin settings:
If using Yoast SEO, go to the page’s settings and update the canonical URL under the Advanced tab.
If using Rank Math, update the canonical field in the Advanced SEO settings.
Ensure HTTPS Consistency:
Ensure all canonical URLs use the correct protocol (https://) and domain version (with or without “www”).
Update your wp-config.php file to enforce consistent site URLs: define(‘WP_HOME’, ‘https://yourdomain.com’);
define(‘WP_SITEURL’, ‘https://yourdomain.com’);
Resolve Duplicate URLs:
Redirect non-canonical versions of URLs to their canonical counterparts using a plugin like Redirection or server-level redirects in .htaccess: RewriteEngine On
Use a staging site to test permalink changes before applying them to the live site.
URL and permalink errors, if left unresolved, can harm both user experience and search engine rankings. For advanced configurations or persistent problems, consider consulting a WordPress developer to ensure your site remains optimized and error-free.
7. Security Vulnerabilities
Security vulnerabilities pose serious risks to your WordPress site, from data breaches to malware infections. A compromised site can lead to lost trust, SEO penalties, or even legal consequences. In this section, we’ll cover two significant security challenges: hacked websites and malware suspicious redirects, and provide actionable steps to safeguard your site.
7.1. Hacked WordPress Site
A hacked site often displays symptoms like unexpected content, unfamiliar user accounts, or being flagged by search engines.
Signs of a Hacked Site:
Defaced homepage or unexpected changes to content.
Unusual admin activity or new user accounts.
Spammy redirects or pop-ups.
Alerts from tools like Google Search Console or web hosting providers.
Steps to Clean and Secure Your Site:
Take Your Site Offline:
Use a maintenance mode plugin like WP Maintenance Mode to protect visitors and prevent further damage during cleanup.
Scan for Malware:
Use a security plugin like Wordfence, Sucuri Security, or MalCare to scan for malicious code.
Check core files, plugins, themes, and database for unauthorized modifications.
Remove Infected Files:
Identify and delete infected files manually via FTP or cPanel. Be cautious not to delete critical WordPress files.
Replace core WordPress files with fresh versions from WordPress.org.
Change All Passwords:
Reset passwords for your WordPress admin, FTP, database, and hosting accounts. Use strong, unique passwords with a generator like LastPass or 1Password.
Restore from Backup:
If the damage is extensive, restore your site from a clean backup using plugins like UpdraftPlus or BackupBuddy.
Harden Site Security:
Update WordPress core, plugins, and themes to the latest versions.
Implement two-factor authentication (2FA) using plugins like Google Authenticator or Duo Security.
Limit login attempts with plugins such as Limit Login Attempts Reloaded.
7.2. Malware and Suspicious Redirects
Malware and redirects can silently harm your visitors and your SEO rankings by spreading spam or phishing links.
Signs of Malware or Redirects:
Users redirected to unrelated or spammy websites.
Alerts from browsers or antivirus software labeling your site as unsafe.
Reduced site performance or resource spikes.
How to Detect and Remove Malware:
Scan Your Site:
Use plugins like Wordfence, MalCare, or Sucuri Scanner to detect malicious scripts.
Remove Malicious Code:
Locate infected files using the scan results and clean them manually.
Check theme and plugin files for unusual PHP scripts or <iframe> tags.
Update .htaccess and wp-config.php:
Ensure your .htaccess and wp-config.php files don’t contain malicious redirects or code.
Replace them with default versions if compromised.
Install a Firewall:
Use plugins like Sucuri Firewall or Wordfence to block suspicious IPs and unauthorized access.
Request a Site Review:
If flagged by Google, use Google Search Console to request a review after cleanup to remove warnings from search results.
Recommended Security Plugins:
Wordfence Security: Comprehensive malware scanning, firewall, and live traffic monitoring.
Sucuri Security: Malware detection, blacklist monitoring, and post-hack cleanup services.
iThemes Security: Features include brute force protection and scheduled malware scans.
Preventative Measures for Site Security:
Regularly update WordPress core, plugins, and themes.
Only install plugins and themes from trusted sources.
Set up regular automated backups with plugins like UpdraftPlus.
Enforce strict user roles and permissions to limit admin access.
Addressing security vulnerabilities promptly is critical to protecting your site, data, and reputation. For ongoing protection or advanced cleanup, hiring a WordPress security expert is often the best course of action.
8. Updates and Compatibility Challenges
WordPress, like all software, requires regular updates to maintain security, compatibility, and performance. However, issues can arise when core updates, themes, or plugins fail to update properly. In this section, we’ll address common challenges related to updates and compatibility and provide solutions to keep your site running smoothly.
8.1. Failed WordPress Core Updates
Sometimes, WordPress core updates fail due to server-related issues, plugin conflicts, or file permission errors.
Common Causes:
Insufficient disk space on the server.
Server timeouts during the update process.
Conflicts with active plugins or themes.
How to Fix Failed Core Updates:
Check Disk Space:
Ensure your hosting server has enough disk space to accommodate the update. Contact your hosting provider if necessary to increase space.
Manually Update WordPress:
If the automatic update fails, manually update WordPress by downloading the latest version from WordPress.org.
Upload the extracted files to your server via FTP, replacing the existing WordPress files (excluding the wp-content folder and wp-config.php file).
Deactivate Plugins and Themes:
Temporarily deactivate all plugins and switch to a default WordPress theme (like Twenty Twenty-Three). This eliminates conflicts that could block updates.
After the update, reactivate plugins and themes one by one to identify the culprit if the update succeeds.
Check PHP Version Compatibility:
Ensure your PHP version is compatible with the latest WordPress release. WordPress recommends PHP 7.4 or higher. Update PHP via your hosting provider’s control panel or contact their support.
Use WP-CLI (Command Line Interface):
If you are comfortable with the command line, you can use WP-CLI to manually update WordPress. Simply run the command: wp core update
8.2. PHP Version Compatibility
PHP is the programming language WordPress is built on. Keeping PHP up to date is essential for site performance, security, and compatibility with newer versions of WordPress and plugins.
Why Updating PHP is Critical:
Newer PHP versions provide faster performance and enhanced security.
PHP 5.6 or older is no longer supported by WordPress and many plugins, leading to compatibility issues.
PHP 7.4 or higher is recommended for optimal WordPress performance.
How to Test and Switch PHP Versions:
Check Your Current PHP Version:
You can check your PHP version in the WordPress dashboard by going to Tools > Site Health under the Info tab.
Alternatively, you can check via your hosting control panel (cPanel or Plesk).
Test Compatibility Before Updating PHP:
Before upgrading PHP, test the compatibility of your site with the latest version.
Use the PHP Compatibility Checker plugin to identify potential issues with your themes or plugins.
Update PHP Version via Hosting Provider:
Most hosting providers allow you to change PHP versions via their control panel. For example, in cPanel:
Go to Select PHP Version and choose the latest supported version (preferably PHP 7.4 or PHP 8.x).
Click Set as Current.
Test Site After PHP Update:
After switching PHP versions, test your site thoroughly for functionality and performance.
Look for any issues such as broken plugins or features and update or replace outdated plugins if necessary.
Preventative Measures for Updates and Compatibility:
Regularly Update WordPress Core, Themes, and Plugins:
Enable automatic updates for minor WordPress releases in the wp-config.php file by adding the following line: define(‘WP_AUTO_UPDATE_CORE’, true);
Keep plugins and themes updated for security and compatibility with WordPress core.
Backup Your Site Before Updates:
Always back up your site before performing updates using tools like UpdraftPlus or BackupBuddy.
Use a Staging Environment:
Test updates on a staging site before applying them to the live site. This ensures no conflicts occur with themes or plugins.
Ensure Compatibility with Hosting Provider:
Work with a hosting provider that offers PHP updates and WordPress optimization to ensure smooth updates and compatibility.
By regularly updating WordPress, themes, and plugins, and ensuring PHP compatibility, you can reduce the risk of encountering update-related issues. If you’re unsure about making these updates yourself, consider hiring a WordPress developer to manage your site’s technical aspects.
9. Backup and Restore Issues
Having reliable backups is essential for WordPress site management. They ensure you can recover your site after a crash, hack, or accidental data loss. However, issues can arise when backups are incomplete, corrupted, or fail to restore properly. In this section, we’ll cover common backup and restore problems and provide solutions to ensure your site is always protected.
9.1. Incomplete or Corrupted Backups
An incomplete or corrupted backup can lead to data loss or failure to restore your site properly when needed.
Common Causes:
Server timeouts during the backup process.
Disk space limitations on the hosting server.
Errors or interruptions while backing up large databases or files.
How to Ensure Reliable Backups:
Use Reliable Backup Plugins:
Opt for well-established backup plugins like UpdraftPlus, BackupBuddy, or VaultPress. These plugins offer scheduled backups, cloud storage integration, and the ability to back up your entire site, including themes, plugins, and database.
Test Backups Regularly:
Don’t just rely on your backup plugin to confirm success; regularly test your backups by restoring them to a staging or local environment.
If a backup doesn’t restore correctly, troubleshoot or switch to a different plugin that offers better reliability.
Ensure Sufficient Storage Space:
Check that you have enough disk space for backups, especially if you’re storing them on your server. Consider using external cloud storage options like Google Drive, Dropbox, or Amazon S3 to avoid running out of space.
Schedule Regular Backups:
Set up daily, weekly, or monthly backups, depending on how frequently you update your site.
Use UpdraftPlus or similar plugins to automate the process and save backups to remote storage.
Monitor Backup Logs:
Many backup plugins generate logs that can help diagnose issues. Regularly check these logs to ensure backups are running smoothly.
9.2. Error During Restore Process
Restoring a backup is the last line of defense against issues like site crashes or hacking. However, problems can arise during the restore process that may leave your site in a broken or incomplete state.
Common Causes:
Incorrect backup file format or incomplete backup.
Plugin or theme conflicts during the restoration process.
PHP memory limits or timeout issues while restoring large backups.
How to Troubleshoot and Successfully Restore a Site:
Check Backup Integrity:
Before starting the restore, ensure your backup file is not corrupted.
If using a plugin like UpdraftPlus, verify that the backup was completed fully by reviewing its log files.
Increase PHP Memory Limits:
Restoring large backups may require more PHP memory than the default limit. Increase your PHP memory limit in the wp-config.php file: define(‘WP_MEMORY_LIMIT’, ‘256M’);
If restoring via cPanel, increase the memory limit in the PHP settings.
Restore Step-by-Step:
If restoring a large site, break it down into smaller parts. Start with the database, then restore the files (themes, plugins, media, etc.).
For UpdraftPlus or BackupBuddy, follow the step-by-step restore process to avoid skipping any important files.
Resolve Plugin or Theme Conflicts:
Deactivate all plugins and switch to the default Twenty Twenty-Three theme before starting the restore process.
After restoration, reactivate plugins and themes one by one to check for conflicts.
Use a Staging Site:
Before restoring to your live site, perform the restore on a staging environment first. This helps identify any issues or conflicts that might arise and ensures your live site remains unaffected.
Restore via FTP or cPanel if Needed:
If your backup plugin fails, you can manually restore the files by uploading them via FTP or using the cPanel file manager.
To restore the database, use phpMyAdmin to import the .sql file from the backup.
Best Practices for Backup and Restore:
Always Backup Before Major Changes:
Back up your site before updating WordPress core, themes, plugins, or adding new content.
Use automated backups to save time and ensure consistency.
Store Backups Off-Site:
Store backups in multiple locations, including cloud services like Google Drive, Amazon S3, or Dropbox. This ensures that even if your server fails, you have an external copy of your site.
Monitor Backup Schedules:
Check your backup plugin regularly to ensure that backups are occurring as scheduled.
Use a monitoring service to alert you in case a backup fails or is incomplete.
Backups are your safety net, but they can only help if they are complete and functional. Regularly testing and managing your backups is key to ensuring that you can quickly recover from any issue. If you encounter ongoing problems, it may be worth consulting a WordPress developer or system administrator for more advanced solutions.
10. User Experience (UX) and Front-End Errors
User experience (UX) is crucial for the success of any website, and WordPress sites are no exception. Front-end errors can frustrate visitors, increase bounce rates, and affect conversion rates. Common front-end issues like missing CSS, broken design, or mobile responsiveness problems can be resolved with the right approach. In this section, we’ll tackle these problems and suggest solutions for improving UX and site performance.
10.1. Missing CSS or Broken Design
CSS (Cascading Style Sheets) is responsible for styling your WordPress site, from layout to colors and fonts. Missing or broken CSS can result in a page that looks unstyled, broken, or hard to navigate.
Common Causes:
Incorrect file paths or URLs for CSS files.
Caching issues causing outdated stylesheets to load.
Plugin or theme conflicts that disable CSS files.
How to Debug Missing CSS or Broken Design:
Clear Browser Cache and Site Cache:
If the site appears unstyled on your end, clear your browser cache to ensure you’re loading the most recent version of the site.
Clear any caching plugins (like W3 Total Cache or WP Super Cache) to eliminate outdated cached CSS files.
Check File Paths and URLs:
Inspect the source code of the page (right-click > “Inspect” or press F12 in most browsers) and look for 404 errors related to CSS files.
Verify that the paths to the CSS files are correct, especially after a site migration or theme update.
Disable Plugins or Switch to Default Theme:
A plugin or theme conflict could be preventing the CSS file from loading. Disable all plugins and switch to a default WordPress theme (like Twenty Twenty-Three).
If the CSS loads correctly after deactivating plugins, reactivate them one by one to pinpoint the cause.
Re-upload the CSS File:
If the CSS file is missing, re-upload it via FTP to the correct directory. For example, ensure that style.css is located in the /wp-content/themes/your-theme/ directory.
Check for Inline CSS Errors:
Review any custom CSS added through the theme’s customizer or a plugin like Simple Custom CSS. Incorrect CSS rules or syntax errors can prevent the design from displaying correctly.
10.2. Mobile Responsiveness Problems
With the increasing use of smartphones and tablets to browse the web, mobile responsiveness is more important than ever. WordPress sites that aren’t optimized for mobile devices may show distorted layouts or content that’s hard to read or navigate.
Common Causes:
Unresponsive themes or outdated theme versions.
Fixed-width elements that do not scale properly on smaller screens.
Lack of mobile-specific settings or media queries in CSS.
How to Test and Fix Mobile Responsiveness Issues:
Use Responsive Design Tools:
Test your site’s mobile responsiveness using built-in tools in browsers like Chrome or Firefox (right-click > “Inspect” > toggle device toolbar).
Alternatively, use online tools like Google’s Mobile-Friendly Test to check for responsiveness issues.
Switch to a Mobile-Optimized Theme:
Choose a theme that is built to be responsive, such as themes from the WordPress Theme Directory or popular premium themes like Astra or GeneratePress.
If your current theme isn’t mobile-friendly, consider updating it or switching to a more modern theme.
Use Media Queries in CSS:
If you’re comfortable with CSS, use media queries to adjust styles based on screen size. For example: @media only screen and (max-width: 768px) {
/* Add mobile-specific CSS here */
}
This ensures your site layout adapts properly on smaller screens, adjusting elements like fonts, images, and columns.
Optimize Images for Mobile:
Large image files can significantly impact load times, especially on mobile devices.
Use responsive image attributes like srcset to serve different sizes for different screen resolutions.
Compress images using plugins like Smush or ShortPixel to reduce their file size.
Test and Optimize Plugins for Mobile:
Some plugins may not be mobile-friendly, leading to broken layouts or functionality issues.
Disable plugins one by one and test to see if any cause mobile display issues.
Tools for Mobile Optimization:
Google Mobile-Friendly Test: A tool to quickly check if your site is optimized for mobile.
Browser Developer Tools: Chrome and Firefox allow you to test how your site looks on different devices.
WPtouch: A plugin that helps optimize your WordPress site for mobile devices.
Best Practices for Improving UX and Front-End Performance:
Responsive Design is Key:
Ensure your WordPress theme is responsive, meaning it automatically adjusts to different screen sizes.
Use AMP (Accelerated Mobile Pages) to improve mobile page speed and responsiveness.
Prioritize Load Speed:
Page speed impacts UX, especially on mobile. Use caching plugins (like W3 Total Cache or WP Rocket) and minimize scripts and stylesheets for faster loading.
Use Lazy Load for images to improve page performance, especially on mobile devices.
Regularly Test Your Site:
Perform regular checks on your site’s appearance and functionality, particularly after updates or new plugin installations.
User-Centered Design:
Keep the user’s needs in mind. Make sure navigation is intuitive, content is easily readable, and buttons and links are clickable on all devices.
UX and front-end errors can significantly affect how visitors interact with your site. Regular testing, updating themes and plugins, and optimizing for mobile are essential steps in ensuring a smooth and professional user experience. If you face recurring issues, consulting a WordPress developer for a custom solution may be worthwhile.
Summary
In this guide, we’ve covered a wide range of common WordPress errors that can affect your site’s efficiency, user experience, and overall performance. From installation and setup issues to security vulnerabilities, it’s clear that regular maintenance and proactive troubleshooting are essential for keeping your site running smoothly.
Key Takeaways for Troubleshooting:
Installation and Setup Errors: Errors like “Error Establishing a Database Connection” or missing files can disrupt your site from the very beginning. Always ensure correct configurations and check server settings when issues arise.
Login and Access Issues: Problems such as being locked out of the admin dashboard or facing too many redirects often stem from password issues or misconfigured URLs. Resetting passwords or adjusting URL settings can resolve most login issues.
Plugin and Theme Conflicts: The “White Screen of Death” and issues with incompatible updates are common challenges in WordPress. Deactivating plugins, checking for theme compatibility, and rolling back updates can help fix these problems.
Performance and Speed Issues: Slow loading times and high CPU usage can stem from a variety of factors, including poorly optimized plugins and large files. Caching, image optimization, and proper hosting choices are crucial for improving site performance.
Backup and Restore Challenges: Ensuring that your backups are reliable and complete is critical. Regularly testing backups and having a solid plan for restoration can prevent major headaches in case of emergencies.
User Experience (UX) and Front-End Errors: Issues like broken design or lack of mobile responsiveness can impact user engagement and retention. Always test your site on different devices, optimize images, and ensure your design adapts to various screen sizes.
The Role of Proactive Maintenance:
Regular Backups: Always keep up-to-date backups to safeguard against data loss.
Plugin and Theme Updates: Keep plugins and themes updated to avoid security risks and compatibility issues.
Security Measures: Use reliable security plugins and monitor your site for vulnerabilities to protect it from hackers and malware.
Mobile Optimization: Ensure your site is mobile-friendly, as more users access websites from mobile devices than ever before.
Maintaining a WordPress site requires vigilance and ongoing effort, but with the right tools and troubleshooting strategies, you can avoid the most common errors and ensure your site runs efficiently. Whether you’re managing a personal blog or a business website, taking the time to address issues proactively can improve performance, enhance the user experience, and secure your site’s long-term success.
12. FAQs
Here are some frequently asked questions (FAQs) to help clarify common concerns related to WordPress errors and troubleshooting:
Q1: What should I do if my site crashes completely?
If your WordPress site crashes completely, follow these steps:
Check for Server Issues: Start by confirming if there are any server-side issues with your hosting provider.
Disable Plugins and Themes: Access your site via FTP or File Manager and disable all plugins by renaming the /wp-content/plugins/ folder. Also, switch to a default WordPress theme like Twenty Twenty-Three.
Check for PHP Errors: Look for PHP error logs in your hosting control panel and identify the source of the issue.
Restore from Backup: If you have a recent backup, restore your site using your backup tool or manually via FTP and phpMyAdmin.
Contact Your Hosting Provider or Developer: If the issue persists, reach out to your hosting provider or hire a WordPress developer for further assistance.
Q2: How often should I back up my WordPress site?
The frequency of backups depends on how often you update your site:
For active sites with frequent updates: Daily or weekly backups are recommended.
For sites with fewer updates: Weekly or monthly backups should be sufficient. Use reliable plugins like UpdraftPlus, BackupBuddy, or VaultPress to automate backups. Always store backups off-site to ensure protection in case of server failure.
Q3: Can I prevent most errors with a managed hosting plan?
Yes, managed WordPress hosting plans can help prevent many common errors.
Managed Hosting Advantages:
Automatic updates and backups.
Optimized performance and caching.
Security features like malware scanning and protection.
Expert support to troubleshoot issues. While managed hosting offers significant benefits, it’s still important to monitor your site, test for performance, and handle specific issues proactively.
Q4: What are the best tools for monitoring site performance?
Monitoring your WordPress site’s performance helps you catch issues early. Some of the best tools include:
Google PageSpeed Insights: A tool for measuring page load speed and providing optimization suggestions.
GTmetrix: Offers detailed performance reports with suggestions to improve speed.
Pingdom: Monitors uptime and performance across multiple locations.
New Relic: Advanced site performance monitoring and debugging tools for developers.
Using these tools, you can track loading times, identify bottlenecks, and optimize your site for better performance.
Q5: How do I know if a plugin or theme is well-coded?
To assess the quality of a plugin or theme, consider these factors:
Check Ratings and Reviews: Look for plugins or themes with positive feedback from users, particularly those that mention reliability and security.
Update History: Well-coded plugins/themes are updated regularly to fix bugs, improve performance, and stay compatible with the latest version of WordPress.
Code Quality: If you have development skills, review the plugin or theme’s code for best practices. Look for clean, well-commented code with no security vulnerabilities.
Compatibility with WordPress Core: Ensure the plugin/theme is compatible with the latest version of WordPress. Reputable developers will update their products in line with WordPress releases.
If you’re unsure about a plugin or theme’s quality, consider asking a WordPress developer to review it for you.
In today’s globalized world, businesses are no longer confined by geographic boundaries. A multilingual website has become a powerful tool for reaching diverse audiences, enhancing customer experiences, and driving international growth. For WordPress users and business owners, creating a multilingual site may seem like a daunting task, but with the right approach, it can be done efficiently and effectively.
WordPress, known for its versatility and user-friendly interface, offers several ways to build a multilingual website. Whether you’re a small business looking to expand into new markets or an established brand aiming to strengthen your global presence, having a site in multiple languages can significantly boost your reach and credibility.
In this guide, we’ll explore the key benefits of multilingual sites, discuss essential tools and methods for implementation, and provide actionable steps to help you easily create a multilingual WordPress site. By the end of this article, you’ll have the knowledge to cater to a global audience while optimizing your site for search engines and user experience.
Understanding the Basics of Multilingual WordPress Sites
Before diving into the technical aspects, it’s essential to understand what a multilingual WordPress site entails and why it’s a critical asset for businesses.
What is a Multilingual WordPress Site?
A multilingual WordPress site is a website that provides content in more than one language. Visitors can switch between languages using a language selector, ensuring they access information in their preferred language. This functionality is vital for businesses targeting audiences across different regions or countries, as it enhances accessibility and user satisfaction.
Key Considerations for Multilingual Websites
Creating a multilingual site involves more than just translating text. Here are some critical factors to consider:
Language Selection: Identify the languages most relevant to your audience. Research your target market to determine the primary and secondary languages spoken by your customers.
User Experience: A seamless experience is crucial. Ensure the language switcher is easy to locate and use. Maintain consistent design and navigation across all language versions to avoid confusion.
SEO Optimization: Multilingual sites can significantly boost your search engine rankings if optimized correctly. Use hreflang tags to indicate language variations to search engines and ensure proper indexing.
Content Strategy: Decide whether to translate all pages or only specific ones. Focus on pages that generate the most traffic or are essential for your business goals.
By understanding these basics, you lay the groundwork for a multilingual site that meets user expectations and aligns with your business objectives.
Using Plugins to Create a Multilingual WordPress Site
Plugins are the easiest and most efficient way to create a multilingual WordPress site. They offer user-friendly interfaces and automation features, making them ideal for WordPress users and business owners without advanced technical expertise. Let’s explore the most popular plugins and how to use them effectively.
Top Multilingual Plugins for WordPress
WPML (WordPress Multilingual Plugin) WPML is one of the most widely used plugins for creating multilingual websites. It supports over 40 languages and allows you to add custom language variants. WPML integrates seamlessly with most themes and plugins, making it a reliable choice for businesses.
Polylang Polylang is a free and lightweight option for multilingual functionality. It enables you to create translations for posts, pages, menus, and widgets. While the free version covers basic needs, the premium version offers advanced features like WooCommerce compatibility.
TranslatePress TranslatePress is ideal for visual translation. It allows you to translate directly from the front end of your website, giving you a live preview of changes. It also supports automatic translations via Google Translate or DeepL.
Step-by-Step Guide to Setting Up a Multilingual Plugin
Here’s a general process using WPML as an example:
Install and Activate the Plugin:
Go to your WordPress dashboard, navigate to Plugins > Add New, and search for WPML.
Install and activate the plugin.
Configure Languages:
Access the WPML setup wizard and select the languages you want to add to your site.
Customize the language switcher to match your site’s design.
Translate Content:
Go to Posts or Pages in your dashboard.
Click the “+” icon next to the language you want to translate into.
Enter the translated content and save.
Test Your Site:
Preview your site to ensure the language switcher works correctly.
Check that all translated content appears as expected.
Pros and Cons of Using Plugins
Pros:
Ease of Use: Plugins simplify the process with intuitive interfaces.
Comprehensive Features: Most plugins offer robust tools for translation and SEO optimization.
Scalability: Plugins can handle multiple languages and large volumes of content.
Cons:
Cost: Premium plugins like WPML or advanced features in TranslatePress may require additional investment.
Performance Impact: Some plugins can slow down your site if not optimized properly.
Using wordpress plugins is a practical solution for most WordPress users and business owners. They save time and effort while ensuring your site remains functional and visually appealing across multiple languages.
Manual Methods for Creating a Multilingual Site
For those who prefer full control over their website’s multilingual setup or wish to avoid relying on plugins, manual methods are a viable alternative. While these methods require more effort and technical expertise, they can be tailored to meet specific business needs.
Overview of Manual Methods
Subdomains for Each Language: This approach involves creating separate subdomains for each language version of your site (e.g., en.example.com for English and fr.example.com for French).
Subdirectories for Each Language: Subdirectories organize language versions within your main domain (e.g., example.com/en/ for English and example.com/fr/ for French).
Separate WordPress Installations: You can set up independent WordPress installations for each language, hosted on separate domains or subdomains. This approach provides maximum customization but requires more maintenance.
Step-by-Step Guide for Manual Setup
Option 1: Using Subdomains
Set Up Subdomains:
Access your hosting control panel and create subdomains for each language.
For example, en.example.com for English and fr.example.com for French.
Install WordPress:
Install WordPress on each subdomain.
Customize each installation to match the main site’s design and functionality.
Translate Content:
Create content in the target language for each subdomain.
Ensure menus, widgets, and media are appropriately localized.
Option 2: Using Subdirectories
Configure Subdirectories:
Create subdirectories within your main domain (e.g., /en/ and /fr/).
Install WordPress in each subdirectory.
Translate and Customize:
Translate content and set up menus, widgets, and other elements for each language.
Option 3: Separate Installations
Install WordPress on Separate Domains:
Purchase unique domain names for each language version (e.g., example.fr for French).
Install WordPress on each domain.
Customize and Translate:
Develop unique content for each domain while maintaining consistency in branding and design.
Pros and Cons of Manual Methods
Pros:
Full Control: Customize each language version to meet specific requirements.
Independence: Avoid reliance on third-party plugins.
Scalability: Suitable for businesses with complex multilingual needs.
Cons:
Time-Consuming: Setting up and maintaining multiple installations is labor-intensive.
Higher Costs: Hosting and managing separate installations or subdomains can increase expenses.
Complexity: Requires technical expertise to configure and maintain effectively.
Manual methods are ideal for businesses that demand high customization or have unique multilingual requirements. However, for most users, plugins offer a more practical solution due to their simplicity and efficiency.
Optimizing Multilingual Sites for SEO
Creating a multilingual WordPress site is only part of the process; optimizing it for search engines is crucial to ensure your content reaches the right audience. Proper SEO practices can improve visibility, drive traffic, and enhance user experience across different languages and regions.
Importance of Multilingual SEO
Search engines like Google prioritize websites that provide localized and relevant content to users. By optimizing your multilingual site, you:
Increase your chances of appearing in region-specific search results.
Improve user engagement by delivering content in their preferred language.
Boost your overall site rankings and visibility.
Key SEO Practices for Multilingual Sites
Use hreflang Tags Hreflang tags signal to search engines which language and region your content targets. For example: html
Ensure hreflang tags are correctly implemented on all pages.
Use tools like Google Search Console to verify their accuracy.
Create Unique URLs for Each Language
Use subdomains (fr.example.com), subdirectories (example.com/fr/), or separate domains (example.fr) to distinguish language versions.
Avoid using query strings (e.g., ?lang=fr) as they are less SEO-friendly.
Optimize Metadata for Each Language
Translate and localize title tags, meta descriptions, and alt text for images.
Ensure keywords are relevant to the language and cultural context.
Submit Sitemaps to Search Engines
Create a separate XML sitemap for each language version.
Submit these sitemaps to Google Search Console and other search engines to ensure proper indexing.
Localize Content and Keywords
Avoid direct translations of keywords; instead, research region-specific search terms using tools like Google Keyword Planner.
Adapt content to suit cultural nuances and preferences.
Leverage Multilingual Plugins for SEO
Plugins like WPML, Polylang, and TranslatePress offer built-in SEO tools to manage hreflang tags, metadata, and sitemaps.
Regularly update and audit your plugin settings to align with SEO best practices.
Common SEO Mistakes to Avoid
Duplicating Content: Ensure translations are unique and culturally appropriate to avoid penalties for duplicate content.
Neglecting Mobile Optimization: Mobile-friendliness is a ranking factor, so ensure all language versions are responsive.
Ignoring Page Speed: Optimize images, enable caching, and use a Content Delivery Network (CDN) to maintain fast loading times across all languages.
Monitoring and Improving SEO Performance
Use tools like Google Analytics to track traffic and engagement for each language version.
Regularly audit your site for broken links, missing hreflang tags, or untranslated content.
Continuously refine your SEO strategy based on user behavior and search engine updates.
By implementing these practices, your multilingual WordPress site will not only serve diverse audiences effectively but also rank higher in search results, driving more traffic and conversions.
Troubleshooting Common Issues
Creating a multilingual WordPress site can present challenges, especially when dealing with plugins, translations, or compatibility issues. Addressing these problems promptly ensures a seamless user experience and maintains your site’s functionality.
Common Issues and How to Resolve Them
Translation Errors
Issue: Incomplete or incorrect translations appearing on your site.
Solution:
Double-check your translations, especially if using automatic tools like Google Translate.
Use professional translators or services for critical content to ensure accuracy.
If using plugins, ensure the translation files are correctly uploaded and synced.
Language Switcher Problems
Issue: The language switcher doesn’t display correctly or doesn’t work.
Solution:
Verify the switcher settings in your plugin.
Ensure the switcher is placed in a visible location, such as the header or menu.
Test the switcher across different devices and browsers.
SEO Conflicts
Issue: Search engines index the wrong language version or fail to recognize hreflang tags.
Solution:
Audit your hreflang tags to ensure they’re properly implemented.
Use tools like Screaming Frog or Google Search Console to check for indexing errors.
Avoid duplicate content by ensuring each language version has unique URLs and metadata.
Performance Issues
Issue: The site slows down after adding multilingual functionality.
Use a lightweight plugin like Polylang if performance is a concern.
Consider upgrading your hosting plan to handle increased traffic and resources.
Compatibility with Themes or Plugins
Issue: Some themes or plugins don’t support multilingual functionality.
Solution:
Choose wordpress themes and plugins that are explicitly compatible with multilingual setups.
Update all themes, plugins, and WordPress core to the latest versions.
Contact the theme or plugin developer for support if issues persist.
Broken Links or Missing Pages
Issue: Links in one language version lead to the wrong or missing pages.
Solution:
Use a link checker plugin to identify broken links.
Ensure all internal links point to the correct language version.
Regularly test your site for navigation errors.
Proactive Steps to Minimize Issues
Backup Your Site Regularly: Before making significant changes, create backups to avoid data loss.
Test in a Staging Environment: Use a staging site to test multilingual setups and updates before deploying them live.
Monitor Site Performance: Regularly check your site’s speed, functionality, and SEO rankings.
By addressing these common issues and adopting proactive measures, you can maintain a robust and user-friendly multilingual WordPress site that serves your audience effectively.
Conclusion
Creating a multilingual WordPress site through custom WordPress development is a strategic move for businesses aiming to expand their reach and connect with a global audience. By offering content in multiple languages, you enhance user experience, build trust, and increase your chances of success in international markets. Whether you choose the simplicity of plugins like WPML, Polylang, or TranslatePress, or opt for manual methods to gain full control, the process can be tailored to suit your needs. Optimizing your site for SEO ensures that your multilingual content reaches the right audience while troubleshooting common issues keeps your site running smoothly.
In today’s digital landscape, mobile optimization is no longer optional for WordPress sites. With the majority of internet traffic coming from mobile devices, ensuring your website is mobile-friendly can significantly impact user experience, search engine rankings, and overall success. Elementor, one of the most popular WordPress page builders, offers robust tools to optimize your site for mobile devices. This guide will explore how to leverage Elementor’s responsive features for a seamless mobile experience.
Importance of Mobile Optimization for WordPress Sites
Mobile optimization ensures your website looks and functions well on smaller screens. A mobile-friendly site can:
Improve user engagement and retention.
Boost SEO rankings, as search engines prioritize mobile-first indexing.
Increase conversion rates by offering a better browsing experience.
Overview of Elementor’s Responsive Features
Elementor simplifies mobile optimization with its responsive design tools. These features allow you to customize layouts, typography, and widgets specifically for mobile, tablet, and desktop views.
What is Elementor Responsive Mode?
Explanation of Elementor Responsive Mode
Elementor’s Responsive Mode enables you to preview and customize your website for different devices. It ensures your content adapts seamlessly to various screen sizes, enhancing usability and aesthetics.
Benefits for Mobile Optimization
Customizable Layouts: Tailor content and designs for mobile users.
Improved Performance: Hide unnecessary elements to reduce load times.
Enhanced User Experience: Ensure readability and navigation are optimized for touchscreens.
How to Access Elementor’s Responsive Mode
Step-by-Step Process to Opening Responsive Mode
Open the Elementor editor for your page or post.
At the bottom-left corner, click the Responsive Mode icon (a monitor and mobile icon).
The editor will display options for Desktop, Tablet, and Mobile views.
Switching Between Device Views
Desktop View: Default mode for editing.
Tablet View: Preview and adjust designs for medium-sized screens.
Mobile View: Customize layouts for smaller devices.
Understanding Elementor Responsive Breakpoints
Default Breakpoints in Elementor
Elementor uses predefined breakpoints to determine how content adjusts:
Desktop: 1025px and above.
Tablet: 768px to 1024px.
Mobile: 767px and below.
How to Customize Breakpoints for Your Site
Go to Elementor Settings > Site Settings > Breakpoints.
Adjust the pixel values to match your design requirements.
Save changes and test your site on different devices.
How to Edit Mobile Version of WordPress Site
Adjusting Content Visibility for Mobile
Use the Visibility Settings in Elementor to hide or show elements based on the device.
Navigate to Advanced Settings > Responsive and toggle visibility for Desktop, Tablet, or Mobile.
Customizing Text and Images for Mobile Devices
Resize images using Elementor’s Image Size options.
Adjust font sizes and alignments in the Typography settings under the Style tab.
How to Edit Mobile Menu in WordPress Using Elementor
Importance of Mobile-Friendly Navigation
A mobile-friendly menu ensures users can navigate your site effortlessly, improving usability and reducing bounce rates.
Steps to Create and Edit a Mobile Menu
Add a Nav Menu widget to your header.
In the widget’s settings, select your menu.
Customize the Dropdown and Toggle Button styles for mobile.
Test the menu in Responsive Mode to ensure functionality.
Customizing Elementor Widgets for Mobile
Using Widget-Specific Responsive Settings
Most Elementor widgets have Advanced Settings for device-specific customization.
Example: Adjust the padding, margin, or alignment for buttons and images.
Best Practices for Widget Adjustments
Use minimal content to avoid clutter.
Ensure buttons are large enough for touch interactions.
Adjusting Typography for Mobile View
Setting Font Sizes and Line Heights
Navigate to the Typography section under the Style tab.
Use the Device Selector to set font sizes and line heights for mobile.
Ensuring Readability on Smaller Screens
Avoid using overly small fonts (recommendation: 16px or larger).
Maintain sufficient contrast between text and background.
Optimizing Images for Mobile Devices
Tips for Resizing and Compressing Images
Use tools like TinyPNG or ShortPixel to compress images.
Resize images to match the display size for faster load times.
Using Elementor’s Image Settings Effectively
Set images to Fit to Screen or Contain under the Style tab.
Mobile optimization is a critical aspect of modern web design. By leveraging Elementor’s responsive features, you can create a seamless and engaging experience for mobile users. Prioritize performance, readability, and navigation to ensure your site stands out.
FAQs
1. Can I customize breakpoints in Elementor Pro?
Yes, Elementor Pro allows you to set custom breakpoints under Site Settings.
2. Why is my mobile menu not displaying correctly?
Ensure the menu is configured in the Nav Menu widget and test it in Responsive Mode.
3. How do I test my site on different devices?
Use Elementor’s Responsive Mode and third-party tools like BrowserStack for comprehensive testing.
In today’s digital world, mobile devices account for over half of all web traffic globally. If your website isn’t optimized for mobile users, you risk losing a significant portion of your audience. Elementor, one of the most popular WordPress page builders, offers powerful tools to ensure your site looks perfect on all devices. However, simply using Elementor isn’t enough—proper optimization for mobile is essential to deliver a seamless user experience.
This article will guide advanced Elementor users through the process of optimizing their websites for mobile devices. We’ll explore Elementor’s mobile editing features, best practices for images and media, and advanced techniques to ensure your site performs flawlessly on smaller screens.
Why Mobile Optimization Matters
Mobile optimization is no longer optional—it’s a necessity. Here’s why:
User Experience: Visitors expect fast-loading, visually appealing, and easy-to-navigate websites. If a site doesn’t perform well on mobile, users will leave quickly.
SEO Rankings: Google prioritizes mobile-friendly websites in search results. Poor mobile optimization can hurt your SEO rankings.
Conversion Rates: A well-optimized mobile site increases user engagement and conversions, whether it’s sales, sign-ups, or other actions.
Device Diversity: With smartphones, tablets, and varying screen sizes, ensuring responsive design helps you reach a broader audience.
In short, optimizing your Elementor website for mobile ensures a better user experience, higher search rankings, and improved business outcomes.
Elementor’s Mobile Editing Features
Elementor offers several built-in tools to make mobile optimization easy and efficient. Here are the key features you should know:
Responsive Editing: Elementor allows you to customize your design for desktop, tablet, and mobile views separately. You can switch between these views using the responsive mode toggle at the bottom of the editor.
Mobile-Specific Customization: You can adjust margins, padding, font sizes, and element visibility specifically for mobile devices without affecting desktop designs.
Hide/Show Elements: Elementor enables you to hide or show specific widgets or sections based on the device. This is particularly useful for simplifying mobile layouts.
Custom Breakpoints: Elementor Pro allows you to define custom breakpoints for different devices, ensuring your design adapts perfectly to varying screen sizes.
These tools give you full control over how your website appears and functions on mobile devices.
Setting Up Mobile-Specific Settings
To optimize your Elementor website for mobile, follow these essential steps:
Step 1: Enable Responsive Mode
Open your Elementor editor and click on the “Responsive Mode” icon at the bottom of the screen.
Switch between Desktop, Tablet, and Mobile views to see how your design adapts.
Step 2: Adjust Typography and Spacing
Font Sizes: Use smaller font sizes for mobile to ensure readability.
Go to Style > Typography and adjust the size for mobile devices.
Spacing: Reduce margins and padding to prevent content from looking cramped.
Use Advanced > Margin/Padding settings to fine-tune spacing.
Step 3: Optimize Layout
Simplify your layout by stacking elements vertically.
Use Elementor’s column settings to adjust column widths and alignments for mobile.
Step 4: Hide Unnecessary Elements
If certain sections or widgets are unnecessary on mobile, hide them using the Responsive > Visibility options.
By customizing these settings, you can ensure your website looks clean and professional on smaller screens.
Optimizing Images and Media for Mobile
Large images and videos can slow down your website, especially on mobile devices with limited bandwidth. Here’s how to optimize media for mobile performance:
1. Use Proper Image Formats
Use modern formats like WebP instead of traditional formats like JPEG or PNG. WebP files are smaller and load faster.
2. Compress Images
Use tools like TinyPNG, ShortPixel, or Smush to compress images without losing quality.
3. Enable Lazy Loading
Lazy loading ensures that images only load when they appear in the user’s viewport.
Elementor has built-in lazy loading, but you can enhance it with plugins like WP Rocket or Autoptimize.
4. Optimize Videos
Avoid auto-playing videos on mobile to reduce data usage.
Use third-party hosting platforms like YouTube or Vimeo to embed videos instead of uploading them directly.
5. Use Elementor’s Image Size Settings
Set appropriate image sizes for mobile under Content > Image Size. Avoid using full-resolution images unless necessary.
By optimizing your media, you can significantly improve page load times and user experience on mobile devices.
Testing and Previewing Mobile Responsiveness
Testing is a critical step in mobile optimization. Here’s how to preview and test your Elementor website:
1. Use Elementor’s Preview Mode
Switch to Responsive Mode in the Elementor editor to preview your design on mobile and tablet views.
2. Test on Real Devices
Use actual smartphones and tablets to test your website. This gives you a more accurate representation of how your site performs.
3. Use Browser Developer Tools
Open your website in Google Chrome.
Right-click and select Inspect > Toggle Device Toolbar.
Test your site on different screen sizes and resolutions.
4. Use Online Testing Tools
Tools like Google Mobile-Friendly Test, BrowserStack, and Responsinator help you identify and fix mobile responsiveness issues.
Regular testing ensures your website looks and functions perfectly across all devices.
Common Mobile Optimization Issues and How to Fix Them
Here are some common mobile optimization problems and their solutions:
Text is Too Small to Read
Solution: Adjust font sizes for mobile under Style > Typography. Use at least 16px for body text.
Clickable Elements Are Too Close
Solution: Increase spacing between buttons and links using Advanced > Margin/Padding.
Images Load Slowly
Solution: Compress images and enable lazy loading with plugins like WP Rocket or Smush.
Content Overflows the Screen
Solution: Ensure all content fits within the mobile viewport. Check column widths and padding settings.
Navigation Menu Doesn’t Work Well
Solution: Use Elementor’s Nav Menu widget to create a mobile-friendly hamburger menu.
By addressing these issues, you can deliver a smoother experience for mobile users.
Advanced Mobile Optimization Tips
For advanced users, here are some additional tips to take your mobile optimization to the next level:
Use Custom CSS for Mobile
Add custom CSS to fine-tune styles specifically for mobile devices.
Example: @media (max-width: 768px) {
.custom-class {
font-size: 14px;
margin: 10px 0;
}
}
Leverage Elementor Add-Ons
Use plugins like Essential Addons for Elementor or Premium Addons for advanced mobile-friendly widgets.
Optimize Mobile Page Speed
Use caching plugins like WP Rocket and W3 Total Cache.
Minimize CSS, JavaScript, and HTML with Autoptimize.
Implement AMP (Accelerated Mobile Pages)
Use the AMP for WP plugin to create lightweight, fast-loading pages for mobile users.
Focus on Core Web Vitals
Optimize for Google’s Core Web Vitals: Largest Contentful Paint (LCP), First Input Delay (FID), and Cumulative Layout Shift (CLS).
By implementing these advanced techniques, you can ensure your Elementor website performs exceptionally well on mobile devices.
Optimizing Elementor for mobile devices is crucial for delivering a seamless user experience, improving SEO rankings, and increasing conversions. By leveraging Elementor’s responsive editing tools, optimizing images, and addressing common issues, you can create a mobile-friendly website that stands out.
For advanced users, implementing custom CSS, leveraging add-ons, and focusing on page speed will take your mobile optimization to the next level. Start applying these tips today, and ensure your website looks flawless on every device!
In today’s digital age, data privacy and security are more important than ever. With increasing concerns over how personal data is collected, stored, and used, regulations like the General Data Protection Regulation (GDPR) have been implemented to protect individuals’ privacy rights. For WordPress site owners, ensuring compliance with GDPR is not just a legal requirement—it’s also a crucial step in building trust with your users and safeguarding your business.
This guide will walk you through everything you need to know about GDPR compliance for WordPress websites. Whether you’re just starting to navigate the complexities of data protection or you’re looking to enhance your existing practices, this comprehensive guide will cover advanced compliance techniques, practical steps, real-world examples, and tools to help you stay on the right side of the law.
Understanding GDPR and Its Core Principles
The General Data Protection Regulation (GDPR) is a European Union (EU) law designed to protect the personal data and privacy of individuals within the EU and the European Economic Area (EEA). It came into effect on May 25, 2018, and applies to any organization that processes the personal data of individuals within these regions, regardless of where the organization is based. For WordPress site owners, this means that if you collect or process personal data from EU users, you are subject to GDPR regulations.
At its core, GDPR focuses on giving individuals more control over their personal data. It requires businesses and organizations to handle data responsibly, transparently, and securely. Here are the key principles of GDPR:
Lawfulness, Fairness, and Transparency: Data must be processed lawfully, fairly, and transparently. Users must be informed about how their data will be used.
Purpose Limitation: Data should only be collected for specific, legitimate purposes and not used for any other purposes.
Data Minimization: Only the minimum amount of data necessary for the intended purpose should be collected.
Accuracy: Data must be accurate and kept up to date. Inaccurate data should be corrected or deleted.
Storage Limitation: Data should only be kept for as long as necessary to fulfill its purpose.
Integrity and Confidentiality: Data must be handled securely to prevent unauthorized access, disclosure, or destruction.
Accountability: Organizations must take responsibility for their data processing activities and be able to demonstrate compliance.
Understanding these principles is essential for ensuring your WordPress website is GDPR-compliant and for establishing practices that respect user privacy and data rights.
WordPress and GDPR: The Intersection
WordPress is one of the most popular content management systems (CMS) in the world, powering millions of websites. However, as a WordPress site owner, it’s important to understand that the platform itself does not automatically make your website GDPR-compliant. Compliance is a shared responsibility between the website owner, hosting provider, and any third-party services or plugins you use.
The good news is that WordPress provides a solid foundation for GDPR compliance, with built-in features and options that help site owners meet legal requirements. However, ensuring full compliance often requires taking additional steps, such as updating your privacy policy, configuring consent mechanisms, and using specific plugins designed for GDPR compliance.
Here are some key considerations for WordPress site owners when it comes to GDPR:
Data Collection: WordPress collects various types of data, such as user registration information, comments, and analytics data. Understanding what data is being collected and how it’s processed is the first step in ensuring compliance.
Third-Party Plugins: Many WordPress sites rely on plugins for additional functionality, such as contact forms, analytics, and social media integration. However, not all plugins are GDPR-compliant by default. It’s essential to audit the plugins you use and ensure they are compliant with GDPR standards.
User Rights: GDPR grants individuals specific rights over their personal data, including the right to access, correct, and delete their data. WordPress provides tools to help you manage these rights, but you may need to configure them correctly.
By understanding how WordPress interacts with GDPR, you can take proactive steps to ensure that your website complies with the regulation and protects user data effectively.
Steps to Make Your WordPress Website GDPR Compliant
Achieving GDPR compliance for your WordPress website requires a systematic approach. Below are the essential steps that you, as a site owner, should take to ensure your website meets GDPR requirements. These steps will guide you through the process of auditing, updating, and securing your site’s data practices.
1. Conducting a Data Audit
The first step in ensuring GDPR compliance is understanding what personal data your website collects and how it’s used. A thorough data audit helps you identify all the data points collected from users, whether directly (e.g., through forms) or indirectly (e.g., via analytics).
To conduct a data audit:
Identify the types of data your website collects, such as names, email addresses, IP addresses, or payment details.
Track where and how the data is stored. This includes databases, email marketing platforms, and third-party services.
Determine the purpose of collecting each type of data. Under GDPR, data must be collected for specific, legitimate purposes.
Assess third-party data processors. If you use third-party services or plugins that handle user data (like payment gateways or email marketing tools), ensure they comply with GDPR as well.
By completing a data audit, you can gain clarity on your data collection practices and ensure that you’re only collecting what is necessary.
2. Updating Your Privacy Policy
One of the key requirements of GDPR is transparency, and a clear, up-to-date privacy policy is a fundamental part of that. Your privacy policy should explain:
What data you collect and why.
How the data is used (e.g., for marketing, analytics, or customer support).
How long the data is retained.
Who has access to the data (e.g., third-party service providers).
Users’ rights under GDPR, including the right to access, correct, or delete their data.
Make sure your privacy policy is easily accessible from every page of your website, typically in the footer. It should also be written in clear, simple language that users can easily understand.
3. Obtaining Explicit Consent
GDPR requires that you obtain explicit consent from users before collecting their personal data. This is especially important for forms, email subscriptions, and any other interactions where users provide their data.
To obtain consent:
Use checkboxes for consent, ensuring they are not pre-checked (this gives users the choice to opt-in).
Be clear about what users are consenting to. For example, explain that their data will be used for marketing purposes or shared with third parties.
Document consent. Keep records of when and how users gave their consent, in case you need to prove it later.
For WordPress sites, plugins like WPForms or Contact Form 7 allow you to add consent checkboxes to your forms, ensuring compliance.
4. Managing Data Requests
GDPR grants users several rights over their personal data, including the right to access, correct, and delete it. As a site owner, you need to be able to handle these requests efficiently and within the required time frame (usually 30 days).
To manage data requests:
Provide a clear process for users to submit requests (e.g., through a contact form or dedicated email address).
Create a system for tracking requests and ensuring they are addressed within the GDPR time frame.
Ensure you have the tools to access and export user data, as well as the ability to delete it upon request.
WordPress includes built-in tools for exporting user data and erasing it when necessary, but you may need plugins to streamline this process.
5. Ensuring Data Security
GDPR requires that personal data is stored securely to prevent unauthorized access, breaches, or data loss. Ensuring the security of your WordPress site is crucial for compliance.
To improve data security:
Use HTTPS. Ensure your website is secured with an SSL certificate to encrypt data transmitted between the site and users.
Regularly update WordPress themes, and plugins to patch security vulnerabilities.
Implement strong user authentication methods, such as two-factor authentication (2FA) for administrators.
Backup your website regularly to prevent data loss in case of a breach or technical failure.
Additionally, plugins like Wordfence Security or Sucuri Security can help monitor and protect your site from malicious activity.
Key GDPR Features in WordPress Core
WordPress offers several built-in features that help site owners comply with GDPR. While additional plugins and configurations may be necessary for full compliance, these core features provide a solid foundation for managing personal data responsibly. Here are some of the key GDPR-related features included in WordPress:
1. Data Export and Erasure Tools
Under GDPR, users have the right to access their personal data and request its deletion. WordPress provides built-in tools that allow site owners to easily export or erase user data:
Data Export: WordPress allows you to export a user’s data from the “Tools” menu in the admin dashboard. This export includes user information such as their comments, posts, and any other data linked to their account.
Data Erasure: Similarly, WordPress also offers a tool to delete a user’s personal data, including comments, posts, and any other information associated with their account. This is essential for complying with the GDPR’s “right to be forgotten.”
These tools are accessible via the WordPress dashboard under “Tools > Export Personal Data” and “Tools > Erase Personal Data.”
2. Privacy Policy Page Generator
WordPress includes a simple privacy policy page generator that helps site owners create a basic privacy policy for their websites. While this tool won’t create a comprehensive policy tailored to every site, it provides a useful starting point. It also offers guidance on what to include, such as:
A description of the data you collect.
How you use the data.
Third-party services you may share data with.
You can access this feature by going to “Settings > Privacy” in the WordPress dashboard.
3. Cookie Consent
WordPress does not have a built-in cookie consent feature, but it does allow you to add cookie consent notices through themes or plugins. The GDPR requires that you inform users about the cookies your site uses and obtain their consent before storing non-essential cookies on their devices.
Many WordPress themes include cookie consent banners, but for more advanced functionality, you can use plugins like Cookie Notice & Compliance for GDPR or Complianz to configure your cookie consent settings and ensure compliance.
4. User Role Management
WordPress has robust user role management, which is crucial for GDPR compliance. You can assign specific roles and permissions to users, ensuring that only authorized personnel have access to sensitive data. This helps you limit exposure to personal data and maintain accountability for data processing activities.
For example, you can restrict access to personal data by assigning roles such as “Editor” or “Subscriber,” and ensure that only administrators have access to more sensitive data.
GDPR-Friendly WordPress Plugins
While WordPress provides some built-in tools for GDPR compliance, many site owners turn to plugins to help automate and streamline the process. These plugins can assist with various aspects of GDPR, such as consent management, data protection, and privacy policy updates. Here are some of the most effective GDPR-friendly plugins for WordPress:
““““““““““““““““““““““““““““
WPForms is a powerful form builder plugin that allows you to add GDPR-compliant checkboxes to your forms. With WPForms, you can easily create contact forms, subscription forms, and payment forms that require users to give explicit consent before submitting their data.
Key Features:
GDPR Consent Fields: Add a checkbox to your forms for users to consent to data collection.
Data Retention: Control how long form entries are stored, and automatically delete them after a set period.
User Consent Tracking: WPForms logs when users give consent, helping you maintain records for compliance.
2. Complianz
Complianz is a comprehensive GDPR compliance plugin that covers multiple aspects of data protection, including cookie consent, privacy policies, and user consent management. It helps you create and manage cookie banners, privacy policies, and more.
Key Features:
Cookie Consent: Automatically displays a cookie consent banner that allows users to opt-in or opt-out of cookies.
Privacy Policy Generator: Helps you generate a GDPR-compliant privacy policy tailored to your site’s needs.
Geo-Targeting: The plugin can tailor cookie consent notices based on the user’s location, ensuring compliance with global privacy laws like GDPR, CCPA, and others.
3. WP Security Audit Log
WP Security Audit Log is a security plugin that helps you track and monitor user activity on your WordPress site. It’s particularly useful for ensuring accountability and transparency in data processing activities, which is a key requirement of GDPR.
Key Features:
Activity Logging: Tracks all user actions, including login attempts, data exports, and changes to personal data.
Compliance Reports: Provides detailed logs that can be used for audits and demonstrating GDPR compliance.
User Monitoring: Monitors who accesses sensitive data, helping ensure that only authorized users can view or modify personal data.
4. Cookie Notice & Compliance for GDPR
This plugin is a simple yet effective solution for displaying cookie consent notices on your WordPress site. It helps you comply with GDPR’s cookie consent requirements by providing a customizable banner that asks users for permission to use cookies.
Key Features:
Customizable Cookie Banner: You can customize the appearance and wording of the cookie consent banner to match your site’s design and comply with GDPR.
Cookie Policy Page: Automatically links to your cookie policy, ensuring users can easily access information about the cookies your site uses.
Consent Logging: Tracks when users give consent, so you can maintain records of their choices.
5. GDPR Cookie Consent
GDPR Cookie Consent is another plugin designed to help you meet GDPR requirements related to cookies. It provides an easy way to manage cookie consent and ensures your site complies with EU regulations.
Key Features:
Cookie Consent Management: Displays a customizable cookie consent notice that lets users opt-in or opt-out of non-essential cookies.
Cookie Declaration: Automatically generates a cookie declaration to inform users about the cookies used on your site.
Geo-Targeting: Allows you to display the cookie consent banner based on the user’s location.
Challenges and Common Mistakes
While GDPR compliance is essential for WordPress site owners, the process can be complex and challenging. Many site owners struggle with understanding the full scope of the regulation or making the necessary changes to their websites. Below are some of the most common challenges and mistakes site owners face when attempting to achieve GDPR compliance:
1. Lack of Clear Data Collection Practices
One of the most common mistakes is failing to clearly define what personal data is being collected and why. GDPR requires transparency, meaning that users must be informed about what data is being collected and how it will be used.
Challenge: Many site owners don’t realize that they are collecting personal data through comments, contact forms, analytics tools, and other features.
Solution: Conduct a comprehensive data audit to identify all the data your site collects. Be clear about the purpose of each data collection activity, and update your privacy policy accordingly.
2. Inadequate Consent Mechanisms
Under GDPR, obtaining explicit consent from users is mandatory before collecting their personal data. A common mistake is using pre-checked boxes or vague consent language, which does not meet GDPR’s strict requirements for informed consent.
Challenge: Many forms and pop-ups on websites automatically check consent boxes, which violates GDPR’s principle of freely given consent.
Solution: Ensure that all consent mechanisms, such as checkboxes, are not pre-checked. Clearly explain what users are consenting to, and provide them with an option to withdraw consent at any time.
3. Failure to Implement Data Security Measures
GDPR requires that personal data is stored securely to prevent breaches, unauthorized access, or data loss. Some WordPress site owners neglect the importance of data security, which can result in vulnerabilities that expose user data.
Challenge: Failing to implement HTTPS, neglecting regular updates, or using weak passwords can lead to data breaches.
Solution: Use SSL certificates to encrypt data transmitted between your website and users. Regularly update WordPress, themes, and plugins to patch security vulnerabilities. Implement strong password policies and two-factor authentication for admins.
4. Not Addressing Third-Party Data Processors
Many WordPress sites rely on third-party plugins, tools, and services that process user data. However, failing to ensure that these third-party providers are GDPR-compliant can lead to compliance issues.
Challenge: Using third-party services that don’t have proper data protection measures in place can result in violations of GDPR.
Solution: Review all third-party services and plugins to ensure they comply with GDPR. Ensure that any data processors you work with have data processing agreements in place that outline their responsibilities under GDPR.
5. Ignoring User Rights Requests
GDPR grants users several rights, including the right to access, correct, and delete their personal data. Failing to respond to user requests for data access or deletion is a serious compliance issue.
Challenge: Site owners may not have the systems in place to manage and respond to user requests efficiently.
Solution: Set up clear processes for handling user rights requests. Use WordPress tools and plugins to easily export or erase user data, and ensure that all requests are addressed within the required 30-day timeframe.
Advanced Topics in GDPR Compliance
While the fundamental steps for achieving GDPR compliance are essential for all WordPress site owners, there are advanced techniques and strategies that can help you further strengthen your compliance efforts. These advanced topics involve deeper understanding and more proactive measures to ensure your site stays in line with GDPR requirements.
1. Data Protection by Design and by Default
Under GDPR, organizations are required to implement “data protection by design and by default.” This means that data protection measures should be integrated into your systems and processes from the outset, rather than being added on later.
Advanced Strategy: Ensure that any new features, plugins, or integrations you add to your WordPress site are designed with data protection in mind. For example, if you integrate a new analytics tool, ensure that it doesn’t collect more data than necessary and that it provides options for user consent.
Additionally, minimize the amount of personal data you collect by default. For instance, if you’re using a contact form, only ask for essential information such as a name and email address, and avoid collecting sensitive data unless absolutely necessary.
2. Data Breach Notification
In the event of a data breach, GDPR requires that you notify the relevant authorities within 72 hours and inform affected individuals without undue delay if their data is compromised. This is one of the more advanced aspects of GDPR compliance that requires a well-prepared response plan.
Advanced Strategy: Create a data breach response plan for your WordPress site. This should include:
A process for identifying and assessing data breaches.
A designated team responsible for handling breaches.
A system for notifying both authorities and affected users within the required timeframe.
Plugins like Wordfence Security and Sucuri Security can help monitor and alert you to potential breaches, providing an early warning system for your website.
3. Cross-Border Data Transfers
If your website transfers personal data outside the European Union (EU) or European Economic Area (EEA), you must ensure that the transfer complies with GDPR’s provisions for cross-border data transfers. This is especially relevant for WordPress site owners who use cloud services or third-party tools based outside the EU.
Advanced Strategy: Use services and plugins that are GDPR-compliant and ensure that any data transfers are covered by appropriate safeguards, such as:
Standard Contractual Clauses (SCCs) or Binding Corporate Rules (BCRs).
Privacy Shield certification (for transfers to the US).
You should also review your hosting provider and any third-party services you use to ensure they have the necessary data protection mechanisms in place for international data transfers.
4. Privacy Impact Assessments (PIAs)
A Privacy Impact Assessment (PIA) is a tool used to identify and minimize the privacy risks of data processing activities. Under GDPR, you are required to conduct a PIA when initiating new processing activities that may pose a high risk to individuals’ privacy.
Advanced Strategy: If you plan to introduce a new feature or service that involves processing personal data, consider conducting a PIA. This assessment should:
Identify potential risks to users’ privacy.
Evaluate the necessity and proportionality of the data processing.
Implement measures to mitigate any identified risks.
For WordPress site owners, PIAs are particularly useful when implementing new third-party plugins or tools that involve sensitive data processing, such as payment gateways or marketing automation systems.
5. Accountability and Documentation
GDPR emphasizes the importance of accountability, meaning you must be able to demonstrate your compliance with the regulation at any time. Keeping thorough documentation of your data processing activities is crucial for demonstrating accountability.
Advanced Strategy: Maintain a detailed record of all data processing activities, including:
The types of data you collect and process.
The purposes for which the data is used.
The third parties with whom you share data.
The security measures you have in place to protect the data.
WordPress plugins like GDPR Tools or WP GDPR Compliance can help you track and document user consent and data processing activities.
Monitoring and Maintaining Compliance
Achieving GDPR compliance is not a one-time task but an ongoing process. As privacy regulations evolve and your WordPress site changes, you must continuously monitor and maintain compliance to ensure that you remain in line with GDPR requirements. Here are some strategies to help you keep your website compliant over time:
1. Regularly Review and Update Your Privacy Policy
Your privacy policy should be a living document that reflects any changes in your data collection practices, third-party services, or the legal landscape. As your website evolves, so will your data processing activities, and your privacy policy should reflect these changes.
Ongoing Strategy: Set a schedule to review and update your privacy policy at least once every six months or whenever there are significant changes to your data collection practices or third-party integrations. This ensures that your policy remains accurate and transparent.
2. Conduct Periodic Data Audits
To maintain compliance, you should regularly audit the data your website collects and processes. A data audit will help you identify any unnecessary data collection and ensure that you are only collecting what is essential for your business.
Ongoing Strategy: Conduct a data audit at least once a year to ensure that your data collection practices remain aligned with GDPR principles. During the audit, assess whether you still need the data you are storing, whether you are retaining it for the appropriate duration, and whether any new tools or plugins have been introduced that affect data collection.
3. Monitor Third-Party Services for Compliance
If you rely on third-party services, plugins, or data processors, it’s crucial to ensure that they remain GDPR-compliant. As regulations evolve, third-party providers may update their privacy practices, which could impact your compliance status.
Ongoing Strategy: Regularly check with your third-party service providers to ensure that they are maintaining GDPR compliance. This includes reviewing their privacy policies, data protection measures, and any changes to their terms of service. If a third-party service is not GDPR-compliant, you may need to switch to an alternative that meets the necessary standards.
4. Use Monitoring Tools for Security and Compliance
Several WordPress plugins and external tools can help you monitor your site for security breaches and compliance issues. These tools provide real-time alerts and logs that can help you stay on top of potential risks.
Ongoing Strategy: Use security plugins like Wordfence or Sucuri to monitor your site for security vulnerabilities and data breaches. Additionally, consider using compliance plugins like Complianz or WP GDPR Compliance to track consent, manage cookie banners, and document your data processing activities.
5. Stay Informed About Changes in Privacy Laws
GDPR is just one of many privacy regulations that may affect your WordPress site, especially if you have an international audience. Laws such as the California Consumer Privacy Act (CCPA) and the ePrivacy Directive may also apply to your site.
Ongoing Strategy: Stay informed about changes in privacy laws by subscribing to updates from legal and compliance organizations or consulting with a legal expert. Regularly review the latest developments in privacy regulations to ensure your site remains compliant with all applicable laws.
Conclusion
Maintaining GDPR compliance for your WordPress site requires ongoing attention to detail and proactive data management. It’s not just about avoiding fines but building trust with your audience by being transparent and safeguarding user privacy. Regularly review your data practices, update your privacy policy, and use GDPR-friendly plugins to automate processes. Monitor third-party services for compliance and stay updated on privacy laws. For a seamless experience and to ensure full compliance, consider hiring a WordPress developer to manage the technical aspects of GDPR on your site.