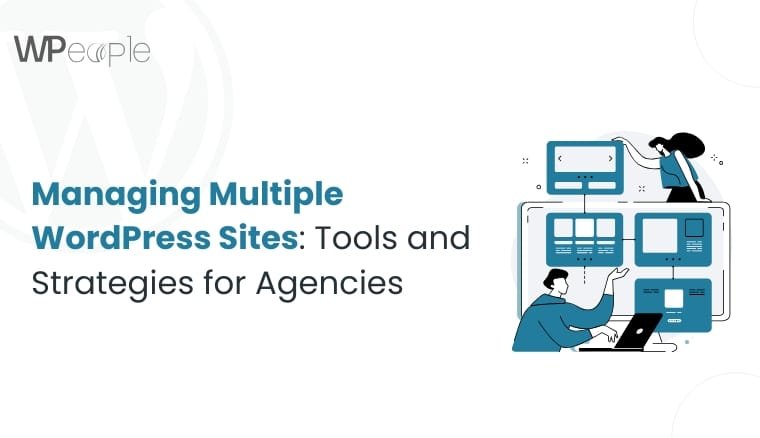
Managing Multiple WordPress Sites: Tools and Strategies for Agencies

Introduction

Managing one WordPress website is challenging enough—there’s plugin updates, backups, client edits, and the ever-present fear of a site crashing unexpectedly. Now multiply that by 10, 50, or even 100. For agencies, freelancers, and developers, that kind of load is more than just time-consuming—it’s a logistical nightmare if you don’t have a system in place.

The stakes are high: clients expect blazing-fast load times, airtight security, and instant support when things go wrong. Falling behind isn’t just inefficient—it can cost you business.

Why Managing Multiple WordPress Sites is Challenging

Update and Backup Overload

Each site you manage has its own ecosystem of plugins, themes, and custom code. A simple update on one site might take minutes—but multiply that by dozens, and you’re spending hours every week just keeping things current. Worse, updates can break functionality or introduce bugs.

The Risks of Manual Maintenance

Manual processes are slow and prone to error. Skip a backup before an update? You’re one misstep away from a disaster. Miss a critical security patch? You’ve left a client’s site vulnerable to attack. Managing sites manually quickly becomes unsustainable.

Client Expectations and Pressure

Clients expect near-perfect uptime, lightning-quick page loads, and fixes within minutes. Juggling multiple client demands without a centralized workflow often results in slower response times and missed issues—which directly affects client satisfaction and retention.

Scaling Pain Without Automation

Growth is great—until your operations can’t keep up. Without automation or centralized control, scaling from 5 to 50 sites becomes a nightmare. You’re doing more tasks, repeating the same steps, and burning out fast.

Core Features to Look for in a Management Tool

Centralized Dashboard

A single pane of glass to view all your client sites is non-negotiable. It lets you check updates, monitor performance, and respond to issues from one place. Think of it as your command center.

One-Click Updates

Why log into every site individually when you can update plugins, themes, and even core files in bulk with just a few clicks?

Reliable Backup and Restore Functionality

Daily or real-time backups with easy one-click restoration save you when something breaks unexpectedly. A good management tool should give you complete control over when and how backups are made.

Security and Uptime Monitoring

You need automatic scans for malware, real-time alerts for downtime, and security tools to proactively block threats. These are critical to maintaining trust and keeping client sites online.

Team Collaboration & Client Reporting

Assign roles and permissions to your team, and automate client reports with uptime stats, resolved issues, and performance improvements. This keeps everyone in the loop and reinforces the value you deliver.

Best Tools for Managing Multiple WordPress Sites

1. ManageWP

Arguably the most popular choice, ManageWP is cloud-based and intuitive. Features include one-click updates, scheduled backups, security scans, and performance reports. You can also white-label the dashboard for clients and integrate premium add-ons as you scale.

2. InfiniteWP

InfiniteWP is a self-hosted alternative for those who prefer having full control. Ideal for developers and agencies with strong technical skills, it supports unlimited sites and offers a lifetime license—a big plus for budget-conscious businesses.

3. MainWP

Open-source and privacy-focused, MainWP is a self-hosted powerhouse. It’s highly extendable with plugins and themes and supports advanced customization. If flexibility and data ownership matter, this is a go-to solution.

4. WP Remote

A clean interface and strong performance metrics make WP Remote a solid option for teams that prioritize speed and stability. Backup management, uptime tracking, and malware scanning are all included.

5. iThemes Sync

If you’re already using iThemes products (like iThemes Security Pro), this lightweight dashboard ties everything together. It’s simple, fast, and ideal for small teams looking for quick wins.

Key Strategies for Efficient Site Management

Automation is Your Best Friend

Automate updates, backups, security scans, and reporting wherever possible. Let machines handle routine tasks so your team can focus on solving real problems and growing your business.

Communicate Like a Pro

Send out automated monthly reports detailing what’s been done—updates, security scans, uptime, and more. Transparency builds trust and justifies your ongoing retainer or maintenance fees.

Use Staging for Smarter Deployments

Always test changes in a staging environment before deploying live. It helps prevent “white screen of death” scenarios caused by incompatible updates or plugin conflicts.

Standardize Your Stack

Create a consistent set of themes, plugins, and hosting environments across client sites. It minimizes conflicts and simplifies troubleshooting.

Version Control for Code-Heavy Projects

For custom development, use Git repositories to manage theme and plugin versions. It ensures a safe rollback option and maintains a history of code changes.

Document Your Processes

Develop internal SOPs (Standard Operating Procedures) for updates, troubleshooting, onboarding, and communication. This helps train new team members quickly and ensures consistent service delivery.

Security and Compliance Best Practices

  • Restrict User Access: Limit user roles to only what’s necessary. Avoid giving admin access unless absolutely needed.
  • Enable Two-Factor Authentication (2FA): Adds a vital layer of login security—especially important for multi-user environments.
  • Scan Regularly: Set up automated scans for malware and vulnerabilities. Act on alerts immediately.
  • Ensure GDPR & Legal Compliance: Tools with built-in GDPR compliance (cookie notices, consent tracking) are essential for EU-based clients.
  • Monitor SSL Certificates: Set up alerts for SSL expiration. Broken HTTPS = SEO hits and client mistrust.

Billing and Client Reporting Tips

White-Labeled, Branded Reports

Customize your reports with logos, colors, and agency details. It reinforces your brand and makes your services feel premium.

Recurring Revenue Models

Offer tiered monthly plans (Basic, Advanced, Premium) based on services like updates, backups, security checks, and reports. Recurring income = business stability.

Show the Value You Provide

Include stats like uptime percentages, vulnerabilities fixed, speed optimizations performed, and plugin updates completed. Clients rarely notice when things don’t go wrong—so show them what you’re proactively doing.

Scaling Up Your WordPress Site Management

Hire VAs or Technical Staff

Don’t do everything yourself. Even a part-time VA can handle reports, routine checks, or support tickets.

Invest in Premium Hosting

High-end managed WordPress hosting (like Kinsta, WP Engine, or GridPane) saves time on server management, offers built-in tools, and gives better performance out-of-the-box.

Create Custom Dashboards

Use platforms like Notion, Airtable, or custom WordPress interfaces to centralize client info, analytics, and status updates in one place.

Streamline Client Onboarding

Use forms, checklists, and automation to onboard clients efficiently. The faster you get a site into your system, the sooner you can deliver results.

Conclusion

Managing multiple WordPress sites doesn’t have to feel like herding cats. With the right tools, strategies, and processes—like implementing custom WordPress development where needed—you can go from reactive chaos to proactive control. Whether you’re managing a handful of client sites or running a full-fledged agency with hundreds of properties, investing in scalable systems is key to long-term success.

Remember—it’s not just about keeping sites updated. It’s about delivering value, building trust, and growing your agency the smart way.

FAQs

1. How many sites can I manage with these tools?
Most tools scale easily. For instance, ManageWP supports unlimited websites with a pay-as-you-go structure for premium features.

2. What’s the most budget-friendly option for freelancers?
MainWP is free and open-source, making it ideal for freelancers. You can buy add-ons as your needs grow.

3. Is it safe to manage all sites from one dashboard?
Yes—if you use tools with secure logins, two-factor authentication, and role-based access control.

4. Can I integrate billing with these tools?
Some tools (like ManageWP) support basic integration with billing plugins, but for full invoicing workflows, pair with systems like WHMCS, QuickBooks, or FreshBooks.

5. Which management tool offers the best security features?
ManageWP and iThemes Sync both offer built-in security scans. For advanced needs, integrate with plugins like Wordfence or iThemes Security Pro.

How to Create Custom WordPress Blocks Like a Pro: A Step-by-Step Guide

1. Introduction

With the introduction of the Gutenberg editor in WordPress 5.0, the content creation experience was revolutionized. Instead of writing shortcodes or manually embedding HTML, users now create content visually using blocks. But what happens when the default blocks just don’t cut it?

That’s where WordPress custom blocks come in.

Custom blocks allow developers to build unique, reusable, and powerful content components tailored to their specific needs. Whether it’s a custom testimonial block, an interactive pricing table, or a branded call-to-action, building your own blocks gives you unmatched control over your site’s content experience.

In this guide, we’ll explore everything you need to know to build your own WordPress blocks using the WordPress block API and other tools. We’ll walk you through the process step by step—from setup to deployment.

By the end, you’ll be creating WordPress custom blocks like a pro.

2. Prerequisites for Block Development

Before diving in, it’s essential to have a few things in place:

Basic Knowledge of WordPress and Gutenberg

Understanding how the WordPress ecosystem works, including themes and plugins, is crucial. Familiarity with WordPress theme development, the Gutenberg block editor, and its interface will also help as we start building.

Required Tools and Setup

To start developing WordPress custom blocks, you’ll need a few tools in your toolbox:

  • Node.js & npm: These are required to run JavaScript-based build tools.
  • A Local WordPress Development Environment: Tools like LocalWP, XAMPP, or MAMP are ideal for setting up a test WordPress site.
  • Code Editor: Visual Studio Code is a favorite among developers, but tools like PHPStorm are also robust options.
  • Command Line Tool: You’ll be using CLI tools to scaffold and build your blocks.

With these basics covered, you’re ready to start.

3. Choosing the Right Approach for Custom Blocks

When it comes to creating WordPress custom blocks, there isn’t a one-size-fits-all method. The best approach depends on your technical background, the complexity of your project, the level of customization needed, and the amount of time you have.

Broadly, there are three primary approaches to creating custom blocks:

  1. Using Pre-built Block Plugins
  2. Manual Coding with JavaScript and PHP
  3. ACF (Advanced Custom Fields) Blocks

Let’s break each one down with detailed insights to help you choose the right path.

A. Basic Plugins – Using Pre-built Solutions

If you’re looking to add custom-like functionality to your WordPress site without diving into code, pre-built block libraries are a fantastic place to start.

Popular plugins include:

  • Kadence Blocks
  • Stackable
  • GenerateBlocks
  • Spectra (formerly Ultimate Addons for Gutenberg)

These plugins provide a suite of ready-to-use blocks that can be styled, configured, and customized directly from the editor UI—no coding required.

✅ Pros:

  • Quick to Set Up: Install the plugin, activate it, and you can start using the blocks instantly.
  • User-Friendly Interface: These tools are built for non-developers and offer an intuitive user experience.
  • Custom Styling Options: Easily change fonts, colors, spacing, borders, and more with visual controls.
  • Responsive Controls: Most pre-built solutions offer responsive design settings for mobile and tablet views.
  • Time-Saving: Perfect for building landing pages, product showcases, and layouts in minutes.

❌ Cons:

  • Limited Flexibility: You’re confined to the options and structures provided by the plugin. Custom logic or layouts may not be possible.
  • Vendor Lock-in: Removing the plugin often breaks your content layout, since blocks are tied to that plugin’s ecosystem.
  • Bloat Risk: Some block libraries load unnecessary assets, affecting site performance.

👉 Best for:

  • Beginners or non-developers
  • Freelancers who need to quickly deliver projects
  • Content editors who prioritize ease of use over technical depth

B. Manual Coding – Full Control with JavaScript and PHP

This is the developer-centric approach and leverages the WordPress Block API to build blocks from the ground up using JavaScript (specifically React) and PHP. It gives you complete control over the block structure, attributes, styling, and rendering.

Key Tools Used:

  • @wordpress/create-block CLI
  • React, JSX
  • Webpack, Babel
  • PHP for server-side rendering (optional)

✅ Pros:

  • Full Control Over Functionality: You design everything—from the editing experience in Gutenberg to how it renders on the front end.
  • Lightweight and Performant: No plugin bloat. You only load what you need.
  • Custom Data Handling: Easily integrate REST APIs, external data, dynamic content, and custom attributes.
  • Modular and Scalable: Ideal for large projects, enterprise solutions, or themes where precision is essential.
  • Headless-Ready: Clean separation of logic makes it easier to transition to headless WordPress in the future.

❌ Cons:

  • Steeper Learning Curve: Requires familiarity with React, modern JavaScript (ESNext), Webpack, and the WordPress Block Editor internals.
  • Longer Development Time: You’ll spend more time setting up, debugging, and testing.
  • Complex Maintenance: As the WordPress block editor evolves, so must your code—staying updated is essential.

👉 Best for:

  • Developers who want total control
  • Agencies building bespoke blocks for clients
  • Performance-conscious sites needing lean, optimized code
  • Projects with highly specific or interactive block requirements

C. ACF Blocks – A Powerful Low-Code Approach with ACF PRO

Advanced Custom Fields (ACF) has long been a go-to tool in the WordPress developer’s toolkit. With ACF PRO (paid version), you can register custom blocks using PHP and the familiar ACF interface, bypassing the need to write JavaScript-heavy block editor code.

This method lets you create dynamic, custom content blocks with all the flexibility of ACF field groups—dropdowns, image pickers, repeaters, and more.

✅ Pros:

  • Low-Code, PHP-Based: If you’re more comfortable with PHP than JavaScript, this is the easiest way to build advanced blocks.
  • Rapid Prototyping: Create fully functional custom blocks in minutes by defining fields and templates.
  • Excellent for Complex Data: Nested repeaters, flexible content fields, and post object selectors make it ideal for advanced structures.
  • Easy Integration with Themes: Uses native WordPress templating, making it seamless to include in custom themes.

❌ Cons:

  • Requires ACF PRO License: It’s not free, and you’ll need a paid subscription to use block features.
  • Limited JavaScript Control: Although powerful, you won’t get the same level of interactivity or React component customization.
  • Performance Considerations: With complex ACF fields, rendering can be heavier if not optimized.

👉 Best for:

  • PHP developers looking to avoid React
  • Quick development of custom blocks with structured data
  • Teams already using ACF in their workflow
  • Theme developers creating bundled block experiences

So, Which Approach Is Right for You?

CriteriaPre-Built  PluginsManual CodingACF Blocks
Ease of Use⭐⭐⭐⭐⭐⭐⭐
Customization⭐⭐⭐⭐⭐⭐⭐⭐⭐
Performance⭐⭐⭐⭐⭐⭐⭐⭐
Development Time⭐⭐⭐⭐⭐⭐⭐
Learning Curve⭐⭐⭐⭐⭐⭐
Best forBeginners & SpeedAdvanced DevsPHP Devs & ACF Users

4. Setting Up the Block Development Environment

Let’s dive into setting up your block development workspace.

Installing and Configuring a Block Plugin

Start by installing a basic plugin structure. You can create a new folder inside your WordPress wp-content/plugins/ directory and add a plugin header to a new PHP file:

Custom Block Plugin

Scaffolding a Block with @wordpress/create-block

WordPress offers a handy CLI tool to generate block code:

This will generate a working plugin complete with a block scaffold.

Reviewing the File Structure

You’ll see files like:

  • block.json – metadata and configuration
  • index.js – entry point for registering the block
  • edit.js – code for how the block looks in the editor
  • save.js – defines how the block is saved (or rendered on the front end)
  • render.php – for dynamic server-side rendering (optional)

5. Creating Your First Custom WordPress Block

Step 1: Setting Up the Block

Open the block.json file to define your block:

Creating Your First Custom WordPress Block

Clean up the default code and remove unneeded files like style.scss if you don’t need custom styles yet.

Step 2: Enhancing the Block with Custom Features

Adding Block Supports

To enable block options like alignment or color, use the supports property in block.json:

block options like alignment or color, use the supports property in block.json

Adding Attributes to Store Dynamic Data

Attributes store user input and are central to dynamic content:

Implementing RichText for Editable Content

In edit.js, use the RichText component for a content area:

RichText component

Adding Controls in the Inspector Panel

For additional customization, add sidebar controls:

additional customization, add sidebar controls

Step 3: Rendering the Block Content

There are two ways to render block content:

Using save.js for Static Rendering

If your block doesn’t change based on backend logic, define the front-end output here:

front-end output

Using render.php for Dynamic Blocks

Dynamic blocks output HTML via PHP:

php

Dynamic blocks output

Register this in your PHP plugin file:

Register this in your PHP plugin

6. Advanced Block Development Techniques

Ready to level up your block skills?

Handling Dynamic Content with API Requests

Use useEffect and wp.apiFetch to pull data:

Handling Dynamic Content with API Requests

Implementing Nested Blocks with InnerBlocks

Allow blocks within blocks:

Implementing Nested Blocks with InnerBlocks

To save nested content:

Adding Media Uploads

Use MediaUpload for images or video:

Adding Media Uploads

7. Debugging and Testing Your Custom Block

Common Errors and Fixes

  • Missing block registration: Check block.json path and namespace.
  • Incorrect attribute type: Ensure types match expected formats.
  • JavaScript not compiling: Use npm start to watch for errors.

Tools for Debugging

  • React Developer Tools
  • WordPress Debug Mode
  • Browser DevTools Console

Plugins That Help

  • Query Monitor – for debugging PHP and database queries.
  • Gutenberg Plugin – always test against the latest block editor updates.

8. Optimizing and Deploying Your Block

Performance Optimization Strategies

  • Use lazy loading for scripts
  • Minimize and bundle JavaScript and CSS
  • Avoid excessive API requests

Writing Documentation

Clearly document:

  • Block name and description
  • Attributes and options
  • Shortcode or reusable block info

This makes it easier for others to use (or for future-you).

Submitting Your Block to the WordPress Plugin Repository

  1. Zip your plugin
  2. Submit to WordPress.org Plugin Submission
  3. Follow their guidelines for naming, licensing, and security

9. Conclusion

Creating WordPress custom blocks unlocks a whole new level of control and creativity in the Gutenberg editor. With tools like the WordPress block API, @wordpress/create-block, and custom React components, you can craft tailored content blocks that elevate your website’s user experience.

Whether you’re building a simple testimonial slider or a full-featured pricing table, custom blocks give you the power to transform your WordPress site beyond the limitations of themes and plugins.

Now that you’ve mastered the step-by-step process, it’s time to start building. Embrace the block, and create something amazing.

WordPress Multisite: The Ultimate Guide to Managing Multiple Websites

In the ever-evolving digital landscape, managing multiple websites can quickly become a complex and time-consuming task. Imagine having the power to control, update, and maintain numerous websites from a single dashboard – this is exactly what WordPress Multisite offers. Originally introduced in WordPress 3.0, this powerful feature has transformed how organizations, businesses, educational institutions, and individuals approach web management.

WordPress Multisite is not just a technical feature; it’s a strategic solution that simplifies web ecosystem management, reduces administrative overhead, and provides unprecedented flexibility in website deployment and maintenance.

Understanding WordPress Multisite: A Deep Dive

What Exactly is WordPress Multisite?

At its core, WordPress Multisite is an advanced network feature that allows you to create and manage multiple WordPress websites using a single WordPress installation. Unlike traditional setups where each website requires a separate WordPress installation, Multisite enables you to:

  • Create a network of interconnected websites
  • Manage all sites from a centralized dashboard
  • Share resources, themes, and plugins across the network
  • Implement granular user roles and permissions

Historical Context and Evolution

WordPress Multisite wasn’t an overnight creation. It evolved from the earlier WordPress Multi-User (WPMU) platform, which was developed to address the growing needs of large organizations and community platforms. The integration into core WordPress with version 3.0 marked a significant milestone in the platform’s development.

Architectural Overview of WordPress Multisite

Network Structure and Domain Configurations

WordPress Multisite supports three primary domain configurations:

  1. Subdomain Structure
    • Websites appear as subdomain.mainsite.com
    • Ideal for large organizations with distinct departmental sites
    • Provides clear separation between different websites
    • Requires wildcard subdomain support from hosting provider
  2. Subdirectory Structure
    • Websites appear as mainsite.com/website
    • Simpler to set up
    • No additional DNS configuration required
    • Works well for closely related websites
  3. Custom Domain Mapping
    • Each website can have a completely independent domain
    • Requires additional plugin or native WordPress domain mapping
    • Perfect for complex network architectures
    • Allows maximum flexibility in branding and presentation

Database and Resource Sharing

In a Multisite setup, all websites share:

  • Core WordPress installation
  • Plugins
  • Themes
  • User database
  • Server resources

This shared architecture provides efficiency but also introduces unique challenges in performance and security management.

Comprehensive Use Cases and Real-World Applications

1. Educational Institutions

Example: University of British Columbia Multisite Network

Universities leverage WordPress Multisite to:

  • Create course websites
  • Develop departmental blogs
  • Host student and faculty portfolios
  • Manage research group websites
  • Provide collaborative platforms

Implementation Strategy

  • Centralized theme for consistent branding
  • Role-based access for different user groups
  • Simplified content management across multiple academic units

2. Corporate and Enterprise Solutions

Example: OpenView Venture Partners

Enterprises use Multisite to:

  • Manage corporate websites
  • Create microsites for different products
  • Develop regional or divisional web presences
  • Maintain consistent brand guidelines
  • Centralize content strategy

Key Benefits

  • Unified design language
  • Centralized updates
  • Reduced development and maintenance costs
  • Scalable web infrastructure

3. Media and Publishing

Example: Cheap Flights Travel Network

Media organizations utilize Multisite for:

  • Creating niche content sections
  • Developing region-specific content hubs
  • Managing multiple publication brands
  • Implementing varied monetization strategies

Content Strategy Advantages

  • Rapid content deployment
  • Consistent editorial workflows
  • Simplified cross-platform content management

Technical Requirements and Preparation

Hosting Infrastructure Considerations

Recommended Hosting Specifications

  • Virtual Private Server (VPS) or Dedicated Hosting
  • Minimum Requirements:
    • PHP 7.4 or higher
    • MySQL 5.7 or MariaDB 10.3+
    • Apache or Nginx web server
    • Wildcard subdomain support (for subdomain structure)

Performance Optimization

  • Use hosting providers with:
    • SSD storage
    • High-performance CPUs
    • Robust caching mechanisms
    • CDN integration
    • Scalable resources

Pre-Installation Checklist

  1. Backup Existing Website
    • Create full site backup
    • Export database
    • Backup all files and configurations
  2. Server Preparation
    • Verify mod_rewrite module
    • Ensure SSL certificate compatibility
    • Check PHP memory limits
    • Confirm FTP/SFTP access
  3. WordPress Configuration
    • Update to latest WordPress version
    • Deactivate all plugins
    • Review current theme compatibility

Detailed Multisite Installation Process

Step-by-Step Configuration Guide

  1. Enable Multisite in wp-config.php

    /* Multisite */

define( ‘WP_ALLOW_MULTISITE’, true );

2. Network Setup Wizard

  • Navigate to Tools > Network Setup
  • Choose subdomain or subdirectory structure
  • Configure network title and admin email

3. Update Configuration Files

  • Modify wp-config.php
  • Update .htaccess with provided code snippets

4. Network Administrative Configuration

  • Set registration policies
  • Configure upload limitations
  • Define user roles and permissions

    Advanced Multisite Management Strategies

    User and Role Management

    User Role Hierarchy

    • Super Admin: Network-wide control
    • Network Administrator: Limited network management
    • Site Administrator: Individual site management
    • Editor: Content creation and modification
    • Contributor: Content submission

    Plugin and Theme Management

    Network-Wide Deployment

    • Install plugins network-wide
    • Activate/deactivate for specific sites
    • Set default themes for new sites
    • Manage theme customization permissions

    Security Considerations

    Comprehensive Security Approach

    • Implement robust password policies
    • Use two-factor authentication
    • Regular security audits
    • Centralized update management
    • Unified SSL implementation

    Recommended Multisite Plugins

    1. Domain Mapping Plugins
      • Enable custom domain configurations
      • Simplify domain management
    2. Performance Optimization
      • Caching plugins with Multisite support
      • Database optimization tools
    3. Security Enhancements
      • Centralized security scanning
      • Unified firewall protection
    4. Monitoring and Analytics
      • Network-wide traffic analysis
      • Consolidated reporting tools

    Potential Challenges and Mitigation Strategies

    Common Multisite Limitations

    1. Performance Bottlenecks
      • Monitor server resources
      • Implement advanced caching
      • Use content delivery networks
    2. Plugin Compatibility
      • Test plugins thoroughly
      • Maintain updated plugin ecosystem
      • Develop custom solutions if needed
    3. Backup and Migration
      • Use specialized Multisite backup tools
      • Develop comprehensive migration strategies

    Monetization and Expansion Opportunities

    Multisite Business Models

    1. Membership Platforms
      • Create tiered website offerings
      • Implement paid site creation
    2. Franchise Web Presence
      • Develop standardized website templates
      • Offer customization services
    3. Educational Platform
      • Create learning management systems
      • Host multiple course websites

    Future of WordPress Multisite

    Emerging Trends

    • Headless WordPress integration
    • Improved block editor compatibility
    • Enhanced performance optimization
    • More sophisticated network management tools

    Conclusion: Is WordPress Multisite Right for You?

    WordPress Multisite is a fantastic tool for managing multiple websites efficiently. However, it’s not always the best choice for every use case. If you run a network of related sites, it can save you time and resources. But if you need flexibility in plugin and performance management, a traditional single-site setup might be better.

    If you need help with custom WordPress development, optimizing your WordPress theme, or ensuring smooth WordPress support and maintenance, consider hiring a professional WordPress developer.

    Frequently Asked Questions

    1. Can I Install Any Plugin in My WordPress Multisite?

    Answer: Not all plugins are Multisite-compatible.

    Detailed Explanation:

    • You can install most plugins in a Multisite network
    • However, not all plugins fully support Multisite functionality
    • Before installation, always:
      • Check plugin documentation
      • Test compatibility
      • Verify network-wide performance
      • Consult plugin developer support

    2. Can I Share User Logins and Roles Across a Multisite Network?

    Answer: Yes, you can share user logins and roles.

    Detailed Explanation:

    • Users can have consistent access across multiple websites
    • Centralized user management
    • Benefits include:
      • Simplified authentication
      • Consistent user experience
      • Reduced administrative overhead
      • Granular permission controls

    3. Is It Possible to Display the Main Website’s Posts on All Network Websites?

    Answer: Yes, you can show main website posts across the network.

    Detailed Explanation:

    • Multiple methods to achieve cross-site content sharing
    • Options include:
      • Widget-based content syndication
      • Custom PHP code
      • Specialized plugins
      • Network-wide RSS feeds
    • Requires careful configuration to maintain performance

    4. Can I Use Different Plugins with Similar Functionality on Different Websites?

    Answer: Yes, with some limitations.

    Detailed Explanation:

    • You can activate different plugins with similar functions
    • Must be installed network-wide first
    • Individual site administrators can:
      • Activate/deactivate specific plugins
      • Configure plugin settings for their site
    • Recommended for maintaining site-specific customization

    5. How Many Websites Can I Add to My WordPress Multisite Network?

    Answer: There’s no strict limit.

    Detailed Explanation:

    • Theoretically unlimited website creation
    • Practical limitations depend on:
      • Server resources
      • Hosting infrastructure
      • Performance considerations
      • Database management capabilities
    • Recommended best practices:
      • Start with a robust hosting solution
      • Monitor server performance
      • Use caching and optimization techniques
      • Regularly audit network resources

    Shared vs. VPS vs. Managed WordPress Hosting: Best Choice for 2025?

    Introduction

    WordPress hosting can feel overwhelming, especially with so many options out there. Whether you’re launching a brand-new website or upgrading your current one, your hosting choice plays a huge role in your site’s speed, security, and overall success.

    But don’t worry we’ve got you covered! In this guide, we’ll break down the key differences between Shared, VPS, and Managed WordPress hosting in a way that’s easy to understand. We’ll cover the pros, cons, costs, and who each option is best for. Plus, we’ll dive into the best WordPress hosting providers in the USA and reveal the fastest hosting options for 2025. By the end, you’ll have everything you need to make the best choice for your website. Let’s get started!

    Understanding Different Types of WordPress Hosting

    Shared WordPress Hosting

    Shared WordPress hosting is the most budget-friendly option out there. It works by hosting multiple websites on the same server, meaning they all share resources like CPU, RAM, and bandwidth. Because the costs are split among many users, hosting providers can offer super-affordable plans. This makes shared hosting a great choice for beginners, bloggers, and small businesses that don’t need a high-powered server. Plus, the hosting provider takes care of all the technical stuff—like security updates and maintenance—so you can focus on building and managing your website without the hassle. However, if your site grows and requires custom features or advanced optimizations, you may need to hire a WordPress developer to enhance performance and scalability.

    Pros:

    • Cost-effective: Shared hosting is one of the most affordable options available, making it perfect for individuals and small businesses with budget constraints.
    • Easy to use: Hosting providers typically offer one-click WordPress installations, making it simple for beginners to set up and launch their websites.
    • Provider-managed maintenance: The hosting company takes care of server maintenance, including updates, security patches, and troubleshooting, reducing the burden on users.
    • Pre-installed software: Many shared hosting plans include pre-configured software like cPanel, website builders, free SSL certificates, and email hosting, helping users get started quickly.
    • Scalability: Although shared hosting has resource limitations, some providers offer easy upgrade options to higher-tier plans as your website grows.

    Cons:

    • Limited resources: Since multiple websites share the same server resources, performance can be affected if one site experiences high traffic or excessive resource consumption.
    • Performance fluctuations: If another website on the server has a sudden surge in traffic, it may slow down other websites hosted on the same server.
    • Limited customization: Users do not have root access, restricting their ability to modify server configurations or install custom applications.
    • Security concerns: Although hosting providers implement security measures, shared hosting environments can be more vulnerable to security risks compared to dedicated or VPS hosting.

    Best For:

    • Personal blogs: Ideal for individuals looking to start a personal blog with minimal investment and technical knowledge.
    • Small business websites: A cost-effective solution for small businesses that need an online presence without requiring extensive resources.
    • Portfolio websites: Suitable for freelancers, designers, and creatives who want to showcase their work online.
    • Startups with low traffic: New businesses or startups that do not yet have high website traffic can benefit from the affordability and simplicity of shared hosting.

    Shared WordPress hosting is an excellent choice for those starting their online journey, offering affordability, ease of use, and provider-managed maintenance. However, as your website grows and requires more resources, upgrading to a higher-tier hosting plan may become necessary to ensure optimal performance and reliability. This is especially important for websites with complex website framework design, as they demand better speed, security, and scalability to function efficiently.

    VPS WordPress Hosting

    Virtual Private Server (VPS) hosting is a step up from shared hosting, offering a middle ground between shared and dedicated hosting. Unlike shared hosting, where multiple websites share the same resources, VPS hosting allocates a dedicated portion of a physical server to your website. This provides greater control, improved performance, and enhanced WordPress security. VPS hosting is ideal for growing websites, businesses with increasing traffic, and users who require more customization options.

    Pros:

    • Dedicated resources: Your website receives a fixed allocation of CPU, RAM, and storage, resulting in improved speed and stability.
    • Better performance: VPS-hosted websites typically load faster and experience fewer slowdowns compared to shared hosting.
    • More control: Root access allows users to customize server settings, install software, and optimize performance as needed.
    • Improved security: Since resources are isolated, your website is less susceptible to vulnerabilities caused by other users on the server.
    • Scalability: VPS hosting allows for easier upgrades to accommodate website growth and increased traffic demands.

    Cons:

    • Higher cost: VPS hosting is more expensive than shared hosting, making it less suitable for those with tight budgets.
    • Requires technical knowledge: Managing a VPS server often requires expertise in server administration, security configurations, and troubleshooting.
    • Limited scalability: While VPS hosting offers more resources than shared hosting, scaling up may require manual upgrades or migration to a higher-tier plan.

    Best For:

    • Medium-sized businesses: Companies that require more resources and reliability than shared hosting can offer.
    • High-traffic blogs: Blogs with growing readerships that demand improved performance and uptime.
    • Developers and tech-savvy users: Those who need root access and customization options for their applications.
    • Websites needing custom configurations: Businesses or individuals who require specific server setups for their applications or security needs.

    VPS WordPress hosting strikes a balance between affordability and performance, making it a great option for websites that have outgrown shared hosting but do not yet require a dedicated server.

    Managed WordPress Hosting

    Managed WordPress hosting is a premium hosting solution where the provider takes care of all technical aspects, including site security, performance optimization, backups, and updates. This type of hosting is designed specifically for WordPress users who require a hassle-free experience and high performance. Managed hosting is ideal for businesses, agencies, and large-scale websites that prioritize speed, site security, and reliability while avoiding server management tasks..

    Pros:

    • Optimized for WordPress: Managed hosting servers are fine-tuned for WordPress, ensuring superior speed, security, and stability.
    • Automatic updates: WordPress core updates, plugin updates, and security patches are handled by the provider, reducing maintenance efforts.
    • Expert support: Managed hosting providers offer specialized WordPress support, providing expert assistance and quick issue resolution.
    • Superior performance: Advanced caching, Content Delivery Networks (CDN), and SSD storage ensure faster load times and enhanced website performance.
    • Enhanced security: Managed hosting providers implement proactive security measures, such as malware scanning, firewalls, and DDoS protection.

    Cons:

    • Higher cost: Managed WordPress hosting is more expensive than shared and VPS hosting, making it less suitable for budget-conscious users.
    • Limited flexibility: Some managed hosting providers restrict certain plugin installations to maintain security and performance, ensuring better overall site stability. Additionally, they offer enhanced maintenance and support services, handling updates, backups, and technical issues for a hassle-free experience.
    • Not suitable for developers needing full control: Users have limited access to backend server configurations, which may be a drawback for tech-savvy users who need extensive customization.

    Best For:

    • Growing businesses and eCommerce websites: Managed hosting ensures optimal performance and security for online stores and business websites.
    • High-traffic WordPress sites: Websites with significant traffic benefit from dedicated resources and expert performance optimization.
    • Agencies and professional bloggers: Agencies and content creators can focus on content and marketing while leaving technical maintenance to the hosting provider.
    • Users who prefer a hassle-free experience: Ideal for those who want a hands-off approach, letting the hosting provider handle all technical aspects.

    Managed WordPress hosting is the best choice for users who prioritize convenience, security, and top-tier performance. Although it comes at a higher price, its benefits outweigh the costs for businesses and professionals who need a reliable and optimized hosting environment.

    Performance and Speed Comparison

    Website speed is crucial for SEO rankings and user experience. Among the three hosting types:

    Managed WordPress Hosting

    • The fastest hosting option due to optimized server configurations and built-in caching.
    • Enhances WordPress SEO by improving site speed and performance.
    • Ideal for businesses and high-traffic websites that need top-tier performance without technical maintenance.

    VPS Hosting

    • Offers significant performance improvements over shared hosting.
    • Requires manual optimization to maximize speed and WordPress SEO benefits.
    • Suitable for growing websites that need more control and resources.

    Shared Hosting

    • The slowest option due to shared server resources.
    • May cause lagging during high-traffic periods, potentially affecting WordPress SEO rankings.
    • Best for beginners, small blogs, and low-traffic websites on a budget.

    Fastest WordPress Hosting Providers in the USA (2025):

    1. WP Engine – Best for managed WordPress hosting
    2. Kinsta – High-speed performance with Google Cloud integration
    3. SiteGround – Excellent shared and managed hosting
    4. Bluehost – Affordable and reliable hosting with good performance
    5. Cloudways – Scalable cloud hosting for advanced users

    Cost Comparison: Shared vs VPS vs Managed WordPress Hosting

    Hosting TypeAverage Cost (Monthly)
    Shared Hosting$3 – $10
    VPS Hosting$20 – $80
    Managed WordPress Hosting$25 – $150d

    While shared hosting is the most budget-friendly, managed hosting offers the best value for performance and convenience.

    Cloud WordPress Hosting Benefits

    For those looking for high scalability and reliability, cloud WordPress hosting benefits include:

    • Scalability: Easily upgrade server resources to accommodate traffic growth.
    • Redundancy: Multiple server locations ensure high availability and uptime.
    • Performance: Integrated CDN and caching technologies boost website speed.

    Popular cloud hosting providers include Cloudways, Google Cloud, and AWS, offering best WordPress hosting USA solutions with enterprise-grade performance.

    Which Hosting Should You Choose?

    • Choose Shared Hosting if you are a beginner or have a low-budget website.
    • Choose VPS Hosting if you need better performance, security, and some server control.
    • Choose Managed WordPress Hosting if you want a high-performance, fully managed solution.

    Choosing the Right WordPress Hosting

    Selecting the right WordPress hosting depends on various factors, including your budget, technical expertise, and website requirements. If you are a beginner or have a small website with minimal traffic, shared hosting offers an affordable and easy-to-use solution. For businesses experiencing growth or needing more control, VPS hosting provides better performance and security. If you prioritize premium features, reliability, and hands-off management, managed WordPress hosting is the best choice.

    Additionally, if your website involves custom WordPress development, opting for VPS or managed hosting ensures better scalability, security, and performance. By evaluating key factors like performance, cost, scalability, and support, you can choose the best WordPress hosting provider in the USA for 2025 that aligns with your needs and long-term goals.

    How to Integrate ChatGPT in WordPress (2025 Guide) 

    Overview of ChatGPT and Generative AI

    Artificial intelligence (AI) has become a game-changer in how websites generate content, interact with visitors, and optimize their online presence. One of the most influential AI advancements in recent years is ChatGPT, a sophisticated generative AI model capable of performing various text-based tasks. ChatGPT, developed by OpenAI, can create high-quality written content, engage with users via chatbots, assist in coding, and enhance SEO strategies.

    For WordPress users, integrating ChatGPT presents an incredible opportunity to automate content creation, boost engagement, and improve search engine rankings. With WordPress powering over 40% of all websites, adopting AI-driven tools like ChatGPT can offer a competitive edge in the ever-evolving digital landscape.

    Why Integrate ChatGPT with WordPress?

    Automating Content Creation

    One of the standout features of ChatGPT is its ability to generate high-quality content swiftly. By integrating ChatGPT, you can automate the creation of:

    • Blog Posts: Generate well-researched and engaging articles, ensuring a consistent publishing schedule without the constant need for manual writing.
    • Landing Pages: Craft compelling copy that resonates with your target audience, enhancing conversion rates.
    • Product Descriptions: Develop detailed and persuasive product descriptions, providing potential customers with the information they need to make informed decisions.

    This automation not only saves time but also ensures that your content remains fresh and relevant, catering to the evolving interests of your audience.

    Enhancing User Engagement with AI-Powered Chatbots

    Integrating ChatGPT enables the deployment of AI-driven chatbots that can interact with visitors in real-time. These chatbots can:

    • Answer Queries: Provide instant responses to common questions, reducing wait times and improving user satisfaction.
    • Offer Recommendations: Suggest products or services based on user preferences and browsing behavior, enhancing the shopping experience.
    • Assist with Navigation: Guide users to relevant sections of your site, improving accessibility and overall user experience.

    By offering personalized and immediate interactions, AI-powered chatbots can significantly boost engagement and retention rates.

    Improving SEO and Content Strategy

    ChatGPT can play a pivotal role in enhancing your site’s search engine optimization (SEO) efforts by:

    • Keyword Optimization: Incorporating relevant keywords naturally into your content, improving visibility on search engines.
    • Meta Descriptions: Generating compelling meta descriptions that encourage higher click-through rates.
    • Content Structuring: Organizing content in a manner that aligns with SEO best practices, such as using appropriate headings and subheadings.

    These enhancements can lead to improved search rankings, driving more organic traffic to your site.

    Assisting in Code Generation and Debugging for Developers

    For developers, ChatGPT serves as a valuable assistant by:

    • Code Generation: Creating code snippets for various functionalities, accelerating the development process.
    • Debugging Assistance: Identifying potential issues in code and suggesting fixes, reducing development time and errors.
    • Learning Resource: Providing explanations and guidance on coding practices, serving as an educational tool for less experienced developers.

    This assistance can streamline development workflows and enhance the quality of your website’s codebase.

    Enhancing WordPress Plugins and Themes with AI-Powered Automation

    Integrating ChatGPT can elevate the functionality of your WordPress site by:

    • AI-Powered Plugins: Developing plugins that utilize AI to offer advanced features, such as personalized content recommendations or automated customer support.
    • Intelligent Themes: Creating themes that adapt to user behavior, providing a customized and dynamic user experience.

    Understanding ChatGPT and Its Benefits for WordPress

    What is ChatGPT?

    ChatGPT is an advanced AI language model developed by OpenAI, designed to generate human-like text responses based on user input. Leveraging deep learning and natural language processing (NLP), ChatGPT comprehends context and produces conversational text, making it a valuable tool for various applications within WordPress.

    How Does Generative AI Work?

    Generative AI models like ChatGPT analyze extensive datasets to generate contextually relevant responses. By integrating such AI into WordPress, site owners can automate content creation, enhance user interaction, and optimize their websites for search engines, leading to improved efficiency and user satisfaction.

    Benefits of Using ChatGPT in WordPress

    Automating Content Creation

    With a ChatGPT WordPress plugin, website owners can effortlessly generate high-quality content, including blog posts, product descriptions, and FAQs. This automation not only saves time but also ensures a consistent flow of engaging material for visitors.

    Enhancing User Engagement with Chatbots

     Implementing a WordPress AI chatbot powered by ChatGPT allows businesses to offer real-time customer support, answer queries instantly, and provide personalized recommendations. This immediate interaction enhances user retention and satisfaction, contributing to a more engaging user experience.

    Improving SEO and Content Strategy

    AI-powered SEO tools can optimize metadata, keywords, and content structure, improving search engine rankings. By analyzing current SEO trends and user behavior, ChatGPT assists in crafting content strategies that align with search algorithms, driving organic traffic to the site.

    Assisting in Code Generation and Debugging

    Developers can utilize ChatGPT to generate WordPress-compatible PHP, HTML, and CSS code, facilitating site customization and functionality enhancements. Additionally, ChatGPT aids in debugging code, identifying errors, and suggesting fixes, streamlining the development process.

    Enhancing WordPress Plugins and Themes

     Integrating ChatGPT into WordPress plugins and themes enables the creation of personalized user experiences. AI-driven customization allows themes to adapt to user preferences, and plugins can offer dynamic features, making the site more adaptive and user-friendly.

    Strengthening WordPress Security

    ChatGPT can assist in identifying potential security vulnerabilities within your WordPress site. by analyzing code and configurations it helps in implementing robust security measures, protecting against threats and ensuring a secure environment for users.

    Facilitating Multilingual Support

    With ChatGPT’s natural language understanding, integrating multilingual support becomes more manageable. This capability allows your WordPress site to cater to a global audience, breaking language barriers and expanding reach.

    Personalizing User Experiences

    By analyzing user behavior and preferences, ChatGPT can deliver personalized content, product recommendations, and tailored interactions. This personalization enhances user satisfaction and encourages repeat visits

    7 Powerful Use Cases for ChatGPT in WordPress

    Researching & Generating Blog Post Ideas

    ChatGPT can serve as a creative assistant, helping you brainstorm fresh and relevant topics for your blog. By analyzing current trends and audience interests, it suggests ideas that resonate with your readers, ensuring your content remains engaging and timely.

    Creating Structured Content Outlines

    Once you have a topic, ChatGPT can assist in organizing your thoughts by generating detailed content outlines. It helps structure your posts logically, ensuring a coherent flow of information that enhances readability and keeps your audience engaged.

    Writing & Debugging Code for Customization

    For developers, ChatGPT is a valuable coding assistant. It can generate code snippets for custom functionalities and assist in debugging existing code, streamlining the development process and reducing potential errors.

    Developing AI-powered plugins & Features

    Leveraging ChatGPT’s capabilities, you can create intelligent AI-powered plugins that offer personalized experiences to users. For instance, AI-driven recommendation systems or dynamic content adjustments based on user behavior can be implemented to enhance engagement.

    Integrating AI Chatbots for User Interaction

    Embedding ChatGPT-powered chatbots into your WordPress site allows for real-time, natural language interactions with visitors. These chatbots can handle customer inquiries, provide maintenance and support, and guide users through your site, improving overall user satisfaction.

    Automating SEO Optimization & Meta Descriptions

    ChatGPT can analyze your content to suggest keyword optimizations and generate compelling meta descriptions. This automation ensures your site adheres to SEO best practices, potentially improving your search engine rankings and increasing organic traffic.

     Generating High-Quality Web Content Instantly

    With ChatGPT, you can produce well-written articles, product descriptions, and other web content swiftly. This capability ensures your site remains up-to-date with fresh content, catering to the evolving interests of your audience and enhancing engagement.

    How to Add ChatGPT to WordPress: Methods & Tools

    Using OpenAI API for Direct Integration

    One way to integrate ChatGPT is through the WordPress OpenAI API integration, allowing direct AI responses on the website.

    Step-by-step API Setup

    1. Sign up for an OpenAI account and generate an API key.
    2. Install a custom plugin or use a code snippet to connect WordPress with OpenAI.
    3. Configure API settings for automated content generation and chatbot features.

    Best Practices for Managing API Calls

    • Limit the number of API requests to reduce costs.
    • Cache responses for frequently asked questions.
    • Ensure data privacy by not sending sensitive information.

    Using ChatGPT-Powered WordPress Plugins

    Several ChatGPT WordPress plugins simplify AI integration.

    Overview of AI Plugins & Features

    • Automate content generation for blog posts.
    • Integrate AI-powered chatbots for customer support.
    • Optimize SEO with AI-driven meta descriptions and keyword suggestions.

    Top ChatGPT Plugins for WordPress (2025 Edition)

    Plugin NameDescription
    Jetpack AI AssistantAn AI-powered blogging assistant that helps in content creation and editing within WordPress.
    AI MojoFacilitates AI-generated content and provides image support to enhance visual elements on your site.
    AI EngineOffers a comprehensive solution for AI content generation and integrates chatbot functionalities.
    ChatBot for WordPressImplemented an AI-powered chatbot to assist users, improving customer support and engagement.
    AIomaticAutomates content generation using AI, ensuring your site remains updated with fresh and relevant material.

    Advanced ChatGPT Integration for Developers

    Direct API Integration with Code Examples

    Developers can customize AI interactions using PHP-based API requests.

    Enhancing WordPress Plugins with AI-Powered Features

    • AI-generated FAQ sections
    • AI-driven personalized recommendations

    AI-Powered Personalization & Content Automation

    Enhancing website user experience by dynamically generating personalized content.

    Optimizing AI-Generated Content for SEO & Engagement

    Reviewing & Editing AI-Generated Content

    Ensure AI-generated content aligns with brand tone and quality.

    Adding Internal & External Links for SEO

    Use AI to suggest relevant internal and external links (AI WordPress SEO).

    Embedding Custom Images & Branding Elements

    Enhance AI-generated content with visuals for better engagement.

    Personalizing Content to Match Your Brand Voice

    Refine AI output to reflect unique brand identity.

    Security, Performance & Future Trends in AI & WordPress

    Privacy & Security Considerations

    • Secure API keys and user data.
    • Implement GDPR-compliant AI solutions.

    Optimizing Performance & API Usage

    • Reduce load times by caching AI responses.
    • Optimize AI-generated content for fast indexing.

    Future of AI in WordPress (GPT-5 & Beyond)

    • Improved natural language generation.
    • AI-powered automated content strategy.

    Final Thoughts

    Integrating ChatGPT into WordPress is a game-changer for website owners, bloggers, and developers. From streamlining content creation and improving SEO to enabling AI-driven chatbots, this technology is reshaping digital interactions. Whether you choose the OpenAI API or a ChatGPT WordPress plugin, implementing AI in your workflow can significantly enhance efficiency and user engagement.

    As AI technology continues to evolve with advancements such as GPT-5 and WordPress OpenAI API, we can expect even more sophisticated applications in content creation, customer support, and site management. By staying ahead of these trends, businesses can optimize their websites and provide users with dynamic, engaging experiences that drive success in 2025 and beyond.

    Web Accessibility in WordPress: A Comprehensive Guide

    In today’s digital world, ensuring your website is accessible to all users, including those with disabilities, is not just a legal requirement but also a moral obligation. Web accessibility ensures that people with visual, auditory, motor, and cognitive impairments can navigate and interact with your website effectively.

    The Web Content Accessibility Guidelines (WCAG) set the standard for web accessibility, outlining best practices for creating inclusive websites. Compliance with WCAG benefits both users and website owners by improving usability, expanding audience reach, and enhancing SEO.

    For WordPress users, making a site accessible doesn’t have to be daunting. With the right practices and tools, you can significantly improve your site’s accessibility. In this guide, we’ll explore WCAG, WordPress accessibility features, key best practices, and tools to help you create a more inclusive website.

    Understanding WCAG and WordPress Accessibility

    What is WCAG?

    WCAG (Web Content Accessibility Guidelines) is an internationally recognized set of guidelines developed by the World Wide Web Consortium (W3C). These guidelines ensure digital content is accessible to people with disabilities. WCAG is built on four key principles:

    1. Perceivable – Users must be able to perceive the content (e.g., text alternatives for images, captions for videos).
    2. Operable – Users should be able to navigate the site using a keyboard or assistive technologies.
    3. Understandable – The content should be clear and easy to comprehend.
    4. Robust – The website must work with a wide range of devices and assistive technologies.

    Legal and Ethical Importance of Compliance

    Many countries have regulations mandating web accessibility, such as the Americans with Disabilities Act (ADA) in the U.S. and the European Accessibility Act in the EU. Non-compliance can result in lawsuits, fines, and reputational damage. Beyond legal considerations, an accessible website demonstrates inclusivity and enhances user experience for all visitors.

    How WordPress Supports Accessibility

    WordPress has made significant strides in accessibility, with several built-in features supporting WCAG compliance:

    • Default themes adhere to accessibility best practices.
    • The block editor (Gutenberg) includes accessibility enhancements.
    • Plugins allow users to improve accessibility without coding.
    • The WordPress Accessibility Team continuously works on improvements.

    Additionally, businesses looking for custom WordPress development can benefit from tailored accessibility solutions that enhance usability while maintaining compliance with WCAG standards.

    Key WordPress Accessibility Practices

    Ensuring your WordPress site is accessible improves usability for all users, including those with disabilities. The following practices will help you create an inclusive and user-friendly website.

    Key WordPress Accessibility Practices

    1. Choose an Accessible Theme

    Importance of WCAG-Compliant Themes An accessible theme ensures your site structure supports screen readers, keyboard navigation, and proper color contrast.

    How to Test a Theme for Accessibility

    • Check if it is labeled “Accessibility Ready” in the WordPress theme directory.
    • Use WAVE or Axe accessibility tools to test compliance.
    • Verify keyboard navigation and contrast settings manually.

    Recommended Accessible Themes

    • Twenty Twenty-Four (official WordPress theme)
    • Astra (lightweight and customizable)
    • GeneratePress (fast and accessibility-ready)

    2. Use Accessibility Plugins

    Plugins can enhance accessibility without modifying your theme’s code.

    Best Accessibility Plugins:

    • WP Accessibility – Adds accessibility features such as skip links and contrast adjustments.
    • One Click Accessibility – Simplifies accessibility improvements.
    • AccessibleWP – Provides automated WCAG compliance checks.

    These WordPress plugins ensure your website meets accessibility guidelines effortlessly.

    3. Ensure Proper Heading Structure

    Using a logical heading hierarchy (H1-H6) improves readability and helps screen readers interpret content structure.

    Best Practices:

    • Use only one H1 per page (usually the title).
    • Organize content with H2s for main sections and H3-H6 for sub-sections.
    • Avoid skipping heading levels.

    4. Improve Color Contrast and Typography

    Why Color Contrast Matters Low contrast makes text difficult to read for visually impaired users. WCAG recommends a minimum contrast ratio of 4.5:1 for normal text.

    Tools to Check Contrast:

    • WebAIM Contrast Checker
    • WAVE Accessibility Tool

    Typography Tips:

    • Use legible fonts (e.g., Arial, Open Sans, Roboto).
    • Ensure text is at least 16px for readability.

    5. Add Alt Text to Images

    Why Alt Text Matters Alternative text (alt text) helps screen readers describe images to visually impaired users.

    How to Add Alt Text in WordPress:

    • Upload an image via the Media Library.
    • Enter a concise, descriptive alt text in the “Alternative Text” field.

    6. Make Links and Buttons Accessible

    Best Practices:

    • Use descriptive anchor text instead of “Click here.”
    • Ensure buttons have clear labels (e.g., “Submit Form” instead of “Submit”).
    • Check that buttons and links are keyboard-navigable.

    7. Enable Keyboard Navigation

    Keyboard accessibility ensures users who cannot use a mouse can navigate via the Tab and Enter keys.

    How to Test Keyboard Navigation:

    • Use the Tab key to navigate through elements.
    • Ensure all interactive elements (links, buttons, forms) are focusable.
    • Fix issues using CSS (:focus styles) or JavaScript.

    8. Implement ARIA Landmarks and Labels

    What is ARIA? Accessible Rich Internet Applications (ARIA) help assistive technologies understand the role of page elements.

    Best Practices:

    • Use role=”navigation” for menus.
    • Apply aria-label to describe interactive elements.

    9. Add Captions and Transcripts for Multimedia

    Why Captions and Transcripts Matter Captions help users with hearing impairments, while transcripts allow screen readers to present audio content.

    How to Add Captions in WordPress:

    • Use YouTube’s auto-captioning.
    • Add captions manually in the WordPress media editor.

    10. Test Your Site’s Accessibility

    Regular testing ensures ongoing compliance.

    Best Accessibility Testing Tools:

    • WAVE – Browser extension for visual analysis.
    • Axe – Developer tool for fixing issues.
    • Lighthouse – Chrome DevTools audit.

    For businesses concerned about WordPress security, ensuring accessibility compliance also strengthens your website against vulnerabilities that may impact user experience.

    Common WordPress Accessibility Mistakes to Avoid

    1. Over-reliance on Plugins – Plugins help but do not replace manual checks.
    2. Using Poorly Coded Third-Party Themes – Always verify WCAG compliance.
    3. Ignoring Mobile Accessibility – Test responsiveness and touch accessibility.

    Conclusion and Final Tips

    Ensuring WordPress accessibility is an ongoing process. By following best practices like choosing accessible themes, using proper heading structures, enabling keyboard navigation, and regularly testing your site, you can create a more inclusive web experience.

    Final Tips:

    • Audit your site regularly with accessibility tools.
    • Keep learning—WCAG updates frequently.
    • Consult an accessibility expert if needed.

    By making WordPress accessible, you improve usability for everyone and ensure compliance with legal requirements. If you need WordPress SEO optimization or WordPress support, consider working with professionals who specialize in accessibility-focused web solutions.

    FAQs on WordPress Accessibility

    1. How do I make my WordPress website WCAG compliant? To make your WordPress site WCAG compliant, choose an accessible theme, use accessibility plugins, ensure proper heading structure, improve color contrast, add alt text to images, and enable keyboard navigation.

    2. What are the best WordPress themes for accessibility? Some of the best accessible themes include Twenty Twenty-Four, Astra, and GeneratePress, all of which are WCAG-compliant and optimized for screen readers.

    3. Which plugins improve WordPress accessibility? Popular accessibility plugins include WP Accessibility, One Click Accessibility, and AccessibleWP, which help enhance usability and compliance.

    4. How do I test my WordPress site’s accessibility? Use tools like WAVE, Axe, and Lighthouse to run accessibility audits and identify areas for improvement.

    5. Why is keyboard navigation important for accessibility? Keyboard navigation ensures users with mobility impairments can access your website without a mouse, improving usability for all visitors.

    WordPress Security Best Practices: Protecting Your Site from Modern Threats

    Why WordPress Security Matters

    WordPress is the world’s most popular content management system (CMS), powering over 40% of websites. However, its popularity makes it a prime target for cybercriminals. Weak security measures can expose your site to hacking, malware, and data breaches, leading to loss of data, reputational damage, and even financial losses.

    To maintain a secure and trustworthy website, implementing proper WordPress security measures is essential. This guide will walk you through how to secure a WordPress site effectively and prevent attacks.

    Common WordPress Security Threats

    What Is Hacking?

    Hacking refers to the unauthorized access or manipulation of a website’s data, often for malicious purposes. Cybercriminals exploit security vulnerabilities in WordPress to steal sensitive information, deface websites, redirect visitors to harmful sites, or inject malicious code. Hackers use various techniques, including exploiting outdated plugins, weak passwords, and security misconfigurations, to gain control over a website.

    Malware and Its Impact

    Malware (malicious software) is designed to infiltrate, damage, or gain unauthorized control over a system. In the context of WordPress, malware can manifest in various forms, including trojans, ransomware, and backdoor scripts. Some common indicators of a malware infection include:

    • Slow website performance due to excessive resource consumption.
    • Unwanted pop-ups or redirects that harm user experience.
    • Unauthorized file modifications that inject malicious scripts into your codebase.
    • Search engine blacklisting if Google or other search engines detect malware on your site.

    WordPress malware removal involves identifying the infected files, removing harmful scripts, and securing the website against future threats.

    Brute Force Attacks

    Brute force attacks involve automated bots repeatedly attempting to guess login credentials by trying multiple username and password combinations. Websites with weak passwords or default login pages are particularly vulnerable to these attacks. To mitigate the risk, consider:

    • Implementing two-factor authentication (2FA) for an additional security layer.
    • Using strong, complex passwords and changing them regularly.
    • Limiting login attempts to block repeated failed logins from the same IP address.
    • Hiding the default wp-login.php page or renaming it to something unique.

    Comment Spam and Bots

    Spam comments, often generated by bots, can flood your WordPress site with irrelevant or malicious links. This not only affects user experience but also poses security risks, such as phishing attempts or malware infections. Combat spam effectively by:

    • Enabling CAPTCHAs to verify human users.
    • Using anti-spam plugins like Akismet to filter out malicious comments.
    • Moderating comments manually to prevent suspicious links from being posted.
    • Disabling anonymous comments to ensure only registered users can post.

    SQL Injections and Cross-Site Scripting (XSS)

    These are two of the most dangerous web application vulnerabilities:

    • SQL Injections: Attackers manipulate website database queries by injecting malicious SQL code via input fields or URL parameters. This can lead to unauthorized data access, database corruption, or even full website takeover.
    • Cross-Site Scripting (XSS): Hackers inject malicious JavaScript into website forms or comment sections. When unsuspecting users interact with the compromised page, their session cookies or sensitive data may be stolen.

    To protect against these attacks:

    • Use firewalls and Web Application Firewalls (WAFs) to filter malicious requests.
    • Sanitize and validate all user inputs to prevent harmful script execution.
    • Keep WordPress core, themes, and plugins updated to patch security vulnerabilities.

    Essential WordPress Security Best Practices

    Ensuring the WordPress security of your website is crucial to protecting your data, maintaining user trust, and preventing cyberattacks. Regular WordPress maintenance is key to staying ahead of potential threats. Below are key security best practices to fortify your WordPress site against common threats.

    A. Secure Your WordPress Login

    1. Use Strong, Unique Passwords

    Your WordPress login credentials act as the first line of defense against unauthorized access. A weak password makes it easier for attackers to gain access through brute force attacks. To create a strong password:

    • Use a mix of uppercase and lowercase letters, numbers, and special characters.
    • Avoid using easily guessable words, birthdays, or sequential numbers (e.g., “password123” or “admin2024”).
    • Consider using a password manager to generate and store complex passwords securely.

    2. Enable Two-Factor Authentication (2FA)

    Two-factor authentication (2FA) adds an additional security layer by requiring a second verification step when logging in. Even if an attacker gets your password, they won’t be able to access your site without the second authentication factor, such as:

    • A one-time code sent via SMS or email.
    • An authentication app like Google Authenticator or Authy.
    • Hardware-based security keys for maximum protection.

    3. Limit Failed Login Attempts

    Brute force attacks involve automated bots attempting thousands of username-password combinations to gain access. Limiting failed login attempts can prevent these attacks by temporarily locking out users after multiple failed attempts. You can:

    • Use security plugins like Limit Login Attempts Reloaded or Wordfence to set login attempt restrictions.
    • Enable IP-based blocking to prevent repeated unauthorized access attempts.

    4. Change Your WordPress Login URL

    By default, WordPress login URLs follow a predictable pattern (e.g., yoursite.com/wp-admin). This makes it easy for attackers to locate your login page and attempt brute force attacks. Changing the login URL to something unique reduces this risk. Plugins like WPS Hide Login can help you modify the login URL easily.

    5. Password Protect the WordPress Admin Page

    Adding an additional password layer to your wp-admin directory ensures that even if someone finds the login page, they must enter another password before accessing it. This can be done using cPanel or .htaccess file protection settings.

    B. Strengthen Your WordPress Installation

    6. Keep WordPress, Themes, and Plugins Updated

    Outdated WordPress core files, plugins, or themes are among the leading causes of website breaches. Developers regularly release security updates to fix vulnerabilities. To stay protected:

    • Enable automatic updates for minor WordPress releases.
    • Manually check and update plugins/themes regularly.
    • Avoid using unmaintained or abandoned plugins.

    7. Remove Unused and Outdated Themes/Plugins

    Inactive themes and plugins can still pose security threats, as they may contain unpatched vulnerabilities. Remove any plugins or themes that you’re not actively using.

    8. Change the WordPress Database Table Prefix

    By default, WordPress database tables use the wp_ prefix, making them an easy target for SQL injection attacks. Changing this prefix to something unique (e.g., wpsecure_ or mysite_) reduces the risk of database exploitation.

    9. Disable File Editing in the WordPress Dashboard

    The WordPress theme allows administrators to edit theme and plugin files directly from the dashboard. If a hacker gains access to your site, they can inject malicious code into these files. To prevent this:

    Add the following line to your wp-config.php file:

    10. Disable PHP File Execution in Sensitive Directories

    Hackers often place malicious PHP files in directories like /wp-content/uploads/ to execute unauthorized commands. You can prevent this by adding the following rule to your .htaccess file:

    C. Protect Your WordPress Site from Malware and Attacks

    • Install a Reputable WordPress Security Plugin
      Security plugins are a crucial part of WordPress development, offering essential protections such as malware scanning, firewall protection, and brute force prevention. Popular choices include:
    • Wordfence Security (firewall, malware scanning, login security).
    • Sucuri Security (website monitoring and malware removal).
    • iThemes Security (two-factor authentication, brute force protection).

    12. Use a Web Application Firewall (WAF)

    A Web Application Firewall (WAF) helps filter and block malicious traffic before it reaches your site. Services like Cloudflare, Sucuri, and Astra Security provide real-time protection against hackers and DDoS attacks.

    13. Scan WordPress for Malware and Vulnerabilities Regularly

    Regular malware scans help detect and remove security threats before they cause harm. Many security plugins offer scheduled scanning features to automate this process.

    14. Disable XML-RPC to Prevent DDoS Attacks

    XML-RPC is an API that allows remote access to WordPress. However, it is commonly exploited in brute force and DDoS attacks. To disable XML-RPC, add this line to your .htaccess file:

    15. Enable Automatic Logout for Inactive Users

    Idle users on your site increase the risk of session hijacking. To automatically log out inactive users, you can use a plugin like Inactive Logout, ensuring users are logged out after a set period of inactivity.

    D. Secure Your WordPress Hosting Environment

    16. Choose a Reliable and Secure Hosting Provider

    A secure hosting provider should offer:

    • Regular malware scanning and firewalls.
    • Automatic backups and DDoS protection.
    • Secure server configurations and uptime monitoring.
      Recommended hosting providers include SiteGround, Kinsta, WP Engine, and Cloudways for their security-focused features.

    17. Use the Latest Version of PHP

    WordPress relies on PHP, and outdated PHP versions contain security vulnerabilities. Always upgrade to the latest stable PHP version supported by your hosting provider.

    18. Implement an SSL Certificate for HTTPS Encryption

    An SSL certificate encrypts data exchanged between your site and visitors, protecting sensitive information such as login credentials and payment details. Many hosting providers offer free SSL certificates via Let’s Encrypt.

    19. Secure Your wp-config.php File

    The wp-config.php file contains sensitive database credentials. To secure it:

    • Move it to a higher directory than the root folder.
    • Set file permissions to 400 or 440 to prevent unauthorized access.

    20. Enable a WordPress Security Lockdown Feature

    Security lockdown features temporarily block access after multiple failed login attempts, preventing brute force attacks. Security plugins like Wordfence and iThemes Security provide this feature.

    E. Backup and Recovery Strategies

    21. Install an Automated Backup Solution

    Regular backups ensure that you can restore your site in case of an attack, hosting failure, or accidental data loss. Recommended backup solutions include:

    • UpdraftPlus (automated cloud backups).
    • BlogVault (incremental backups and staging features).
    • VaultPress (Jetpack Backup) (real-time backups).

    22. How to Restore Your Site in Case of an Attack

    Having a disaster recovery plan helps reduce downtime. If your website is compromised:

    1. Restore a clean backup from your backup solution.
    2. Scan and remove malware before reactivating your site.
    3. Update all passwords and security settings to prevent re-infection.
    4. Strengthen security measures (firewall, 2FA, secure hosting).

    Final Thoughts: Is Your WordPress Site Secure?

    Securing your WordPress site requires proactive measures. From using WordPress security best practices to leveraging WordPress security plugins, every step enhances your site’s resilience against attacks. If managing security seems overwhelming, hiring a professional security service can provide peace of mind.

    FAQs on WordPress Security

    How Do I Know If My WordPress Site Has Been Hacked?

    Common signs include sudden slowdowns, unauthorized redirects, unknown admin accounts, and flagged security alerts. A WordPress security audit helps identify security issues.

    Can Free Security Plugins Protect My Site?

    While free security plugins offer basic protection, premium versions provide advanced features such as real-time malware scanning, WordPress firewall protection, and automated backups.

    Should I Switch to Managed WordPress Hosting for Better Security?

    Managed hosting providers handle updates, backups, and security optimizations, reducing security risks. If you lack technical expertise, managed hosting can be a great option.

    By following these WordPress hardening steps, you significantly reduce your site’s vulnerability to cyber threats. Stay vigilant, keep everything updated, and conduct regular WordPress security audits to maintain a safe and secure website.

    How to Revert a WordPress Multisite to a Single Site

    Running a WordPress Multisite network can be incredibly useful for managing multiple sites under one installation. However, there may come a time when you need to convert your multisite setup into a standalone WordPress site. Whether due to performance concerns, maintenance difficulties, or business restructuring, the process requires careful execution to avoid data loss and downtime.

    In this guide, we’ll walk you through how to revert a WordPress Multisite to a single site step by step. You’ll learn the key differences between WordPress Multisite and single-site installations, essential preparations before conversion, and detailed instructions on how to migrate your content, users, and settings seamlessly.

    Understanding WordPress Multisite vs. Single Site

    Before diving into the conversion process, it’s crucial to understand the fundamental differences between a WordPress Multisite network and a standard single-site WordPress installation. This understanding will help you make informed decisions throughout the migration process.

    What is WordPress Multisite?

    WordPress Multisite is a feature that allows you to run multiple websites under a single WordPress installation. This setup is ideal for organizations that need to manage a network of related sites, such as universities with multiple departments, businesses with regional websites, or content networks with multiple blogs.

    Key features of WordPress Multisite include:

    • Centralized User Management: Users can be managed across all sites in the network, with different roles and permissions for each site.
    • Shared Themes and Plugins: Themes and plugins can be activated network-wide or on individual sites, allowing for consistent branding and functionality across the network.
    • Subdomains or Subdirectories: Sites in a Multisite network can be set up as subdomains (e.g., site1.example.com) or subdirectories (e.g., example.com/site1).

    What is a Single Site WordPress Installation?

    A single-site WordPress installation is the standard setup where one WordPress instance manages only one website. This is the most common type of WordPress installation and is suitable for most individual bloggers, small businesses, and organizations that only need to manage a single site.

    Key features of a single-site WordPress installation include:

    • Greater Flexibility in Customization: Since there’s only one site to manage, you have more freedom to customize themes, wordpress plugins, and settings without affecting other sites.
    • Easier Maintenance: Managing a single site is generally simpler and less resource-intensive than managing a Multisite network, making WordPress maintenance more straightforward and efficient. With fewer technical complexities, tasks like updates, backups, and security checks become easier to handle, ensuring your site remains stable and secure over time.
    • Fewer Technical Complexities: Single-site installations are less complex than Multisite networks, making them easier to troubleshoot and maintain.

    When Should You Convert a Multisite to a Single Site?

    There are several scenarios where converting a WordPress Multisite to a single site might be necessary:

    • Only One Subsite Remains Active: If most of the subsites in your Multisite network are no longer in use, it may make sense to convert the remaining active subsite into a standalone site.
    • Performance Issues: Multisite networks can be resource-intensive, especially if you have a large number of subsites. Converting to a single site can improve performance and reduce server load.
    • Customization Needs: If the customization needs of your subsites differ significantly, it may be easier to manage them as separate single-site installations.
    • Simplified Backups and Security: Managing backups and security for a single site is generally simpler and more straightforward than managing them for an entire Multisite network.

    Preparing for the Migration

    A successful migration from a WordPress Multisite to a single site requires careful planning and preparation. Here are the essential steps you need to take before starting the conversion process.

    Step 1: Backup Your Entire WordPress Multisite

    Before making any changes to your WordPress Multisite network, it’s crucial to create a full backup of your entire installation. This includes both the database and the files. A backup ensures that you can restore your site in case something goes wrong during the migration process.

    • Use Backup Plugins: Plugins like UpdraftPlus or Duplicator can help you create a full backup of your Multisite network. These plugins allow you to back up both the database and files with just a few clicks.
    • Store the Backup Securely: Once the backup is complete, store it in a secure location, such as Google Drive, Dropbox, or an external hard drive. Make sure you have multiple copies of the backup in case one becomes corrupted.

    Step 2: Identify the Subsite to Convert

    If your Multisite network has multiple subsites, you’ll need to identify which subsite you want to convert into a standalone site. This is typically the subsite that you want to keep active after the migration.

    • Log in to Your WordPress Dashboard: Access the WordPress admin dashboard for your Multisite network.
    • Navigate to Sites: Under the Network Admin section, go to Sites. Here, you’ll see a list of all the subsites in your network.
    • Choose the Specific Subsite: Select the subsite you want to extract and convert into a standalone site.

    Step 3: Set Up a Fresh WordPress Installation

    Once you’ve identified the subsite you want to convert, you’ll need to set up a fresh WordPress installation on a new hosting account (if necessary). This will serve as the new home for your standalone site.

    • Purchase a New Hosting Account: If you don’t already have a hosting account for the new site, purchase one from a reliable hosting provider.
    • Install WordPress: Most hosting providers offer one-click WordPress installation, making it easy to set up a new WordPress site.
    • Secure the New Site: Once WordPress is installed, secure the new site with SSL (Secure Sockets Layer) and essential security measures, such as strong passwords and security plugins.

    Extracting the Subsite Data

    With the preparations complete, the next step is to extract the data from the subsite you want to convert. This includes the content, database tables, and theme/plugin files.

    Step 1: Export the Subsite Content

    The first step in extracting the subsite data is to export the content from the subsite. This includes posts, pages, comments, and other content types.

    • Navigate to Tools > Export: In the subsite’s dashboard, go to Tools > Export.
    • Select All Content: Choose the option to export all content. This will generate an XML file containing all the content from the subsite.
    • Download the XML File: Once the export is complete, download the XML file to your computer.

    Step 2: Export the Database Tables

    In addition to the content, you’ll also need to export the database tables associated with the subsite. These tables contain important information, such as user data, settings, and plugin configurations.

    • Access phpMyAdmin: Log in to your hosting control panel and access phpMyAdmin, a tool for managing MySQL databases.
    • Locate the Database: Find the database associated with your Multisite network. The database will contain tables prefixed with wp_XX_, where XX is the subsite ID.
    • Export the Tables: Select the tables associated with the subsite you want to convert and export them in SQL format.

    Step 3: Download Theme and Plugin Files

    Finally, you’ll need to download the theme and plugin files associated with the subsite. These files are stored in the wp-content directory on your server.

    • Connect to the Server: Use FTP (File Transfer Protocol) or your hosting provider’s File Manager to connect to your server.
    • Download Theme and Plugin Files: Navigate to the wp-content/themes and wp-content/plugins directories and download the folders for the themes and plugins used by the subsite.

    Importing Data to the New WordPress Installation

    With the data extracted from the subsite, the next step is to import it into the new single-site WordPress installation.

    Step 1: Import Content

    The first step in importing the data is to import the content from the XML file you exported earlier.

    • Go to Tools > Import: In the new WordPress dashboard, navigate to Tools > Import.
    • Install the WordPress Importer Plugin: If you haven’t already, install the WordPress Importer plugin. This plugin allows you to import content from an XML file.
    • Upload the XML File: Upload the XML file you exported from the subsite and assign the content to an existing user.

    Step 2: Import the Database Tables

    Next, you’ll need to import the database tables you exported earlier. This step is crucial for ensuring that all the settings, user data, and plugin configurations are transferred to the new site.

    • Access phpMyAdmin: Log in to your hosting control panel and access phpMyAdmin for the new WordPress installation.
    • Import the SQL File: Select the database for the new site and import the SQL file containing the subsite tables.
    • Update the wp_options Table: After importing the tables, update the wp_options table to reflect the new URL of the site.

    Step 3: Upload Theme and Plugins

    With the content and database tables imported, the final step is to upload the theme and plugin files to the new site.

    • Use FTP or File Manager: Connect to the new site’s server using FTP or File Manager.
    • Upload Theme and Plugin Files: Upload the theme and plugin files you downloaded earlier to the wp-content/themes and wp-content/plugins directories.
    • Activate the Theme and Plugins: Once the files are uploaded, go to the WordPress dashboard and activate the theme and plugins.

    Adjusting URLs and Fixing Broken Links

    After importing the data, you’ll need to update the URLs and fix any broken links. This is necessary because the URL structure of the subsite may differ from the new single-site installation.

    Step 1: Update Site URLs

    The first step in adjusting URLs is to update the site URLs in the WordPress settings.

    • Go to Settings > General: In the WordPress dashboard, navigate to Settings > General.
    • Update WordPress Address (URL) and Site Address (URL): Update these fields to reflect the new URL of the site.
    • Use the Better Search Replace Plugin: To update internal links, use the Better Search Replace plugin to find and replace old URLs with the new ones.

    Step 2: Redirect Old URLs (If Necessary)

    If you want to ensure that visitors to the old subsite URL are redirected to the new site, you can set up 301 redirects.

    • Add 301 Redirects: You can add 301 redirects using the .htaccess file or a plugin like Redirection.
    • Example .htaccess Rule: To redirect an old subsite URL to the new domain, add the following rule to your .htaccess file:
    • Copy
    • Redirect 301 /old-subsite-url/ https://newdomain.com/

    Final Checks and Testing

    After completing the migration, it’s essential to perform thorough testing to ensure that everything is functioning correctly.

    Step 1: Check Website Functionality

    Navigate through different pages on the new site to confirm that they load properly. Test contact forms, search functions, and any interactive elements to ensure they work as expected.

    Step 2: Test for Broken Links

    Use tools like the Broken Link Checker plugin or Screaming Frog SEO Spider to check for broken links on the new site. Fix any broken links that are found.

    Step 3: Optimize Performance

    Finally, optimize the performance of the new site to ensure it loads quickly and efficiently.

    • Install Caching Plugins: Use caching plugins like WP Rocket or W3 Total Cache to improve site speed.
    • Optimize Images: Optimize images using plugins like Smush or ShortPixel to reduce file sizes and improve load times.
    • Enable a CDN: Consider enabling a Content Delivery Network (CDN) to further improve load times for visitors around the world.

    Conclusion

    Reverting a WordPress Multisite to a single site is a complex process that requires careful planning and execution. However, by following this step-by-step guide, you can achieve a smooth transition with minimal downtime and data loss. From backing up your data and extracting the necessary files to importing content and fixing URLs, each step is crucial to ensuring that your new single-site setup runs efficiently.

    If you’re not confident in handling the migration yourself, consider hiring a professional WordPress developer to assist with the process. A well-executed migration will improve site performance, simplify management, and ensure long-term stability for your WordPress site.

    WordPress Performance Optimization: 25 Proven Techniques for 2025

    Introduction

    A slow WordPress site can significantly impact your online presence in multiple ways. Users expect pages to load in under 2 seconds, with studies showing that 40% of visitors abandon sites that take longer than 3 seconds to load. This immediate loss of traffic directly affects your conversion rates, with each additional second of load time reducing conversions by an average of 7%.

    Search engines, particularly Google, have made site speed a critical ranking factor. With the introduction of Core Web Vitals as ranking signals, speed metrics now directly influence your SEO performance. In 2025, Google has further refined these metrics, placing even greater emphasis on mobile performance and user interaction measurements.

    Current benchmarks for WordPress sites in 2025 suggest that high-performing sites should achieve:

    • Time to First Byte (TTFB) under 200ms
    • Largest Contentful Paint (LCP) under 1.5 seconds
    • First Input Delay (FID) under 100ms
    • Cumulative Layout Shift (CLS) under 0.1
    • Total page size under 1MB
    • HTTP requests under 50

    To measure your WordPress site’s performance, several reliable tools are available:

    • Google PageSpeed Insights provides detailed speed metrics and optimization suggestions based on real-world user data
    • GTmetrix offers comprehensive performance reports and waterfall charts to identify bottlenecks
    • WebPageTest allows for testing from different locations and devices
    • Lighthouse (built into Chrome DevTools) provides performance audits
    • New Relic offers real-time performance monitoring for enterprise sites

    Before implementing optimization strategies, establish your baseline performance using these tools and set clear performance goals. Let’s explore the 25 most effective WordPress optimization techniques for 2025.

    Foundation Optimization 

    Selecting Performance-Optimized Hosting

    Your hosting choice forms the foundation of your site’s performance. In 2025, the difference between shared and managed WordPress hosting is more pronounced than ever.

    Managed WordPress Hosting vs. Shared Hosting

    Shared hosting places multiple websites on a single server with shared resources, often resulting in the “noisy neighbor” effect where other sites impact your performance. While affordable ($3-10/month), shared hosting typically delivers slower TTFB and inconsistent performance during traffic spikes.

    Managed WordPress hosting provides optimized environments specifically configured for WordPress. Though more expensive ($20-200/month), these specialized platforms offer superior performance through:

    • WordPress-specific server configurations
    • Built-in caching mechanisms
    • Automatic updates and backups
    • Enhanced security features
    • Expert WordPress support

    Server Specifications That Matter for Speed

    When selecting hosting, prioritize these specifications:

    • SSD Storage: 3-4x faster than traditional HDD
    • PHP 8.3+: The latest PHP versions offer significant performance improvements
    • Sufficient RAM: Minimum 2GB for small sites, 4GB+ for larger sites
    • Server Location: Choose servers geographically close to your primary audience
    • NGINX: Often delivers better performance than Apache for WordPress
    • MariaDB/MySQL 8.0+: Newer database versions provide performance enhancements

    Choosing Lightweight, Speed-Optimized Themes

    Your WordPress theme significantly impacts loading times as it determines your site’s code structure and asset loading.

    What Makes a Theme “Fast”

    Speed-optimized themes share these characteristics:

    • Minimal, clean code without bloated features
    • Responsive design using native CSS
    • Limited use of JavaScript
    • Optimized image handling
    • Compliance with WordPress coding standards
    • Regular updates and maintenance
    • Modular loading of assets

    Recommendations for 2025

    Some standout themes for performance include:

    • GeneratePress: Extremely lightweight (<10KB) with excellent customization
    • Astra: Fast-loading with modular asset loading
    • Kadence: Built with performance and Core Web Vitals in mind
    • Blocksy: Modern block-based theme with performance optimization
    • Hello Elementor: Minimalist theme designed for speed

    Essential Image Optimization Techniques

    Images typically account for 50-80% of a webpage’s total size. Proper image optimization can dramatically reduce load times.

    Proper Image Sizing and Formats

    • Size images to their display dimensions (never upload 2000px images for 500px spaces)
    • Use modern formats like WebP (30-50% smaller than JPEG) and AVIF (20-30% smaller than WebP)
    • Implement responsive images using srcset attributes
    • Use SVGs for logos and icons when possible

    Compression Tools and Plugins

    • ShortPixel: Offers excellent compression with minimal quality loss
    • Optimole: Provides real-time image optimization and CDN delivery
    • EWWW Image Optimizer: Comprehensive image optimization extension.
    • TinyPNG/TinyJPG: Excellent compression API with WordPress integration

    Implementing Lazy Loading

    Lazy loading defers off-screen images until users scroll to them, significantly improving initial page load times. Since WordPress 5.5, native lazy loading is available using the loading=”lazy” attribute, but plugins like WP Rocket enhance this functionality with JavaScript-based solutions for broader browser support.

    Implementing Effective Caching

    Caching creates static versions of your dynamic content, dramatically reducing server processing time and database queries.

    Browser Caching

    Browser caching instructs visitors’ browsers to store static assets locally, reducing repeat downloads. Implement it by adding expires headers to your server configuration or through caching plugins. For optimal performance, set appropriate cache durations:

    • Images and static assets: 1 year
    • CSS and JS files: 1 month
    • HTML: Varies based on content update frequency

    Page Caching

    Page caching generates HTML files of your pages, eliminating PHP execution and database queries for repeat visitors. This can reduce load times by 2-5x. Top solutions include:

    • WP Rocket
    • WP Super Cache
    • W3 Total Cache
    • LiteSpeed Cache

    Object Caching

    Object caching stores the results of complex database queries, reducing database load. For small to medium sites, transients API provides basic object caching. For high-traffic sites, persistent object caching using Redis or Memcached delivers superior performance.

    Content Delivery Network (CDN) Implementation

    CDNs distribute your site’s static files across a global network of servers, delivering content from locations closest to each visitor.

    How CDNs Improve WordPress Performance

    CDNs enhance performance by:

    • Reducing server load by offloading static file delivery
    • Decreasing latency through geographic distribution
    • Providing an additional layer of caching
    • Offering built-in DDoS protection
    • Optimizing assets automatically (on some platforms)

    Top CDN Options and Integration Methods

    Leading CDN providers for WordPress include:

    • Cloudflare: Offers free tier with comprehensive features
    • BunnyCDN: Cost-effective with excellent performance
    • KeyCDN: Pay-as-you-go pricing with WordPress integration
    • Cloudinary: Specialized in image and video optimization
    • Fastly: Enterprise-level solution with advanced features

    Most CDNs integrate with WordPress through plugins or DNS changes, with many caching plugins offering built-in CDN support.

    Technical Optimization Strategies

    Database Optimization Techniques

    The WordPress database powers every page load, making its optimization critical for site performance.

    Cleaning and Optimizing WordPress Database

    Regular maintenance should include:

    • Removing post revisions (limit to 3-5 per post)
    • Cleaning up trackbacks and pingbacks
    • Deleting spam and trashed comments
    • Removing transients
    • Optimizing database tables

    Reducing Database Calls

    Minimize database queries by:

    • Using object caching
    • Implementing fragment caching for common elements
    • Limiting dynamic widgets in sidebars
    • Using query monitoring tools to identify inefficient queries
    • Optimizing custom SQL queries

    Database Caching Solutions

    For high-traffic sites, implement:

    • Redis for object caching
    • MySQL query cache configuration
    • Database replication for read/write splitting
    • Database indexing for frequently queried tables

    Code Minification and Compression

    Minification and compression reduce file sizes without affecting functionality.

    Minifying CSS, JavaScript, and HTML

    Minification removes unnecessary characters (whitespace, comments, etc.) from code files, reducing file sizes by 10-20%. Tools like WP Rocket, Autoptimize, and Asset CleanUp handle minification automatically.

    GZIP and Brotli Compression

    Server-level compression further reduces file transfer sizes:

    • GZIP: Standard compression reducing file sizes by 60-70%
    • Brotli: Next-gen compression offering 15-25% better compression than GZIP

    Both can be enabled via server configuration or through plugins.

    Using HTTP/2 and HTTP/3

    Modern HTTP protocols enable:

    • Multiplexing (multiple requests over a single connection)
    • Server push for critical resources
    • Binary data transfer instead of text
    • Header compression

    HTTP/3 (QUIC) further improves performance with UDP instead of TCP, reducing connection establishment time.

    Resource Optimization

    Efficient resource handling significantly impacts loading times.

    Reducing HTTP Requests

    Each resource (CSS, JS, images) requires a separate HTTP request. Reduce these by:

    • Combining CSS/JS files
    • Using CSS sprites for multiple small images
    • Implementing icon fonts or SVGs
    • Removing unnecessary plugins
    • Eliminating render-blocking resources

    Deferring Non-Critical CSS and JavaScript

    Load only critical resources initially, then defer non-essential ones:

    • Extract and inline critical CSS
    • Defer non-critical JavaScript with defer or async attributes
    • Load JavaScript modules with type=”module”
    • Use dynamic imports for conditional code

    Removing Unused Code

    Unused CSS and JavaScript add unnecessary weight. Tools like PurgeCSS, UnCSS, and Coverage in Chrome DevTools help identify and remove unused code.

    Combining Files Strategically

    While combining files reduces HTTP requests, it can impact caching efficiency. In 2025, with HTTP/2/3 adoption, strategic combination works best:

    • Combine rarely changing files
    • Keep frequently updated files separate
    • Balance request reduction with cache efficiency

    Core Web Vitals Optimization

    Google’s Core Web Vitals have become essential performance metrics.

    Improving LCP, FID, and CLS

    • Largest Contentful Paint (LCP): Optimize by prioritizing above-the-fold content loading, preloading key resources, and implementing critical CSS
    • First Input Delay (FID): Improve by breaking up long tasks, deferring non-critical JavaScript, and using web workers for complex operations
    • Cumulative Layout Shift (CLS): Reduce by specifying image dimensions, reserving space for ads and embeds, and avoiding injecting content above existing content

    Mobile Optimization Techniques

    With mobile-first indexing, mobile performance is paramount:

    • Use responsive design principles
    • Implement AMP (Accelerated Mobile Pages) for content-heavy sites
    • Optimize touch targets for mobile users
    • Use streamlined navigation for mobile devices
    • Test thoroughly on actual mobile devices

    PHP Optimization

    PHP configuration significantly impacts WordPress performance.

    Using Latest PHP Versions

    PHP 8.3 delivers substantial performance improvements over previous versions:

    • JIT compiler for faster execution
    • Improved type system and error handling
    • Reduced memory usage
    • Enhanced opcode caching

    PHP Memory Limits and Configuration

    Optimize PHP settings:

    • Increase memory_limit to 256M-512M
    • Configure opcache for production environments
    • Set appropriate max_execution_time
    • Optimize realpath_cache_size and realpath_cache_ttl
    • Disable unnecessary PHP modules

    Advanced Techniques

    Implementing Redis or Memcached for Object Caching

    For high-traffic sites, persistent object caching is essential. Redis and Memcached store database query results in memory, dramatically reducing database load and improving response times.

    Redis generally outperforms Memcached for WordPress with better data persistence and more data types. Implementation requires server access or managed hosting that supports these technologies.

    Optimizing WordPress Core Functionality

    Heartbeat API Management

    WordPress Heartbeat API facilitates real-time updates but can consume resources. Optimize by:

    • Limiting Heartbeat frequency
    • Disabling it on frontend
    • Restricting it to specific admin pages

    Post Revisions Control

    Limit post revisions by adding define(‘WP_POST_REVISIONS’, 3); to wp-config.php or using plugins.

    Autoloaded Data Optimization

    Minimize autoloaded options in wp_options table, as these load on every page request. Use tools like Query Monitor to identify and clean bloated options.

    HTTPS Optimization and Security Enhancements

    HTTPS is standard in 2025, but requires optimization:

    • Use OCSP stapling to reduce TLS handshake time
    • Implement proper HTTP to HTTPS redirects
    • Configure HSTS headers
    • Use TLS 1.3 for faster encryption
    • Optimize SSL certificate chain

    Using AI-Powered Optimization Tools

    AI optimization tools automatically analyze and enhance WordPress performance:

    • Predictive content loading based on user behavior
    • Automated image optimization and format selection
    • Intelligent resource prioritization
    • Dynamic caching strategies
    • Performance-focused code suggestions

    Preloading and Prefetching Critical Resources

    Strategic resource loading improves perceived performance:

    • Preload critical resources with <link rel=”preload”>
    • Prefetch likely-needed resources with <link rel=”prefetch”>
    • DNS-prefetch external domains with <link rel=”dns-prefetch”>
    • Preconnect to critical origins with <link rel=”preconnect”>

    Maintenance Strategies

    Ongoing Optimization Practices

    Maintain performance through consistent practices:

    • Regular updates to WordPress core, themes, and plugins.
    • Scheduled performance testing using tools like Google PageSpeed Insights
    • Quarterly plugin audits to remove unnecessary or poorly performing plugins
    • Monthly database optimization routines
    • Continuous image optimization workflow for new content

    Plugin and Tool Recommendations for 2025

    Essential Performance Tools

    Top Caching Solutions:

    • WP Rocket: Comprehensive caching with excellent ease of use
    • NitroPack: AI-powered all-in-one optimization
    • LiteSpeed Cache: Superior performance for LiteSpeed servers
    • WP Super Cache: Reliable, free caching solution

    Image Optimization Tools:

    • ShortPixel: Excellent compression quality
    • Optimole: Real-time optimization and CDN
    • EWWW Image Optimizer: Comprehensive image toolset

    Performance Monitoring:

    • Query Monitor: Development-focused debugging
    • New Relic: Enterprise-level monitoring
    • GTmetrix Pro: Detailed performance tracking

    Conclusion

    WordPress performance optimization is an ongoing journey, not a destination. The 25 techniques outlined in this guide provide a roadmap to faster loading times, better user experience, and improved search rankings. Start with the fundamentals—quality hosting, lightweight themes, and proper image optimization—before progressing to more advanced WordPress development strategies. Remember that each improvement, however small, contributes to overall site performance. In 2025’s competitive digital landscape, speed isn’t just a technical metric—it’s a business advantage. Implement these strategies methodically, measure your progress, and enjoy the benefits of a lightning-fast WordPress site.

    WordPress for Mobile-First Design: Best Practices and Solutions

    Mobile-first design isn’t just a trend—it’s a necessity. With over 60% of web traffic coming from mobile devices, optimizing your WordPress website for mobile users has become crucial for success. This comprehensive guide will walk you through the essential strategies and best practices for creating mobile-first WordPress websites that deliver exceptional user experiences across all devices.

    Understanding Mobile-First design

    Mobile-first design is an approach that prioritizes designing for smaller screens first, then progressively enhancing the experience for larger screens. This methodology ensures that your website’s core content and functionality work flawlessly on mobile devices before adding more complex features for desktop users.

    Why Mobile-First Matters

    The shift towards mobile-first design is driven by several factors:

    • Mobile traffic continues to dominate desktop traffic across most industries
    • Google’s mobile-first indexing means your mobile site determines your search rankings
    • Mobile users have different behavioral patterns and expectations compared to desktop users
    • Conversion rates on mobile devices are heavily influenced by user experience

    Essential Mobile-First WordPress Strategies

    1. Choose a Responsive Theme Framework

    The foundation of a mobile-first WordPress website starts with selecting the right theme. Consider these factors:

    Your theme should be built on a modern, responsive framework that implements mobile-first principles. Look for themes that:

    • Use fluid grids and flexible layouts
    • Implement proper viewport settings
    • Support modern CSS features like Flexbox and Grid
    • Have clean, lightweight code

    Recommended frameworks include:

    • GeneratePress
    • Astra
    • OceanWP
    • Kadence

    These frameworks are specifically designed with mobile-first principles and offer excellent performance characteristics.

    2. Optimize Images for Mobile

    Image optimization is crucial for mobile performance. Implement these practices:

    • Use responsive images with srcset and sizes attributes
    • Compress images without sacrificing quality
    • Implement lazy loading for images below the fold
    • Consider using WebP format with fallbacks
    • Use appropriate image dimensions for different viewport sizes

    Example WordPress code for responsive images:

    Example WordPress code for responsive images

    3. Implement Progressive Enhancement

    Start with a basic, functional mobile experience and progressively add features for larger screens:

    • Begin with essential content and functionality
    • Add enhanced interactions for tablet users
    • Implement more complex features for desktop users
    • Use feature detection to ensure compatibility

    4. Mobile-First Navigation Patterns

    Navigation is particularly challenging on mobile devices. Consider these approaches:

    • Use hamburger menus judiciously
    • Implement bottom navigation for frequently accessed items
    • Create clear visual hierarchies
    • Ensure touch targets are at least 44×44 pixels
    • Maintain consistent navigation patterns

    Example CSS for mobile navigation:

    CSS for mobile navigation

    5. Performance Optimization

    Mobile users often face bandwidth and processing power constraints. Optimize your site by:

    • Minimizing HTTP requests
    • Implementing effective caching strategies
    • Reducing JavaScript and CSS file sizes
    • Using a content delivery network (CDN)
    • Optimizing database queries

    Recommended WordPress plugins for performance:

    • WP Rocket
    • Flying Press
    • Swift Performance
    • W3 Total Cache

    6. Typography and Readability

    Mobile typography requires special attention:

    • Use a minimum font size of 16px for body text
    • Maintain appropriate line heights (1.5 to 1.6)
    • Ensure sufficient contrast ratios
    • Use system fonts when possible
    • Implement proper spacing for touch interactions

    Example typography CSS:

    typography CSS

    7. Form Design for Mobile

    Forms are critical touch points for user interaction:

    • Use appropriate input types (tel, email, etc.)
    • Implement auto-fill where possible
    • Show/hide password toggles
    • Use clear error messages
    • Minimize form fields
    • Implement proper keyboard behaviors

    Example form markup:

    Example of form markup

    Testing and Validation

    1. Cross-Device Testing

    Implement a comprehensive testing strategy:

    • Use real devices for testing
    • Leverage browser developer tools
    • Implement automated testing where possible
    • Test on different network conditions
    • Verify touch interactions

    2. Performance Metrics

    Monitor key performance indicators:

    • First Contentful Paint (FCP)
    • Largest Contentful Paint (LCP)
    • First Input Delay (FID)
    • Cumulative Layout Shift (CLS)
    • Time to Interactive (TTI)

    Use tools like:

    • Google PageSpeed Insights
    • WebPageTest
    • Chrome DevTools
    • Google Search Console

    Common Mobile-First Pitfalls to Avoid

    1. Blocking JavaScript and CSS
    2. Unoptimized images
    3. Poor touch target sizing
    4. Complex animations on mobile
    5. Horizontal scrolling
    6. Intrusive interstitials
    7. Unreadable font sizes

    Recommended WordPress Plugins for Mobile Optimization

    1. AMP for WP
    2. Mobile Menu
    3. WP Touch
    4. Lazy Load by WP Rocket
    5. WebP Express

    Future-Proofing Your Mobile-First Design

    Stay ahead of mobile design trends:

    • Monitor Core Web Vitals
    • Implement Progressive Web App features
    • Consider AI-powered optimizations
    • Plan for emerging mobile technologies
    • Regular testing and updates

    Conclusion

    Creating a mobile-first WordPress website requires careful planning, implementation, and ongoing optimization. By following these best practices and regularly testing your site’s performance, you can ensure an excellent mobile experience for your users while maintaining strong search engine rankings.

    Remember that mobile-first design is an iterative process. Regularly collect user feedback, monitor analytics, and make data-driven improvements to your mobile experience. As mobile technology continues to evolve, staying current with best practices and emerging trends will help ensure your WordPress site remains effective and competitive.

    Additional Resources

    • WordPress Developer Documentation
    • Google’s Mobile-First Indexing Guidelines
    • Web Content Accessibility Guidelines (WCAG)
    • WordPress Theme Handbook
    • Google’s Mobile-Friendly Test Tool

    By implementing these strategies and best practices, you’ll be well-equipped to create WordPress websites that not only meet but exceed mobile users’ expectations while maintaining excellent performance and user experience across all devices.