WordPress Multisite: The Ultimate Guide to Managing Multiple Websites

In the ever-evolving digital landscape, managing multiple websites can quickly become a complex and time-consuming task. Imagine having the power to control, update, and maintain numerous websites from a single dashboard – this is exactly what WordPress Multisite offers. Originally introduced in WordPress 3.0, this powerful feature has transformed how organizations, businesses, educational institutions, and individuals approach web management.

WordPress Multisite is not just a technical feature; it’s a strategic solution that simplifies web ecosystem management, reduces administrative overhead, and provides unprecedented flexibility in website deployment and maintenance.

Understanding WordPress Multisite: A Deep Dive

What Exactly is WordPress Multisite?

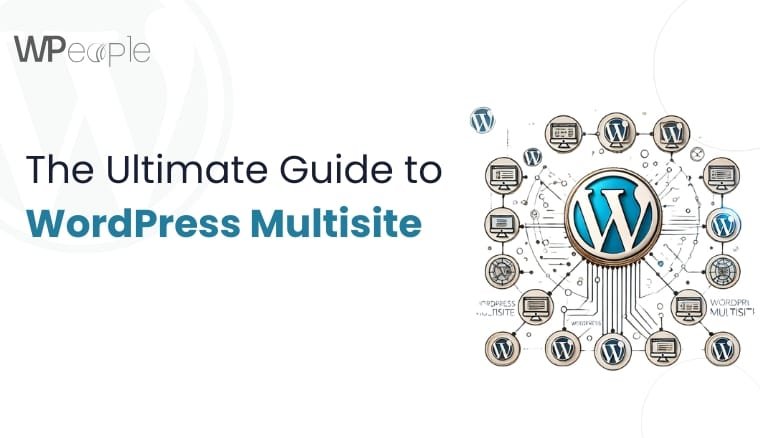
At its core, WordPress Multisite is an advanced network feature that allows you to create and manage multiple WordPress websites using a single WordPress installation. Unlike traditional setups where each website requires a separate WordPress installation, Multisite enables you to:

  • Create a network of interconnected websites
  • Manage all sites from a centralized dashboard
  • Share resources, themes, and plugins across the network
  • Implement granular user roles and permissions

Historical Context and Evolution

WordPress Multisite wasn’t an overnight creation. It evolved from the earlier WordPress Multi-User (WPMU) platform, which was developed to address the growing needs of large organizations and community platforms. The integration into core WordPress with version 3.0 marked a significant milestone in the platform’s development.

Architectural Overview of WordPress Multisite

Network Structure and Domain Configurations

WordPress Multisite supports three primary domain configurations:

  1. Subdomain Structure
    • Websites appear as subdomain.mainsite.com
    • Ideal for large organizations with distinct departmental sites
    • Provides clear separation between different websites
    • Requires wildcard subdomain support from hosting provider
  2. Subdirectory Structure
    • Websites appear as mainsite.com/website
    • Simpler to set up
    • No additional DNS configuration required
    • Works well for closely related websites
  3. Custom Domain Mapping
    • Each website can have a completely independent domain
    • Requires additional plugin or native WordPress domain mapping
    • Perfect for complex network architectures
    • Allows maximum flexibility in branding and presentation

Database and Resource Sharing

In a Multisite setup, all websites share:

  • Core WordPress installation
  • Plugins
  • Themes
  • User database
  • Server resources

This shared architecture provides efficiency but also introduces unique challenges in performance and security management.

Comprehensive Use Cases and Real-World Applications

1. Educational Institutions

Example: University of British Columbia Multisite Network

Universities leverage WordPress Multisite to:

  • Create course websites
  • Develop departmental blogs
  • Host student and faculty portfolios
  • Manage research group websites
  • Provide collaborative platforms

Implementation Strategy

  • Centralized theme for consistent branding
  • Role-based access for different user groups
  • Simplified content management across multiple academic units

2. Corporate and Enterprise Solutions

Example: OpenView Venture Partners

Enterprises use Multisite to:

  • Manage corporate websites
  • Create microsites for different products
  • Develop regional or divisional web presences
  • Maintain consistent brand guidelines
  • Centralize content strategy

Key Benefits

  • Unified design language
  • Centralized updates
  • Reduced development and maintenance costs
  • Scalable web infrastructure

3. Media and Publishing

Example: Cheap Flights Travel Network

Media organizations utilize Multisite for:

  • Creating niche content sections
  • Developing region-specific content hubs
  • Managing multiple publication brands
  • Implementing varied monetization strategies

Content Strategy Advantages

  • Rapid content deployment
  • Consistent editorial workflows
  • Simplified cross-platform content management

Technical Requirements and Preparation

Hosting Infrastructure Considerations

Recommended Hosting Specifications

  • Virtual Private Server (VPS) or Dedicated Hosting
  • Minimum Requirements:
    • PHP 7.4 or higher
    • MySQL 5.7 or MariaDB 10.3+
    • Apache or Nginx web server
    • Wildcard subdomain support (for subdomain structure)

Performance Optimization

  • Use hosting providers with:
    • SSD storage
    • High-performance CPUs
    • Robust caching mechanisms
    • CDN integration
    • Scalable resources

Pre-Installation Checklist

  1. Backup Existing Website
    • Create full site backup
    • Export database
    • Backup all files and configurations
  2. Server Preparation
    • Verify mod_rewrite module
    • Ensure SSL certificate compatibility
    • Check PHP memory limits
    • Confirm FTP/SFTP access
  3. WordPress Configuration
    • Update to latest WordPress version
    • Deactivate all plugins
    • Review current theme compatibility

Detailed Multisite Installation Process

Step-by-Step Configuration Guide

  1. Enable Multisite in wp-config.php

    /* Multisite */

define( ‘WP_ALLOW_MULTISITE’, true );

2. Network Setup Wizard

  • Navigate to Tools > Network Setup
  • Choose subdomain or subdirectory structure
  • Configure network title and admin email

3. Update Configuration Files

  • Modify wp-config.php
  • Update .htaccess with provided code snippets

4. Network Administrative Configuration

  • Set registration policies
  • Configure upload limitations
  • Define user roles and permissions

    Advanced Multisite Management Strategies

    User and Role Management

    User Role Hierarchy

    • Super Admin: Network-wide control
    • Network Administrator: Limited network management
    • Site Administrator: Individual site management
    • Editor: Content creation and modification
    • Contributor: Content submission

    Plugin and Theme Management

    Network-Wide Deployment

    • Install plugins network-wide
    • Activate/deactivate for specific sites
    • Set default themes for new sites
    • Manage theme customization permissions

    Security Considerations

    Comprehensive Security Approach

    • Implement robust password policies
    • Use two-factor authentication
    • Regular security audits
    • Centralized update management
    • Unified SSL implementation

    Recommended Multisite Plugins

    1. Domain Mapping Plugins
      • Enable custom domain configurations
      • Simplify domain management
    2. Performance Optimization
      • Caching plugins with Multisite support
      • Database optimization tools
    3. Security Enhancements
      • Centralized security scanning
      • Unified firewall protection
    4. Monitoring and Analytics
      • Network-wide traffic analysis
      • Consolidated reporting tools

    Potential Challenges and Mitigation Strategies

    Common Multisite Limitations

    1. Performance Bottlenecks
      • Monitor server resources
      • Implement advanced caching
      • Use content delivery networks
    2. Plugin Compatibility
      • Test plugins thoroughly
      • Maintain updated plugin ecosystem
      • Develop custom solutions if needed
    3. Backup and Migration
      • Use specialized Multisite backup tools
      • Develop comprehensive migration strategies

    Monetization and Expansion Opportunities

    Multisite Business Models

    1. Membership Platforms
      • Create tiered website offerings
      • Implement paid site creation
    2. Franchise Web Presence
      • Develop standardized website templates
      • Offer customization services
    3. Educational Platform
      • Create learning management systems
      • Host multiple course websites

    Future of WordPress Multisite

    Emerging Trends

    • Headless WordPress integration
    • Improved block editor compatibility
    • Enhanced performance optimization
    • More sophisticated network management tools

    Conclusion: Is WordPress Multisite Right for You?

    WordPress Multisite is a fantastic tool for managing multiple websites efficiently. However, it’s not always the best choice for every use case. If you run a network of related sites, it can save you time and resources. But if you need flexibility in plugin and performance management, a traditional single-site setup might be better.

    If you need help with custom WordPress development, optimizing your WordPress theme, or ensuring smooth WordPress support and maintenance, consider hiring a professional WordPress developer.

    Frequently Asked Questions

    1. Can I Install Any Plugin in My WordPress Multisite?

    Answer: Not all plugins are Multisite-compatible.

    Detailed Explanation:

    • You can install most plugins in a Multisite network
    • However, not all plugins fully support Multisite functionality
    • Before installation, always:
      • Check plugin documentation
      • Test compatibility
      • Verify network-wide performance
      • Consult plugin developer support

    2. Can I Share User Logins and Roles Across a Multisite Network?

    Answer: Yes, you can share user logins and roles.

    Detailed Explanation:

    • Users can have consistent access across multiple websites
    • Centralized user management
    • Benefits include:
      • Simplified authentication
      • Consistent user experience
      • Reduced administrative overhead
      • Granular permission controls

    3. Is It Possible to Display the Main Website’s Posts on All Network Websites?

    Answer: Yes, you can show main website posts across the network.

    Detailed Explanation:

    • Multiple methods to achieve cross-site content sharing
    • Options include:
      • Widget-based content syndication
      • Custom PHP code
      • Specialized plugins
      • Network-wide RSS feeds
    • Requires careful configuration to maintain performance

    4. Can I Use Different Plugins with Similar Functionality on Different Websites?

    Answer: Yes, with some limitations.

    Detailed Explanation:

    • You can activate different plugins with similar functions
    • Must be installed network-wide first
    • Individual site administrators can:
      • Activate/deactivate specific plugins
      • Configure plugin settings for their site
    • Recommended for maintaining site-specific customization

    5. How Many Websites Can I Add to My WordPress Multisite Network?

    Answer: There’s no strict limit.

    Detailed Explanation:

    • Theoretically unlimited website creation
    • Practical limitations depend on:
      • Server resources
      • Hosting infrastructure
      • Performance considerations
      • Database management capabilities
    • Recommended best practices:
      • Start with a robust hosting solution
      • Monitor server performance
      • Use caching and optimization techniques
      • Regularly audit network resources

    How to Revert a WordPress Multisite to a Single Site

    Running a WordPress Multisite network can be incredibly useful for managing multiple sites under one installation. However, there may come a time when you need to convert your multisite setup into a standalone WordPress site. Whether due to performance concerns, maintenance difficulties, or business restructuring, the process requires careful execution to avoid data loss and downtime.

    In this guide, we’ll walk you through how to revert a WordPress Multisite to a single site step by step. You’ll learn the key differences between WordPress Multisite and single-site installations, essential preparations before conversion, and detailed instructions on how to migrate your content, users, and settings seamlessly.

    Understanding WordPress Multisite vs. Single Site

    Before diving into the conversion process, it’s crucial to understand the fundamental differences between a WordPress Multisite network and a standard single-site WordPress installation. This understanding will help you make informed decisions throughout the migration process.

    What is WordPress Multisite?

    WordPress Multisite is a feature that allows you to run multiple websites under a single WordPress installation. This setup is ideal for organizations that need to manage a network of related sites, such as universities with multiple departments, businesses with regional websites, or content networks with multiple blogs.

    Key features of WordPress Multisite include:

    • Centralized User Management: Users can be managed across all sites in the network, with different roles and permissions for each site.
    • Shared Themes and Plugins: Themes and plugins can be activated network-wide or on individual sites, allowing for consistent branding and functionality across the network.
    • Subdomains or Subdirectories: Sites in a Multisite network can be set up as subdomains (e.g., site1.example.com) or subdirectories (e.g., example.com/site1).

    What is a Single Site WordPress Installation?

    A single-site WordPress installation is the standard setup where one WordPress instance manages only one website. This is the most common type of WordPress installation and is suitable for most individual bloggers, small businesses, and organizations that only need to manage a single site.

    Key features of a single-site WordPress installation include:

    • Greater Flexibility in Customization: Since there’s only one site to manage, you have more freedom to customize themes, wordpress plugins, and settings without affecting other sites.
    • Easier Maintenance: Managing a single site is generally simpler and less resource-intensive than managing a Multisite network, making WordPress maintenance more straightforward and efficient. With fewer technical complexities, tasks like updates, backups, and security checks become easier to handle, ensuring your site remains stable and secure over time.
    • Fewer Technical Complexities: Single-site installations are less complex than Multisite networks, making them easier to troubleshoot and maintain.

    When Should You Convert a Multisite to a Single Site?

    There are several scenarios where converting a WordPress Multisite to a single site might be necessary:

    • Only One Subsite Remains Active: If most of the subsites in your Multisite network are no longer in use, it may make sense to convert the remaining active subsite into a standalone site.
    • Performance Issues: Multisite networks can be resource-intensive, especially if you have a large number of subsites. Converting to a single site can improve performance and reduce server load.
    • Customization Needs: If the customization needs of your subsites differ significantly, it may be easier to manage them as separate single-site installations.
    • Simplified Backups and Security: Managing backups and security for a single site is generally simpler and more straightforward than managing them for an entire Multisite network.

    Preparing for the Migration

    A successful migration from a WordPress Multisite to a single site requires careful planning and preparation. Here are the essential steps you need to take before starting the conversion process.

    Step 1: Backup Your Entire WordPress Multisite

    Before making any changes to your WordPress Multisite network, it’s crucial to create a full backup of your entire installation. This includes both the database and the files. A backup ensures that you can restore your site in case something goes wrong during the migration process.

    • Use Backup Plugins: Plugins like UpdraftPlus or Duplicator can help you create a full backup of your Multisite network. These plugins allow you to back up both the database and files with just a few clicks.
    • Store the Backup Securely: Once the backup is complete, store it in a secure location, such as Google Drive, Dropbox, or an external hard drive. Make sure you have multiple copies of the backup in case one becomes corrupted.

    Step 2: Identify the Subsite to Convert

    If your Multisite network has multiple subsites, you’ll need to identify which subsite you want to convert into a standalone site. This is typically the subsite that you want to keep active after the migration.

    • Log in to Your WordPress Dashboard: Access the WordPress admin dashboard for your Multisite network.
    • Navigate to Sites: Under the Network Admin section, go to Sites. Here, you’ll see a list of all the subsites in your network.
    • Choose the Specific Subsite: Select the subsite you want to extract and convert into a standalone site.

    Step 3: Set Up a Fresh WordPress Installation

    Once you’ve identified the subsite you want to convert, you’ll need to set up a fresh WordPress installation on a new hosting account (if necessary). This will serve as the new home for your standalone site.

    • Purchase a New Hosting Account: If you don’t already have a hosting account for the new site, purchase one from a reliable hosting provider.
    • Install WordPress: Most hosting providers offer one-click WordPress installation, making it easy to set up a new WordPress site.
    • Secure the New Site: Once WordPress is installed, secure the new site with SSL (Secure Sockets Layer) and essential security measures, such as strong passwords and security plugins.

    Extracting the Subsite Data

    With the preparations complete, the next step is to extract the data from the subsite you want to convert. This includes the content, database tables, and theme/plugin files.

    Step 1: Export the Subsite Content

    The first step in extracting the subsite data is to export the content from the subsite. This includes posts, pages, comments, and other content types.

    • Navigate to Tools > Export: In the subsite’s dashboard, go to Tools > Export.
    • Select All Content: Choose the option to export all content. This will generate an XML file containing all the content from the subsite.
    • Download the XML File: Once the export is complete, download the XML file to your computer.

    Step 2: Export the Database Tables

    In addition to the content, you’ll also need to export the database tables associated with the subsite. These tables contain important information, such as user data, settings, and plugin configurations.

    • Access phpMyAdmin: Log in to your hosting control panel and access phpMyAdmin, a tool for managing MySQL databases.
    • Locate the Database: Find the database associated with your Multisite network. The database will contain tables prefixed with wp_XX_, where XX is the subsite ID.
    • Export the Tables: Select the tables associated with the subsite you want to convert and export them in SQL format.

    Step 3: Download Theme and Plugin Files

    Finally, you’ll need to download the theme and plugin files associated with the subsite. These files are stored in the wp-content directory on your server.

    • Connect to the Server: Use FTP (File Transfer Protocol) or your hosting provider’s File Manager to connect to your server.
    • Download Theme and Plugin Files: Navigate to the wp-content/themes and wp-content/plugins directories and download the folders for the themes and plugins used by the subsite.

    Importing Data to the New WordPress Installation

    With the data extracted from the subsite, the next step is to import it into the new single-site WordPress installation.

    Step 1: Import Content

    The first step in importing the data is to import the content from the XML file you exported earlier.

    • Go to Tools > Import: In the new WordPress dashboard, navigate to Tools > Import.
    • Install the WordPress Importer Plugin: If you haven’t already, install the WordPress Importer plugin. This plugin allows you to import content from an XML file.
    • Upload the XML File: Upload the XML file you exported from the subsite and assign the content to an existing user.

    Step 2: Import the Database Tables

    Next, you’ll need to import the database tables you exported earlier. This step is crucial for ensuring that all the settings, user data, and plugin configurations are transferred to the new site.

    • Access phpMyAdmin: Log in to your hosting control panel and access phpMyAdmin for the new WordPress installation.
    • Import the SQL File: Select the database for the new site and import the SQL file containing the subsite tables.
    • Update the wp_options Table: After importing the tables, update the wp_options table to reflect the new URL of the site.

    Step 3: Upload Theme and Plugins

    With the content and database tables imported, the final step is to upload the theme and plugin files to the new site.

    • Use FTP or File Manager: Connect to the new site’s server using FTP or File Manager.
    • Upload Theme and Plugin Files: Upload the theme and plugin files you downloaded earlier to the wp-content/themes and wp-content/plugins directories.
    • Activate the Theme and Plugins: Once the files are uploaded, go to the WordPress dashboard and activate the theme and plugins.

    Adjusting URLs and Fixing Broken Links

    After importing the data, you’ll need to update the URLs and fix any broken links. This is necessary because the URL structure of the subsite may differ from the new single-site installation.

    Step 1: Update Site URLs

    The first step in adjusting URLs is to update the site URLs in the WordPress settings.

    • Go to Settings > General: In the WordPress dashboard, navigate to Settings > General.
    • Update WordPress Address (URL) and Site Address (URL): Update these fields to reflect the new URL of the site.
    • Use the Better Search Replace Plugin: To update internal links, use the Better Search Replace plugin to find and replace old URLs with the new ones.

    Step 2: Redirect Old URLs (If Necessary)

    If you want to ensure that visitors to the old subsite URL are redirected to the new site, you can set up 301 redirects.

    • Add 301 Redirects: You can add 301 redirects using the .htaccess file or a plugin like Redirection.
    • Example .htaccess Rule: To redirect an old subsite URL to the new domain, add the following rule to your .htaccess file:
    • Copy
    • Redirect 301 /old-subsite-url/ https://newdomain.com/

    Final Checks and Testing

    After completing the migration, it’s essential to perform thorough testing to ensure that everything is functioning correctly.

    Step 1: Check Website Functionality

    Navigate through different pages on the new site to confirm that they load properly. Test contact forms, search functions, and any interactive elements to ensure they work as expected.

    Step 2: Test for Broken Links

    Use tools like the Broken Link Checker plugin or Screaming Frog SEO Spider to check for broken links on the new site. Fix any broken links that are found.

    Step 3: Optimize Performance

    Finally, optimize the performance of the new site to ensure it loads quickly and efficiently.

    • Install Caching Plugins: Use caching plugins like WP Rocket or W3 Total Cache to improve site speed.
    • Optimize Images: Optimize images using plugins like Smush or ShortPixel to reduce file sizes and improve load times.
    • Enable a CDN: Consider enabling a Content Delivery Network (CDN) to further improve load times for visitors around the world.

    Conclusion

    Reverting a WordPress Multisite to a single site is a complex process that requires careful planning and execution. However, by following this step-by-step guide, you can achieve a smooth transition with minimal downtime and data loss. From backing up your data and extracting the necessary files to importing content and fixing URLs, each step is crucial to ensuring that your new single-site setup runs efficiently.

    If you’re not confident in handling the migration yourself, consider hiring a professional WordPress developer to assist with the process. A well-executed migration will improve site performance, simplify management, and ensure long-term stability for your WordPress site.