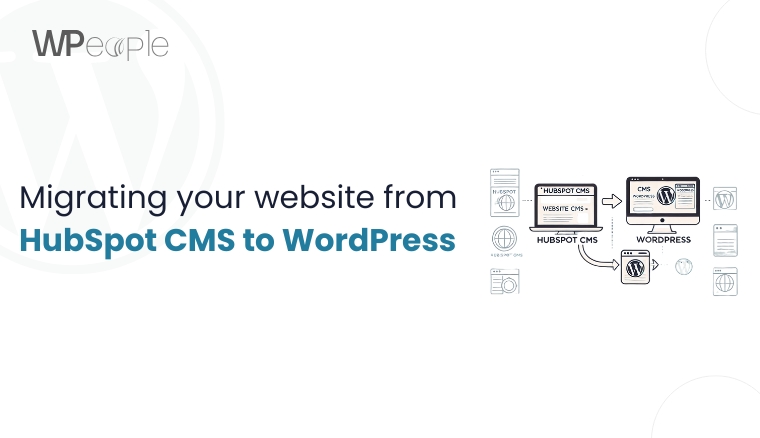
Migrating your website from HubSpot CMS to WordPress is a strategic decision that can significantly enhance your site’s flexibility, scalability, and cost-effectiveness. This comprehensive guide provides a step-by-step checklist to ensure a seamless transition, preserving your site’s functionality and SEO integrity.
Introduction
- Overview of HubSpot CMS and WordPress
HubSpot CMS: An all-in-one platform offering integrated marketing tools, user-friendly interface, but with certain limitations in customization and scalability.
WordPress: A versatile, open-source content management system powering over 40% of all websites, known for its extensive customization options and a vast library of plugins and themes.
- Reasons for Migrating
Cost-Effectiveness: WordPress is free to use, with costs incurred only for hosting and premium features, making it more economical than HubSpot’s tiered pricing.
Customization and Flexibility: WordPress offers unparalleled customization through thousands of themes and plugins, allowing for a highly personalized website.
Scalability and Control: With WordPress, you have complete control over your site’s data and scalability, enabling you to adapt and grow without platform-imposed restrictions.
Pre-Migration Preparation
- Content Audit
Inventory Existing Content: Compile a comprehensive list of all current website content, including pages, blog posts, images, and other media.
Evaluate Content Relevance: Determine which content is still valuable and aligns with your brand’s goals, identifying outdated or redundant content for removal or updating.
- SEO Performance Analysis
Analyze Current SEO Metrics: Use tools like Google Analytics to assess your site’s performance, focusing on high-traffic pages and valuable keywords.
Document Backlinks and Rankings: Record existing backlinks and search engine rankings to ensure these are maintained post-migration.
- Technical Assessment
Review Website Functionalities: List all current features, such as forms, e-commerce capabilities, and third-party integrations, to replicate them on WordPress.
Identify Necessary Plugins: Research WordPress plugins that can provide equivalent or enhanced functionality for your site’s features.
- Choosing the Right WordPress Hosting
Performance Considerations: Select a hosting provider known for reliability and speed to ensure optimal site performance.
Security Features: Ensure the host offers robust security measures, including SSL certificates and regular backups.
Scalability Options: Choose a host that can accommodate your site’s growth, offering scalable resources as traffic increases.
Setting Up the WordPress Environment
- Installing WordPress
Set Up Hosting Account: Register with your chosen hosting provider and set up your account.
Install WordPress: Use the hosting provider’s one-click installation feature or manually install WordPress to your server.
Create a Staging Environment: Establish a staging site to test changes and migrations without affecting the live site.
- Selecting and Customizing a Theme
Choose a Theme: Select a WordPress theme that closely aligns with your brand’s aesthetics and functionality requirements.
Customize Design Elements: Utilize the WordPress Customizer or a page builder plugin to adjust colors, fonts, layouts, and other design aspects to match your brand identity.
- Essential Plugins Installation
SEO Optimization: Install plugins like Yoast SEO or Rank Math to manage on-page SEO elements effectively.
Security Enhancements: Add security plugins such as Wordfence or Sucuri to protect your site from threats.
Performance Optimization: Use caching plugins like WP Rocket or W3 Total Cache to improve site loading times.
Backup Solutions: Implement backup plugins like UpdraftPlus to schedule regular backups of your site.
Content Migration
- Exporting Data from HubSpot
Export Blog Posts and Pages: Use HubSpot’s export functionality to download your content, typically in CSV or XML format.
Download Media Files: Manually download images and other media assets from your HubSpot file manager.
- Importing Data into WordPress
Import Content Files: Utilize WordPress import tools or plugins like WP All Import to upload your content files.
Upload Media Assets: Add media files to the WordPress media library, ensuring they are correctly linked within your content.
- Manual Adjustments
Format Content Appropriately: Review each page and post to ensure proper formatting, adjusting headings, images, and links as necessary.
Set Up Categories and Tags: Organize your content by assigning relevant categories and tags to maintain site structure and improve navigation.
Recreating Functionalities
- Forms and Lead Capture
Implement Form Plugins: Use plugins like Gravity Forms or Contact Form 7 to recreate existing forms, ensuring they capture necessary data.
Integrate with CRM Systems: Connect your forms to CRM tools, such as HubSpot’s free CRM, to maintain lead management workflows.
- Analytics and Tracking
Set Up Google Analytics: Install the Google Analytics tracking code or use plugins like MonsterInsights to monitor site traffic and user behavior.
Configure Search Console: Verify your site with Google Search Console to monitor search performance and indexing status.
- Third-Party Integrations
Email Marketing Services: Integrate with platforms like Mailchimp or Sendinblue using their respective plugins to manage newsletters and email campaigns.
Social Media Platforms: Add social sharing plugins to facilitate content sharing and integrate your social media profiles.
SEO Preservation and URL Redirection
- Maintaining URL Structures
Replicate Existing URL Slugs: Ensure your new WordPress URLs match the structure of your old HubSpot URLs.
Set Up WordPress Permalinks: Go to Settings > Permalinks in WordPress and choose a format that aligns with your old URLs.
- 301 Redirects Implementation
Map Old URLs to New URLs: Use a spreadsheet to list old and new URLs to prevent broken links.
Use a Redirection Plugin: Install the Redirection plugin or modify your .htaccess file to implement 301 redirects.
Test Redirects: Use tools like Screaming Frog or Google Search Console to confirm redirects are functioning properly.
- Updating Sitemap and Robots.txt
Generate a New XML Sitemap: Use Yoast SEO or Rank Math to create an updated sitemap.
Submit Sitemap to Search Engines: Upload the new sitemap to Google Search Console and Bing Webmaster Tools.
Optimize Robots.txt: Ensure that search engines can crawl important pages while blocking unnecessary admin pages.
- Testing and Quality Assurance
Cross-Browser and Device Testing
Test Across Browsers: Check website compatibility on Chrome, Firefox, Safari, and Edge.
Mobile Responsiveness: Use Google Mobile-Friendly Test to ensure your website displays correctly on mobile devices.
- Functionality Checks
Verify Forms and CTA Buttons: Test contact forms, email opt-ins, and call-to-action buttons.
Check Site Navigation: Ensure menus, dropdowns, and internal links work properly.
Test Load Times: Use Google PageSpeed Insights and GTmetrix to analyze and optimize site performance.
- Content Verification
Check for Formatting Issues: Ensure proper use of headings, images, and spacing.
Fix Broken Links: Use Broken Link Checker to identify and correct any dead links.
Launching the New Website
- Final Preparations
Perform a Final Backup: Use UpdraftPlus or BackupBuddy to create a full backup before launch.
Communicate Launch Plans: Inform team members, stakeholders, and customers about the transition.
- DNS and Domain Settings
Update DNS Records: Change your domain settings to point to your new WordPress hosting provider.
Enable SSL Certificate: Install an SSL certificate and enable HTTPS for secure browsing.
- Post-Launch Monitoring
Monitor Traffic and Performance: Use Google Analytics to track changes in visitor behavior.
Address Issues Promptly: Watch for user reports and fix any problems that arise.
Post-Migration Optimization
- Performance Enhancements
Enable Caching: Use WP Rocket or W3 Total Cache to improve loading speeds.
Optimize Images: Compress images using Smush or ShortPixel.
- Ongoing SEO Strategies
Regularly Publish New Content: Keep your blog updated to maintain rankings.
Build High-Quality Backlinks: Reach out to relevant sites to restore lost backlinks.
- Regular Maintenance
Update WordPress, Themes, and Plugins: Keep your site secure and functional by installing updates.
Schedule Backups: Automate backups to protect against data loss.
Conclusion
Migrating from HubSpot CMS to WordPress can unlock greater customization, lower costs, and improved scalability for your website. However, without a structured migration plan, you risk losing critical data, SEO rankings, and site functionality.
By following this complete migration checklist, you can ensure a smooth transition while maintaining your website’s performance and user experience.
Need expert help with your migration? Consider hiring a professional WordPress developer to handle the process seamlessly.
Consult with Our WordPress Experts On:
- WooCommerce Store
- Plugin Development
- Support & maintenance


