For website owners leveraging WordPress, implementing a distinctive header logo not only strengthens your brand identity but also enhances user experience, especially when supported by essential WordPress plugins for customization. Our comprehensive WordPress support and maintenance services ensure your logo and branding elements remain consistently displayed across all pages while adhering to WordPress security best practices to prevent unauthorized modifications.
In this detailed guide, we’ll explore various methods for updating your WordPress header logo – from utilizing default WordPress theme options and security-verified plugins to implementing custom code solutions. Whether you’re a beginner requiring ongoing WordPress support or an experienced developer managing website maintenance, follow these detailed steps to efficiently add, replace, or resize your logo while maintaining the integrity of your WordPress security protocols.
Understanding the Importance of the Header Logo
Your header logo is often the first thing visitors notice on your site. A clear, well-positioned logo helps establish your brand and contributes to a cohesive web design. Whether you’re refreshing your brand or setting up your website for the first time, placing your logo correctly on your WordPress site is essential.
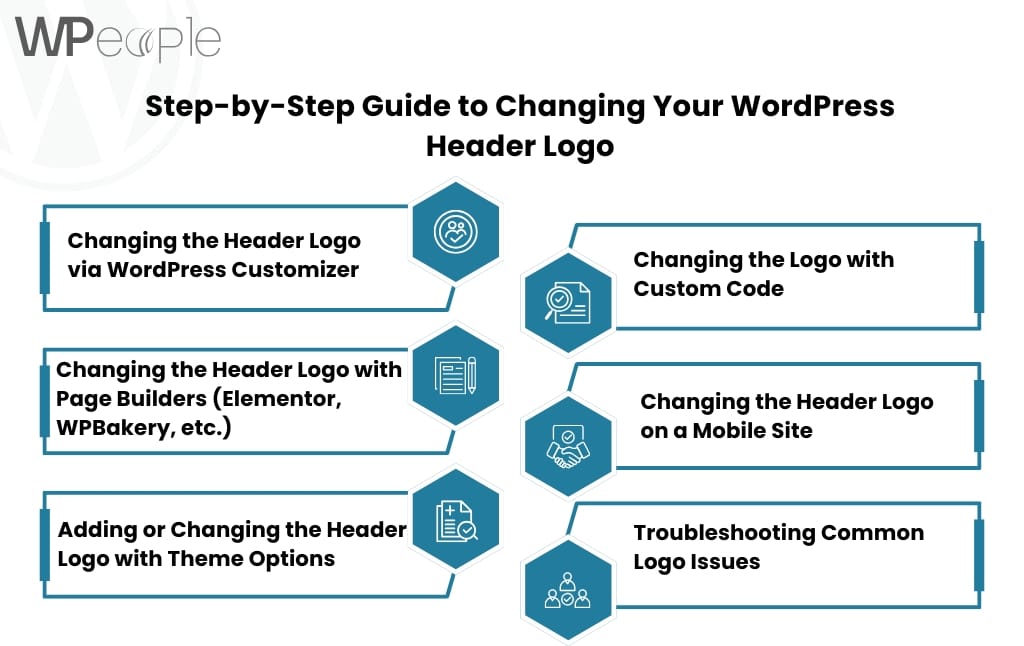
Step-by-Step Guide to Changing Your WordPress Header Logo

1. Changing the Header Logo via WordPress Customizer
Most WordPress themes include a built-in tool called the WordPress Customizer, which allows you to modify your site’s appearance in real time. Follow these steps to change your header logo through the Customizer:
1. Log in to Your WordPress Dashboard: Access the back end of your website by logging in with your admin credentials.
2. Navigate to Appearance > Customize: In the left-hand menu of your dashboard, go to Appearance and then click on Customize. This will open the WordPress Customizer.
3. Locate the Site Identity Section: In the Customizer menu, look for the Site Identity or Header section. This is where you can add or change your logo and site title.
4. Upload Your Logo: Click on Select Logo to upload a new image or choose an existing image from your media library. WordPress allows you to upload files in formats like .jpg, .png, and .svg (if enabled).
5. Adjust the Logo Display Options: After uploading, you may have options to adjust the logo size and positioning. This varies by theme, but most themes allow resizing or cropping.
6. Publish Your Changes: After finalizing the adjustments, click Publish to apply your new header logo to the site.
2. Changing the Header Logo with Page Builders (Elementor, WPBakery, etc.)
If you’re using a page builder like Elementor or WPBakery, the process may differ slightly. These tools offer a drag-and-drop experience and give you more control over design elements.
For Elementor:
1. Open Elementor Editor: Navigate to the page where you want to add or change the header logo. Open the page with Elementor.
2. Locate the Header Section: In Elementor, headers are typically located in Global Settings or Theme Builder sections.
3. Select the Logo Widget: Use the Site Logo widget to add your logo image. This widget is available under Elementor’s Theme Elements if you have Elementor Pro.
4. Upload and Adjust: Click on Choose Image to upload a new logo or select one from the media library. Use the widget settings to adjust the logo’s size, alignment, and other display options.
5. Save and Publish: Once satisfied, click Update to save the changes.
For WPBakery:
1. Edit Header Using WPBakery: Open WPBakery on the page with your header or go to Theme Options if your theme includes it.
2. Select the Image Block or Logo Module: Locate the block where your logo is placed, usually labeled as an Image or Logo element.
3. Upload a New Logo: Replace the existing logo image by selecting Upload. Adjust the image size, alignment, and padding as needed.
4. Save Changes: Publish or update your page to save your new header logo.
3. Adding or Changing the Header Logo with Theme Options
Some themes come with their own theme options panel where you can control the logo placement without using the WordPress Customizer or a page builder.
1. Go to Theme Options Panel: Check if your theme has a Theme Options or Settings panel by navigating to Appearance and looking for your theme’s specific settings.
2. Find the Logo Section: Look for a section titled Logo, Header Logo, or Branding.
3. Upload and Configure: Use the upload tool to add your logo. Depending on your theme, you may also have options to adjust size, padding, and alignment.
4. Save Settings: After making the changes, click Save or Publish to apply the new header logo.
4. Changing the Logo with Custom Code
If you’re comfortable with coding, you can directly edit your theme files or use CSS to add or replace the header logo.
Method 1: Editing the Header PHP File
1. Access Theme Files: In the WordPress dashboard, go to Appearance > Theme File Editor. Locate the header.php file.
2. Locate Logo Code: Look for a code snippet similar to `<img src=”logo.png”>` or `<div class=”site-logo”>`.
3. Replace the Logo URL: Change the image source to the URL of your new logo.
4. Save and Test: After saving the changes, refresh your site to confirm the new logo appears correctly.
Method 2: Adding CSS for Logo Customization
1. Open the Additional CSS Panel: In Appearance > Customize > Additional CSS, add CSS to control logo placement.
2. Write CSS for Logo Styling: For instance, to adjust size and padding:
“`css
.site-logo img {
width: 150px;
padding: 10px;
}
“`
3. Publish CSS Changes: Click Publish to apply the changes to your logo display.
5. Changing the Header Logo on a Mobile Site
Ensuring your logo is optimized for mobile is critical for user experience. If your theme or page builder doesn’t automatically scale the logo, follow these steps:
1. Use Responsive Settings: In your theme’s logo settings or page builder, look for responsive options that allow you to customize the logo size specifically for mobile devices.
2. Add Custom CSS for Mobile: If needed, use CSS targeting mobile screen sizes. Here’s an example:
“`css
@media (max-width: 768px) {
.site-logo img {
width: 100px;
}
}
“`
3. Preview on Mobile: Use the preview option in WordPress Customizer to view the logo on different screen sizes before publishing.
6. Troubleshooting Common Logo Issues
Changing your WordPress header logo can sometimes lead to unexpected issues. Here are solutions to common problems:
1. Logo Doesn’t Update: Clear your browser cache or use a private browsing window to see recent changes. Check any caching plugins and clear their cache if necessary.
2. Blurry Logo on High-Resolution Screens: For a sharper logo on devices with high DPI, upload a logo twice the display size and set dimensions in CSS.
3. Logo Off-Center or Misaligned: Use custom CSS to adjust padding or margins for accurate alignment.
WordPress development goes far beyond just changing visual elements like logos – it requires a comprehensive understanding of wordpress plugins, ongoing wordpress support and maintenance, and robust wordpress security measures to ensure your site runs smoothly. While updating your header logo might seem like a simple task, it’s important to consider how different plugins might interact with your theme’s header section, whether your regular maintenance routine includes backing up your customizations, and if your security protocols protect your branded assets from unauthorized changes.
Many site owners find that working with qualified developers who can handle both the technical aspects of logo implementation and the broader ecosystem of WordPress development helps ensure their branding stays consistent while maintaining the integrity of their site’s functionality and security.
Final Thoughts
Your WordPress header logo is a powerful branding element. By following the steps in this guide, you can easily change or update your header logo using different methods that suit your theme, page builder, or coding skills. A well-placed and optimized logo enhances your website’s visual appeal and reinforces your brand identity.
Consult with Our WordPress Experts On:
- WooCommerce Store
- Plugin Development
- Support & maintenance


