WordPress Custom Solutions For Enterprises: ROI-Driven Investment In 2026

Have you ever wondered how Fortune 500 companies transform their digital operations and enjoy astonishing results? The answer lies in custom enterprise WordPress development. 

They are accelerating their campaigns’ time-to-market, reducing operational costs, and sharply increasing ROI metrics by harnessing the maturity of WordPress for enterprises. 

Here’s a bitter reality: many organizations remain chained to legacy CMS platforms that drain their budgets. On top of that, they have to deal with rising licensing costs, outdated integrations, and substantial technical debt. 

All this raises a valid question: should we continue patching a traditional system or adopt WordPress enterprise solutions that promise both agility and savings?

If you have similar questions or are still relying on legacy CMS platforms, this blog is for you. You will discover the real benefits of enterprise WordPress, clear ROI benchmarks, and a phased roadmap that de-risks investment. 

Whether you are a CTO, CMO, or a digital leader, you will uncover insights to justify every dollar and demonstrate impressive outcomes. 

Let’s dive in to know why your competitors are scaling faster, and how you can stop losing ground.

The 2026 Enterprise WordPress Landscape: Why Custom Solutions Now

The enterprise CMS market is at a tipping point in 2026. For years, large organizations leaned on platforms such as Drupal, Sitecore, or other proprietary systems that promised stability but often delivered high costs, sluggish innovation, and frustrating vendor lock-in. That era is fading. 

A silent WordPress migration is reshaping the digital landscape WordPress is no longer just “good enough” for blogs; it’s now driving enterprise-level digital transformation at scale.

Let us discuss what is propelling it.

The Market Shift

Enterprises are increasingly walking away from expensive, rigid CMS platforms. Reports indicate that global adoption of WordPress VIP and custom enterprise WordPress solutions has grown significantly, with organizations saving millions in licensing fees and maintenance costs. 

The financial case is clear: enterprises achieve substantial cost savings when they switch from traditional CMS to WordPress.

What Makes 2026 Different

  • The maturity of WordPress technology now positions it on par with, and in many cases ahead of, legacy enterprise platforms.
  • Headless WordPress for enterprises has reached complete maturity with REST API and GraphQL delivering seamless omnichannel content delivery.
  • AI integration capabilities enable enterprises to embed machine learning and personalization engines natively rather than relying on complex bolt-on solutions.
  • Enterprise-grade compliance and security are now achievable with SOC 2, ISO 27001, and GDPR frameworks. They are built into modern WordPress enterprise solutions.
  • Performance benchmarks prove that enterprise-level WordPress platforms can deliver sub-2-second load times at a global scale. It eliminates the performance stigma of earlier years.

ROI Teaser: Why This Matters

These shifts are not just about features. They are about measurable ROI. From cost savings in hosting and licensing to significant performance-driven revenue growth, enterprises adopting WordPress are already reporting double-digit gains in efficiency and profitability.

Main Message: 2025 is no longer the year to debate whether WordPress belongs in the enterprise. It is the critical time (11th hour) for enterprises to realize that not moving toward WordPress enterprise solutions in 2026 could mean falling behind.

Decoding Enterprise WordPress Investment: What “Custom” Actually Means

Two ideas usually come to mind when enterprise leaders hear the word “custom.” First, the promise of a solution designed specifically for their business goals. Second, the worry that “custom” equals inflated budgets and never-ending timelines. The truth is more balanced. 

Custom enterprise WordPress development is not about reinventing the wheel. It is about building systems that align with enterprise needs, remove inefficiencies, and maximize ROI.

Let’s break “custom” into three enterprise-ready tiers to make this clear and understandable.

The Three-Tier Custom Solution Framework

Custom Enterprise WordPress Development (Themes and Architecture)

  • Proprietary design systems synced with brand guidelines
  • Sophisticated custom post types and taxonomies for complex content
  • Multi-tenant models to manage multiple brands or regions

➡️ROI Driver: Quicker publishing cycles and reduced dependency on agency

Custom Plugin Ecosystem and Integrations

  • ERP, CRM, and CDP connectors (Salesforce, SAP, HubSpot)
  • Automated workflows for compliance, approvals, and publishing
  • Advanced analytics and reporting dashboards

➡️ROI Driver: Fewer manual processes, real-time data synchronization

Enterprise-Grade Infrastructure Engineering

  • Kubernetes-based auto-scaling and CI/CD pipelines
  • Custom CDN optimization with edge computing
  • High-end security (WAF, DDoS protection, penetration testing)

➡️ROI Driver: Maximum uptime, fewer incidents, stronger resilience

Busting the Cost Myth

Many still believe WordPress is “free” or that custom solutions are prohibitively expensive. In reality, enterprise WordPress development consistently offers a lower total expenditure of ownership than traditional CMS. 

Licensing, maintenance, and upgrade costs often shrink significantly, while scalability and performance grow more resilient.

Smart Summary: Custom enterprise WordPress development delivers tangible ROI by blending flexible themes, intelligent integrations, and enterprise-grade infrastructure at a fraction of the long-term cost of legacy CMS platforms.

The ROI Assessment Framework: 8 Measurable Impact Categories

Enterprises do not invest in technology for the sake of trends. They invest for measurable returns. That is why you should evaluate WordPress enterprise development through concrete ROI metrics, not vague promises. 

Below are eight impact categories that prove why WordPress is more than just a CMS.

1. Development Velocity and Time-to-Market

Reusable component libraries accelerate new website launches

Enterprises can launch microsites in days, not weeks

➡️ROI Driver: Faster campaign execution leads to speedier revenue capture

2. Content Operations Efficiency

  • Automated approval workflows streamline compliance
  • Multi-channel publishing mitigates bottlenecks

➡️ROI Driver: Lower content costs and increased team productivity

3. Integration and Data Consolidation

  • Real-time sync with ERP, CRM, and CDP systems
  • Eliminates costly manual data entry

➡️ROI Driver: Fewer errors and more reliable decision-making

4. Hosting and Infrastructure Optimization

  • Kubernetes-based scaling adapts to traffic spikes
  • Pay-as-you-go infrastructure cuts excess hosting costs

➡️ROI Driver: Peak performance boosts conversion rates

5. Security and Compliance Risk Mitigation

  • Custom security hardening aligned with SOC 2, ISO, and GDPR
  • Prevents data breaches and regulatory penalties

➡️ROI Driver: reduced risk costs and stronger brand trust

6. Maintenance and Technical Debt Reduction

  • Documented custom code minimizes “mystery fixes”
  • Fewer emergency patches and maintenance tickets

➡️ROI Driver: Lower support contracts and quicker resolution times

7. Multi-Brand and International Scaling

  • Multi-tenant architecture supports multiple brands or regions
  • Rapid rollout for mergers and acquisitions

➡️ROI Driver: Massive savings compared to separate CMS builds

8. Revenue Enablement and Conversion Optimization

  • Enterprise WordPress performance tuning delivers swift load times
  • Personalized customer journeys lift conversions

➡️ROI Driver: Measurable revenue increases on existing traffic

👉The Consolidated ROI Formula

Enterprises can project both 3-year and 5-year returns by combining these categories. The weighted formula includes direct cost savings, risk prevention, and incremental revenue from improved performance.

Must-Know Insight: WordPress enterprise ROI comes from measurable savings in development, operations, and infrastructure, while simultaneously unlocking revenue through personalization, speed, and scalability across brands and regions.

Phased Implementation Roadmap With Quick Wins And Risk Controls

Large-scale enterprise projects often collapse under the weight of complexity. WordPress enterprise development avoids this pitfall by working in phases, each delivering value while lowering risks. Instead of betting everything on a 12-month overhaul, enterprises experience ROI from the very initial steps.

To understand how this unfolds in practice, let’s discuss the three key phases every enterprise should follow.

Phase 1: Foundation (Months 1–3)

  • Security hardening and hosting enhancements ensure compliance and safeguard sensitive data.
  • Performance baseline optimization delivers immediate speed boosts, enriching user experience.
  • Discovery and architecture planning set the stage for scalable growth.

➡️Quick Win: Measurable site speed improvement, reduced vulnerability exposure.

Phase 2: Core Build (Months 4–8)

Once the foundation is in place, the subsequent stage focuses on building pivotal custom components that power enterprise-grade performance.

  • Custom enterprise WordPress themes and taxonomies align digital properties with brand and global needs.
  • Plugin development and integrations connect ERP, CRM, and CDP systems for seamless workflows.
  • Content migration and team training eliminate bottlenecks in operations.

➡️ROI Driver: Significant returns visible by the end of this stage, including operational cost savings.

Phase 3: Advanced Optimization (Months 9–12)

With the essentials in place, enterprises can now shift toward innovation and predictive capabilities.

  • AI-driven personalization tailors customer journeys for higher conversions.
  • Predictive automation and analytics inform better business decisions.
  • Continuous optimization protocols ensure scaling without disruptions.

➡️ROI Driver: Long-term compounding gains through personalization and predictive tools.

👉Reality Checks Along The Way

  • No roadmap is complete without safeguards. Each phase must include careful evaluation of scope and resources.
  • DIY may work for early steps, but enterprise scale requires experienced partners.

Risk control involves avoiding tool overload, designing with scalability in mind, and ensuring compliance checks at every stage.

In a Nutshell: Breaking enterprise WordPress implementation into phases makes ROI attainable at every step, from quick speed wins to AI-powered personalization, while minimizing risks and controlling complexity. 

CTA button inviting enterprises to explore ROI-driven custom WordPress solutions.

Risk Mitigation: Addressing The “What Could Go Wrong” Factor

Every enterprise technology decision comes with a shadow question: what if this fails? Skepticism is a common sentiment regarding WordPress for enterprise. Security, scalability, and governance are usually the primary concerns. 

The truth is that these challenges are real, but they are also solvable when approached with enterprise-level planning.

Let’s walk through the most common objections and see how they are addressed.

Security and Compliance

  • Myth: “WordPress is not secure enough for enterprises.”
  • Reality: WordPress now meets SOC 2, ISO, and GDPR standards with enterprise-grade hardening, features such as WAF, SSO, two-factor authentication, and automated compliance audits.
  • Proof: Global banks and government agencies depend on enterprise WordPress without compromise.

Vendor Lock-In Prevention

  • Myth: “We’ll be stuck with one vendor or agency forever.”
  • Reality: As an open-source platform, WordPress gives total code ownership. Well-defined documentation, governance protocols, and transition planning make vendor lock-in avoidable.

Scaling Concerns

  • Myth: “WordPress cannot handle enterprise-level traffic.”
  • Reality: Multi-tenant setups, Kubernetes scaling, and CDN optimization allow WordPress to serve millions of visitors seamlessly, with sub-2-second load benchmarks.

Governance and Executive Buy-In

  • Myth: “Internal politics will block adoption.”
  • Reality: Enterprise adoption succeeds when IT, marketing, and finance align. Business case templates and ROI-driven presentations make executive buy-in easier by demonstrating both savings and growth potential.

Quick Recap: Enterprise concerns about WordPress often originate from outdated perceptions. You can neutralize governance, planning, security, scalability, and vendor risks with the ideal architecture. 

Build vs. Buy vs. Partner: The Enterprise Decision Matrix

When enterprises consider WordPress development, the actual question is not whether it works but how to approach implementation. Some organizations try to build everything in-house, others rely entirely on agencies, and many adopt a hybrid approach. 

Each path has trade-offs, and the ideal choice depends on budget, technical maturity, and business goals.

Here’s a breakdown to guide decision-makers:

ApproachWhen It Makes SenseProsConsTypical Timeline
In-House BuildRare, suited for enterprises with very large internal tech teams and unique IP requirementsComplete control, proprietary customization, complete ownershipExtremely resource-heavy, high costs, slower innovation, risk of technical debt18-24 months
Agency PartnershipMost common for enterprises that want expertise and faster time-to-marketAccess to enterprise WordPress agency expertise, proven workflows, ongoing supportPotential dependency on agency quality, variable pricing6-12 months
Hybrid ModelGrowing trend where core build is outsourced but maintenance and iterations handled internallyCombines agency expertise with in-house agility, shared ownershipRequires internal upskilling, clear governance needed8-14 months

This decision is not just technical but strategic. Enterprises must weigh control versus agility, immediate expertise versus long-term self-reliance, and budget predictability versus upfront investment.

The Bottom Line: Choosing between in-house, agency, or hybrid depends on resources and goals. For most enterprises, an experienced WordPress agency or a hybrid approach offers the fastest ROI with reduced risk. 

Clickable banner to connect with WordPress migration and customization experts for enterprise projects.

Getting Started: 30-Day Enterprise Action Plan

Knowing the potential of enterprise WordPress is one thing. Acting on it quickly is where the ROI begins. Enterprises do not need a year-long plan to see impact. In fact, the first 30 days can deliver clarity, alignment, and momentum if approached systematically.

Here is a step-by-step action plan to move from discussion to execution.

Week 1: Internal Assessment

  • Conduct a current platform audit to document performance, costs, and bottlenecks.
  • Interview key stakeholders from IT, marketing, and compliance.
  • Align pain points with business priorities to define non-negotiables.

Week 2: Vendor Research

  • Create a shortlist of potential enterprise WordPress agencies.
  • Use an RFP template tailored for enterprise WordPress development.
  • Prepare reference questions to validate vendor claims and track record.

Week 3: ROI Case Building

  • Run an enterprise WordPress ROI calculator with your actual data.
  • Draft an executive summary presentation highlighting savings and growth potential.
  • Secure preliminary budget approval based on clear financial justification.

Week 4: Partner Kickoff

  • Finalize vendor evaluation and negotiate key contract terms.
  • Set up governance protocols and success benchmarks.
  • Prepare the kickoff roadmap to begin implementation.

This structured timeline ensures enterprises start strong. Leadership will have clarity on costs, partners, and ROI potential by the end of 30 days, with the initial steps already underway.

Key Takeaway: A disciplined 30-day action plan moves enterprises from strategy to execution with audits, vendor alignment, and ROI modelling. It ensures momentum without delays.

ROI-Proof Case Studies: How Enterprises Scaled With Custom WordPress

It is one thing to talk about ROI in theory, and another to experience it proven in practice. Organizations across industries have adopted custom enterprise WordPress development and are enjoying measurable results. 

The following stories illustrate how operations, personalization, and lifetime value all transform when WordPress is treated as enterprise infrastructure.

Case Study 1: Operations Bottleneck to Automation ROI

  • Profile: A global healthcare provider managing multiple websites for different regions.
  • Challenge: Campaign rollouts were taking weeks, and content teams were stuck in repetitive manual workflows.
  • Solution: Custom plugins for workflow automation and enterprise integrations with their CRM and compliance tools.
  • Result: Publishing speed improved by nearly 60 percent, manual labor was reduced by approximately 40 hours a month, and annual savings were substantial.

Case Study 2: Personalization Breakthrough Driving Conversions

  • Profile: An electronics retailer with high traffic but weak conversion rates.
  • Challenge: Generic user journeys with no personalized recommendations.
  • Solution: AI-driven personalization engines and dynamic checkout flows.
  • Result: Conversion rate jumped from 1.3% to nearly 3.1%, average order value rose by approximately 35%, and revenue increased substantially within 12 months.

Case Study 3: Compound Effects Through Lifetime Value Growth

  • Profile: A consumer goods enterprise with $200M annual revenue but stagnant growth.
  • Challenge: High customer acquisition costs and limited repeat purchases.
  • Solution: Lifecycle automation, loyalty program integration, and predictive inventory management.
  • Result: Customer lifetime value grew by nearly 150%, retention improved significantly, and CAC dropped by around 30%, resulting in sustainable year-over-year growth.

👉WordPress vs. Other Enterprise CMS Outcomes

When compared to Drupal, Sitecore, and proprietary CMS platforms, enterprises migrating to WordPress consistently reported:

  • Lower total cost of ownership (20 to 40 percent reduction).
  • Faster time-to-market for new initiatives.
  • Stronger integration flexibility with AI, ERP, and CRM systems.

Essential Insight: Custom enterprise WordPress development delivers ROI across multiple dimensions: reduced costs, higher conversions, and long-term scalability. Real-world case studies prove it is not just theory; it is repeatable success. 

Button prompting users to get a consultation on enterprise-level WordPress development solutions.

Future-Proofing Enterprise WordPress For 2026 And Beyond

The digital landscape never stands still, and enterprises that rely on static platforms are already falling behind. WordPress for enterprise has evolved into an adaptable ecosystem, but staying competitive in 2026 and beyond requires building with tomorrow’s innovations in mind.

Let’s look at the trends shaping the next five years.

AI-Native Personalization and Predictive Analytics

Artificial intelligence is no longer a bolt-on feature. Enterprises are adopting AI-native personalization engines that learn from behavior in real-time, anticipating what customers want before they ask.

Headless WordPress Adoption

Decoupled architecture is becoming mainstream. By separating content management from the front end through APIs, enterprises gain speed, flexibility, and omnichannel delivery without compromising stability.

Blockchain and Web3 Integrations

Smart contracts, tokenized experiences, and decentralized verification are emerging in enterprise roadmaps. WordPress can integrate with blockchain solutions to enhance trust and transparency.

Sustainability and Green Hosting

Eco-conscious hosting is moving from a “nice-to-have” to a board-level requirement. Enterprises are embracing green hosting and energy-efficient infrastructure as part of their ROI and compliance strategies.

The Five-Year Roadmap

Forward-thinking enterprises are already aligning with technology roadmaps that anticipate these shifts. Investing in custom enterprise WordPress development today ensures adaptability and resilience tomorrow.

Final Thought: Future-proofing enterprise WordPress means planning for AI, headless setups, blockchain, and sustainability. Enterprises that build with these shifts in mind secure a competitive advantage well into the next decade. 

Conclusion

The enterprise CMS landscape is evolving rapidly. Organizations locked into outdated, high-cost platforms will face rising inefficiencies and a shrinking competitive edge in 2026. 

Custom enterprise WordPress development is no longer just an option; it is a strategic investment that reduces total cost of ownership, accelerates time-to-market, and delivers measurable ROI. It positions your business to thrive in a digital-first world.

In this guide, you have seen why now is the moment to act, what “custom” truly means across themes, plugins, and infrastructure, and how to measure ROI through eight impact categories. 

You also know how to phase your rollout with risk controls, address security and governance concerns, and choose between in-house, agency, and hybrid models. Most importantly, you now have a clear forward path through a 30-day action plan.

If your enterprise is ready to decrease costs, accelerate launches, and secure a future-proof digital foundation, WPeople can help. We build custom enterprise WordPress solutions engineered for ROI, scalability, and resilience.

➡️The real question is how quickly you will move before competitors turn tomorrow’s opportunities into their market share. The next move belongs to you.

FAQ

Is WordPress Really Suitable For Enterprises With Millions Of Monthly Visitors?

Yes. WordPress can handle millions of visits per month with enterprise-grade infrastructure, such as Kubernetes scaling, advanced caching layers, and CDN optimization. It will also maintain sub-2-second load times.

How Does Enterprise WordPress Compare In Total Cost Of Ownership To Platforms Like Sitecore Or Adobe Experience Manager?

WordPress typically lowers the total cost of ownership by 30 to 50 percent. Unlike proprietary platforms with costly licensing fees, enterprises spend primarily on customization, hosting, and support. It also benefits from an open-source foundation.

Can Enterprise WordPress Integrate With Legacy Systems Like ERP Or Data Warehouses?

Yes. Enterprise WordPress supports real-time API integrations with ERP, CRM, CDP, and data warehouse solutions. You can develop custom middleware to synchronize data securely across platforms without disrupting existing operations.

How Long Does It Take To See ROI From Enterprise WordPress Development?

Most enterprises begin to see measurable ROI within 6 to 12 months. Quick wins often come from improved website performance and reduced licensing costs. In contrast, long-term gains arise from personalization, automation, and scaling efficiency.

What Kind Of Support And SLAs Can Enterprises Expect With WordPress?

Enterprises can secure 24/7 support, uptime guarantees, and custom service-level agreements from specialized WordPress enterprise agencies or managed hosting providers. It ensures mission-critical stability and compliance.

What Security Measures Are Unique To Enterprise-Level WordPress?

Enterprise WordPress includes custom firewalls, penetration testing, role-based access controls, and automated compliance checks. These safeguards align with standards such as SOC 2, ISO 27001, and GDPR, making it safer than traditional enterprise CMS options.

How Does WordPress Handle Multi-Brand Or International Enterprise Needs?

WordPress supports multi-tenant architecture that enables enterprises to manage dozens of brand or regional websites from a single platform. This approach lowers costs, accelerates localization, and ensures brand consistency across markets.

Do Enterprises Risk Technical Debt With Custom WordPress Development?

No, if it is built correctly. You can prevent technical debt by adopting clean code standards, proper documentation, and CI/CD pipelines. Partnering with an experienced enterprise WordPress development agency ensures sustainable builds that remain scalable for years to come.

WordPress AI Integration Guide: From Plugins To Custom Development

Imagine opening your WordPress dashboard, eager to supercharge your website with AI, only to be met with a maze of plugins, contradictory reviews, and endless tutorials. 

One blog tempts with a free AI plugin, another insists you integrate the OpenAI API, while agencies whisper about $10,000 custom builds. 

Sounds confusing? Absolutely. Costly if you choose wrong? Without a doubt.

Here’s the dilemma: AI promises to revolutionize WordPress with intelligent search, automated SEO, instant content creation, and chatbots that never sleep. 

Yet most users stumble because they treat AI integration as a quick add-on, not a strategic decision. The result? Failed projects, wasted budgets, and frustrated business owners left wondering if WordPress and AI are even worth the effort.

But here’s the truth: You don’t need to drown in technical jargon or gamble with shiny plugins that overpromise and underdeliver. 

The actual essence lies in understanding which path best suits your precise needs: a lightweight WordPress AI plugin, an API integration with models like ChatGPT or Claude, or a fully custom AI solution built for scale.

By the end of this guide, you’ll have a clear roadmap: the decision framework, the best AI plugins for WordPress in 2025, hidden costs nobody tells you about, and the step-by-step actions to implement AI confidently. 

Consider this as your compass in the noisy world of AI promises.

So, let’s get started!

Why Most WordPress AI Projects Fail In The First 30 Days

Let’s face it. The majority of WordPress AI projects don’t collapse because AI itself is flawed. They fail because users approach it with visionless optimism, rushing into shiny tools without understanding the hidden traps. 

In fact, most WordPress AI failures occur in the very first month, often before the website even goes live with AI-powered features. The following mistakes highlight exactly where things start to fall apart.

Mistake 1: Luring into the Shiny Plugin Trap

The captivation of “one-click AI” plugins is strong. However, here’s the catch: many of these plugins fix a single problem while ignoring the practical use case. 

I’ve seen e-commerce websites install a chatbot plugin, only to realize it couldn’t pull product data from WooCommerce. The result? A chatbot that smiled but stayed clueless, costing $300 in licenses and far more in lost customer trust.

Mistake 2: Underestimating API Costs

At first glance, AI APIs like OpenAI look reasonable. Two cents per request feels harmless until you’re processing 10,000 queries a month. Suddenly, that “affordable” setup balloons to $500 or more. And worst: websites crash when rate limits hit during peak hours. 

I once consulted on a WordPress blog where the chatbot broke down at 2 AM because the API quota maxed out, leaving late-night users stranded.

Mistake 3: Rushing Into Custom Development

There’s nothing wrong with custom AI development in WordPress, but it is not the starting line. Too many companies dive into $10,000 projects before testing if a $59 plugin or a simple API call could do the job. 

On the contrary, others start with free plugins, only to outgrow them in weeks and rebuild everything from scratch. Both extremes waste time and money.

Your AI Readiness Checklist

Before you even think about installing a plugin or hiring a developer, take a deep breath, pause, and answer these:

  • Do you know the exact task you want AI to perform?
  • Have you estimated monthly API requests based on traffic?
  • Does your AI need to access WordPress databases directly?
  • Is real-time processing critical, or can tasks be queued up?
  • What is your technical comfort level on a scale of 1 to 10?

If you can’t answer these confidently, you’re not ready to pick a solution yet. You need expert guidance to show you the correct path.

Must-Know Insight: Most WordPress AI projects collapse in the first month due to poor planning, hidden costs, or premature custom work. Success begins with clarity on goals, costs, and readiness.

WordPress AI Use Cases In 2025: What AI Can Actually Do For Your Site

The promise of AI in WordPress is no longer science fiction. In 2025, website owners are no longer asking “can AI help?” but rather “how far can it go?”. From content workflows to customer experiences, AI has transitioned from gimmick to backbone technology. 

Here are the most compelling and practical ways illustrating how AI is shaping WordPress today.

Content Generation and SEO Automation

AI content generators for WordPress can now draft posts, polish grammar, suggest SEO-friendly titles, and create structured outlines in seconds. 

Tools such as AI Engine or Jetpack AI Assistant integrate with Gutenberg, making blog post creation almost effortless. Marketers save hours per week, while websites benefit from keyword-rich, optimized content that actually ranks.

Chatbots and Support Automation

AI-powered chatbots are becoming the new front desk of WordPress websites. Plugins like Tidio AI Chatbot let you automate customer FAQs, WooCommerce order tracking, or even lead capture. 

Users get instant answers instead of relying on slow email replies, and support teams see ticket loads drop off by 30 to 40 percent.

AI-Powered Search and Recommendations

Gone are the days of WordPress search returning irrelevant results. With AI-powered search plugins, you can implement semantic search that understands intent, not just keywords. 

Imagine a user typing “affordable summer laptop” and instantly finding mid-range models on sale. Recommendation engines also drive upsells by analyzing user behavior and suggesting relevant products.

Image and Media Generation

WordPress AI image generator plugins, such as DALL·E WP, make it effortless for creators to design unique visuals without Photoshop. Bloggers can generate featured images, e-commerce owners can create product mockups, and designers can polish visuals with AI image enhancement. 

The result is: minimal dependency on stock libraries and faster creative turnaround.

Emerging Trends: Personalization, Predictive Analytics, and Workflow Automation

The future of AI in WordPress is even more exciting. Personalized homepages tailored to each visitor, predictive analytics that forecast sales trends, and automated workflows that handle repetitive admin tasks are becoming mainstream. 

You will experience WordPress not only processing commands swiftly in 2026 but also more thoughtfully and intelligently.

The Crux: From AI chatbots that reduce support costs to SEO tools that supercharge content, WordPress AI in 2025 focuses on personalization, automation, and tech-focused website experiences that boost growth.

The WordPress AI Decision Framework (Plugins vs API vs Custom)

Deciding how to bring AI into WordPress is not just about picking the “best plugin.” It is about understanding your actual needs, scale, and budget. Most projects backfire not because AI was a bad fit, but because they selected the wrong path at the start. 

The following framework will help you decide in minutes which track best suits your situation.

Path 1: Pre-Built AI Plugins (Best for 80% of Users)

This path works when your AI needs are standard and time-sensitive. It is ideal for generating blog content, optimizing SEO, customer support chatbots, and even AI image creation. 

➡️Plugins are your best starting point if you want results this week, and your budget is between $0 and $200 per month.

  • Best For: Bloggers, small business owners, e-commerce stores
  • Setup Time: 1 to 4 hours
  • Skill Level: Basic WordPress admin
  • Real Use Case: A fitness blogger installs Jetpack AI Assistant to draft posts twice as fast, with built-in SEO improvements.

Path 2: Plugin Plus API Integration (Best for 15% of Users)

Select this if plugins cover only half of your needs and you want custom behavior, advanced prompts, or specific models, such as GPT-4 or Claude. You will gain more control by adding a direct WordPress OpenAI integration via REST API. 

➡️ Budget typically ranges from $200 to $800 per month, depending on API usage.

  • Best For: Medium-sized stores, content-heavy businesses, technical users
  • Setup Time: 3 to 14 days
  • Skill Level: Requires some coding and API knowledge
  • Real Use Case: An e-commerce store integrates OpenAI with WooCommerce to generate product descriptions dynamically while syncing with inventory data.

Path 3: Custom AI Development (Best for 5% of Users)

This path is perfect for businesses whose AI needs cannot be resolved with off-the-shelf plugins. It involves building proprietary AI solutions tailored to your WordPress website. 

➡️Investment starts at $5,000 and can exceed $50,000. However, the tradeoff is total control and enterprise-level scalability.

  • Best For: SaaS platforms, membership sites, large enterprises
  • Setup Time: 4 to 12 weeks
  • Skill Level: Requires hiring WordPress AI developers
  • Real Use Case: A membership platform builds a custom AI recommendation engine that matches users with resources based on over 50 behavioral signals.

Decision Matrix Table

SituationRecommended PathWhy It Works
Blogger wants faster content creationPluginStandard AI content use case with minimal setup
SMB needs AI to analyze user behaviorPlugin + APIRequires access to custom data beyond plugin limits
Enterprise wants AI as a core productCustom DevNeeds proprietary features and scalability
Shop owner curious to test AI safelyFree PluginLow-risk, fast experiment with no upfront investment

Core Insight: WordPress AI integration is not one-size-fits-all. Plugins serve most, APIs bridge the middle ground, and custom development powers enterprise. Choosing correctly from the beginning prevents wasted money and months of setbacks.

Best AI Plugins For WordPress In 2025 (Comparison & Red Flags)

The WordPress AI plugin marketplace has experienced exponential growth. A quick search pulls up hundreds of results, each promising to “revolutionize” your website. The truth? Most plugins overlap in features; some are glorified wrappers for the OpenAI API, and a few can hinder your site’s performance or cause compatibility issues. 

Below are the best AI plugins in 2025, along with the traps to watch for.

1. AI Engine (By Jordy Meow)

  • Best For: All-purpose AI toolkit
  • Key Features: ChatGPT integration, AI content generator, embeddings, and custom assistants
  • Pricing: Free | Pro from $49/year
  • Red Flags: Can overwhelm beginners with too many settings, heavy API usage if prompts are not optimized

2. Jetpack AI Assistant

  • Best For: Bloggers and content creators using Gutenberg
  • Key Features: Inline AI writing in the block editor, SEO-friendly content suggestions, and translation
  • Pricing: Included in Jetpack plans (from $8.25/month)
  • Red Flags: Locked into the Jetpack ecosystem, limited flexibility for custom workflows

3. Tidio with AI

  • Best For: WooCommerce stores requiring AI chatbots
  • Key Features: Automated support responses, customer intent detection, and integration with CRMs
  • Pricing: Free plan with limits | Pro from $29/month
  • Red Flags: Conversations may feel robotic without training data, higher tiers required for advanced logic

4. Rank Math Content AI

Best For: SEO optimization powered by AI

Key Features: Keyword suggestions, AI-driven meta descriptions, and content grading

Pricing: Free | Pro from $59/year

Red Flags: Focuses narrowly on SEO, not content creation, may not justify cost for casual bloggers

5. DALL·E WP / Image Generator Plugins

  • Best For: Websites relying on visuals, media, or e-commerce stores with creative assets
  • Key Features: Generate custom images from text prompts, in-dashboard editing
  • Pricing: Free with credits | Paid credits vary ($15-$100/month)
  • Red Flags: High API cost if traffic spikes, copyright concerns if prompts are vague

A Visual Glance At The Quick Comparison Table

PluginBest ForKey FeaturesPricingRed Flags
AI EngineGeneral AI toolkitChatGPT, embeddings, assistantsFree / $49+ yearlyComplex setup, API overuse risk
Jetpack AI AssistantBloggers, content writersInline writing, translations, SEO tipsFrom $8.25 monthlyLocked in the Jetpack ecosystem
Tidio with AIWooCommerce support chatsAI chatbot, CRM integrationFree / $29+ monthlyRobotic replies, advanced tier costs
Rank Math Content AISEO-focused optimizationKeyword suggestions, meta generationFree / $59 yearlyLimited to SEO tasks
DALL·E WPVisual-heavy sitesAI image generationFree / paid creditsExpensive at scale, copyright risks

Red Flags Checklist Before Installing Any Plugin

❌ Plugin is just a thin wrapper around OpenAI with no actual customization

❌ No caching or rate limiting (your API bill will skyrocket)

❌ No recent updates or weak support community

❌ Poor compatibility with popular page builders such as Elementor or Divi

❌ No clear documentation for setup and troubleshooting

Knowledge Drop: The best WordPress AI plugin for you depends on your primary goal. Content creators thrive with Jetpack AI, stores benefit from Tidio, and all-rounders lean on AI Engine. Remember: red flags ignored today can cost you thousands tomorrow. 

Free vs. Paid AI Plugins: What Makes Sense for You?

Free always sounds sweet. However, when it comes to AI in WordPress, the wrong choice can become very expensive. It results in lost conversions, wasted time, or limitations that block your growth. 

The question isn’t “Should I pay?” It’s “At what point does paying bring returns that free plugins simply cannot match?”

When Free Plugins Are Enough

  • Small Blogs or Start-up Websites: If you only need basic content generation or minimal SEO help, free plugins such as AI Engine (free version) or Rank Math Content AI basic plan cover the essentials.
  • Testing Waters: Free plugins are perfect for experimenting with AI without risking your budget. Use them to validate if AI actually supports your workflow.
  • Limited Traffic: If your website has fewer than 10K monthly visitors, free plugins rarely hit usage ceilings.

When Paid Plugins Deliver Real ROI

  • Scaling Websites: E-commerce stores, growing blogs, or agencies need sophisticated features such as bulk generation, detailed analytics, and priority support. It is where $49-$99/year can pay for itself in weeks.
  • Feature Unlocks: Paid tiers often include custom prompts, API fine-tuning, caching controls, and integrations that make AI actually usable at scale.

➡️ Case Example: A WooCommerce store running on Tidio’s free plan missed handling 40% of queries. Upgrading to a monthly paid plan improved chatbot accuracy, reduced support tickets by 30% and saved nearly $500/month in labor costs.

Smart Summary: Free plugins are training wheels. However, if your business depends on AI-driven workflows, paid plugins are investments, not expenses. For every paid plugin, there’s a potential $5,000 in labor saved or revenue gained when used strategically. 

best WordPress AI integration services

The Plugin Path: How To Install & Configure Correctly (Step-by-Step)

Choosing the ideal plugin is only half the battle. The actual magic happens when you configure it strategically, test it thoroughly, and avoid the rookie mistakes that cost businesses time and money. 

Let’s walk through the setup using AI Engine as an example.

Step 1: Pre-Installation Checklist

Before you install anything, make sure:

  • Completely back up your website.
  • WordPress and all plugins/themes are updated.
  • You have your AI API key ready (OpenAI, Claude, or your choice of provider).
  • You’ve documented your specific use case (content, chatbot, and SEO).

Step 2: Install & Activate

  • Go to WordPress Dashboard → Plugins → Add New.
  • Search for the AI Engine or upload the zip file.
  • Click Install → Activate.
  • Enter your license or API key in the settings panel.

Step 3: Core Configuration

  • API Key Setup: Add your key under Settings → AI Engine. Store it as a constant in wp-config.php for resilient security.
  • Rate Limits: Define the number of requests users can trigger per hour. For example, limit a chatbot to 10 queries per session.
  • Caching: Enable caching for repeated queries. It will lower API costs and speed up responses.
  • Prompts: Predefine branded prompts for consistency (e.g., tone of voice, formatting).

Step 4: Optimize for Performance

  • Compatibility Check: Test the plugin first on a staging website. Ensure it works with your page builder (Elementor, Divi, Gutenberg).
  • Speed Testing: Use Query Monitor to check added queries. Response time should not exceed +300ms.
  • Conflict Resolution: Disable caching temporarily and check console logs for conflicts with security or SEO plugins.

Step 5: Testing Checklist

Conduct this quick test before going live:

  • Generate content with a branded prompt.
  • Test chatbot flow on desktop and mobile.
  • Verify AI outputs for accuracy and tone.
  • Review API usage after 24 hours to pinpoint cost spikes.
  • Simulate errors by disconnecting the API key to test fallback behavior.

In a Nutshell: Installing a WordPress AI plugin takes minutes. However, configuring it with caching, limits, and branded prompts is what separates “just another plugin” from a powerful, cost-efficient AI assistant operating smoothly behind your website.

The API Integration Path: When Plugins Aren’t Enough

At some point, your needs will grow beyond what even the best plugins can deliver. Maybe you want AI to analyze customer data, generate personalized recommendations, or run predictive workflows across thousands of records. 

That is when plugin limits appear, and direct API integration becomes a practical route.

When To Outgrow Plugins

You know it is time to upgrade when:

  • Plugins cannot access custom post types or database fields.
  • You need multiple AI models working together.
  • Rate limits on plugins throttle your scale.
  • You want precise prompt control beyond plugin presets.
  • Responses must be formatted for integration with CRMs, ERPs, or WooCommerce.

Safe API Integration Pattern

The worst mistake is calling AI APIs directly from the frontend. It exposes keys, creates vulnerabilities, and leaves you unsighted to usage logs. Instead, use a middleware approach:

Recommended Flow:

WordPress Backend → Your Custom REST Endpoint → AI API

(Logging, Caching, Rate Limits)

It creates a secure buffer, so your keys remain private and you obtain total control over usage.

Security Setup Essentials

Never skip these safeguards:

API Key Storage

Store keys in wp-config.php. Rotate them every 90 days. Never hardcode into themes or plugins.

Request Validation

Require nonces and capability checks. Sanitize all inputs to prevent prompt injection attacks.

Rate Limiting

Define per-user or per-IP caps. Block excessive requests and set monitoring alerts.

➡️  Real-world story: One website skipped rate limiting, was hit with approximately 20,000 spam calls in one night, and ended up with a nearly $3,000 API bill.

Cost Control Strategies

API costs can skyrocket quickly. You can keep them in line with these tactics:

  • Tiered Responses: For the first 100 queries, use GPT-4, then fall back to GPT-3.5 Turbo for non-critical calls.
  • Aggressive Caching: Cache FAQs or repeated prompts for up to 30 days.
  • Fallback Systems: If the API is down, serve cached responses instead of showing errors.

Cost Breakdown of API Integration

CategoryRangeWhat It Covers
Setup Costs$1,100 – $3,800Developer setup, testing, error handling, refinement
Monthly Costs$220 – $950API calls, monitoring tools, server resources, maintenance
Break-even Point~6 monthsReplaces 3+ premium plugins costing ~$300/month

Quick Recap: API integration transforms WordPress into a powerful AI-enabled platform only if done with secure endpoints, strict rate limits, and cost controls. Without these, what feels like freedom quickly becomes a money pit and a security nightmare. 

hire developer for WordPress AI plugin setup

The Custom Development Path: When You Need Proprietary AI Features

There comes a point where no plugin or API add-on is sufficient. If AI becomes the core of your WordPress website, you step into the custom development zone. Though this path is difficult, it’s the only one that works for businesses where AI determines their success or scale. 

When Custom AI Development Makes Sense

  • Your AI feature is the product (think AI-driven learning platforms or SaaS add-ons).
  • You have thousands of users whose interactions require personalization at scale.
  • You need airtight control of sensitive data that cannot leave your infrastructure.
  • Plugins and APIs have been tested but proved insufficient.

Examples Worth The Investment

  • AI Member Matcher: A membership website built a custom engine to match users based on over 50 attributes. Cost is $25,000. ROI hit nearly 300% in the initial year.
  • Content Intelligence Dashboard: Publishers invested $15,000 to build a custom AI that analyzed existing blogs and suggested new topics. The result is 20 hours saved weekly.
  • WooCommerce Configurator: A store created a $40,000 AI-powered 3D product configurator that checked live inventory. Conversion rates jumped to around 45%.

The Roadmap To Custom AI

  • Validation (Weeks 1–2): Define exact requirements, build wireframes, estimate API load, and gather developer quotes.
  • MVP Development (Weeks 3–8): Launch a lean version with essential AI functions.
  • Refinement (Weeks 9–12): Add polish, optimize performance, and fortify security.
  • Launch & Monitor (Week 13+): Roll out gradually, track errors, train users, iterate based on feedback. 

Custom AI Development Cost Breakdown

Project ScaleTypical FeaturesInvestment RangeTimelineWho It Fits
Small ProjectCustom chatbot with proprietary data, AI-powered search, automated content tagging$5,000 – $15,0004 – 8 weeksNiche sites, B2B portals, startups testing AI
Medium ProjectAI recommendation engine, content intelligence dashboards, multi-model orchestration$15,000 – $40,0008 – 16 weeksGrowing e-commerce, media publishers, and SaaS apps
Large ProjectAI SaaS built on WordPress, enterprise-level ML models, deep workflow automation$40,000+4 – 6+ monthsEnterprises, large platforms, high-volume sites

Knowledge Drop: Custom AI development in WordPress is not about bells and whistles but about creating features that define your business. The investment is steep. However, the long-term payoff can be transformational when plugins and APIs cannot keep up. 

Cost Breakdown & Hidden Costs Nobody Talks About

When WordPress users budget for AI, they often focus on setup or plugin license fees, forgetting the “underlying costs” that appear in 2, 6, or 12 months. The reality is that plugins, APIs, and custom development each carry different financial commitments over time. 

Here’s a side-by-side breakdown to make the picture crystal clear:

ApproachSetup CostsMonthly Operating CostsYear 1 TotalYear 3 TotalWho It Fits Best
Plugins$0 – $300$0 – $200$0 – $2,700$0 – $8,100Bloggers, small stores
API Integration$1,500 – $4,000$300 – $800$5,100 – $13,600$15,000 – $40,000SMBs, mid-scale sites
Custom Development$10,000 – $50,000$500 – $2,000$16,000 – $74,000$50,000 – $200,000+Enterprises, SaaS

The Hidden Costs Nobody Mentions

  • API Price Hikes: Providers like OpenAI have raised their rates in the past few years. Plan budgeting for at least a 20% increase yearly.
  • Scaling Bills: Traffic growth means more calls and higher API costs. A website doubling traffic could see bills triple.
  • Forced Migrations: Models get deprecated. Migrating from GPT-3 to GPT-4, or a similar version, can cost between $500 and $2,000.
  • Maintenance & Monitoring: Plugins and integrations break after updates. Ongoing monitoring adds $50 to $200 per month.
  • Downtime Risk: No fallback system? API outages can affect conversions until they are fixed.

Essential Insight: What seems like the cheapest option at the start can become the most expensive over three years if you ignore scaling, maintenance, and hidden costs. Hence, always project your costs on a three-year horizon, not just month one. 

WordPress AI plugin development company

Troubleshooting Common AI Integration Issues

Even with the best planning, AI integrations in WordPress can break, misfire, or cause errors when traffic spikes or when plugins clash. Instead of panicking, the key is to be familiar with the most common issues, why they occur, and how to resolve them before they burn through your budget or frustrate your users. 

Let’s walk through the most frequent challenges and the solutions that keep your AI running smoothly.

Plugin and Theme Conflicts

  • The Problem: Installing a new AI plugin suddenly breaks layouts or turns off widgets.
  • The Fix: Test in staging before going live, disabling caching temporarily, and inspect the browser console for JavaScript errors. If conflicts persist, switch to a default theme to isolate the culprit.

💡Pro Tip: Use the Health Check & Troubleshooting plugin to safely identify conflicts without breaking your live website.

API Errors and Downtime

  • The Problem: “Service unavailable” or timeout messages during chatbot or content generation.
  • The Fix: Set up caching for general queries, configure fallback messages, and monitor provider status pages. Always have a backup model (e.g., GPT-3.5 if GPT-4 is down).

💡Pro Tip: Tools such as UptimeRobot or Better Uptime can alert you instantly when your AI endpoints fail.

Unexpected Costs from API Spikes

  • The Problem: Bills are 5x higher than expected due to bot attacks or runaway loops.
  • The Fix: Apply strict rate limits, cap daily/monthly quotas, and create API usage alerts. Use middleware to log and block suspicious traffic.

💡Pro Tip: Enable Cloudflare rate limiting or use WP Rate Limiter to prevent spammy or abusive requests.

Security Risks and Injection Attacks

  • The Problem: Malicious users try prompt injection to manipulate AI outputs or exfiltrate data.
  • The Fix: Sanitize inputs, restrict model capabilities, and rotate API keys every 90 days. Never expose keys on the client side.

💡Pro Tip: Store API keys in wp-config.php or secure them with WordPress Secrets Manager instead of hardcoding.

Poor AI Output or Irrelevant Results

  • The Problem: Chatbot answers irrelevant questions, or the generated content is off-brand.
  • The Fix: Refine prompts, feed brand guidelines, and regularly review logs. Use embeddings for more context-aware outputs.

💡Pro Tip: Tools like LangChain or Vector Databases (Pinecone, Weaviate) enhance context relevance in AI responses.

Emergency Troubleshooting Checklist

  • Clear plugin and server caches
  • Rebuild API integration logs
  • Rotate keys and verify endpoints
  • Disable conflicting plugins
  • Review server error logs
  • Test features in incognito mode

The Bottom Line: AI in WordPress is potent. However, without guardrails, it can spiral into broken features, costly API bills, or even security holes. A proactive troubleshooting framework ensures your website is resilient, rapid, and trustworthy. 

Plugin vs. API vs. Custom: Final Decision Matrix

Selecting the most suitable path for WordPress AI integration often feels like standing at a crossroads. Each option has trade-offs in cost, scalability, speed, and long-term flexibility. 

Here is a matrix that simplifies the choice based on business size and technical needs. 

Use Case / ScenarioPluginsAPI IntegrationCustom Development
Cost (Year 1)$0-$600$5,100-$13,600$16,000-$74,000
Time to Market1-4 hours1-2 weeks2-6+ months
Technical Skill NeededBasic WP adminIntermediate (coding, REST APIs)Advanced dev team or agency
ScalabilityLow to MediumMedium to HighEnterprise-level
Best ForBloggers, small sites, quick winsSMBs needing custom data handlingEnterprises, SaaS products, proprietary needs
RisksLimited features, plugin conflictsHigher API costs, security misconfigurationsHigh upfront cost, maintenance burden
Future FlexibilityEasy to switch or upgradeCan extend gradually with APIsLong-term control but vendor lock-in risk

Key Considerations

  • Cost: Plugins are pocket-friendly upfront, APIs add recurring usage costs, and custom development requires significant initial investment.
  • Scalability: Plugins may struggle with growth, APIs scale with costs, while custom development scales best when planned thoughtfully.
  • Complexity: Plugins are simple, APIs demand technical setup, and custom requires professional development teams.
  • Timeline: Plugins go live in hours, APIs require days to weeks, and custom projects take months to a year.

What This Means For You: Your choice is less about “what’s best” and more about “what fits right now.” Start small with plugins, upgrade to APIs when data demands it, and move to custom only when AI becomes your business backbone. 

WPeople’s Expertise In WordPress AI Integration

Integrating AI into WordPress is not just about installing a plugin or calling an API; it is about aligning technology with business goals, ensuring long-term stability, and preparing for scale. That is where WPeople steps in as a trusted partner.

At WPeople, we have helped businesses of every size, from bloggers to enterprises, make shrewd AI decisions that avoid wasted money and time. Instead of falling into the “trial and error” trap, our team works with you to design an AI path that fits your current needs while preparing you for future growth.

How WPeople Helps

  • Plugin Setup & Optimization: Installing, configuring, and testing top AI plugins to deliver quick wins.
  • API Integrations: Secure connections between WordPress and AI APIs, with caching, cost control, and security layers.
  • Custom Builds: Proprietary AI workflows and features designed for SaaS products, membership platforms, and enterprise websites.
  • Scalability Support: Preparing your AI system for traffic spikes, model changes, and ongoing maintenance.

Key Takeaway: WPeople helps you skip the confusion and wasted spending by providing AI solutions that actually align with your WordPress goals, whether through plugins, APIs, or custom builds. 

custom WordPress AI automation solutions

Future Of AI In WordPress In 2026 And Beyond

AI in WordPress is moving from a helpful add-on to a core capability. The next wave focuses on experiences that feel personal, predictive, and rapid, without adding friction to your stack. 

Explore these four shifts to see what is coming, how to prepare, and the practical steps to adopt them.

AI Personalization at Scale

  • Dynamic homepages that adapt to visitor segments in real-time
  • Content blocks that change based on past users’ behavior and intent
  • Product sort order tuned to each user’s click patterns

➡️How To Prepare: Centralize behavioral data, tag content by theme and outcome, and test segment rules on staging before rollout.

Predictive Analytics for Growth

  • Forecasted traffic and revenue based on seasonality and campaigns
  • Churn and cart abandonment risk signals with win-back prompts
  • Editorial and product gap analysis for the subsequent best action

➡️How To Prepare: Ship a lightweight data layer, define KPIs you can act on, and schedule monthly model reviews to avoid drift.

Voice and Visual AI Assistants

  • Voice search responds to requests based on answers from posts, docs, and FAQs
  • Visual search lets shoppers find products from a photo
  • Accessibility gains through speech-friendly navigation

➡️How To Prepare: Add structured data, compress media for fast inference, and conduct usability tests on mobile first flows.

Multisite and Headless AI Deployments

  • Shared models across a multisite network with local rules per site
  • Headless front ends that call WordPress via API and AI via middleware
  • Hybrid caching that stores both content and AI responses

➡️How To Prepare: Introduce a secure REST middleware, implement rate limits, and use a vector store for reusable context.

Final Thought: The next phase of WordPress AI is personal, predictive, and omnichannel. Begin with clean data, clear KPIs, and a secure middleware layer, then pilot one feature at a time. It will help you learn fast without risking performance or budget. 

Your 48-Hour Action Plan

You do not need months of planning to get started with WordPress AI. Here’s a simple 3-step action plan you can execute in the next two days:

Hour 1: Audit Needs

Define what you want AI to do. Is it content writing, SEO, chatbots, or personalization? Jot it down clearly.

Hours 2-4: Test a Plugin

Set up a trusted AI plugin, such as AI Engine or Jetpack AI, in a staging website. Run it against actual content or customer queries. Monitor errors, costs, and speed.

Hours 24-48: Measure and Decide

Review the results. If it works and scales affordably, roll it out. If not, move it to an API integration or custom approach. Utilize metrics such as time saved, conversion rate changes, or support queries diverted.

➡️  Small steps now prevent costly mistakes later.

Conclusion

AI in WordPress has the power to turn your website from average to exceptional. It is quickly becoming the backbone for sites that want to stay competitive in 2026 and beyond. 

Poor integration choices can drain budgets, slow performance, and frustrate users, while thoughtful decisions cut costs, increase efficiency, and boost conversions.

Plugins offer speed and simplicity, APIs bring flexibility and control, and custom development unlocks possibilities that no off-the-shelf tool can match. The key is knowing which path best suits your business today and which one will grow with you tomorrow.

As you plan your AI journey, steer clear of three costly mistakes: rushing into plugins without testing, ignoring hidden costs, and underestimating custom development complexity. 

The clever approach is to begin small, validate results, and scale with confidence.

At WPeople, we have seen how the ideal AI integration transforms businesses by improving efficiency, enhancing customer experience, and delivering measurable ROI. If you need guidance, our experts are ready to walk the path with you.

Your competitors are already experimenting with AI. The actual question is: will you watch them move ahead, or start shaping your own innovative future today?

FAQ

1. How To Add AI To WordPress?

You can add AI through plugins, API integrations, or custom development. Plugins are easiest for tasks such as chatbots or content generation. APIs offer more control and deeper customization, while custom builds are ideal for enterprise needs. The most suitable path depends on your goals, budget, and technical expertise.

2. How Much Does WordPress AI Cost?

Costs vary widely. Free plugins cover basic needs, while premium plugins range from $49 to $299 annually. API integrations often cost between $200 and $800/month, depending on usage. Custom AI development can start at $5,000 and scale to $50,000 or more for enterprise projects.

3. Is WordPress AI Worth It?

Yes, when aligned with your website’s goals. AI can reduce workload by automating content, direct support queries with chatbots, and improve SEO efficiency. ROI often comes from time saved, exceptional user experience, and increased conversions. The key is beginning small and scaling strategically.

4. What Factors Decide The Best AI Plugin For My Website?

The best plugin depends on your use case, budget, site size, and technical comfort. Bloggers may need AI content assistants, while stores benefit from AI chatbots or recommendations. Check for compatibility with your theme, API costs, support quality, and whether the plugin aligns with your future growth plans.

5. Which AI Models Can Be Integrated With WordPress?

WordPress can connect with popular models, such as OpenAI’s GPT, Anthropic’s Claude, Google’s Gemini, and even fine-tuned custom models. Integrations happen via plugins or APIs. Choosing the ideal model depends on whether you need natural language content, code generation, customer support automation, or personalized recommendations.

6. How To Integrate Different AI APIs Like Claude, GPT, or Gemini With WordPress?

Integration requires creating a secure REST API endpoint in WordPress, storing API keys safely, and configuring middleware to handle requests. Some plugins simplify this process, while developers can set up direct connections effectively. Always add rate limits, caching, and fallback strategies to prevent high costs or service disruptions.

7. Can AI Slow Down My WordPress Site?

Yes, if not optimized. AI plugins can add extra queries, thereby increasing load times. API calls can also delay responses if not cached. To prevent slowdown, use performance monitoring, enable caching for repeated queries, and test plugin impact in a staging environment before going live.

8. Is AI Safe To Use On WordPress?

AI is safe if integrated responsibly. Use secure API key storage, validate inputs to prevent injection attacks, and ensure plugins are updated. Avoid exposing APIs directly to users. Consider local hosting or private AI models for protecting sensitive data. Regular monitoring reduces security risks and ensures compliance.

9. What’s The Difference Between AI Plugins And SaaS AI tools For WordPress?

AI plugins integrate directly into WordPress, providing you with control over website functions and data. SaaS AI tools are external services that connect via APIs and may process data outside your server. Plugins are convenient for beginners, while SaaS tools often offer sophisticated features but come with higher ongoing costs.

10. Can AI Work With WooCommerce Stores?

Yes, AI can enhance WooCommerce with product recommendation engines, personalized search, AI chatbots for customer support, and automated product descriptions. Advanced setups integrate AI with sales analytics to predict buying behavior. These tools improve conversions and customer experience, making WooCommerce more competitive in global markets. 

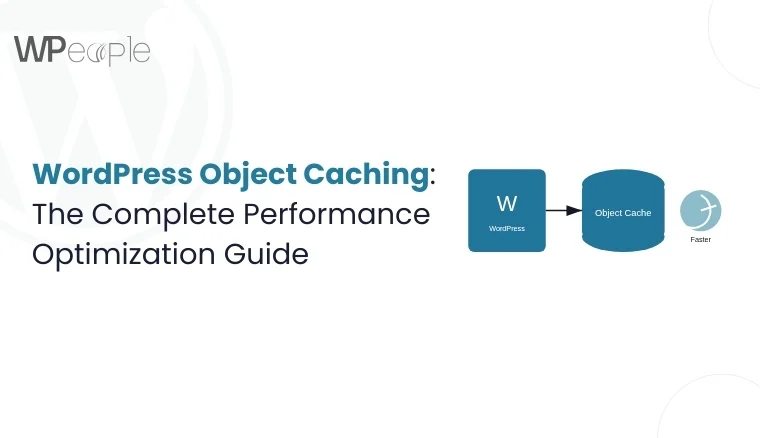
WordPress Object Caching: The Complete Performance Optimization Guide

If your WordPress website is taking 3, 5, or more seconds to load, you are shutting the door on thousands of dollars in sales. 

Sites that load within 2.4 seconds achieve nearly a 2% conversion rate. Learn how to improve LCP performance for optimal results. Every one-second delay can cut conversion rate by 7 percent, and even a two-second delay increases bounce rates by almost 100%. Research also shows that 80 percent of shoppers avoid returning to websites that suffer from poor performance.

For growing online stores and service businesses in competitive markets, this performance gap is a silent killer.

So, what makes your website sluggish while others race ahead? The answer often lies in how efficiently your site stores and retrieves information. Hidden beneath themes and plugins is a powerful mechanism many businesses overlook: WordPress object caching.

In this blog, we will explore how WordPress object caching can transform slow websites into fast, growth-friendly, and profitable digital platforms. 

This guide is built for business owners, developers, and decision-makers, revealing how object caching works, why it matters, and how to implement it strategically with proven methods, real case studies, and WPeople’s expertise.

So, let’s get started. 

What Is Object Caching In WordPress? (Beyond The Basics)

Imagine a busy restaurant scenario: Every time a customer places an order, the chef has to run to the market to fetch the ingredients. Service would be painfully slow. Instead, kitchens keep essential items prepared and ready, ensuring quick delivery and happy customers. 

WordPress works similarly. 

  • Without object caching, it queries the database repeatedly for the same information. 
  • With object caching, WordPress preserves frequently requested data in memory. 

It ensures your website can serve content quickly without constantly asking the database.

So, what does object cache do in WordPress? In layperson terms, it reduces the number of times your website must run heavy database queries by temporarily storing results in memory. It allows faster content delivery and less server strain.

There are several types of WordPress caching:

  • Page caching: Stores complete HTML pages for rapid delivery.
  • Object caching: Stores database query results for quick reuse.
  • Database caching: Focuses on speeding up queries across sessions.
  • Opcode caching: Stores precompiled PHP code to save processing time.

Compared to page caching, object caching provides speedier data access during dynamic website operations, making it crucial for e-commerce stores, membership sites, and large content platforms. 

Persistent object caching goes one step further. It retains cached data even after page reloads, offering consistent performance gains.

Main Message: WordPress object caching reduces repeated database queries, improves website speed, and ensures smoother user experiences. It makes it paramount for e-commerce stores and dynamic platforms seeking long-term growth.

Why Persistent Object Caching Matters for Business

Persistent object caching is not just a technical adjustment; it is a growth lever for modern businesses. By reducing the number of repeated database calls, it boosts performance and improves scalability. It also ensures consistent website experiences. 

Let’s discuss its significance and how it impacts your business operations.

Faster and More Growth-Friendly Sites

Persistent object caching keeps frequently requested data in memory across sessions. It means your site does not need to query the database repeatedly. The result is swifter load times, lower bounce rates, and higher capacity to manage traffic spikes.

Reduced Database Strain

Without caching, your database is forced to handle the same queries hundreds of times. Persistent caching frees up resources by minimizing repetitive requests, allowing your database to focus on critical, real-time interactions.

Proven Speed Benchmarks

Independent tests and WPeople’s client work show that websites using persistent object caching can significantly bolster site speed. Faster websites enjoy higher SEO rankings, increased engagement, and stronger trust from users.

When To Use Persistent Object Caching

This approach is highly valuable for:

  • E-commerce stores with frequent cart or checkout interactions
  • Membership websites with logged-in users
  • SaaS platforms serving large volumes of data through third-party API integration
  • Publishers with high traffic and complex queries

Essential Insight: Persistent object caching reduces database stress, boosts site speed benchmarks, and supports business scalability. It makes it crucial for e-commerce, SaaS, and publishers striving for sustainable growth.

The Real Cost Of Not Using Object Caching

Many WordPress website owners underestimate the impact of subpar performance. Slow sites are not just an inconvenience; they directly affect sales, search visibility, and customer loyalty. Without object caching, your database works arduously, your hosting bills skyrocket, and your visitors leave frustrated. 

Let’s look at the hidden costs of ignoring object caching.

Heavier Database Workloads

When object caching is not enabled, WordPress executes the same queries repeatedly. It slows down page rendering and puts constant strain on your database. It leads to higher server resource consumption and possible downtime during peak hours.

Lost Revenue Opportunities

Conversion data shows that even a one-second delay in site load can decrease sales by almost 20 percent. For online stores, it means abandoned carts, reduced checkout completions, and direct revenue loss – issues solved by checkout optimization

WPeople’s revenue impact estimation reveals just how much a business can lose annually due to delays as small as two seconds.

SEO Setbacks

Google prioritizes fast websites in its ranking algorithm. Sites that ignore object caching risk lower Core Web Vitals scores, reduce organic visibility, and decline search engine rankings. The correlation is clear: swifter websites enjoy more search traffic.

Must-Know Insight: Ignoring object caching increases server costs, hurts SEO rankings, and reduces conversions. Businesses across diverse industry verticals have proven that caching is not optional; it is necessary for growth and long-term profitability.

How Different Industries Can Benefit From Persistent Object Caching

Persistent object caching delivers measurable gains across industries. Its ability to reduce database load and accelerate content delivery translates into tangible results for businesses with diverse digital needs. 

Here is how it benefits the following three industry verticals:

  • E-commerce Brand: A store with professional WooCommerce development handling thousands of product pages and checkout requests can deliver quicker shopping experiences, lower abandoned carts, and increase completed transactions. With caching in place, conversion rates can rise by up to 20 percent and even more.
  • SaaS Platform: Applications that count on frequent data requests from logged-in users can cut server overhead dramatically. By serving cached results instead of querying the database each time, SaaS companies can significantly reduce hosting costs while delivering exceptional user experiences.
  • News Publisher: High-traffic publishers facing content-heavy pages and breaking news spikes can rely on caching to improve Core Web Vitals, secure better ad placements, and increase overall ad revenue through faster page delivery.

In a Nutshell: From e-commerce stores to SaaS platforms to publishers, persistent object caching creates quicker, leaner, and more profitable websites. E-commerce brands can substantially boost their conversion rates.

Deep Dive: How WordPress Object Caching Actually Works

Object caching might sound intimidating, but understanding how it functions is key to using it effectively. At its core, object caching in WordPress is a system that stores the results of complex operations in memory. They can be reused instantly when needed. 

Let’s break this down accessibly.

WordPress Object Cache API

WordPress includes a built-in object cache API that developers can call through functions such as wp_cache_set() and wp_cache_get(). This API lets plugins and themes store data in memory temporarily, avoiding repeated database queries.

Memory Allocation and Garbage Collection

Object caching uses server memory to hold cached objects. Garbage collection automatically removes outdated or unused data, ensuring memory is not wasted and performance remains stable.

Debunking Common Misconception

Many assume object caching replaces page caching. In reality, they complement each other. Page caching speeds up the delivery of entire pages, while object caching accelerates the building blocks of those pages. Both are essential for optimal performance.

Cache Flush Methods and Limitations

WordPress provides methods such as wp_cache_flush() to clear stored data. Though it is helpful, you should avoid frequent flushing because it resets the cache and forces the database to handle new queries from scratch.

Persistent vs. Non-Persistent Caching: A Visual Comparison

FeatureNon-Persistent CachingPersistent Caching
DefinitionStores cached data only during a single page load sessionStores cached data across multiple page loads and sessions
Data RetentionCache clears automatically once the page reloadsCache remains intact until explicitly flushed or expired
Use CaseSuitable for low-traffic or simple WordPress sitesPivotal for high-traffic, dynamic, and enterprise sites
Performance ImpactProvides small performance boosts limited to current requestsDelivers significant and consistent performance improvements
ScalabilityLimited, not ideal for handling large query volumesScales effectively for eCommerce, SaaS, and membership platforms
ReliabilityCache disappears after refresh, offering no lasting benefitData persists in memory, improving reliability and site stability
Example ScenarioA small blog loading posts during one sessionA large WooCommerce store with thousands of cart and checkout operations
  • Non-Persistent Caching: Stores data only for the duration of a single page load. Once the page reloads, the cache clears.
  • Persistent Caching: It retains data between page loads, which is vital for handling high traffic and dynamic websites.

Smart Summary: WordPress object caching stores reusable data in memory, minimizes database queries, and uplifts performance. Persistent caching ensures these benefits last across sessions, making it vital for scaling websites smoothly.

Object Caching Solutions Compared (2025 Edition)

WordPress supports multiple object caching solutions, each with its own strengths, limitations, and ideal use cases. Selecting the right one depends on your hosting environment, traffic demands, and business goals. 

Here is a breakdown of the leading options.

Redis: The Enterprise Standard

Redis is the most widely adopted solution for high-traffic WordPress websites. It stores data in memory and delivers lightning-fast responses while supporting advanced features such as clustering and persistence. Here are its pivotal insights:

  • The WordPress Redis object cache setup guide helps configure Redis using plugins or direct server integration.
  • Businesses using managed hosting can learn how to implement Redis object cache in WordPress managed hosting with provider-level support.
  • Install Redis cache. WordPress hosting walkthroughs often involve accessing the server and modifying the wp-config.php file.
  • Redis also supports robust monitoring, enabling site owners to track cache hit ratios and optimize performance.
  • Redis vs Memcached WordPress object caching reveals that Redis generally offers more flexibility, better clustering, and stronger persistence.

Memcached: The Lightweight Alternative

Memcached is known for speed and simplicity, making it suitable for websites that need blazing-fast cache delivery without advanced persistence. Here is what you should know:

  • The Memcached WordPress setup guide involves installing the extension and connecting it through the wp-config.php file.
  • Ideal for single-server environments where simplicity and speed are priorities.
  • In WordPress Memcached and Redis performance, Memcached often employs less memory overhead. However, it lacks Redis’s top-tier features.
  • Supports clustering for scale but does not retain cached data across server restarts.

APCu: Budget-Friendly Choice

APCu provides an easy caching layer within PHP, making it practical for single-server WordPress websites. Here is what you need to know:

  • Works best for smaller websites that need local caching without external dependencies.
  • APCu object caching WordPress setup is straightforward but limited.
  • The major drawback is that APCu is not ideal for multi-server environments.

Cloud-Based Solutions

For businesses already operating on cloud infrastructure, managed caching services deliver scalability without manual configuration. Here are the salient aspects you must be aware of:

  • AWS ElastiCache for WordPress integrates seamlessly with EC2 and RDS instances.
  • Google Cloud Memorystore setup allows WordPress websites to scale caching at the enterprise level.
  • Cloud providers typically include cost monitoring, making it easier to manage performance and budget.

What You Should Know: Redis dominates enterprise use cases, Memcached works well for lightweight setups, APCu serves single servers, and cloud-based solutions scale with infrastructure. Choosing the ideal caching layer depends on site traffic, resources, and long-term business requirements. 

WordPress object caching CTA graphic with text "Not Sure Which Cache Fits Your WordPress Site?" and a yellow "Find My Best Fit" button with a server icon.

Best WordPress Object Cache Plugins In 2025

Plugins make object caching accessible to website owners who may not want to configure caching manually. The WordPress ecosystem offers reliable drop-in solutions and plugin-based options that fit diverse business needs. 

Here is a visual breakdown of the leading plugins comparison. 

PluginBest ForKey FeaturesProsCons
Redis Object Cache (Drop-In)High-traffic and enterprise sitesPersistent caching, clustering support, server-level integrationFast, trustworthy, scales easily, widely supportedRequires server configuration and technical knowledge
W3 Total CacheComplex WordPress websites needing all-in-one optimizationObject caching, page caching, database caching, CDN integrationFeature-rich, flexible, widely usedSetup can overwhelm beginners; advanced tuning is required
LiteSpeed CacheSites hosted on LiteSpeed serversFull-page and object caching, image optimization, CDN supportExtremely quick on LiteSpeed, strong plugin ecosystemLimited to LiteSpeed hosting environments
APCu ManagerSmall to medium single-server websitesIn-PHP caching, low overheadLightweight, budget-friendly, user-friendly setupNot persistent across servers, unsuitable for enterprise or clusters

Quick Recap: The best WordPress object cache plugins in 2025 include Redis Object Cache for enterprise use, W3 Total Cache for all-in-one optimization, LiteSpeed Cache for specialized hosting, and APCu for simple setups. 

If you find this helpful, we have something of similar interest for you. Do checkout our another blog on Top Selling and Trending WordPress Plugins in 2025.

Step-by-Step Implementation For WordPress Object Caching

A successful object caching setup begins with preparation, followed by correct configuration, and finally testing to validate results. This section walks you through the process with practical steps that anyone can follow.

Step 1: Pre-Implementation Audit

Before enabling object caching, perform a readiness check to ensure your hosting environment and WordPress setup can support it. For that, 

  • Use WPeople’s Object Cache Readiness Checker to confirm compatibility.
  • Review server requirements, including PHP version, database support, and memory availability.
  • Create a backup of your WordPress website to protect against unexpected issues.
  • Define a rollback strategy in case plugin conflicts or hosting restrictions appear.

Step 2: Redis Implementation Walkthrough

Redis is a prominent option for persistent object caching in WordPress.

  • Install Redis on your hosting environment. Most managed hosts provide direct instructions or pre-built Redis support.
  • Update the wp-config.php file with Redis connection details to enable integration.
  • Activate a Redis object cache plugin such as the official Redis Object Cache or W3 Total Cache.
  • Apply plugin configurations to optimize performance and security. It ensures only trusted users can access Redis.
  • Use code snippets such as wp_cache_set() and wp_cache_get() to confirm caching is working in your environment.

Step 3: Testing and Validation

  • Once Redis or another cache solution is enabled, verify the results by:
  • Running performance improvement benchmarks using tools such as GTmetrix, WebPageTest, or Lighthouse.
  • Monitoring cache hit ratio in Redis to confirm that queries are being served from memory rather than the database.
  • Setting up monitoring alerts to catch cache failures early.
  • Troubleshooting common concerns, such as cache not persisting across reloads or plugin conflicts.

The Bottom Line: Proper implementation involves auditing your environment, configuring Redis or another caching solution, and validating results through testing. With these steps, WordPress object caching becomes reliable, future-ready, and performance-driven. 

WordPress object caching CTA graphic with headline "Not A Developer? Not A Problem." and a button that says "Do It For Me ➡️".

Advanced WordPress Object Caching Strategies

Basic caching can dramatically improve performance. However, modern strategies open the door to next-level speed, stability, and scalability. Mastering these methods is paramount for websites with complex architectures, millions of users, or high-value transactions. 

Here are some proven techniques that take caching to the next level.

Cache Warming WordPress Strategies

Cache warming involves preloading important pages or objects into memory before users request them, similar to WordPress cron job automation for scheduled tasks. It eliminates the “cold start” effect, where visitors hit uncached data. 

Preloading product pages, category pages, and checkout flows ensures more rapid delivery during peak hours.

Selective Cache Invalidation

Instead of flushing the entire cache, selective invalidation clears only the outdated parts of the website. For example, updating a product price should refresh only the product page cache, leaving the rest of the website untouched and lightweight.

Multi-Tier Caching Architecture

High-traffic websites often combine object caching with page, database, and CDN caching. This layered approach creates multiple checkpoints for performance. It reduces strain on servers and improves response times globally.

CDN Integration Strategies

Integrating a content delivery network with object caching extends performance benefits across geographic regions. Cached data is served from the nearest edge server. It minimizes latency for international audiences and delivers a consistent user experience.

Custom Object Caching for Complex Plugins like ACF

Plugins such as WooCommerce and LearnDash generate dynamic queries that can create latency on websites. 

Custom plugin development ensures frequently accessed data, such as cart sessions or course progress, is stored efficiently through object caching It reduces query load while keeping functionality intact.

➡️Possible Use Case: Scaling For 10M+ Pageviews

Advanced caching strategies can be a decisive factor for publishers or SaaS platforms managing millions of Pageviews between downtime and seamless scalability. 

Combining selective invalidation, cache warming, and CDN integration helps these websites stay well-balanced and profitable even under extreme loads.

Core Insight: Advanced object caching strategies such as cache warming, selective invalidation, multi-tier architecture, and custom caching enable WordPress websites to handle large-scale growth, maintain stability, and consistently deliver fast user experiences.

Troubleshooting And Optimization of WordPress Object Caching

Even with the best setup, object caching in WordPress can encounter issues that slow down performance or create conflicts. Troubleshooting and fine-tuning ensure that caching works as intended, delivers consistent results, and avoids unwanted surprises. 

Common Challenges And How To Address Them

Caching Issues

When caching fails, pages may load slowly or not at all. Standard causes include misconfigured plugins, insufficient server memory, or expired connections to Redis or Memcached. 

  • Reviewing error logs and testing plugins individually often reveals the root problem (origin).

Plugin Conflicts

Some caching plugins overlap in functionality, creating redundancy or clashes. Running multiple caching solutions simultaneously may unnecessarily delete caches or override settings. 

  • The solution is to deactivate overlapping plugins and rely on a single, well-optimized caching layer.

Memory Leaks and Cache Stampede Prevention

Improper memory allocation can lead to leaks where cached data is not correctly cleared. Tools like Redis monitoring dashboards help track usage and identify issues. Cache stampedes occur when multiple requests query the database at once after cache expiration. 

  • Prevention methods include staggered cache refreshing and cache locking techniques.

➡️What You Should Know

Redis and Memcached can expose sensitive data if left unsecured. Restrict access to trusted IP addresses, use strong authentication, and configure firewalls to guard cache servers. Managed hosting providers often include these safeguards by default.

➡️Note: Not all hosting providers wholly support object caching. While leading managed hosts offer Redis or Memcached integration, some budget plans exclude it. Hence, confirm before implementing whether your host provides object caching support or allows custom installation.

Knowledge Drop: Effective troubleshooting involves checking plugin conflicts, monitoring memory usage, securing cache servers, and confirming hosting compatibility. With the accurate optimization, object caching remains reliable, safe, and future-proof for WordPress websites. 

WordPress caching CTA graphic with headline "Don't Risk SEO And Sales With Trial And Error" and a button that says "Hand It Over To Experts ➡️", emphasizing expert-managed caching for better site speed and SEO.

ROI And Business Impact Of Object Caching

Object caching is a long-term growth asset that helps businesses thrive in an environment where every second counts. Speed influences everything from conversions to brand trust, and caching ensures that your WordPress website remains quick, scalable, and ready for what comes next. 

Let’s explore how object caching delivers measurable impact.

Future-Proofing Digital Growth

Search engines are becoming more demanding, with Google’s Core Web Vitals and AI-driven ranking systems increasingly prioritizing site speed through WordPress performance optimization services. Websites that ignore the caching risk lower search visibility. In contrast, those who invest early position themselves for lasting visibility and authority.

Beyond Revenue and Conversions

The impact of object caching extends beyond the checkout improvements. Lightning-fast performance reduces customer frustration, lowers refund requests, and strengthens loyalty. 

Teams also spend less time firefighting server slowdowns, freeing WordPress development teams to focus on innovation rather than maintenance.

Scalable Stability for High-Traffic Growth

Imagine your website growing from 5,000 to 50,000 daily visitors. Yes, you can achieve such tempting targets with persistent caching and WordPress migration services for scalable hosting It enables resources to handle the surge smoothly, turning growth into an opportunity instead of a liability. 

Without caching, hosting costs skyrocket, servers crash, and users leave the website.

Hidden ROI Many Businesses Overlook

  • Employee Efficiency: Developers spend fewer hours troubleshooting performance bottlenecks.
  • Customer Trust: Visitors relate blazing-fast websites with trustworthy businesses. It fosters long-term brand value.
  • Market Opportunities: Quicker, more reliable sites are more attractive to partners, advertisers, and marketplaces.

➡️Here is my personalized ROI perspective: If your website generates around $50,000 in monthly revenue, cutting down just two seconds off load times can increase annual sales by up to 20%. And that does not factor in improved SEO rankings; it lowers server bills and increases repeat customers.

Key Takeaway: Object caching delivers ROI that compounds over time, from higher conversions and SEO gains to stronger loyalty, reduced costs, and competitive advantage. For forward-looking businesses, it is a growth multiplier that pays dividends long after the setup.

When To Call The Experts For Object Caching

Object caching can significantly improve WordPress performance. However, not every business has the technical proficiency, time, or resources to implement it correctly. 

At some point, the complexity of managing caching solutions, avoiding conflicts, and ensuring long-term stability requires professional intervention. We will discuss the vital aspects to consider when seeking an expert.

Red Flags That Mean You Need Professional Help

  • Persistent slowdowns even after enabling caching
  • Frequent website crashes or downtime during traffic spikes
  • Security vulnerabilities with Redis or Memcached
  • Complex integrations with WooCommerce, SaaS, or learning platforms

A Visual Comparison of DIY vs. Professional Object Caching Cost Analysis

FactorDIY ImplementationProfessional Implementation
Upfront CostsLow, usually limited to free or low-cost pluginsModerate to high, depending on scope and provider
Time InvestmentHigh, requires research, setup, and troubleshootingLow, experts handle setup, monitoring, and optimization
Risk LevelHigher risk of misconfiguration, downtime, or data lossMinimal risk, tested processes, and secure best practices
Performance ResultsInconsistent, depends on technical skill, and trial-and-errorReliable, benchmarked improvements backed by expertise
Hidden CostsDowntime, lost sales, SEO penalties, and higher server billsTransparent pricing with predictable ROI and fewer hidden risks
ScalabilityLimited, may struggle under high traffic or complex sitesBuilt for growth, handles eCommerce, SaaS, and publishers
Long-Term ValueShort-term savings, but with potential costly mistakesLong-term gains in speed, stability, SEO, and customer trust

While do-it-yourself setups may appear cost-effective, hidden costs often pile up. Misconfigurations can lead to downtime, poor SEO performance, and higher server bills. Professional implementation provides a structured setup, testing, and monitoring that offset these risks.

➡️WPeople’s Object Caching Implementation Package

WPeople offers customized caching services for future-ready businesses. From pre-implementation audits to Redis configuration, plugin optimization, and long-term monitoring, our plans ensure WordPress websites perform at maximum efficiency with minimal hassle.

➡️Pro Tip: If your website shows any red flags or you aim to scale, professional help ensures your investment in caching pays off.

Final Thought: Calling the experts ensures caching is implemented securely, efficiently, and strategically. It will save you from costly mistakes and ensure your website performs at its peak without risking downtime or lost revenue. 

WordPress caching CTA graphic with headline "Don't Leave Conversions On The Table" and a button that says "Claim My Free Performance Review ➡️", emphasizing faster site performance and higher conversions through expert caching.

Conclusion

Website performance is the foundation of online success. Object caching equips WordPress websites with exceptional speed, stability, and scalability needed to thrive in a digital world where every second matters. 

From reducing database load to boosting SEO rankings and supporting growth at scale, caching proves its value across every dimension of business performance.

Throughout this guide, we explored what object caching is, its significance, and how to implement it using tools such as Redis, Memcached, APCu, and cloud solutions. 

We also discovered advanced strategies, troubleshooting tips, and real-world business impacts that show how caching transforms websites into faster, more profitable platforms.

If you are ready to move from slow, unpredictable performance to a WordPress site built for speed and growth, professional support makes all the difference. 

At WPeople, our WordPress specialists have helped e-commerce brands, SaaS providers, and publishers achieve lasting performance gains with proven methods and measurable outcomes.

➡️The next step is yours. Whether you want to safeguard SEO rankings, reduce server costs, or capture more sales, persistent object caching is the key to turning your WordPress website into a competitive advantage.

FAQ

How Much Faster Will Object Caching Make My WordPress Site?

Object caching can improve WordPress speed by 50 to 80 %. For example, WPeople reduced one client’s load time from double-digit to under single-digit seconds, proving how object caching speeds up WordPress websites dramatically.

Is Object Caching Safe For My WordPress Site?

Yes, when configured securely. Use authentication for Redis or Memcached, restrict access to trusted IPs, and update plugins regularly. WordPress object cache security considerations are minimal with these safeguards.

How Much Does Professional Object Caching Implementation Cost?

Professional implementation typically ranges from $500 to $5,000, depending on website complexity. Transparent pricing enables businesses to plan investments, and most recover costs quickly through improved conversions and server savings.

Can I Implement Object Caching Without Technical Knowledge?

Yes, you can enable object caching in WordPress without plugin conflicts by using user-friendly plugins like W3 Total Cache. Professional help is recommended for advanced setups like Redis to avoid errors and maximize results.

Which Hosting Providers Support Object Caching?

Leading providers such as WP Engine, Kinsta, Cloudways, and SiteGround offer object cache WordPress hosting compatibility. If migrating from another platform, check our platform migration guide for caching setup. Check with your host, since some entry-level shared plans do not support persistent caching.

What’s The Difference Between Redis And Memcached For WordPress?

Redis supports persistence, clustering, and monitoring, making it best for high-traffic or enterprise websites. Memcached is faster for lightweight workloads but lacks Redis’s advanced features. WordPress Memcached vs Redis performance comparisons favor Redis for scalability.

How Do I Enable WordPress Object Cache On My Site?

Install a plugin such as Redis Object Cache or W3 Total Cache to enable object caching. After that, you can configure the wp-config.php file with your server details and validate the results. It is the simplest way to switch on object caching in WordPress.

What Are The Best WordPress Object Cache Plugins In 2025?

The best WordPress object cache plugin options include Redis Object Cache for enterprises, W3 Total Cache for all-in-one optimization, LiteSpeed Cache for LiteSpeed servers, and APCu Manager for budget-friendly setups. For page builder performance comparison, consider editor-specific optimizations.

How Much Memory Does WordPress Object Caching Require?

WordPress object cache memory requirements may vary by website size. Small blogs may run with 64MB, while high-traffic e-commerce or SaaS websites often need 256MB or more to maintain consistent speed and stability.

How Do I Troubleshoot WordPress Object Cache Issues?

Check for plugin conflicts, misconfigured wp-config.php entries, or insufficient server memory. Use Redis or Memcached monitoring tools to review cache hit ratios. If issues persist, clean the cache and retest performance improvements.

WordPress vs Wix vs Squarespace: Which Is Best For Bloggers In 2025?

You will be surprised to know that over 600 million blogs compete for attention online in 2025. And here’s the catch: great content alone isn’t enough anymore. If your blogging platform is heavy, hard to scale, or fails to support your vision, it can quietly sabotage your growth before it even begins.

So, here’s the question: Which website builder truly sets you up for blogging success in 2025: WordPress, Wix, or Squarespace?

If you’ve been scratching your head over this, you’re not alone. Each platform markets itself as “the best,” but bloggers need more than marketing fluff. They need clarity, functionality, SEO power, design freedom, and scalability. 

We have thoughtfully curated this guide for content creators, bloggers, side hustlers, and online entrepreneurs who want no-nonsense insights about choosing the right foundation for long-term blogging success.

We’ve tested, researched, and broken it all down for you. From AI-powered tools and SEO performance to design flexibility and real-world use cases, this guide will uncover the truth behind the top three blogging platforms in 2025.

Get ready to meet the perfect fit for your content goals.

And guess what? One of these platforms has recently rolled out an AI-driven design assistant that builds your blog layout in under 5 minutes. Curious which one? The answer lies just a few scrolls down.

Let’s dive in. 

Why Choosing The Right Website Builder Is Critical For Bloggers In 2025

In 2025, blogging isn’t just about writing. It’s a business, a brand, and a full-time income stream for many. Your blogging platform is not just a canvas; it’s your toolkit, your storefront, and your growth engine.

Choosing the wrong platform can mean:

  • Poor SEO visibility
  • Limited customization and scalability
  • Higher costs with fewer features
  • Frustrating migration down the line

In contrast, the right platform will open doors to amplified search rankings, faster publishing, greater control, and, ultimately, more revenue from your content.

With AI-assisted content tools, built-in marketing integrations, and changing user expectations, 2025 demands more from blogging platforms than ever before. You need one that evolves with technology, adapts to your niche, and supports growth without holding you back.

Whether you’re a beginner looking for ease or an experienced blogger craving flexibility and monetization, this decision will shape your upcoming years. 

What This Means For You: The website builder you choose in 2025 will directly impact your blog’s reach, monetization potential, and long-term success. Ensure it aligns with your goals and not just your current skill level. 

What To Look for In A Blogging Platform

With numerous website builders available today, selecting the ideal one starts with knowing what truly matters to a blogger. A spectacular blogging platform does more than just publish posts; it empowers you to grow, rank, engage, and earn.

Let’s break down the essentials every blogger should consider in 2025.

Vital Features For Bloggers

Blogging in 2025 means competing in a dynamic, content-rich world. That means you need a platform that supports:

  • Seamless content creation and formatting
  • Built-in or flexible content scheduling tools
  • Mobile responsiveness
  • Swift-loading pages
  • Integration with tools like email marketing, analytics, and social sharing

Key Considerations For Bloggers

Content Management

Your platform should make it straightforward to organize, edit, and structure blog posts. A powerful editor with media management, categories, tags, and SEO inputs is non-negotiable.

SEO Tools

Search engines are still a primary traffic source for bloggers. Look for platforms with solid SEO support, whether built-in or via third-party tools. Metadata control, URL customization, schema markup, and sitemaps all contribute to better rankings.

Flexibility And Customization

As your blogging website grows, you may want more features, a new layout, or specific plugins. Hence, choose a platform that lets you evolve rather than outgrow your ambitions.

Monetization Options

Affiliate marketing, digital product sales, subscriptions, ads, and sponsorships are income streams for Millennials and Gen Z bloggers. Hence, your platform must accommodate these strategies without needing complex workarounds.

Ownership And Control

Many platforms offer convenience but restrict true ownership. Ideally, you want complete control over your domain, content, backups, and monetization methods.

Why This Matters In 2025: The blogging landscape is no longer just about writing. From AI integrations and voice search to visual-first design and mobile prioritization, your platform must be equipped to support next-generation blogging. 

WordPress In 2025: Features, Pros, And Cons

What Is WordPress.org?

WordPress.org is the self-hosted version of WordPress, the most illustrious content management system in the world. It powers over 40 percent of all websites today and remains a foremost choice for bloggers who want complete authority, customization, and ownership.

Unlike platforms that bundle hosting, design, and tools into a single package, WordPress.org requires you to set up your own hosting, select themes, and install plugins. However, that added responsibility comes with unmatched creative freedom.

WordPress Key Features For Bloggers In 2025

Gutenberg 3.0 And Beyond

The block editor has evolved into a robust, comprehensive website editing tool that allows bloggers to visually create dynamic layouts, reusable blocks, and custom content areas without relying heavily on code.

Plugin Ecosystem

With over 59,000 free plugins and thousands of premium options, WordPress empowers you to add contact forms, SEO tools, eCommerce functionality, speed optimization, security, and AI-powered enhancements.

AI Integration

You get ingenious features, from AI writing assistants to smart SEO suggestions and personalized content recommendations. WordPress plugins now leverage AI to help bloggers create and manage content more efficiently.

Full Control And Ownership

Your content, domain, and data are 100% yours. You decide where and how your blog is hosted, backed up, monetized, and maintained. 

Pros And Cons Of Using WordPress

ProsCons
Unparalleled customization and flexibilityRequires hosting setup and maintenance
Massive plugin and theme ecosystemSteeper learning curve for beginners
Strong SEO potential with tools like Rank Math, YoastWebsite performance depends on the choice of theme, plugins, and hosting
Full ownership of your websiteSecurity and backup are your responsibility
Scales effortlessly with your blog’s growthCan be overwhelming for casual or hobby bloggers

Best Use Cases: Who Should Choose WordPress?

  • Bloggers who want total freedom over their website and content
  • Content creators planning to scale or monetize in diverse ways
  • SEO-focused bloggers aiming for organic traffic growth
  • Bloggers with some technical confidence or access to developer support

What You Should Know: WordPress.org is ideal for serious bloggers who want full control, long-term growth potential, and access to powerful SEO and customization tools. If you’re ready to invest a little time to gain a lot of flexibility, this is the platform for you. 

Wix In 2025: Features, Pros, And Cons

What Is Wix?

Wix is a fully hosted, drag-and-drop website builder that has evolved substantially over the years. It is highly preferred for its simplicity, speed, and visual design interface. 

With everything bundled into one platform, from hosting and design tools to templates, apps, and support, Wix is incredibly appealing to bloggers who want a no-fuss, all-in-one solution to start quickly.

Wix Key Features For Bloggers In 2025

Wix Studio And AI Website Builder

Wix’s AI tools now allow users to generate entire blog layouts, color palettes, and content structures just by answering a few questions. It’s a time-saving, beginner-friendly innovation for new bloggers.

Integrated Marketing Tools

It offers email campaign tools, social media integrations, analytics dashboards, and pop-up forms. Wix has matured into a strong contender because of its built-in marketing features customized to growing blogs.

Template Library And Visual Editor

Over 800 designer-made templates are available, catering to various niches. The drag-and-drop builder lets users visually place elements wherever they want without coding expertise.

App Market

Although not as significant as WordPress’s plugin library, the Wix App Market offers a broad range of add-ons, including blogging tools, eCommerce features, chatbots, and more.

Pros And Cons Of Using Wix

ProsCons
Easiest learning curve with drag-and-drop editingLimited customization compared to open-source platforms
Built-in hosting, security, and updatesCannot switch templates after publishing without rebuilding the site
AI-assisted design and setup processFewer third-party integrations than WordPress
Good range of modern templates and visual toolsLess suited for large-scale blogs or deeply customized workflows
All-in-one platform for blogging, marketing, and designMinor flexibility in managing backend functionality or fine-tuning performance

Best Use Cases: Who Should Choose Wix?

  • First-time bloggers with no technical experience
  • Lifestyle bloggers who prioritize design over in-depth customization
  • Users who want to focus on content creation without backend hassle
  • Bloggers looking for a quick setup and integrated marketing options

The Bottom Line: Wix is perfect for beginners who want to start blogging fast without getting bogged down by technical setup. Wix simplifies your blogging journey with its intuitive tools, AI builder, and bundled features while offering decent creative flexibility.

Squarespace In 2025: Features, Pros, And Cons

What Is Squarespace?

Squarespace is a sleek, all-in-one website builder known for its award-winning templates and refined design experience. It is built for creatives, artists, and storytellers. 

It focuses on delivering a visually captivating web presence with minimal effort. Its streamlined interface makes it an excellent choice for bloggers who care deeply about aesthetic presentation without diving into complex customization.

Updated Tools And Design Capabilities In 2025

AI Styling Assistant

Squarespace now includes AI-powered design suggestions that help bloggers match typography, color palettes, and layout styles to their brand identity. It is best for bloggers seeking a curated visual look.

Enhanced Commerce And Membership Features

2025 brings rock-solid support for monetization with gated content, membership subscriptions, and digital product sales built directly into the platform.

Built-In Marketing And SEO Tools

Squarespace includes integrated email campaigns, scheduling tools, and SEO settings. This makes it easier to manage outreach and visibility from one dashboard.

Content Blocks And Page Editor Improvements

New advancements to the drag-and-drop page builder make adding dynamic blog content more intuitive and versatile than before.

Pros And Cons Of Using Squarespace

ProsCons
Visually stunning templates with polished designLimited plugin or third-party app integration
Easy-to-use editor with modern featuresCustomization requires code for high-end tweaks
Ideal for portfolios, photo-heavy blogs, and creativesNot the best option for large-scale or highly functional blogs
Built-in email marketing and eCommerce optionsFewer SEO features and optimization controls compared to WordPress
Reliable hosting and security handled by SquarespaceTemplate lock-in makes major redesigns more complex after website launch

Best Use Cases: Who Should Choose Squarespace?

  • Bloggers who prioritize visual storytelling and elegant layouts
  • Creatives, photographers, and lifestyle bloggers
  • Those who prefer a minimal learning curve and value built-in tools
  • Users interested in launching small-scale subscription or portfolio blogs

Core Insight: Squarespace is ideal for bloggers who want a visually captivating and professional-looking blog without designing from scratch. Though it is not as flexible as WordPress, it is perfect for those who value elegance, simplicity, and storytelling. 

wix vs wordpress vs squarespace

Head-To-Head Comparison: WordPress vs. Wix vs. Squarespace

Making an informed decision is challenging as endless features and platforms compete for attention. Let’s compare WordPress, Wix, and Squarespace across the most critical areas for bloggers in 2025.

Visual Breakdown Of Each Platform Comparison

FeatureWordPressWixSquarespace
Ease of UseModerate learning curve, requires setup & upkeepBeginner-friendly, drag-and-drop simplicityVery easy with guided setup and polished interface
Design & CustomizationFully customizable with themes and buildersLimited template switching, some drag flexibilityVisually stunning templates and fewer customization options
Plugins & Integrations59,000+ plugins and vast integrationsSmaller app market, not substantial advanced integrationsLimited apps, mostly built-in features
SEO CapabilitiesBest-in-class with plugins like Rank Math, YoastImproved SEO tools with AI-guided setupDecent SEO tools, less flexible than WordPress
Pricing & ValueFlexible pricing depending on needsPredictable pricing, all-in-oneAll-in-one pricing, slightly premium
Scalability & OwnershipFully scalable, complete site ownershipLess scalable, limited ownershipModerate scalability, platform-owned hosting

Final Winner In Each Category

CategoryWinnerWhy It Wins
Ease of UseWixOffers unmatched simplicity and quick setup
Design & AestheticsSquarespaceExcels in beautiful, ready-to-use design
FlexibilityWordPressEndless customization through themes and plugins
SEO OptimizationWordPressIndustry-leading SEO tools and more significant control
PricingDepends on needWordPress is flexible, while Wix and Squarespace offer predictable all-in-one rates
ScalabilityWordPressBuilt for growth, ideal for long-term expansion

Quick Comparison Table: Platform Summary For Bloggers

PlatformBest For
WordPressAdvanced bloggers needing complete control, SEO, and scalability
WixBeginners seeking a quick setup and ease of use
SquarespaceCreatives who want sleek design and minimal technical involvement

Platform Comparison Summary

Smart Summary: Each platform thrives in different areas. WordPress wins for long-term growth and customization, Wix for ease of use, and Squarespace for stunning visuals. The most suitable choice depends on your goals, skills, and the kind of blog you want to build. 

Real-World Use Cases Of Each Website Builder

Understanding platforms is one thing, but knowing how they perform in real-life scenarios makes all the difference. Below are practical examples that highlight which builder works perfectly for specific blogging needs.

WordPress: For Growth-Focused Bloggers & Niche Experts

Use Case: Emma, a travel blogger with monetization goals

Emma wants total freedom over her content layout, access to the latest SEO tools, and the ability to scale her website as she grows her audience. She uses plugins like Rank Math, WooCommerce, and newsletter tools to turn her blog into a full-fledged business. 

WordPress gives her the flexibility to manage ads, affiliate links, and custom designs for her brand.

Best Fit:

  • Professional bloggers
  • Content marketers
  • Bloggers aiming to scale and monetize

Wix: For First-Time Bloggers & Personal Journals

Use Case: Jake, a lifestyle blogger with no technical background

Jake just wants to blog about his daily life, hobbies, and travel experiences without worrying about plugins, hosting, or maintenance. Wix’s drag-and-drop interface will enable him to rapidly build an aesthetic website. Moreover, he will have enough tools to grow his online presence over time.

Best Fit:

  • Hobby bloggers
  • First-time bloggers
  • Bloggers who want a quick setup without tech hassle

Squarespace: For Creatives & Design-Led Storytellers

Use Case: June, a photographer and blogger

June wants her visuals to shine and prefers a minimalist, elegant design. Squarespace gives her beautifully structured templates with just enough control to personalize her website. 

She doesn’t need extensive third-party plugins or complex SEO tools. She just needs a sleek and stylish platform to showcase her stories and images.

Best Fit:

  • Creative professionals
  • Visual storytellers
  • Bloggers who prioritize aesthetics

Knowledge Drop: Think beyond features. Consider your goals, tech comfort, and content style. Whether you’re a creative, a beginner, or a future digital entrepreneur, there’s a perfect fit among WordPress, Wix, or Squarespace.

Final Verdict: Which One Should You Pick?

Choosing the right blogging platform isn’t about what’s most popular; it’s about what fits your personal goals, technical comfort, and long-term vision.

WordPress.org is the most suitable choice if you want total freedom, scalability, and flexibility to evolve your blog into a business or large content hub. Its massive ecosystem of themes, plugins, and customization options is unparalleled.

Wix is a solid, beginner-friendly option if you’re just starting, want a quick setup, and don’t want to deal with hosting or maintenance. It lets you publish rapidly without worrying about technical setup.

Squarespace is a perfect option if you’re a creative storyteller or visual content creator looking for an elegant, stylish blog that’s easy to use. It offers visually stunning templates with just enough features to power your blog beautifully.

Who Should Pick What?

Blogger TypeRecommended Platform
Beginners with no tech skillsWix
Creatives, photographersSquarespace
Growth-focused bloggersWordPress
Niche experts/content marketersWordPress
Personal or hobby bloggersWix or Squarespace
eCommerce bloggersWordPress

Tips For Making The Right Decision

  • Consider your future goals. Will your blog remain a hobby, or do you plan to monetize it?
  • Evaluate your comfort level. Do you enjoy tweaking things, or do you prefer plug-and-play?
  • Think about design vs control. Is looks more important than functionality, or do you want both?

Final Thought: No matter which platform you choose, the key to success is consistent, high-quality content. Focus on sharing your voice and providing value. Fancy designs are eye-pleasing, but meaningful content is what truly makes your blog stand out. Keep writing, and prosperity will follow!

Must-Know Insight: Your blogging journey is unique. Hence, select the platform that not only meets your current needs but also supports your growth in the years to come. 
Bonus: Can You Switch Platforms Later?

Many bloggers start on one platform and later realize they’ve outgrown its features or need more hands-on configuration. Guess what? You can switch platforms. However, it’s not always as easy as clicking a button. 

Platform Migration Overview

From → ToMigration ComplexityKey Notes
Wix to WordPressModerate to HighManual content export is required; third-party tools can assist. Design must be rebuilt.
Squarespace to WordPressModerateBlog posts can be exported via an .xml file, but layouts, styling, and media require manual adjustments.
WordPress to Wix or SquarespaceHighThese platforms don’t support full imports. You’ll need to copy-paste the content and rebuild the design.

Switching platforms often involves:

  • Exporting blog content (some platforms support XML/CSV exports)
  • Re-uploading images and media
  • Rebuilding design and layout
  • Redirecting old URLs for SEO
  • Reconnecting analytics and SEO tools

While possible, migration can be time-intensive and may require professional help if you’re moving to or from WP. Our WordPress Migration experts are happy to assist you and answer your queries for firm clarity.

Key Takeaway: Pick the right platform beforehand to avoid time-consuming migrations later. However, if your needs change, migration is possible, and you just need to plan for the work involved. 

wix vs wordpress vs squarespace

Conclusion

Choosing the right website builder in 2025 is more than just a technical decision. It’s a strategic move that shapes your blog’s growth, reach, and creative freedom. The ideal platform is your business engine, growth catalyst, and creative partner. 

Remember, the tools you will select will directly shape how effectively you share your message, connect with your audience, and build lasting impact.

Throughout the guide, we’ve explored each website builder in a detailed and comprehensible way. 

WordPress.org is the powerhouse for bloggers seeking complete control, in-depth customization, and long-term scalability. It’s built for creators ready to grow and evolve. 

Wix is the go-to for beginners who want speed, simplicity, and built-in tools. It is perfect for quick launches and visual storytelling. 

Squarespace offers elegance and ease. It is preferred by creatives and minimalists who value polished design without the tech hassle.

The best fit lies in aligning your platform with your vision, workflow, and growth ambitions. 

Success comes from delivering consistent value, authentic storytelling, and fearless publishing. The stage is yours. Hence, choose the right spotlight. 

Keep writing, keep refining, and let your platform support your journey. 

FAQ

Can I Monetize My Blog On WordPress, Wix, And Squarespace?

Yes, all three platforms support monetization, but with varying flexibility. 

For instance, WordPress offers most options, including ads, affiliate marketing, memberships, and eCommerce. Wix provides ad options to sell digital products. Squarespace supports subscriptions and sales, but with limited third-party ad integration.

Which Platform Offers The Best Mobile Optimization For Blogs?

Squarespace offers the most polished mobile-responsive designs out of the box. Wix and WordPress also support mobile optimization. However, WordPress themes vary in responsiveness, and Wix requires manual adjustments for some mobile layouts.

Do These Platforms Support Multi-Language Blogging?

WordPress supports multilingual blogs via plugins like WPML or Polylang. Wix provides built-in multilingual tools. Squarespace also supports multiple languages. However, advanced setups may require workarounds or third-party integrations.

How Secure Are WordPress, Wix, And Squarespace For Bloggers?

Wix and Squarespace handle security for you, offering built-in SSL, protection from attacks, and automatic updates. WordPress security depends on your hosting provider and plugins. However, it can be equally robust with proper configuration and regular maintenance.

Which Platform Has The Best Customer Support For Bloggers?

Wix and Squarespace offer dedicated customer support via live chat and email. Squarespace is known for its fast, knowledgeable assistance. WordPress relies on community forums, documentation, and support from hosting providers or premium plugin/theme developers. 

Is Your WordPress Site Slowing Down? Here’s How Cron Jobs Might Be Hurting Performance (and How to Fix It)

Have you noticed your WordPress site feeling sluggish lately? Pages taking longer to load? Your hosting provider warning about resource usage? Before you blame your theme or start uninstalling plugins randomly, there’s a hidden culprit you might not have considered: WordPress Cron jobs.

Most WordPress site owners don’t even know what WP-Cron is, let alone that it could be the reason their site feels like it’s running through mud. In this comprehensive guide, we’ll uncover how WordPress handles scheduled tasks, why it can become a performance nightmare, and most importantly how to fix it.

The Hidden Performance Killer: Understanding WP-Cron

WordPress runs scheduled tasks differently than you might expect. Every time someone visits your website, every single visitWordPress checks if there are any scheduled tasks that need to run. This system is called WP-Cron.

What Makes WP-Cron Different (and Problematic)?

Unlike traditional server cron jobs that run at specific times regardless of website traffic, WP-Cron only triggers when someone loads a page on your site. Think of it like a lazy employee who only starts working when the boss walks by.

Here’s what happens behind the scenes:

  1. A visitor lands on your homepage
  2. WordPress loads all its core files
  3. Before displaying the page, it checks: “Are there any cron jobs due?”
  4. If yes, it spawns a background process to run those tasks
  5. Only then does it serve the page to your visitor

This process adds overhead to every single page load. On a high-traffic site, that means thousands of unnecessary checks every hour.

The Technical Reality: Why WordPress Chose This Approach

WordPress was designed to work on any hosting environment, including basic shared hosting where users don’t have access to server-level cron jobs. The WP-Cron system was a clever workaround that made WordPress incredibly portable and easy to install anywhere.

When WordPress was first developed in 2003, most websites were small blogs with minimal traffic. The performance overhead was negligible. Fast forward to today, and WordPress powers 43% of all websites, including massive e-commerce stores, news sites, and enterprise applications. The same system that worked fine for a personal blog now becomes a bottleneck for business-critical applications.

Why This Matters for Your Business

If you’re running an e-commerce store, a membership site, or any business-critical WordPress installation, these milliseconds add up. Studies show that:

  • A 1-second delay in page load time can reduce conversions by 7%
  • 40% of visitors abandon a site that takes more than 3 seconds to load
  • Google considers page speed as a ranking factor for both desktop and mobile search
  • 53% of mobile users leave a site that takes longer than 3 seconds to load

When WP-Cron runs heavy tasks like generating reports, sending bulk emails, or processing data it can delay page rendering for your actual visitors. That’s a direct hit to your revenue and search rankings.

The Anatomy of WP-Cron: What’s Really Happening

To truly understand the performance impact, let’s dive deeper into the mechanics of WP-Cron execution.

The Page Load Sequence

When a typical WordPress page loads with WP-Cron enabled:

Step 1 (0-50ms): Initial HTTP request received
Step 2 (50-200ms): WordPress core loads, database connection established
Step 3 (200-250ms): WP-Cron check initiates – queries database for scheduled events
Step 4 (250-300ms): If cron jobs are due, spawns background HTTP request to itself
Step 5 (300ms+): Page continues rendering while cron jobs execute in parallel

The problem? That “parallel” execution isn’t truly parallel on many hosting environments. On shared hosting or servers with limited resources, the cron execution competes with page rendering for CPU and memory. This creates visible slowdowns.

The Multiplier Effect

Here’s what makes it worse: if five visitors load your site simultaneously, WordPress potentially spawns five separate cron checks. While WordPress has logic to prevent duplicate execution, the checking process itself consumes resources.

On a site receiving 100 visits per hour, that’s 100 database queries checking for scheduled tasks, even if there’s nothing scheduled to run. For a high-traffic site with 10,000 visits per hour, that’s 10,000 unnecessary database queries every single hour.

The Hidden Cron Jobs You Don’t Know About

Most site owners think cron jobs are just for scheduled posts. In reality, WordPress and your plugins create dozens of background tasks:

WordPress Core Tasks:

  • Checking for WordPress updates (twice daily)
  • Checking for plugin updates (twice daily)
  • Checking for theme updates (twice daily)
  • Cleaning up old transients from database (daily)
  • Purging expired comments from trash (daily)
  • Regenerating .htaccess file (weekly on some configurations)

Common Plugin Tasks:

  • Backup plugins: Full site backups, incremental backups, database exports
  • SEO plugins: Sitemap generation, broken link checking, analytics syncing
  • Security plugins: Malware scanning, login attempt monitoring, database hardening
  • Cache plugins: Cache preloading, cache cleanup, optimization routines
  • Email plugins: Queue processing, bounce handling, list cleaning
  • Analytics plugins: Data aggregation, report generation, API syncing
  • Social media plugins: Auto-posting, metrics collection, feed updates
  • E-commerce plugins: Inventory syncing, abandoned cart emails, report generation

We’ve audited sites with over 60 active cron jobs running throughout the day. Each one adds overhead.

The 5 Warning Signs WP-Cron Is Hurting Your Site

How do you know if WP-Cron is causing problems? Look for these telltale signs:

1. Inconsistent Page Load Times

Some pages load quickly, while others take several seconds. This inconsistency often occurs because certain page loads trigger cron jobs while others don’t. Run multiple speed tests at different times if you see load times varying by more than 500ms without traffic changes, WP-Cron interference is likely.

2. Spike in Server Resource Usage

Your hosting provider sends warnings about CPU or memory limits, especially during peak traffic hours. WP-Cron tasks competing with regular traffic can max out your server resources. Check your server logs you’ll often see simultaneous spikes in CPU usage and wp-cron.php execution.

3. Scheduled Posts Publishing Late

You schedule a blog post for 9:00 AM, but it doesn’t go live until 9:47 AM when someone finally visits your site. This unpredictability is classic WP-Cron behavior. For content marketing teams running time-sensitive campaigns, this unreliability is unacceptable.

4. Plugin Tasks Not Running Reliably

Backup plugins, SEO tools, and analytics plugins rely on cron jobs. If your backups are inconsistent or your automated tasks keep failing, WP-Cron might be the culprit. We’ve seen cases where nightly backups failed for weeks because the site received no traffic during the scheduled backup window.

5. Slow Admin Dashboard

The WordPress admin area feels sluggish, especially when checking scheduled posts or viewing plugin settings. This can indicate cron job congestion. The admin dashboard itself can trigger cron checks, making routine tasks frustratingly slow.

The Real Cost of Ignoring This Problem

Beyond just slow loading speeds, poorly configured cron jobs can create cascading problems:

Business Impact:

  • Lost sales from abandoned carts due to slow checkouts (average cart value × abandonment rate = quantifiable loss)
  • Reduced email deliverability if your email queue backs up (marketing ROI suffers)
  • Missed marketing opportunities when scheduled campaigns don’t deploy on time
  • Poor user experience leading to decreased customer retention and lifetime value
  • Damaged brand reputation from a “laggy” website
  • Lower search rankings due to poor Core Web Vitals scores

Technical Debt:

  • Increased server costs as you upgrade hosting to compensate (often $50-300/month more than needed)
  • Plugin conflicts and errors from failed scheduled tasks
  • Database bloat from stuck or failed cron events that pile up over time
  • Difficulty scaling your site as traffic grows
  • Increased complexity troubleshooting other issues when cron problems create false flags

Real-World Financial Impact:

Consider a mid-sized e-commerce site generating $50,000 monthly revenue:

  • 2% conversion rate on 25,000 monthly visitors
  • 40% of mobile users experience slow loads during cron execution
  • Average order value: $100

If page delays from WP-Cron cause just a 10% drop in mobile conversions during affected loads, that’s approximately $2,000 in lost monthly revenue,$24,000 annually. Many site owners throw money at hosting upgrades when a one-time $500-1,500 optimization would solve their performance issues permanently.

The Professional Solution: Disabling WP-Cron the Right Way

The most effective fix is disabling WP-Cron and replacing it with proper server-side cron jobs. However, this isn’t as simple as flipping a switch; it requires careful implementation to avoid breaking your site.

Step 1: Audit Your Current Cron Jobs

Before making changes, you need to know what’s currently scheduled. This discovery phase is critical and often reveals surprises.

Manual Audit Using Plugins:

Install a plugin like “WP Crontrol” or “Advanced Cron Manager” to view all scheduled tasks. Document:

  • Event name (hook)
  • Recurrence interval
  • Next scheduled run time
  • Which plugin/theme created it
  • Arguments passed to the event

You might be surprised to find dozens of jobs you didn’t know existed. We routinely find abandoned cron jobs from deleted plugins still running years later, consuming resources for no reason.

Database-Level Investigation:

For a complete picture, examine the wp_options table directly:

Look for the cron option key. This serialized array contains every scheduled event. Expert developers can parse this to identify problematic patterns like:

  • Jobs scheduled to run every minute (excessive)
  • Multiple duplicate jobs (configuration errors)
  • Jobs with execution times in the past (stuck/failed tasks)

Step 2: Clean Up Before Optimization

Before disabling WP-Cron, clean house:

Remove Unnecessary Jobs:

  • Deactivate unused plugins and verify their cron jobs are removed
  • Disable update checks if you manage updates manually
  • Remove duplicate scheduled events

Optimize Existing Jobs:

  • Consolidate similar tasks to run together
  • Adjust overly frequent schedules (does that task really need to run every 5 minutes?)
  • Stagger resource-intensive tasks to avoid conflicts

This cleanup alone can improve performance by 15-30% without any structural changes.

Step 3: Disable WP-Cron Safely

Add this line to your wp-config.php file (above the “/* That’s all, stop editing! */” line):

define('DISABLE_WP_CRON', true);

Critical Warning: Once you disable WP-Cron, your scheduled tasks will stop running completely unless you set up a replacement. Don’t do this unless you’re ready to implement Step 4 immediately.

Best Practice: Implement this during a maintenance window or low-traffic period, and have a rollback plan ready.

Step 4: Configure Server-Level Cron Jobs

This is where things get technical. You need to set up your server to trigger wp-cron.php at regular intervals. The exact method depends on your hosting environment:

For cPanel Hosting:

Navigate to Advanced → Cron Jobs, then add:

*/5 * * * * wget -q -O - https://yoursite.com/wp-cron.php?doing_wp_cron >/dev/null 2>&1

Alternative using curl (faster, if available):

*/5 * * * * curl -s https://yoursite.com/wp-cron.php?doing_wp_cron >/dev/null 2>&1

This runs every 5 minutes. For most sites, this interval works well.

Understanding Cron Syntax:

The timing format follows this pattern:

Understanding Cron Syntax:

Common intervals:

  • */1 * * * * – Every minute (for high-priority sites)
  • */5 * * * * – Every 5 minutes (standard recommendation)
  • */15 * * * * – Every 15 minutes (low-traffic sites)
  • 0 * * * * – Every hour, on the hour

For Managed WordPress Hosting:

Platforms like WP Engine, Kinsta, or Flywheel often have built-in cron management:

  • WP Engine: Supports server cron, contact support to enable
  • Kinsta: Automatic server-level cron, no configuration needed
  • Flywheel: Available on higher plans, contact support

Check their documentation or contact support before making changes.

For VPS or Dedicated Servers:

You’ll need SSH access to edit the crontab directly:

Security Consideration:

For public-facing sites, consider adding authentication to wp-cron.php to prevent unauthorized execution. This requires custom configuration and is part of professional optimization services.

Step 5: Verify Everything Still Works

After implementation, monitor your site for 24-48 hours:

Immediate Checks (First Hour):

  • Check that scheduled posts publish on time
  • Verify plugin tasks are completed (backups, emails, etc.)
  • Review error logs for any cron-related failures
  • Test a few critical user workflows (checkout, registration, etc.)

Short-Term Monitoring (24-48 Hours):

  • Monitor server resource usage for improvements using tools like New Relic or server monitoring
  • Test page load speeds using GTmetrix, Pingdom, or Google PageSpeed Insights
  • Check analytics for any anomalies in user behavior
  • Verify all automated emails are sent (order confirmations, password resets, etc.)

Performance Metrics to Track:

  • Average page load time (should decrease 20-40%)
  • Time to First Byte (TTFB) (should improve 15-30%)
  • Server CPU usage (should drop 30-50% during peak hours)
  • Database query time (should decrease noticeably)
  • Bounce rate (should improve if speed was causing exits)

Advanced Optimization: Custom Cron Intervals

Some tasks don’t need to run every 5 minutes. Newsletter processing might only need to run hourly, while critical e-commerce tasks might need to run every minute.

Creating Intelligent Schedules

WordPress defaults to these intervals:

  • hourly (once per hour)
  • twice daily (twice per day)
  • daily (once per day)
  • weekly (once per week)

But your business needs might require custom intervals:

E-Commerce Priority Example:

  • Every 1 minute: Payment gateway synchronization, inventory updates from suppliers
  • Every 5 minutes: Order processing queue, abandoned cart tracking
  • Every 15 minutes: Email queue processing, customer notification batches
  • Hourly: Sales reports generation, analytics aggregation
  • Every 6 hours: Full inventory reconciliation
  • Daily: Database optimization, old order archiving, backup verification

Membership Site Example:

  • Every 5 minutes: New member onboarding emails
  • Every 15 minutes: Access level checking for expired memberships
  • Hourly: Engagement metrics calculation
  • Daily: Member activity reports, content drip releases
  • Weekly: Member retention analysis

The Technical Implementation

Creating custom intervals requires adding code to your theme’s functions.php or a custom plugin:

Creating custom intervals requires adding code to your theme's functions.php or a custom plugin

This level of customization requires understanding both WordPress internals and your specific business workflows.

Load Distribution Strategies

Professional implementations go further by staggering tasks to prevent resource conflicts:

  • Run heavy database operations during low-traffic hours (typically 2-5 AM local time)
  • Distribute email sending throughout the day rather than one large batch
  • Offset similar tasks by a few minutes to prevent CPU spikes
  • Implement queue systems for tasks that can be processed asynchronously

Why DIY Optimization Often Backfires

We’ve worked with dozens of business owners who tried to implement these fixes themselves. Here’s what typically goes wrong:

Common Mistakes:

  1. Disabling WP-Cron without a replacement – Scheduled posts stop publishing, backups fail, and plugins break silently. Recovery requires identifying every broken workflow manually.
  2. Wrong cron syntax – Tasks run too frequently (overloading the server) or not at all. We’ve seen accidental configurations that triggered wp-cron.php every second, bringing servers to their knees.
  3. Missing error logging – Problems occur silently, and you don’t know until something major breaks. Without proper logging, debugging takes hours instead of minutes.
  4. Incorrect file paths – The cron job can’t find wp-cron.php and fails repeatedly. This is especially common on sites with unusual directory structures or security configurations.
  5. Inadequate testing – Everything seems fine initially but breaks under traffic load. Testing with low traffic doesn’t reveal problems that emerge during peak usage.
  6. Security holes – Leaving wp-cron.php publicly accessible without protection allows potential abuse. Attackers can trigger resource-intensive cron jobs repeatedly.
  7. Missing multisite considerations – Network-wide cron jobs require special handling that differs from single-site implementations.

Real Disaster Stories

Case Study: The E-Commerce Email Catastrophe

One client came to us after their “optimization” caused their WooCommerce store to stop sending order confirmation emails for three days. They lost sales and customer trust because they didn’t realize their fix had broken a critical function. Customers thought orders weren’t processed, leading to chargebacks and angry phone calls. The recovery included:

  • Manually sending 247 order confirmations
  • Offering goodwill discounts to affected customers (cost: $3,700)
  • Emergency reputation management
  • Technical recovery taking 12 hours

Total cost of the DIY mistake: Over $8,000 in lost revenue and recovery expenses.

Case Study: The Membership Site Lockout

A membership site disabled WP-Cron without realizing their access control plugin relied heavily on scheduled checks. When the cron jobs stopped, new members couldn’t access content and renewals didn’t process correctly. They lost 12% of their monthly recurring revenue before discovering the issue five days later.

The Hosting Environment Factor

Not all hosting environments are created equal when it comes to cron optimization.

Shared Hosting Challenges

On shared hosting (GoDaddy, Bluehost, HostGator, etc.):

  • Limited control over server configuration
  • Resource restrictions affect cron execution
  • Other sites on the same server impact performance
  • Cron job frequency limits (often max every 15 minutes)
  • Some hosts block wp-cron.php completely for security

Recommendation: If you’re on shared hosting and experiencing performance issues, cron optimization provides limited relief. Consider upgrading to VPS or managed WordPress hosting for serious business sites.

VPS and Dedicated Server Advantages

Full server control enables:

  • Precise cron timing down to the second
  • Resource allocation specifically for cron jobs
  • Advanced scheduling with job dependencies
  • Complete logging and monitoring
  • Security lockdown of cron execution

Cloud Hosting Considerations (AWS, Google Cloud, Azure)

Cloud environments offer the most flexibility:

  • Separate workers for cron processing
  • Auto-scaling based on job queue depth
  • Geographic distribution for global audiences
  • Advanced queuing systems (AWS SQS, Google Cloud Tasks)
  • Serverless cron alternatives (AWS Lambda, Google Cloud Functions)

However, this complexity requires DevOps expertise to implement correctly.

The Enterprise Approach: Professional Cron Management

Large-scale WordPress sites use sophisticated cron management strategies that go far beyond basic optimization:

Advanced Architecture Patterns

1. Dedicated Cron Server

Separate application server from cron execution:

  • Web servers handle only user requests
  • Dedicated cron server processes all scheduled tasks
  • Eliminates performance impact on user experience
  • Enables resource allocation tuned for batch processing

2. Queue-Based Systems

Replace direct cron execution with job queues:

  • Tasks added to queue instead of immediate execution
  • Worker processes consume queue at controlled rate
  • Automatic retry logic for failed jobs
  • Priority queues for critical tasks
  • Real-time monitoring of queue depth and processing speed

3. Microservices Architecture

Break cron functionality into independent services:

  • Email service handles only email-related cron jobs
  • Payment service processes payment-related tasks
  • Each service scales independently based on load
  • Failure isolation prevents cascading problems

Enterprise Monitoring

Professional implementations include comprehensive monitoring:

Real-Time Dashboards Tracking:

  • Cron job execution frequency and duration
  • Success/failure rates per job type
  • Resource consumption per job
  • Queue depth and processing lag
  • Cost per job execution (important for cloud environments)

Automated Alerting:

  • Instant notification when jobs fail
  • Warnings when jobs exceed normal execution time
  • Alerts for queue backlog building up
  • Capacity warnings before resources max out

Performance Analytics:

  • Historical trends showing optimization effectiveness
  • Correlation analysis between cron timing and user metrics
  • Predictive alerts for potential issues
  • Cost optimization recommendations

Load Balancing Strategies

Time-Based Distribution: Intelligent scheduling spreads load throughout the day rather than clustering jobs at arbitrary intervals. For example, instead of all hourly jobs running at the top of the hour (creating a spike), they’re distributed: some at :05, others at :17, others at :33, etc.

Priority Queuing: Critical tasks (like order processing) run before non-essential tasks (like social media posting). If resources are constrained, low-priority jobs queue until capacity is available.

Geographic Distribution: For global sites, cron jobs run on servers geographically closest to the data they’re processing, reducing latency and improving execution speed.

These enterprise solutions require custom development and ongoing management, but they’re essential for sites processing thousands of transactions daily or serving millions of visitors monthly.

Alternative Solutions: When Full Optimization Isn’t Needed

Not every site requires complete WP-Cron replacement. Sometimes simpler solutions work:

The Hybrid Approach

Keep WP-Cron enabled but optimize how it runs:

  1. Reduce Check Frequency: Modify how often WordPress checks for scheduled events
  2. External Trigger: Use an uptime monitoring service (like UptimeRobot) to ping wp-cron.php regularly
  3. Selective Disabling: Disable only for frontend, keep enabled for admin

This provides 60-70% of the performance benefit with less complexity.

Plugin-Based Solutions

Several plugins offer optimization without code changes:

  • WP Crontrol: Manages existing cron jobs, helps identify problems
  • Disable WP Cron: Simple interface for disabling WP-Cron
  • Advanced Cron Manager: Visual management of all scheduled tasks

However, plugins add another layer of code to maintain and can themselves create performance issues.

When to Keep Default WP-Cron

Some sites work fine with default WP-Cron:

  • Low-traffic personal blogs (under 100 visitors/day)
  • Sites with minimal plugins (less than 10 active)
  • Sites without time-critical scheduled tasks
  • Staging/development environments

If your site isn’t experiencing performance issues, the complexity of optimization may not be worthwhile.

Real-World Results: What Proper Cron Optimization Achieves

When implemented correctly, cron optimization delivers measurable improvements:

Performance Gains:

  • 20-40% reduction in average page load time
  • 50-70% decrease in server resource usage during peak hours
  • Consistent page load speeds regardless of traffic patterns
  • Improved scalability as traffic grows
  • Better Core Web Vitals scores affecting SEO rankings

Reliability Improvements:

  • Scheduled content publishes exactly on time
  • Plugin tasks complete reliably without manual intervention
  • Email queues process smoothly without delays or bounces
  • Backup and maintenance tasks run predictably
  • Zero failed cron jobs from resource exhaustion

Cost Savings:

  • Reduced need for hosting upgrades ($50-300/month savings typical)
  • Lower server resource consumption (20-40% reduction in CPU/memory)
  • Fewer emergency support tickets and crisis management
  • Decreased downtime and maintenance needs
  • Better resource utilization means delayed infrastructure scaling

Business Impact Examples:

E-Commerce Client (Fashion Retailer):

  • Previous state: Cart abandonment 73%, conversion rate 1.8%
  • After optimization: Cart abandonment 61%, conversion rate 2.1%
  • Result: 12% increase in conversion rate translated to $180,000 additional annual revenue
  • Implementation cost: $1,200 one-time

Membership Site (Online Education):

  • Previous state: Member complaints about access delays, content not releasing on schedule
  • After optimization: Zero access issues, perfect content drip execution
  • Result: Churn rate decreased from 8% to 5.5% monthly, retaining $14,400 more in annual recurring revenue
  • Implementation cost: $900 one-time

News Publishing Site:

  • Previous state: Articles publishing 15-45 minutes late, SEO penalties for poor page speed
  • After optimization: Precise publishing, 42% improvement in mobile page speed scores
  • Result: 23% increase in organic search traffic within 90 days
  • Implementation cost: $1,500 one-time

Security Implications of Cron Optimization

An often-overlooked aspect of cron optimization is security. Improperly configured cron systems create vulnerabilities:

Common Security Risks

1. Unauthenticated wp-cron.php Access

By default, anyone can trigger wp-cron.php by visiting the URL. Attackers can exploit this to:

  • Overwhelm your server by repeatedly triggering cron execution
  • Time attacks to coincide with cron execution for maximum disruption
  • Trigger resource-intensive tasks deliberately to cause downtime

2. Information Disclosure

Cron jobs often process sensitive data:

  • Customer emails and personal information
  • Financial transaction details
  • User access credentials
  • Business intelligence and analytics

Poor logging practices can expose this data in plain text log files.

3. Privilege Escalation

Some cron jobs run with elevated privileges. Vulnerabilities in custom cron code can allow attackers to execute unauthorized actions.

Security Best Practices

Implement these protections:

  1. Restrict wp-cron.php Access: Use server configuration to limit access to wp-cron.php to your server’s IP address only
  2. Add Authentication: Require a secret token passed as a parameter to wp-cron.php
  3. Encrypt Sensitive Data: Never log passwords, payment details, or personal information
  4. Use Secure Connections: Always trigger wp-cron.php via HTTPS
  5. Implement Rate Limiting: Prevent abuse by limiting how frequently wp-cron.php can be accessed
  6. Regular Audits: Review cron jobs quarterly for abandoned tasks from deleted plugins

Professional optimization includes these security measures by default.

When to Call in the Experts

While technically inclined site owners can implement basic cron optimization, professional help is recommended when:

High-Stakes Scenarios

  • Your site processes significant revenue (e-commerce, memberships, bookings, SaaS)
    • Any downtime or malfunction directly impacts revenue
    • Cart abandonment from performance issues costs real money
    • Customer trust depends on reliability
  • Time-critical operations (news sites, event platforms, time-sensitive offers)
    • Content must publish at exact times for maximum impact
    • Coordinated campaigns across multiple channels require precise timing
    • Late execution means missed opportunities
  • Complex technical environments (VPS, dedicated, cloud hosting with complex configurations)
    • Multi-server setups require advanced knowledge
    • Load balancers and CDNs add complexity
    • Custom security configurations need careful integration

Technical Complexity Indicators

  • Multiple plugins with interdependent cron jobs
    • Understanding dependencies prevents breaking workflows
    • Optimization must consider the entire ecosystem
    • Plugin conflicts can be subtle and difficult to debug
  • High traffic volumes (1,000+ visitors daily, 10,000+ for optimization necessity)
    • Scale introduces problems that don’t exist on small sites
    • Concurrent cron execution requires advanced handling
    • Resource constraints become critical
  • Previous optimization attempts failed or created problems
    • Recovery often more complex than initial implementation
    • Existing issues may mask underlying problems
    • Professional assessment identifies root causes
  • Custom cron scheduling needed for specific business workflows
    • Off-the-shelf solutions don’t fit unique requirements
    • Business logic requires custom development
    • Integration with third-party systems adds complexity
  • Unique hosting setups (load balanced, multisite networks, enterprise installations)
    • Standard approaches don’t work
    • Network-wide changes affect multiple sites
    • Enterprise compliance and security requirements

The Value Proposition of Professional Service

Professional WordPress developers don’t just disable WP-Cron and set up a basic cron job. They:

  1. Analyze Your Entire Technical Stack
    • Server configuration review
    • Database optimization assessment
    • Plugin efficiency evaluation
    • Theme performance audit
    • Identify bottlenecks beyond just cron
  2. Implement Intelligent Scheduling
    • Custom intervals matched to business needs
    • Load distribution for optimal performance
    • Priority queuing for critical tasks
    • Geographic optimization for global sites
  3. Ensure Reliability
    • Comprehensive testing before deployment
    • Fallback mechanisms for failures
    • Monitoring and alerting systems
    • Documentation for future maintenance
  4. Provide Ongoing Support
    • Performance monitoring post-implementation
    • Optimization as your site grows
    • Emergency support if issues arise
    • Regular audits and recommendations
  5. Deliver Measurable Results
    • Benchmarking before and after
    • Clear metrics showing improvement
    • ROI calculation demonstrating value
    • Ongoing optimization recommendations

The investment in professional optimization typically pays for itself within 1-3 months through improved conversions, reduced hosting costs, or eliminated emergency support needs.

Beyond Cron: The Bigger Performance Picture

Cron optimization is often just one piece of the performance puzzle. A truly fast WordPress site requires addressing multiple factors simultaneously:

Database Optimization

Your database grows over time, becoming sluggish:

  • Post revisions accumulating (thousands of old versions)
  • Transients never cleaned up (expired data lingering)
  • Comment spam in trash but not deleted
  • Orphaned metadata from deleted posts
  • Unused tables from old plugins

Professional database optimization can reduce query time by 40-60%, directly improving every page load.

Caching Strategy

Multi-layered caching provides dramatic improvements:

  • Object Cache (Redis or Memcached): Stores database query results
  • Page Cache: Serves pre-generated HTML for common pages
  • CDN (Content Delivery Network): Distributes static assets globally
  • Browser Cache: Tells browsers to store assets locally
  • Opcode Cache: Caches compiled PHP for faster execution

Proper caching can reduce page load time by 70-90% for repeat visitors.

Image Optimization

Images are often the heaviest page elements:

  • Unnecessary resolution (serving 4K images when 1080p suffices)
  • Uncompressed formats (PNG when JPG would work)
  • Missing next-gen formats (WebP offers 30% smaller files)
  • Loading all images upfront (lazy loading defers offscreen images)

Image optimization typically reduces page weight by 40-70%.

Code-Level Performance

Clean, efficient code matters:

  • Removing unused CSS and JavaScript (often 50%+ of loaded code is unused)
  • Minifying remaining code (reducing file size by 20-40%)
  • Deferring non-critical JavaScript (allowing page to render faster)
  • Optimizing database queries (reducing query count and complexity)
  • Eliminating plugin bloat (each plugin adds overhead)

Server Configuration

Proper server setup makes everything faster:

  • PHP Version: PHP 8.x is 2-3x faster than PHP 7.x
  • HTTP/2 or HTTP/3: Allows parallel resource loading
  • GZIP/Brotli Compression: Reduces transfer size by 60-80%
  • Resource Limits: Adequate memory and CPU allocation
  • Database Configuration: Proper MySQL/MariaDB tuning

The Holistic Approach

Many site owners chase individual fixes without understanding how all these elements interact:

  • Caching without image optimization means caching huge pages
  • Database optimization without caching means repeated slow queries
  • Code optimization without proper server configuration limits gains
  • Cron optimization without addressing plugin bloat provides partial improvement

That’s why a holistic approach analyzing your entire WordPress installation and implementing targeted improvements across all layers delivers the best results. A comprehensive audit identifies the specific bottlenecks affecting your site, rather than applying generic optimizations that may or may not help.

Monitoring and Maintaining Optimized Performance

Optimization isn’t a one-time task. Your site evolves, and performance can degrade over time without proper monitoring:

What to Monitor Regularly

Weekly Checks:

  • Page load speed trends (using GTmetrix or similar)
  • Server resource usage patterns
  • Cron job execution logs for failures
  • Error logs for new issues

Monthly Reviews:

  • New plugins added and their cron jobs
  • Traffic pattern changes affecting resource needs
  • Hosting resource utilization trends
  • User experience metrics (bounce rate, time on site)

Quarterly Audits:

  • Comprehensive performance testing
  • Database cleanup and optimization
  • Plugin necessity review (remove unused)
  • Security vulnerability assessment
  • Cron job efficiency review

Tools for Ongoing Monitoring

Free Tools:

  • Google PageSpeed Insights: Core Web Vitals tracking
  • GTmetrix: Detailed performance analysis
  • Pingdom: Uptime and speed monitoring
  • Query Monitor (WordPress plugin): Database query analysis
  • WP Crontrol: Cron job management and monitoring

Professional Tools:

  • New Relic: Application performance monitoring
  • Datadog: Infrastructure and application metrics
  • Sentry: Error tracking and debugging
  • Cloudflare: CDN with built-in analytics
  • ManageWP: Multi-site monitoring dashboard

Performance Degradation Warning Signs

Watch for these indicators that optimization is degrading:

  1. Gradual Speed Decline: Load times creeping up week over week
  2. Increasing Server Alerts: More frequent resource warnings from host
  3. Cron Job Failures: Tasks missing scheduled execution windows
  4. Growing Database: Significant size increases without content growth
  5. Plugin Conflicts: New errors appearing in logs
  6. User Complaints: Reports of slow loading or timeout errors

Early detection prevents small issues from becoming major problems.

The Migration Advantage: Starting Fresh

Sometimes the most effective optimization happens during a migration:

When Migration Makes Sense

Consider migrating to a new hosting environment or fresh WordPress installation when:

  • Your current host lacks necessary cron configuration options
  • Years of accumulated technical debt make cleanup impractical
  • Moving to managed WordPress hosting with built-in optimizations
  • Scaling up from shared to VPS/dedicated hosting
  • Transitioning to cloud infrastructure for better performance

Migration Best Practices

Pre-Migration Planning:

  • Document all current cron jobs and their purposes
  • Audit plugins and themes for necessity
  • Plan the new architecture with optimization built-in
  • Test the migration process in a staging environment
  • Prepare rollback procedures in case of issues

During Migration:

  • Clean database before transferring (remove old data, optimize tables)
  • Transfer only essential plugins and themes
  • Implement proper caching from day one
  • Configure server-level cron immediately
  • Set up monitoring tools before going live

Post-Migration:

  • Verify all cron jobs executing correctly
  • Test all critical user workflows
  • Monitor performance metrics closely for 72 hours
  • Document the new configuration for future reference
  • Update disaster recovery and backup procedures

A well-executed migration with optimization built-in often provides better results than trying to optimize a site with years of accumulated issues.

Common Myths About WordPress Performance

Let’s dispel some misconceptions that lead site owners astray:

Myth 1: “More RAM/CPU Always Solves Performance Problems”

Reality: Throwing hardware at software problems rarely works. We’ve seen sites on 16GB RAM servers performing worse than optimized sites on 2GB servers. Efficiency matters more than raw power.

Myth 2: “Premium Hosting Automatically Means Fast Sites”

Reality: Expensive hosting provides better infrastructure, but poorly configured WordPress still runs slowly. You need both good hosting AND proper optimization.

Myth 3: “Fewer Plugins Always Means Better Performance”

Reality: One poorly coded plugin can cause more problems than ten well-optimized ones. Quality matters more than quantity. A single plugin that runs 50 database queries per page load does more damage than five plugins that cache intelligently.

Myth 4: “Caching Plugins Solve Everything”

Reality: Caching helps tremendously, but it can’t fix underlying inefficiencies. It’s putting a bandaid on the symptom rather than curing the disease. You need both caching AND optimization for optimal performance.

Myth 5: “Disabling WP-Cron Always Improves Performance”

Reality: Improperly configured server cron can actually perform worse than default WP-Cron in some scenarios. The implementation quality matters more than the approach itself.

Myth 6: “Performance Only Matters for High-Traffic Sites”

Reality: Even small sites benefit from optimization. Better performance means better user experience, improved SEO, lower hosting costs, and professional credibility regardless of traffic volume.

Special Considerations for Different Site Types

Different WordPress applications have unique cron optimization needs:

E-Commerce Sites (WooCommerce, Easy Digital Downloads)

Critical Cron Jobs:

  • Order processing and status updates (every 1-5 minutes)
  • Inventory synchronization with suppliers (every 5-15 minutes)
  • Abandoned cart recovery emails (every 15-30 minutes)
  • Payment gateway reconciliation (hourly)
  • Sales reporting and analytics (hourly/daily)

Optimization Priorities:

  • Never let cron delays impact checkout performance
  • Separate order processing from marketing tasks
  • Implement queue systems for email sending
  • Real-time inventory updates for critical products
  • Monitor closely during high-traffic periods (sales, holidays)

Membership and LMS Sites (LearnDash, MemberPress, Restrict Content Pro)

Critical Cron Jobs:

  • Access control checks and updates (every 5-15 minutes)
  • Content drip scheduling (hourly or daily)
  • Subscription renewal processing (daily)
  • Engagement tracking and analytics (hourly)
  • Email notifications for courses and content (every 15-30 minutes)

Optimization Priorities:

  • Precise timing for content releases
  • Reliable subscription processing (revenue impact)
  • Smooth onboarding experiences for new members
  • Efficient access control without impacting page loads

Content Publishing Sites (News, Blogs, Magazines)

Critical Cron Jobs:

  • Scheduled post publishing (every 1-5 minutes for precise timing)
  • Social media auto-posting (every 15-30 minutes)
  • RSS feed generation (every 15-30 minutes)
  • Related content calculation (hourly)
  • Search index updates (hourly)
  • Analytics aggregation (hourly/daily)

Optimization Priorities:

  • Exact publish timing for news and time-sensitive content
  • Fast RSS updates for subscribers
  • Efficient social media integration
  • Quick search index updates for new content

Service-Based and Local Business Sites

Critical Cron Jobs:

  • Contact form submissions processing (every 5-15 minutes)
  • Appointment reminder emails (hourly/daily)
  • Backup scheduling (daily)
  • Update checks (weekly)

Optimization Priorities:

  • Reliable form processing for lead generation
  • Consistent backup execution
  • Minimal overhead since traffic is typically lower

Each site type benefits from customized cron scheduling aligned with business priorities.

Future-Proofing Your WordPress Performance

Technology evolves, and your optimization strategy should too:

Emerging Trends to Watch

1. Serverless Architecture

Cloud platforms increasingly offer serverless cron alternatives:

  • AWS Lambda for scheduled tasks
  • Google Cloud Functions for event-driven processing
  • Azure Functions for automated workflows

These eliminate traditional server management entirely, automatically scaling based on demand.

2. JAMstack and Headless WordPress

Decoupling WordPress from frontend delivery:

  • WordPress as content management only
  • Static site generation for faster delivery
  • API-driven content updates
  • Scheduled builds triggered by cron jobs

This architecture naturally separates cron execution from user experience.

3. Advanced Caching Technologies

Next-generation caching moving beyond traditional approaches:

  • Edge computing pushing cache closer to users
  • Intelligent cache warming predicting needed content
  • Real-time cache invalidation for instant updates
  • Machine learning optimizing cache strategies

4. HTTP/3 and QUIC Protocol

New protocols improving connection efficiency:

  • Faster initial connections
  • Better handling of packet loss
  • Improved multiplexing
  • Enhanced mobile performance

While not directly related to cron, these technologies complement optimization efforts.

Preparing for WordPress Evolution

WordPress continues evolving, and optimization strategies must adapt:

  • Block Editor Impact: Full Site Editing changes how content renders, affecting performance patterns
  • PHP Requirements: Newer PHP versions offer performance gains but require testing
  • Security Updates: Core updates sometimes change how cron works
  • Plugin Ecosystem: Popular plugins evolve, potentially changing cron requirements

Stay informed about WordPress development to adapt optimization strategies proactively rather than reactively.

Conclusion: Performance as a Competitive Advantage

In today’s digital landscape, website performance isn’t a luxury, it’s a competitive necessity. When two businesses offer similar products or services, the faster website wins. When search engines compare similar content, the faster site ranks higher. And when users have multiple options, the smoother experience captures their attention and trust.

Optimizing WordPress cron jobs is a powerful step toward better performance, but it works best as part of a comprehensive, custom WordPress development strategy. The most successful businesses treat performance not as a one-time fix, but as an ongoing investment continuously refining their website’s speed, reliability, and user experience to stay ahead in the digital race.

European Accessibility Act (EAA) 2025: A Guide For WordPress Owners

Imagine this: It’s mid-2025, and your WordPress website, though beautifully designed, quietly fails to meet a new legal standard, which is overwhelming businesses and organizations across the European Union. The result? Fines, lost visitors, and a reputation hit you didn’t see coming. Sounds like a nightmare? It is if the necessary actions aren’t implemented. 

Did you know that over 100 million people in the EU live with some form of disability? Yet, many websites still ignore their fundamental right to access digital content without barriers. With the European Accessibility Act 2025 (EAA) just around the corner, this is no longer a nice-to-have feature; it’s mandatory.

So, here’s the big question: Is your WordPress website EAA-compliant, and what’s at stake if it isn’t? No need to panic as this blog has got you covered. 

This guide is built for WordPress site owners, developers, digital agencies, and decision-makers. We’ll walk you through what the EAA is, why it matters, who needs to comply, and how to make your WordPress website meet accessibility standards hassle-free. 

You’ll also discover practical tips, tools, and examples to help you make your website more inclusive, legally compliant, and future-ready – all in a straightforward, easy-to-understand way.

Let’s future-proof your website, not just for compliance but for everyone who visits it. 

Understanding The Importance Of EAA & Accessibility

Accessibility is no longer optional, especially for digital experiences in 2025. It’s a legal, ethical, and practical necessity.

The European Accessibility Act 2025 is built on a simple but powerful principle: everyone deserves equal access to digital services. That includes websites, mobile apps, eCommerce platforms, PDFs, and everything in between. 

Whether someone uses a screen reader or keyboard navigation or requires high contrast to see content clearly, your website must accommodate them.

This shift isn’t just about ticking a compliance box. It’s about creating a web experience that works for everyone without exception.

Why It Matters For WordPress Users

With over 43% of the web powered by WordPress, website owners now carry a greater responsibility to meet accessibility standards. It doesn’t matter if your site is visually stunning. If it lacks WordPress screen reader compatibility, fails basic keyboard navigation, or ignores alt text for images, it is potentially unlawful under the EAA.

That’s why understanding what the law demands and how it applies to WordPress is critical. It’s not about changing your platform. It’s about how you build and maintain your website on that platform with accessibility in mind.

What You Should Know: Accessibility isn’t just a trend. The European Accessibility Act 2025 (EAA) puts it front and center as a must-have legal obligation. WordPress users must rethink how they design and manage their sites to stay compliant, inclusive, and competitive. 

What Is The European Accessibility Act (EAA)?

The European Accessibility Act 2025 is a legislative game-changer. It sets a new standard for how digital products and services must be built and accessible for everyone, regardless of ability.

The Background And Purpose

Passed in 2019, the EAA was introduced to harmonize accessibility rules across EU member states. It aims to remove digital barriers that people with disabilities face when navigating websites, apps, or using everyday digital services.

Its core goal is to make essential digital experiences accessible, inclusive, and consistent across Europe. This isn’t a suggestion. It’s an enforceable law, and businesses within and outside the EU must comply if they serve European users.

What Falls Under Its Scope?

If your service touches users in the EU, the EAA applies. It covers:

  • eCommerce websites and mobile apps
  • Banking services and self-service terminals
  • E-books and e-readers
  • Public transport ticketing and travel info platforms
  • Audio-visual media services
  • Online communication services

WordPress websites offering products, content, or services within the EU fall squarely under this umbrella. That’s where issues like WordPress accessibility testing, accessible forms, and even keyboard navigation start to matter a lot more.

Main Point: The European Accessibility Act 2025 is not just about compliance; it’s about giving all users equal access to digital spaces. If your WordPress website connects with European users, it must follow these new rules.

Who Must Comply With The EAA?

The European Accessibility Act 2025 is not just a call to action for government websites. It applies to a much broader group, especially businesses offering digital products or services across the European Union (EU).

EU-Based And Non-EU Businesses

If your company is based in the EU and provides digital services or products, you must follow the EAA. But here’s the twist: Non-EU businesses that operate online and serve European consumers must also adhere to it.

That means if you run a WordPress eCommerce site from outside the EU, and your audience includes European customers, your website needs to meet accessibility standards like WordPress screen reader compatibility, keyboard navigation, and alt text image support.

Note: If your website is hosted elsewhere, the user experience it offers within the EU matters.

What About Small Businesses And Exceptions?

The EAA provides some flexibility. Microenterprises, businesses with fewer than 10 employees and less than €2 million in annual turnover may be exempt from direct compliance. 

But there’s a catch. If these businesses partner with larger service providers or operate in industries such as banking, telecom, or transport, they could still be indirectly affected. 

Accessibility will often become a baked-in requirement in supply chain contracts and platform guidelines. Hence, it’s wiser for WordPress site owners to stay ahead. 

Future-proofing your website with WordPress accessibility best practices can shield your growth and reputation.

The Bottom Line: Whether you’re in the EU or not, if your WordPress site serves EU users, you may be required to meet the EAA standards. Exemptions exist, but don’t always guarantee immunity as accessibility expectations rise across industries. 

When Does The EAA Take Effect?

The European Accessibility Act 2025 isn’t a future problem; it’s a present priority. With the final compliance deadline approaching rapidly, the clock is ticking for WordPress site owners who must prepare.

Timeline And Compliance Deadline (June 2025)

The EAA was enacted in 2019, but the real impact begins in June 2025, when enforcement officially begins. After that, any new digital products or services made available in the EU must meet accessibility requirements. That includes websites, mobile apps, eBooks, online stores, ticketing systems, and more.

If you’re planning a website redesign or launching a new WordPress build, the time to incorporate accessibility is now. Retroactive updates after 28th June 2025 could be riskier, more expensive, and subject to legal scrutiny.

What Happens If You Miss It?

  • Non-compliance isn’t just a technical issue; it could mean severe consequences. You might face:
  • Fines and legal actions under national enforcement bodies
  • Damaged brand trust from customers who find your website inaccessible
  • Missed market opportunities, especially in public sector contracts or large tenders that demand digital inclusion

For WordPress site owners, using tools like a WordPress accessibility audit checklist or investing in accessibility remediation can help identify and fix issues before they become liabilities.

What This Means For You: June 2025 is a challenging deadline. WordPress sites not aligned with EAA requirements by then could face penalties, reputation damage, or lost opportunities. Starting today gives you time to fix, test, and launch confidently. 

EAA vs WCAG: What’s The Real Difference?

EAA and WCAG are often mentioned in the same breath when it comes to web accessibility. However, they are both different. Though they work together, understanding how they differ (and connect) helps WordPress website owners stay smart and compliant.

Overview Of WCAG 2.1 (AA)

WCAG, or Web Content Accessibility Guidelines, is a global standard created by the W3C. Its goal is simple: make digital content usable for people of all abilities. The current benchmark, WCAG 2.1 Level AA, includes rules on color contrast, keyboard navigation, screen reader compatibility, and more elements.

If you’ve heard about WordPress accessibility best practices, they’re almost always rooted in WCAG.

How WCAG Supports EAA Compliance

Here’s where things link up. While the European Accessibility Act 2025 is a law, WCAG is not. Instead, WCAG 2.1 AA serves as the technical reference to meet the legal requirements set by the EAA.

Think of the EAA as the “why” and WCAG as the “how.”

If your WordPress website follows WCAG 2.1 AA, you’re already on the right path to EAA compliance. It includes:

  • Proper WordPress alt text for images
  • Full WordPress keyboard navigation
  • Adequate color contrast using tools or checkers
  • Use of accessible forms and error notifications
  • Logical heading structure and label associations

Tools like Lighthouse or WAVE can help test whether your WordPress website abides by WCAG and supports your EAA journey by extension.

A Quick Visual Distinction Between EAA And WCAG

AspectEuropean Accessibility Act (EAA)Web Content Accessibility Guidelines (WCAG)
NatureLegislation (Law)Technical Standard (Guidelines)
Issued ByEuropean Union (EU)W3C (World Wide Web Consortium)
PurposeEnforce digital accessibility across the EUProvide best practices for digital accessibility
ApplicabilityMandatory for public & private sector businesses in the EUVoluntary but widely adopted for compliance
Compliance DeadlineJune 28, 2025No deadline, but referenced by laws like EAA
FocusProducts & services (websites, apps, hardware, etc.)Web and digital content accessibility
Technical ReferenceRelies on WCAG (mostly 2.1 Level AA) for implementationDefines specific accessibility success criteria
How Does It Affect WordPress?Requires WordPress sites to meet accessibility standardsProvides the checklist for making WP websites compliant

Smart Summary: The EAA tells you what’s required. WCAG shows you how to get there. Following WCAG 2.1 AA guidelines is the most direct way to meet the EAA’s expectations for your WordPress website. 

Accessibility In Practice: The POUR Principles

The European Accessibility Act 2025 isn’t just a checklist of what to fix. It’s deeply rooted in creating meaningful, barrier-free experiences for everyone. 

At the heart of accessible digital design lies the four POUR principles: Perceivable, Operable, Understandable, and Robust. These principles guide how your WordPress website should behave to support users of all abilities.

Perceivable

Your website must present content in ways that users can notice and interpret. That means screen reader-friendly elements, proper image alt text, and captions on multimedia must be clearly perceivable. Features like WordPress alt text images and keyboard-friendly navigation are your first checkpoints here.

Operable

Users should be able to interact with all elements of your website without hindrances, including those who don’t use a mouse. It is where WordPress keyboard navigation and form accessibility come into play. Ensure menus, buttons, and interactive components are easy to reach and activate.

Understandable

Your content and navigation should be straightforward to grasp. Comprehensible headings, readable fonts, and consistent behavior help users predict what happens next. This principle isn’t just good for accessibility; it also makes your content more user-friendly for everyone.

Robust

Your website must work reliably across different browsers, devices, and assistive technologies. Using WordPress accessibility testing tools like WAVE or Lighthouse ensures your website holds up currently and as technology evolves.

In a Nugget: When your WordPress site is Perceivable, Operable, Understandable, and Robust, you’re not just ticking accessibility boxes;  you’re building trust, improving usability, and future-proofing your business digital presence.

How The EAA Impacts WordPress Site Owners

The European Accessibility Act 2025 isn’t just a legal checkpoint. It’s a wake-up call for WordPress site owners to reshape how their digital content speaks to everyone, including users with disabilities.

From themes and plugins to editors and forms, every corner of your WordPress setup matters.

Custom Themes And Plugin Compatibility

If your website runs on a custom theme or has been heavily customized with third-party plugins, chances are high that some features may not pass accessibility checks. 

Custom-built designs often miss the mark on keyboard access, semantic HTML, or screen reader support. Hence, it’s time to fine-tune your WordPress site like a pro by ensuring your themes and plugins are compatible with accessibility standards.

Gutenberg And Classic Editor Differences

The Gutenberg block editor has come a long way, offering advancements in accessibility structure. But that doesn’t mean your content is automatically compliant. 

In comparison, Classic Editor gives more manual control but requires added effort to make it accessible. Please note: Irrespective of whichever editor you use, put your website’s smart switch to work – test and adapt with intention.

Forms, Mobile Views, And Multilingual Setups

Contact forms, newsletter signups, and feedback tools often become barriers when they lack crystal-clear labels or keyboard navigation. So do mobile menus that trap users or language switchers that don’t speak to screen readers. 

It’s essential to fire up your website’s true power by auditing every interaction and ensuring accessibility across devices and languages.

The Crux: Your WordPress site isn’t just for those who can see, hear, or click with ease. The EAA encourages clearing out clutter and chaos, ensuring your custom builds, editors, and user interfaces offer every visitor equal access and seamless journeys.

Must-Have Accessibility Tools And Resources For WordPress

You don’t need to start from scratch or drown in code to meet the European Accessibility Act 2025 standards. WordPress offers a rich toolkit to help you run flawlessly, systematically, and swiftly with accessibility front and center.

Here are some tools that simplify the process and bring clarity to compliance.

Helpful WordPress Plugins

Some plugins work behind the scenes to patch common accessibility issues. Here are a few worth exploring:

  • WP Accessibility: Adds skip links, outlines focusable elements, and improves form labeling. It is a trustworthy choice to cover basic gaps.
  • One Click Accessibility: Ideal for beginners, this wordpress plugin adds user-friendly features like contrast toggles, text resizers, and keyboard navigation helpers.
  • Accessibility Widget: A handy tool for adding compliance notices and user-facing accessibility features without altering code.

Think of these as your site’s cleanup crew in one plugin. They take care of things you might miss, allowing you to stay focused on content and user experience.

Top Testing Tools To Identify Issues

You need to locate bottlenecks before fixing them. These tools help scan your website for potential trouble spots:

  • WAVE: A browser extension that flags accessibility problems visually and explains them.
  • axe DevTools: Built for developers, this tool runs audits within the browser and provides actionable insights.
  • Google Lighthouse: It runs in Chrome DevTools and offers a quick snapshot of your website’s performance and accessibility score.

Pair these tools with regular testing, and you’ll spot issues before they affect real users or compliance deadlines. 

A Quick Visual Glance

Tool/PluginTypeKey FeaturesBest For
WP AccessibilityPluginSkip links, form labels, outline fixesGeneral compliance basics
One Click AccessibilityPluginText resizer, contrast toggle, keyboard navigationBeginners, non-coders
Accessibility WidgetPluginAdds accessibility tools without code changesInformational accessibility
WAVETesting ToolVisual issue detection, browser extensionQuick scans and flagging issues
axe DevToolsTesting ToolIn-browser audit, developer-focusedDeep diagnostics
Google LighthouseTesting ToolPerformance and accessibility reports in ChromeOverall site health check

Knowledge Drop: Plugins and testing tools are your first responders in the accessibility journey. Use them cleverly to put your site’s smart switch to work, find what’s broken, and fix it quickly without guesswork or headaches. 

How To Make Your Website EAA-Compliant

Getting your WordPress site compliant with the European Accessibility Act 2025 may seem like a daunting task, but it’s straightforward and attainable when broken down into clear, manageable steps. 

Whether you’re a developer, business owner, or content creator, following a smart compliance path can help you avoid risk, welcome more users, and stay ahead of the 2025 deadline.

Step 1: Run An Accessibility Audit

Begin with a WordPress accessibility audit checklist. Use trusted tools like WAVE, Lighthouse, or Axe to identify gaps in your current design and code. These tools scan for issues, such as missing WordPress alt text images, imperfect color contrast, broken keyboard navigation, and screen reader problems.

Step 2: Fix The Most Critical Barriers

Once you have the audit report, fix the most impactful issues first:

  • Work on keyboard navigation for users who don’t use a mouse.
  • Add descriptive alt text to all crucial images.
  • Use a WordPress color contrast checker to ensure readable text.
  • Ensure your forms are WordPress-accessible with proper labels, focus states, and error messages.

Step 3: Choose Accessibility-Friendly Themes And Plugins

If your current setup causes more problems than it solves, switch to a WordPress accessibility-compliant theme and plugins that follow WordPress accessibility best practices. Avoid themes that override browser defaults or use inaccessible JavaScript components.

Check the WordPress accessibility plugins list for tested options like:

  • WP Accessibility
  • One Click Accessibility
  • Accessibility Checker

These tools assist in rectifying code-level issues and maintaining ongoing accessibility.

Step 4: Write And Display An Accessibility Statement

An accessibility statement that WordPress users can find easily on your site is not just good practice; it’s becoming an EAA essential. It shows users what steps you’ve taken, where you stand, and how they can get in touch if they face issues. 

Handy Tip: Use a WordPress accessibility statement generator or draft a custom version customized to your site’s journey.

Step 5: Add A Feedback Form

Give users a simple way to report accessibility problems. This demonstrates you care about continuous advancement and stay legally safe by showing a willingness to correct known problems.

Step 6: Keep Testing And Training

Accessibility is not a one-time fix. Schedule regular scans and engage in WordPress accessibility training to keep your team updated. Enterprise websites can consider professional WordPress accessibility compliance services or audits.

Core Thought: Making your site EAA-compliant doesn’t mean starting over. A structured approach like auditing, fixing, and future-proofing can help you build an accessible, inclusive WordPress experience that’s legally safe and user-friendly.

The Benefits Of Web Accessibility

Complying with the European Accessibility Act 2025 isn’t just about avoiding penalties; it’s about building top-notch, innovative websites that serve everyone. Focusing on accessibility elevates user experience, cultivates trust, and expands your reach to a broader audience.

Better SEO, Better Visibility

Accessibility improvements like semantic HTML, alt text, and uncomplicated navigation also boost your SEO. Search engines value well-structured content that’s easy to crawl. 

Following WordPress accessibility standards makes it more straightforward for people and bots to understand and rank your website.

Improved User Experience For All

Features like keyboard navigation, comprehensible forms, and readable contrast benefit more than just users with disabilities. They make your website more effortless for everyone, including people on mobile devices, older adults, and even users with slow internet connections.

Stronger Brand Reputation

When your website welcomes all visitors, it reflects positively on your brand. It shows responsibility, inclusivity, and care for user needs. It can lead to heightened loyalty, more referrals, and increased customer satisfaction.

Reach A Larger Audience

Approximately 87 million people in the EU live with some form of disability. If your WordPress site isn’t accessible, you’re unfortunately closing the door on millions of potential visitors, customers, or clients. WordPress accessibility refinements help you tap into this overlooked market.

Higher Conversions

Simple design adjustments that follow WordPress accessibility best practices, such as readable fonts, focusable buttons, and a coherent flow of pages, can help reduce bounce rates and amplify conversions. A smoother experience leads to longer sessions, more interactions, and favorable results.

Essential Insight: Accessibility is not a limitation; it’s a necessary upgrade. Building an accessible WordPress website opens doors to peak performance and creates a space that works for everyone. 

CTA Content: Make Every Visitor Feel Seen, Heard, And Clicked

CTA Button: Build A Website Everyone Can Use →

The Risk Of Not Complying With EAA

Ignoring the European Accessibility Act 2025 isn’t just a design oversight; it’s a business liability. If your WordPress site doesn’t meet the legal usability standards outlined in the EAA by June 28, 2025, the consequences could go far beyond a substandard user experience.

Legal And Financial Repercussions

Non-compliance can lead to severe penalties. Regulatory bodies across the EU are empowered to enforce the EAA through fines, warnings, and mandatory corrective actions. If your website is found to create digital barriers, you could face ongoing scrutiny or even legal proceedings.

Reputational Damage

Failing to conform to inclusivity can hamper how people view your brand. Today’s consumers expect companies to value digital equity. A website that excludes users with disabilities can quickly lose public trust and customer loyalty. 

Note: People remember how your website made them feel, and exclusion isn’t forgettable.

Competitive Disadvantage

As more businesses embrace inclusive web guidelines, those lagging may find themselves left out. Government organizations, large-scale enterprises, and even B2B clients now demand that their partners and vendors meet digital inclusivity requirements. 

If your website can’t deliver, it might be overlooked for significant opportunities.

Key Takeaway: Non-adherence to the European Accessibility Act 2025 could result in legal fines, lost trust, and missed partnerships. A website that’s not user-first in design will fall behind. Taking action now is an intelligent move for future-proofing your brand. 

Conclusion

The European Accessibility Act 2025 isn’t just another piece of regulation; it’s a powerful push toward a web that works for everyone. For WordPress website owners, this is your moment to lead with purpose.

Throughout this guide, you’ve explored how the EAA reshapes digital responsibilities, who it applies to, what it demands, and how your WordPress site fits into the picture. We’ve walked through inclusive design principles, explored usability tools, and broken down step-by-step how to build a website that invites every visitor in, and no exceptions.

Whether you’re a solo creator, part of an agency, or managing enterprise-scale websites, adhering to the EAA isn’t just about avoiding fines or ticking off boxes. It’s about showing your users that their experience matters. It’s about creating plain sailing navigation, comprehensible content, and interfaces that feel like home to everyone.

Don’t wait for the deadline to define your direction. Start removing barriers by working on one improvement at a time. 

Remember, a compliant website isn’t just a legal win. It’s a gateway to a faster, friendlier, more future-proof web experience.

We hope this blog serves as your lighting guide in making your website EAA-compliant. 

FAQ

Do WordPress Theme Developers Need To Make Their Themes EAA-Compliant?

Yes. If your themes are sold or distributed within the EU and used by businesses offering services to EU consumers, they must meet EAA standards. Accessibility-ready themes with proper semantic markup, contrast ratios, and keyboard navigation are pivotal for compliance.

Can Third-Party Plugins Break EAA Compliance On My WordPress Site?

Absolutely. Plugins that generate non-accessible forms, pop-ups, or media elements can violate compliance. It’s vital to test third-party plugins for accessibility or use trusted plugins designed with inclusivity in mind.

Is Using An Accessibility Overlay Enough For EAA Compliance?

No. Accessibility overlays are often seen as a temporary fix and can miss profound structural issues. EAA compliance requires thorough development practices, testing, and actual improvements, not just surface-level mending.

How Often Should I Conduct Accessibility Audits On My WordPress Site?

Ideally, audits should be done after significant updates or design changes. Perform a comprehensive accessibility audit at least every 6–12 months to ensure ongoing compliance and to catch new issues beforehand.

What Accessibility Training Options Are Available For WordPress Teams?

Several online platforms offer WordPress-specific accessibility training, including courses from W3C, Deque, and accessibility-focused WordPress communities. Team training ensures consistent development practices and makes compliance more manageable in the long-term. 

How to Fix the WordPress 500 Internal Server Error

The WordPress 500 Internal Server Error is one of the most common and frustrating issues WordPress users face. This error can prevent visitors from accessing your website, and because it doesn’t provide much detail about the cause, it can be challenging to troubleshoot. However, with the right approach, you can identify and fix the underlying issue.

This guide will walk you through the steps to resolve the WordPress 500 error, from understanding its causes to applying effective solutions. Whether you are an intermediate user or an experienced developer, the following solutions will help you restore your site quickly and efficiently

Understanding the 500 Internal Server Error

The 500 Internal Server Error is a general HTTP status code that indicates something has gone wrong on the server’s side, but the server is unable to be more specific about the exact issue. Unlike other errors like the 404 (Page Not Found), the 500 error does not point to a specific file or resource causing the problem. Instead, it signals a server-side issue that needs to be addressed.

This error can occur for a variety of reasons, including server misconfigurations, issues with WordPress plugins or themes, problems with PHP settings, or even conflicts between the server and your WordPress installation. Although it is a common error, its vague nature makes it difficult to pinpoint the exact cause without further investigation.

In the context of WordPress, the 500 error is often linked to problems with the server’s configuration, file permissions, or corrupted files. When this error appears, it prevents your website from loading, which can impact your site’s traffic and reputation. However, with the right troubleshooting steps, the issue can typically be resolved.

Identifying the Root Cause of the Error

Before diving into fixes, it’s crucial to identify the root cause of the WordPress 500 Internal Server Error. Since this error can stem from multiple sources, narrowing down the potential causes will help you apply the right solution. Below are some common reasons behind this error:

  1. Plugin or Theme Conflicts: One of the most frequent causes of the 500 error is a conflict between installed plugins or themes. An incompatible plugin or a theme update can disrupt the normal operation of WordPress, leading to the error.
  2. Corrupted .htaccess File: The .htaccess file in WordPress controls how the server responds to different requests. If this file becomes corrupted, it can trigger the 500 error.
  3. PHP Memory Limit Issues: WordPress requires a certain amount of memory to run smoothly. If the PHP memory limit is exceeded, it can result in a 500 error. This is particularly common on shared hosting environments.
  4. File and Folder Permissions: Incorrect file and folder permissions can prevent WordPress from accessing necessary files, resulting in a 500 error.
  5. Server-Side Issues: Sometimes, the issue lies with the server itself, such as server misconfigurations or issues with the server’s software. These problems can cause the server to return a 500 error.
  6. Database Corruption: If your WordPress database becomes corrupted, it can cause a range of issues, including the 500 error. This is often due to failed updates, plugin conflicts, or server issues.

Once you have a general idea of where the problem may lie, you can proceed with targeted troubleshooting steps. Each cause has its own set of solutions, so understanding the root cause is essential for effectively resolving the issue.

Common Fixes for WordPress 500 Internal Server Error

When encountering the WordPress 500 Internal Server Error, there are several common fixes you can try to resolve the issue. While the root cause of the error may vary, these general solutions can help you restore your site and prevent the error from reoccurring.

Common Fixes for WordPress 500 Internal Server Error

1. Deactivate All Plugins

A common cause of the 500 error is a conflict between plugins. To check if a plugin is the culprit, you can deactivate all plugins and see if the error is resolved.

  • How to do it:
    • Log into your WordPress dashboard.
    • Navigate to the Plugins section and deactivate all plugins.
    • If the error is resolved, reactivate each plugin one by one, checking the site after each activation. This will help you identify the specific plugin causing the issue.

If you cannot access the dashboard, you can deactivate plugins via FTP by renaming the plugins folder in the wp-content directory.

2. Switch to a Default Theme

Themes can also cause conflicts that lead to the 500 error. To rule out a theme-related issue, switch to a default WordPress theme (like Twenty Twenty-One or Twenty Twenty-Two).

  • How to do it:
    • Go to the Appearance > Themes section in your WordPress dashboard.
    • Activate a default theme.
    • Check your website to see if the error is resolved.

If you cannot access the dashboard, you can change the theme via FTP by renaming the current theme’s folder in the wp-content/themes directory.

3. Check the .htaccess File

A corrupted .htaccess file is a common culprit behind the 500 error. You can regenerate this file by simply resetting it.

  • How to do it:
    • Via FTP, navigate to the root directory of your WordPress installation.
    • Locate the .htaccess file and rename it (e.g., .htaccess_old).
    • Log into your WordPress dashboard and go to Settings > Permalinks.
    • Simply click “Save Changes” to regenerate a new .htaccess file.

4. Increase PHP Memory Limit

If your WordPress site exceeds the allocated PHP memory, it can cause 500 errors. Increasing the PHP memory limit can often resolve the issue.

  • How to do it:
    • Open the wp-config.php file in your WordPress root directory.

Add the following line before the “That’s all, stop editing!” comment:
php
Copy code
define(‘WP_MEMORY_LIMIT’, ‘256M’);

  • Save the file and check if the error persists.

5. Check File and Folder Permissions

Incorrect file and folder permissions can prevent WordPress from functioning correctly. Ensure that your files and folders have the correct permissions.

  • How to do it:
    • Via FTP, navigate to your WordPress root directory.
    • Ensure that files have 644 permissions and directories have 755 permissions.
    • If any files or folders have incorrect permissions, change them to the appropriate values.

6. Reinstall WordPress Core Files

If the WordPress core files are corrupted, reinstalling them can often resolve the issue.

  • How to do it:
    • Go to Dashboard > Updates in your WordPress admin panel.
    • Click the Reinstall Now button to reinstall the WordPress core files.

Plugin and Theme Conflicts

One of the most common causes of the WordPress 500 Internal Server Error is conflicts between plugins or themes. WordPress plugins and themes can interact with each other in unexpected ways, causing issues that result in the 500 error. When a plugin or theme update introduces a compatibility issue, it can break the functionality of your site, leading to this error.

Identifying Plugin Conflicts

Plugins are essential for extending the functionality of WordPress, but sometimes they can conflict with each other. A plugin conflict occurs when two or more plugins try to modify the same functionality or use incompatible code. This can result in the server returning a 500 error.

To identify plugin conflicts, follow these steps:

  1. Deactivate All Plugins: As mentioned earlier, deactivate all your plugins and check if the error persists.
  2. Activate Plugins One by One: Reactivate each plugin individually and refresh your website after each activation. This will help you identify the specific plugin causing the issue.

If you find a conflicting plugin, try updating it to the latest version. If the problem persists, you may need to contact the plugin developer for support or find an alternative plugin.

Identifying Theme Conflicts

Themes can also contribute to the 500 error. An outdated or poorly coded theme can cause conflicts with plugins or WordPress core files. This is especially true if the theme is not compatible with the latest version of WordPress.

To check if the theme is the cause of the issue:

  1. Switch to a Default Theme: As mentioned previously, switch to a default WordPress theme like Twenty Twenty-One or Twenty Twenty-Two.
  2. Check for the Error: If the error disappears after switching themes, then the issue lies with your original theme. In this case, you may need to update the theme or contact the theme developer for assistance.

Resolving Plugin and Theme Conflicts

Once you identify the conflicting plugin or theme, there are a few possible solutions:

  1. Update Plugins and Themes: Ensure all your plugins and themes are up to date. Developers often release updates to fix bugs and improve compatibility.
  2. Remove or Replace the Conflicting Plugin/Theme: If updating doesn’t solve the problem, consider removing or replacing the conflicting plugin or theme with a more compatible one.
  3. Consult the Developer: If you’re unsure which plugin or theme is causing the conflict, or if you cannot resolve the issue, it may be time to consult a developer. A developer can help identify the root cause of the conflict and provide a custom solution.

Corrupted .htaccess File

The .htaccess file in WordPress is a configuration file used by the server to control how it handles requests. It can define rules for URL redirection, security, and access control. When this file becomes corrupted, it can lead to various issues, including the 500 Internal Server Error.

A corrupted .htaccess file can be caused by a number of factors, such as improper plugin installations, faulty theme updates, or server misconfigurations. Fortunately, fixing a corrupted .htaccess file is relatively straightforward.

How to Fix a Corrupted .htaccess File

  1. Access Your Site via FTP:
    To begin, you’ll need access to your site’s files via FTP or a file manager in your hosting control panel. Use an FTP client like FileZilla or cPanel’s File Manager to access your site’s root directory.
  2. Locate the .htaccess File:
    In the root directory of your WordPress installation, look for the .htaccess file. If you can’t find it, ensure that your FTP client is set to show hidden files, as the .htaccess file is hidden by default.
  3. Rename the .htaccess File:
    To test if the .htaccess file is causing the error, rename it (e.g., .htaccess_old). This will disable the current file and force WordPress to create a new one.
  4. Check Your Website:
    After renaming the file, visit your website. If the 500 error disappears, then the issue was indeed caused by the .htaccess file.
  5. Generate a New .htaccess File:
    To regenerate the .htaccess file, log into your WordPress dashboard, navigate to Settings > Permalinks, and click Save Changes. This action will create a fresh .htaccess file with the default rules.
  6. Manually Edit the .htaccess File (Optional):
    If you had custom rules in your previous .htaccess file (such as redirects or security rules), you can manually add them back to the new file. However, be cautious when doing this, as incorrect rules can cause further issues.

Preventing Future .htaccess Issues

To prevent future problems with the .htaccess file, it’s a good idea to:

  • Regularly Backup Your Site: Always backup your WordPress site, including the .htaccess file, before making any changes to it.
  • Use a Plugin for .htaccess Management: Consider using a plugin like Yoast SEO or WP Rocket to manage your .htaccess file. These plugins can automatically handle most configurations and reduce the risk of errors.

PHP Memory Limit Issues

The PHP memory limit defines the amount of memory that PHP scripts can use when running on your server. WordPress relies heavily on PHP to process data, and when the PHP memory limit is too low, it can result in various errors, including the 500 Internal Server Error.

When WordPress exceeds the allocated memory, it can cause processes to fail, triggering the 500 error. This is particularly common when your site has many plugins, large media files, or high traffic.

How to Increase the PHP Memory Limit

  1. Edit the wp-config.php File:
    The easiest way to increase the PHP memory limit is by editing the wp-config.php file, located in the root directory of your WordPress installation.
    • Open the wp-config.php file in a text editor.

Add the following line of code before the line that says, “That’s all, stop editing! Happy blogging”:
php
Copy code
define(‘WP_MEMORY_LIMIT’, ‘256M’);

  • Save the changes and upload the file back to your server.
  1. Edit the php.ini File:
    If the first method doesn’t work, you can try increasing the PHP memory limit by editing the php.ini file. This file is typically located in your server’s root directory or in the public_html folder.

Look for the following line in the php.ini file:
ini
Copy code
memory_limit = 128M

Change the value to a higher number, such as:
ini
Copy code
memory_limit = 256M

  • Save the file and restart your web server.
  1. Contact Your Hosting Provider:
    If you don’t have access to the wp-config.php or php.ini files, or if increasing the memory limit doesn’t solve the issue, contact your hosting provider. Many shared hosting environments have strict memory limits, and your host may need to adjust the memory settings for you.

Preventing PHP Memory Limit Issues

To prevent running into PHP memory limit issues in the future:

  • Monitor Your Plugins: Keep your plugin count to a minimum, and only install plugins that are necessary for your site’s functionality. Excessive plugins can drain memory resources.
  • Optimize Your Site: Regularly optimize your WordPress site by reducing the size of images, using caching, and removing unused plugins and themes.
  • Upgrade Your Hosting: If your site is growing and requires more resources, consider upgrading to a higher-tier hosting plan, such as VPS or dedicated hosting, which offers more memory and better performance.

File and Folder Permissions

Incorrect file and folder permissions are another common cause of the WordPress 500 Internal Server Error. Permissions control who can read, write, and execute files and directories on your server. When permissions are set incorrectly, WordPress may not be able to access or modify necessary files, leading to errors such as the 500 Internal Server Error.

Understanding File and Folder Permissions

Permissions are typically represented by three digits in the form of rwx (read, write, execute) for files and directories. These permissions are granted to the owner, group, and others. For WordPress to function properly, files and directories need to have specific permissions set.

  • Files should have 644 permissions (read and write for the owner, read-only for everyone else).
  • Directories should have 755 permissions (read, write, and execute for the owner, and read and execute for everyone else).

How to Check and Fix Permissions

To check and fix file and folder permissions, you’ll need to access your site’s files via FTP or through your hosting control panel.

  1. Access Your Site via FTP:
    Use an FTP client like FileZilla to connect to your server, or log into your hosting control panel and open the File Manager.
  2. Check File Permissions:
    • Navigate to the wp-content folder and other critical directories like wp-admin and wp-includes.
    • Right-click on a file or folder and select File Permissions (or similar, depending on your FTP client).
    • Verify that files have 644 permissions and directories have 755 permissions.
  3. Fix Permissions:
    • If any files or directories have incorrect permissions, change them to the appropriate values.
    • For files, set the permission to 644.
    • For directories, set the permission to 755.
    • Apply the changes recursively to all files and folders within the WordPress installation.
  4. Test Your Site:
    After adjusting the permissions, check your site to see if the error has been resolved.

Preventing Future Permission Issues

To avoid future permission-related issues:

  • Avoid Changing Permissions Manually: Only adjust permissions when necessary, as incorrect changes can lead to security risks or functionality issues.
  • Regularly Backup Your Site: Backing up your site ensures that you can quickly restore it to a working state if permission errors occur again.
  • Use a Security Plugin: WordPress security plugins like Wordfence or iThemes Security can help manage file permissions and protect your site from unauthorized access.

Core WordPress File Issues

Another potential cause of the WordPress 500 Internal Server Error is issues with the core WordPress files. These are the files that make up the WordPress platform itself, including the wp-admin, wp-includes, and wp-content directories. If any of these core files become corrupted, missing, or outdated, it can lead to errors that disrupt the normal functioning of your site, including the 500 error.

How Core Files Become Corrupted

Core WordPress files can become corrupted for a variety of reasons:

  1. Failed Updates: If an update to WordPress or a plugin fails, it can result in incomplete or corrupted core files.
  2. Manual File Modifications: If someone manually edits WordPress files (such as wp-config.php or .htaccess) without proper knowledge, it can lead to errors.
  3. Malware or Hacking: In some cases, hackers may target WordPress sites and modify core files, causing unexpected issues.
  4. Server Failures: Server crashes or misconfigurations can cause data corruption, affecting WordPress core files.

How to Fix Core WordPress File Issues

  1. Reinstall WordPress Core Files:
    The easiest way to fix corrupted core files is to reinstall WordPress. This can be done without affecting your content or settings.
    • Via the WordPress Dashboard:
      • Go to Dashboard > Updates.
      • Click the Reinstall Now button. This will reinstall the core WordPress files while preserving your themes, plugins, and content.
    • Manually Reinstall WordPress:
      If you cannot access the WordPress dashboard, you can manually reinstall WordPress by downloading the latest version from WordPress.org. Upload the fresh WordPress files to your server, overwriting the existing ones (except the wp-content folder and wp-config.php file).
  2. Check for Missing Files:
    If some core files are missing, download the latest version of WordPress and upload the missing files to your server. This can often resolve issues caused by incomplete installations.
  3. Restore from Backup:
    If the above steps do not resolve the issue, restoring your site from a recent backup (if available) may help. This will restore your core files to a working state.

Preventing Core File Issues

To avoid problems with core WordPress files in the future:

  • Always Backup Your Site: Regular backups ensure that you can quickly restore your site to a functional state if core files become corrupted.
  • Enable Automatic Updates: WordPress has an automatic update feature that ensures your core files are always up to date. Enable automatic updates for WordPress core, plugins, and themes.
  • Limit Manual File Modifications: Avoid making manual changes to core WordPress files unless absolutely necessary. Use plugins or child themes for customizations instead.

Server-Side Issues

Server-side issues are another possible cause of the WordPress 500 Internal Server Error. These issues are typically related to the server environment or configuration and are beyond the control of WordPress itself. Server-side problems can arise from misconfigurations, resource limitations, or even issues with the server software. When these issues occur, they can prevent WordPress from functioning properly, resulting in a 500 error.

Common Server-Side Issues

  1. Server Configuration Errors:
    Incorrect server settings or misconfigurations in the server’s software (e.g., Apache, Nginx, or PHP) can lead to the 500 error. For example, if the server is not properly configured to handle WordPress, it can fail to load the site correctly.
  2. Server Resource Limitations:
    Shared hosting environments often impose limits on server resources, such as CPU usage, memory, and bandwidth. If your WordPress site exceeds these limits, it may trigger a 500 error. This is more common on high-traffic sites or sites with resource-intensive plugins.
  3. Server Downtime or Outages:
    Sometimes, the issue may be caused by temporary server downtime or outages. If the server is experiencing issues or is undergoing maintenance, it may be unable to serve your WordPress site, resulting in a 500 error.
  4. PHP Version Compatibility:
    WordPress requires a specific version of PHP to function properly. If your server is running an outdated or incompatible version of PHP, it can cause conflicts with WordPress and lead to errors like the 500 Internal Server Error.

How to Fix Server-Side Issues

  1. Check Server Logs:
    The first step in diagnosing server-side issues is to check the server logs. Most hosting providers offer access to error logs through the hosting control panel. These logs can provide valuable information about what’s causing the error and where it’s coming from.
  2. Increase Server Resources:
    If your site is on shared hosting and you’re encountering resource limitations, consider upgrading to a higher-tier hosting plan, such as VPS (Virtual Private Server) or dedicated hosting. These plans offer more resources and greater control over the server environment.
  3. Update PHP Version:
    Ensure that your server is running a compatible version of PHP. WordPress recommends using PHP 7.4 or higher. You can update your PHP version through your hosting control panel, or you may need to contact your hosting provider for assistance.
  4. Contact Your Hosting Provider:
    If you’ve tried troubleshooting server-side issues yourself and the error persists, it may be time to contact your hosting provider. They can check for server misconfigurations, resource limitations, or other issues that may be causing the 500 error. In some cases, they may be able to resolve the issue on their end.

Preventing Server-Side Issues

To prevent server-side issues from causing the 500 Internal Server Error in the future:

  • Choose a Reliable Hosting Provider: Opt for a reputable hosting provider with excellent customer support and performance. If your site experiences frequent server issues, it may be worth switching to a more reliable host.
  • Monitor Server Resources: Keep an eye on your site’s resource usage, especially if your site grows in size or traffic. Most hosting providers offer tools to monitor server performance and resource usage.
  • Keep Your Server Software Up to Date: Ensure that your server software, including PHP, Apache, or Nginx, is up to date. This can help prevent compatibility issues and improve server performance.

Database Issues

WordPress relies heavily on its database to store all site content, settings, and configurations. A corrupted or misconfigured database can lead to a variety of issues, including the 500 Internal Server Error. Problems with the WordPress database can arise from a variety of factors, such as server crashes, failed updates, or plugin conflicts.

Common Database Issues

  1. Corrupted Database Tables:
    WordPress stores all content in database tables. If one or more of these tables become corrupted, it can cause the site to malfunction and trigger the 500 error. Corruption may occur during a failed update, plugin installation, or server crash.
  2. Database Connection Errors:
    A database connection error occurs when WordPress is unable to connect to the database. This can happen if the database credentials in the wp-config.php file are incorrect, or if the database server is down or overloaded.
  3. Excessive Database Size:
    Over time, your WordPress database can grow in size due to accumulated data, such as post revisions, comments, and plugin data. An excessively large database can slow down your site and potentially lead to the 500 error.

How to Fix Database Issues

Repair the Database:
WordPress includes a built-in feature to repair and optimize the database. To enable this feature, add the following line to your wp-config.php file:
php
Copy code
define(‘WP_ALLOW_REPAIR’, true);

Once added, visit the following URL to repair the database:
arduino
Copy code
http://yoursite.com/wp-admin/maint/repair.php

  1. You’ll be presented with options to repair and optimize the database. After the process is complete, be sure to remove the line from your wp-config.php file for security reasons.
  2. Check Database Credentials:
    If you’re encountering a database connection error, verify that the database credentials in your wp-config.php file are correct. Ensure that the database name, username, password, and host are accurate. If you’re unsure, contact your hosting provider for assistance.
  3. Optimize the Database:
    Use a plugin like WP-Optimize or WP-Sweep to clean up and optimize your database. These plugins can remove unnecessary data such as post revisions, spam comments, and transient options, which can help reduce the size of the database and improve performance.
  4. Repair Corrupted Tables:
    If you suspect that specific database tables are corrupted, you can repair them manually using phpMyAdmin (available through most hosting control panels). In phpMyAdmin:
    • Select your WordPress database.
    • Select the tables you want to repair.
    • From the “With selected” dropdown, choose the Repair table.
  5. Restore from Backup:
    If the above steps don’t resolve the issue, and you have a recent backup of your database, restoring it to a previous state may help. This is particularly useful if the database corruption occurred after a failed update or plugin installation.

Preventing Database Issues

To prevent database issues from causing the 500 Internal Server Error in the future:

  • Regularly Backup Your Database: Ensure that you have regular backups of your WordPress database. Many backup plugins, such as UpdraftPlus or BackWPup, can automate this process.
  • Optimize Your Database Periodically: Use plugins to clean and optimize your database on a regular basis to prevent it from growing too large.
  • Monitor Database Performance: Keep an eye on your database performance, especially as your site grows. If your database becomes sluggish, consider upgrading your hosting plan or optimizing your database more frequently.

Advanced Debugging Techniques

When the basic troubleshooting steps do not resolve the WordPress 500 Internal Server Error, more advanced debugging techniques are required. These techniques can help you identify deeper issues within your WordPress installation, server configuration, or codebase. Advanced debugging involves examining error logs, enabling debugging in WordPress, and testing various configurations to pinpoint the root cause of the error.

Advanced Debugging Techniques

1. Enable WordPress Debugging

WordPress has a built-in debugging feature that can help identify the cause of errors. By enabling debugging, you can view error messages that provide valuable information about what’s going wrong.

To enable debugging, follow these steps:

  1. Open the wp-config.php file in your WordPress root directory.

Add or modify the following lines to enable debugging:
php
Copy code
define(‘WP_DEBUG’, true);

define(‘WP_DEBUG_LOG’, true);

define(‘WP_DEBUG_DISPLAY’, false);

    • WP_DEBUG: Enables debugging mode.
    • WP_DEBUG_LOG: Saves error messages to a log file (wp-content/debug.log).
    • WP_DEBUG_DISPLAY: Prevents error messages from being displayed on the front end (set to false for security reasons).
  1. Save the changes and upload the file back to your server.

After enabling debugging, check the wp-content/debug.log file for error messages. These messages can provide specific details about the issue, such as which plugin or theme is causing the error.

2. Check the Server Error Logs

In addition to WordPress debugging, checking your server’s error logs can provide more insights into the 500 error. Most hosting providers offer access to error logs through their control panels (e.g., cPanel or Plesk).

To access error logs:

  1. Log into your hosting control panel.
  2. Look for an option like Error Logs or Logs.
  3. Review the logs for any errors or warnings related to your WordPress site. Server logs can provide information about server misconfigurations, database connection issues, or resource limitations.

3. Deactivate All Plugins and Themes

Sometimes, the issue may be caused by a conflict between plugins or between a plugin and your theme. To identify the culprit, deactivate all plugins and switch to a default WordPress theme (such as Twenty Twenty-Three).

  • Deactivate Plugins:
    • If you have access to the WordPress dashboard, go to Plugins > Installed Plugins and deactivate all plugins.
    • If you cannot access the dashboard, use FTP or your hosting file manager to navigate to the wp-content/plugins folder and rename the plugins folder (e.g., to plugins_old). This will deactivate all plugins.
  • Switch to Default Theme:
    • Go to Appearance > Themes and activate a default theme (e.g., Twenty Twenty-Three).
    • If you cannot access the dashboard, use FTP to navigate to the wp-content/themes folder and rename your active theme folder. WordPress will automatically switch to the default theme.

After deactivating all plugins and switching to a default theme, check your site again. If the 500 error is resolved, reactivate each plugin and theme one by one to identify the cause.

4. Increase PHP Limits and Timeouts

Sometimes, the error can be caused by insufficient PHP limits or timeouts, especially if your site is resource-intensive. You can increase the PHP limits by modifying the php.ini or .htaccess files.

Increase PHP Limits:
Add the following lines to your php.ini file to increase PHP limits:
ini
Copy code
max_execution_time = 300

memory_limit = 256M

post_max_size = 64M

upload_max_filesize = 64M

    • max_execution_time: Increases the maximum time a PHP script can run before being terminated.
    • memory_limit: Increases the maximum amount of memory a PHP script can use.
    • post_max_size and upload_max_filesize: Increase the maximum size for file uploads.

Increase PHP Limits via .htaccess:
Add the following lines to your .htaccess file:
apache
Copy code
php_value memory_limit 256M

php_value max_execution_time 300

php_value post_max_size 64M

php_value upload_max_filesize 64M

5. Check for Theme or Plugin Code Issues

If you’ve narrowed down the issue to a specific theme or plugin, there may be errors in the code that are causing the 500 error. In this case, you can:

  • Review the Code: If you are familiar with PHP, review the plugin or theme code to look for any syntax errors, deprecated functions, or issues with database queries.
  • Use Debugging Tools: You can use debugging tools such as Xdebug or Query Monitor to track down issues in the code, such as slow database queries or conflicts between functions.

6. Contact Your Hosting Provider

If you’ve exhausted all debugging techniques and the issue persists, contact your hosting provider. They can help you identify server-side issues, such as misconfigurations, resource limitations, or server errors, that may be causing the 500 Internal Server Error.

7 Most Effective Ways to Prevent HTTP Error 500 on Your WordPress Website

Once you’ve resolved the WordPress 500 Internal Server Error, it’s essential to take steps to prevent it from happening again. While some errors are inevitable, implementing preventive measures can significantly reduce the likelihood of encountering this issue in the future. These strategies focus on maintaining a healthy WordPress environment, optimizing server settings, and ensuring proper backups and updates.

7 Most Effective Ways to Prevent HTTP Error 500 on Your WordPress Website

1. Regularly Update WordPress, Themes, and Plugins

One of the most effective ways to prevent errors is to keep your WordPress installation, themes, and plugins up to date. Developers frequently release updates to fix bugs, patch security vulnerabilities, and improve compatibility with newer versions of PHP and other technologies.

Enable Automatic Updates:
WordPress offers automatic updates for minor releases by default. You can also enable automatic updates for plugins and themes by adding the following lines to your wp-config.php file:
php
Copy code
define(‘WP_AUTO_UPDATE_CORE’, true);

  • This ensures that security updates and minor WordPress releases are applied automatically.
  • Manually Check for Updates:
    Regularly check for updates in the WordPress dashboard under Dashboard > Updates. Make sure that you’re running the latest versions of all plugins, themes, and WordPress itself.

2. Implement a Robust Backup Strategy

Having a solid backup strategy is crucial for recovering from any error, including the 500 Internal Server Error. Backups ensure that if something goes wrong, you can quickly restore your site to a working state.

  • Use Backup Plugins:
    Plugins like UpdraftPlus, BackupBuddy, and BackWPup can automate the backup process. Schedule daily or weekly backups depending on how frequently you update your site.
  • Store Backups Off-Site:
    Ensure that your backups are stored in a secure, off-site location, such as cloud storage (e.g., Google Drive, Dropbox, or Amazon S3). This ensures that your backups are safe even if your server goes down.
  • Test Backups Regularly:
    Don’t just assume your backups will work. Periodically test your backups by restoring them to a staging site or local environment to ensure they are complete and functional.

3. Optimize Server Resources

Overloading your server with too many resources or running resource-intensive processes can lead to the 500 Internal Server Error. Optimizing your server settings can help prevent this.

  • Upgrade Hosting Plan:
    If you’re using shared hosting and your site is growing in traffic or complexity, consider upgrading to a VPS or dedicated server. These hosting plans offer more resources and better performance.
  • Monitor Resource Usage:
    Use tools provided by your hosting provider to monitor your server’s resource usage. Watch for spikes in CPU, memory, or bandwidth usage, and take action if you notice any unusual patterns.
  • Optimize PHP Settings:
    Ensure that your PHP settings are optimized for WordPress. You can do this by adjusting the php.ini file to increase the memory limit, execution time, and other PHP settings, as discussed in the previous section.

4. Perform Regular Database Optimization

A bloated or inefficient database can contribute to performance issues and errors. Regularly optimizing your WordPress database can help maintain its health and prevent errors.

  • Use Database Optimization Plugins:
    Plugins like WP-Optimize and WP-Sweep can automatically clean up your database by removing unnecessary data, such as post revisions, spam comments, and transients.
  • Manually Optimize the Database:
    You can also optimize your database manually using phpMyAdmin. This involves running optimization queries on your database tables to improve performance.

Limit Post Revisions:
WordPress stores every revision of a post or page, which can quickly add up. Limit the number of post revisions WordPress stores by adding the following line to your wp-config.php file:
php
Copy code
define(‘WP_POST_REVISIONS’, 5);

  • This will limit the number of revisions to five per post or page.

5. Monitor Error Logs and Debugging Tools

Regularly monitoring your error logs and using debugging tools can help you catch potential issues before they escalate into major problems.

  • Enable Debugging:
    As mentioned in the Advanced Debugging Techniques section, enabling WordPress debugging can help you identify issues early. Keep the WP_DEBUG_LOG feature active, but disable error display on the front end to avoid exposing sensitive information to visitors.
  • Use Monitoring Plugins:
    Plugins like Query Monitor and Health Check & Troubleshooting can help you monitor your site’s performance, identify errors, and troubleshoot issues in real time.

6. Limit the Use of Resource-Heavy Plugins and Themes

Some plugins and themes can be resource-intensive, especially those that add complex functionality or rely heavily on external APIs. While these plugins can be useful, they can also contribute to server strain and potential errors.

  • Use Lightweight Plugins:
    Opt for lightweight plugins that don’t overburden your server. Avoid installing plugins that you don’t actively use.
  • Test New Plugins on a Staging Site:
    Before installing new plugins or themes, test them on a staging site to ensure they don’t cause conflicts or errors.

7. Regularly Check File and Folder Permissions

Incorrect file and folder permissions can lead to various WordPress errors, including the 500 Internal Server Error. Make sure that your WordPress files and directories have the correct permissions.

  • Set Correct Permissions:
    The recommended file permissions for WordPress are:
    • Files: 644
    • Directories: 755
    • wp-config.php: 600
  • Use FTP to Check Permissions:
    You can use an FTP client like FileZilla to check and adjust the file and folder permissions for your WordPress installation.

Any Post Slider For WordPress Plugin: Showcase Posts Elegantly & Boost Engagement

Introduction

Imagine landing on a WordPress website where the content doesn’t just sit still but glides frequently. Your eyes are instantly drawn to elegantly presented posts sliding across the screen, perfectly personalized to your interests. You stay longer, you click more, and before you know it, you’re exploring content you didn’t even know you needed.

Now flip the script.

What happens when a visitor lands on your website and it looks ordinary? Static, cluttered, and easy to bounce from. That’s the silent killer of engagement and lack of visual storytelling. 

So here’s the big question: What if you could transform your blog or website into a dynamic, visually captivating experience without touching a single line of code?

That’s precisely what the Any Post Slider plugin for WordPress is built for. We have curated this blog for bloggers, marketers, designers, and content creators looking to captivate their audience and boost engagement. 

We will discuss what makes this plugin a standout choice and how this tool reshapes how your content connects, irrespective of whether you’re running a portfolio, a news site, or a passion project.

Let’s explore how to turn scroll fatigue into scroll delight.

Why Showcasing Posts Visually Matters For Engagement

Picture this: A potential customer lands on your website and is instantly greeted by a sleek, sliding display of featured posts containing vibrant visuals, clean headlines, and smooth transitions. Without thinking, their cursor hovers over a post, then another. The user is strongly hooked, and they haven’t even scrolled down yet.

This isn’t magic. It’s the power of visual content presentation.

When visitors land on your website, they’re not there to read a wall of text, at least not yet. First, they want to feel something intriguing, curiosity, maybe even delight. That’s where post sliders shine. They act like curated exhibitions, presenting your best content in a way that’s impossible to ignore.

And it’s not just about pretty animations; it’s about results. 

Here’s why visual post sliders are game-changers: 

  • Enhanced Engagement: Visual sliders naturally draw the eye and prompt interaction, encouraging users to explore more content without making them feel bored or fatigued.
  • Improved Time-on-Site & CTR: Websites using well-designed sliders experience lower bounce rates and increased click-through rates (CTRs), as users are more likely to engage with featured or trending content.
  • Seamless Navigation: By showcasing content categories, featured articles, or recent posts in an interactive format, you guide visitors through your website more intuitively.
  • Adaptable for Any Niche: Whether you run a blog, magazine, news portal, portfolio, or even a WooCommerce store, sliders are a visual upgrade that fits anywhere.

A fascinating fact: Users process visual data 60,000 times faster than text

So when you turn your top posts into stunning, swipeable sliders, you’re not making your site appealing, but making it more memorable and clickable.

Central Idea: Visual post sliders help capture attention, reduce bounce rates, and elevate the user experience by making your content not just seen but truly explored.

What Is the Any Post Slider Plugin?

Imagine having the power to spotlight your best content, be it any post from any post type, right where your visitors can’t miss it. That’s what the Any Post Slider plugin brings to the table.

It is a sleek, user-friendly WordPress plugin developed by WPeople, a team known for building intuitive, performance-driven tools for WordPress creators. 

Whether you’re a blogger wanting to highlight your latest posts, a marketer crafting testimonials, or a designer showcasing case studies, this plugin offers an excellent way to put your content in motion.

At its core, this plugin empowers you to:

  • Create beautiful, responsive sliders for any kind of WordPress post (yes, including custom post types).
  • Display posts based on categories, tags, or even specific selections, giving you total control over what appears in your slider.
  • Enjoy the flexibility of using shortcodes or Gutenberg blocks to put sliders anywhere on your website.

What makes it shine isn’t just its functionality but how smoothly it fits into your workflow. No code. No clutter. Just a focused, futuristic plugin built for creators who want neat, powerful visual storytelling.

So, whether you’re running a personal blog, a news portal, an agency website, or an online store, Any Post Slider gives you a lightweight, performance-first way to make your content stand out exquisitely and effectively.

The Crux: Any Post Slider is a feature-rich, beginner-friendly plugin by WPeople that empowers WordPress users to create splendid, responsive content sliders effortlessly. 

Key Features That Make Any Post Slider A Must-Have WordPress Plugin

A post slider plugin should do more than slide; it should elevate your content. That’s what Any Post Slider excels at. With a blend of intuitive usability, design flexibility, and powerful features under the hood, it emerges as a content presentation powerhouse.

Here’s what makes it distinct: 

Fully Responsive Across All Devices

Whether it’s a smartphone, tablet, or desktop, your sliders look flawless everywhere. The plugin adapts smoothly, ensuring perfect display across screen sizes without requiring any tweaks.

Supports All Custom Post Types

Have custom post types for portfolios, testimonials, events, or products? No problem. This plugin supports any post type, making it an outstanding pick for diverse use cases and complex websites.

Unlimited Sliders

There is no cap on creativity here. Create and manage unlimited sliders customized to different pages, categories, or campaigns – all from a single dashboard.

Simple & Intuitive Interface

User experience is at the heart of this plugin. Whether you’re a seasoned developer or a WordPress beginner, the clean UI and streamlined workflow make slider creation quick and enjoyable.

Multiple Layout Options

Select from three modern layouts (with more on the way) to match your website’s aesthetic. Whether you’re going minimalist or bold, your slider fits right in.

Seamless Compatibility With Any WordPress Theme

You won’t need to stress about theme conflicts. This plugin works smoothly with any WordPress theme, so you can just plug and play.

Advanced Navigation Options

Enhance user interaction with touch-swipe, mouse wheel scroll, and keyboard navigation – all built-in and ready to go.

RTL (Right-to-Left) Language Support

Do you have an audience that reads right to left? This plugin fully supports RTL languages, making it a globally ready solution.

Lightweight & Optimized For Speed

Your website’s speed won’t take a hit. Made with performance in mind, Any Post Slider is lightweight, optimized, and doesn’t bloat your site.

Gutenberg Block & Shortcode Support

Whether you’re a fan of the Block Editor or prefer classic shortcodes, this plugin offers both, giving you flexibility and ease of integration.

Flexible Post Filtering

Display content by category, tag, author, or specific posts. This level of filtering control helps you spotlight precisely what your visitors need to see.

Developer-Friendly Hooks & Filters

This plugin, created for extensibility, offers a developer-friendly architecture. Hooks and filters allow custom tweaks without touching the core code.

Multiple Slider Types

Go beyond basic. Choose from a range of slider types, including carousel, fade, auto-scroll, and more, to match your website’s branding elements and vision.

FeatureDescription
Fully ResponsiveAdapts seamlessly to all devices, be it desktop, tablet, or mobile.
Custom Post Type SupportWorks with any post type, be it blogs, products, portfolios, or testimonials.
Unlimited SlidersNo cap on how many sliders you can create – total freedom.
User-Friendly InterfaceClean, intuitive UI that even beginners can master in minutes.
Multiple LayoutsChoose from carousel, fade, and auto-scroll.
Note: More layouts coming soon.
Theme CompatibilityWorks smoothly with any modern WordPress theme.
Navigation ControlsIncludes mousewheel, keyboard, swipe, and arrow navigation.
RTL SupportPerfect for languages written from right to left.
Speed-Optimized & LightweightMinimal codebase ensures swift loading with no bloat.
Gutenberg & Shortcode ReadyEffortlessly embed sliders via Gutenberg blocks or shortcodes.
Advanced FilteringFilter posts by categories, tags, or specific post IDs.
Developer-FriendlyExtend or customize with built-in hooks and filters.
Flexible Slider TypesCarousel, fade, loop, and more, customized for various content needs.

Smart Summary: Packed with flexible layouts, post filtering, custom post support, and performance-first design, the Any Post Slider plugin is the complete package for showcasing content sublimely and responsively. 


How To Use Any Post Slider: Step-by-Step Guide

As you’ve seen, what it can do. Now, let’s bring it to life on your WordPress website. Whether you’re a beginner or an experienced WordPress user, setting up the Any Post Slider plugin is incredibly straightforward. Here’s how to get started:

Step 1: Install & Activate The Plugin

  1. Log in to your WordPress dashboard.
  2. Navigate to Plugins → Add New.
  3. Search for “Any Post Slider by WPeople”.
  4. Click Install Now, and once installed, hit Activate.

Pro Tip: If you’ve downloaded the plugin as a .zip file from WPeople’s website, upload it via the “Upload Plugin” option.

Step 2: Create Your First Post Slider

  1. Go to Any Post Slider → Add New Slider in your dashboard menu.
  2. Give your slider a name.
  3. Choose the post type you want to display, such as posts, products, portfolios, or any custom post type.
  4. Filter your posts using categories, tags, or even specific post IDs.

Step 3: Customize The Layout & Behavior

  1. Select a layout style (carousel, fade, etc.).
  2. Define the number of slides to show, scroll speed, auto-scroll settings, and animation style.
  3. Switch on or off navigation controls like arrows, swipe, mouse wheel, or keyboard.
  4. Choose RTL if your site uses a right-to-left language.

 Good to Know: Every change is reflected in real-time with the intuitive preview tool.

Step 4: Embed The Slider On Pages or Posts

  • Copy the generated shortcode and paste it into any page, post, or widget area.
  • Or, use the Gutenberg block labeled “Any Post Slider” to insert it visually.
  • That’s it! Your content is now showcased in a glistening, responsive, high-converting slider.

What It Means For You: With just a few clicks, Any Post Slider turns your static content into dynamic sliders that propel engagement, improve UX, and visually elevate your website without touching a line of code. 

What Distinguishes Any Post Slider From Other Slider Plugins

Let’s face it: the WordPress plugin market is stacked with slider tools. From Smart Slider to MetaSlider, you’ve probably come across dozens of promising, visually enticing carousels and flexible layouts. So what differentiates Any Post Slider from the rest?

Simplicity Without Compromise

Most slider plugins bombard users with a sharp learning curve or overly complex UIs. Any Post Slider flips the script by offering:

  • A clean, minimal interface
  • No coding setup is required
  • Gutenberg + shortcode support for both beginners and advanced users

You don’t need to dig through nested menus or toggle endless options just to display a few posts gracefully.

Precision Filtering That Saves Time

Many sliders can show recent posts. But what if you want only posts from a specific category or just handpicked articles?

That’s where Any Post Slider emerges as a powerful option by empowering you with:

  • Tag, Category, And Post ID Filtering
  • Support for all custom post types (e.g., products, portfolios, testimonials)

Whether you’re running a blog or a WooCommerce store, this plugin adapts efficiently to your needs.

Speed-Optimized & Lightweight

Unlike bloated alternatives that slow down your website:

  • The plugin is built to be lightweight and performance-friendly
  • It uses minimal dependencies, resulting in speedier load times
  • Fully supports mobile-first, touch-swipe gestures for modern UX

Designed With Developers in Mind

For those who like to tinker, this plugin doesn’t get in your way. It:

  • Offers developer hooks and filters
  • Has RTL language support
  • Has Theme-agnostic, works out-of-the-box with any latest WordPress theme

A Visual Glance At Any Post Slider Plugin Comparison with the other 2 Prominent Plugins

FeatureAny Post SliderSmart SliderMetaSlider
Post Filtering by Tags/CategoryYesLimitedLimited
Custom Post Type SupportYesPartialNo
Gutenberg + Shortcode SupportYesYesYes
Lightweight PerformanceOptimizedHeavyMedium
Developer Hooks & RTL SupportYesNoNo
Layout & Navigation FlexibilityHighHighBasic

In a Nutshell: Unlike generic slider plugins that try to do everything and end up doing nothing well. Any Post Slider is smartly focused on speed, simplicity, and total control over what you want to display and how. 

Challenges Overcome By Any Post Slider Plugin

If you’ve ever tried displaying dynamic content in a visually appealing way on WordPress, chances are you’ve hit some or all of these frustrating walls. The Any Post Slider plugin isn’t just another ordinary plugin letting you add another carousel. It is created to solve real pain points that users face every day.

Problem 1: Limited Post Control

Many popular slider plugins restrict users to recent posts or offer basic filtering. But what if you want to:

  • Showcase posts only from a certain category?
  • Feature handpicked articles?
  • Exclude outdated or irrelevant content?

 Solution: With flexible filtering options based on tags, categories, or specific post IDs, Any Post Slider gives you total content control and no compromises.

 Problem 2: Overcomplicated Interfaces

A plugin meant to save time shouldn’t take hours to configure. Complex settings, confusing navigation, and technical jargon create unnecessary barriers.

 Solution: Any Post Slider offers a minimal, intuitive UI that works seamlessly with Gutenberg and shortcodes, irrespective of whether you’re a beginner or a pro.

 Problem 3: Plugin Bloat & Slow Load Times

Let’s be honest: some slider plugins feel heavier than the content they display. They load unnecessary scripts and styles, creating latency on your website.

 Solution: Any Post Slider is lightweight and speed-optimized, delivering aesthetic post sliders without dragging your site’s performance.

Problem 4: Poor Mobile & RTL Support

Many plugins fall apart on mobile or struggle with RTL languages, especially for multilingual and global sites.

Solution: This plugin is fully responsive, supports touch gestures, and is RTL-ready, ensuring accessibility and compatibility for all users.

Problem 5: Lack Of Developer Flexibility

Custom tweaks? Integration with other plugins or themes? Many tools lack hooks, filters, or extensibility.

Solution: Any Post Slider is developer-friendly, offering extendable features and code-level flexibility to customize sliders precisely how you want.

Quick Recap: Any Post Slider is a thoughtfully designed solution to everyday content display challenges. It is built with users and developers in mind and aims to simplify your workflow while amplifying your website’s visual impact. 

Real-World Use Cases Of Any Post Slider Plugin

While features are impressive on paper, the true value of a plugin lies in how it performs in real-world scenarios. Any Post Slider isn’t just a utility; it’s a practical solution designed for content creators, marketers, publishers, and developers who want more authority and flair in how their posts appear.

Let’s explore how different types of users are making the most of it:

Blogger Featuring Trending or Evergreen Content

Imagine you’re a food blogger with hundreds of recipes. Instead of letting value-oriented older content fade into the archives, use a post slider on your homepage to feature:

  • Seasonal favorites (e.g., “Top 5 Summer Salads”)
  • Reader favorites
  • Recently updated recipes

Result: Better engagement, improved session duration, and revived traffic to older content.

Marketer Showcasing Product Updates or Testimonials

A digital marketer managing a product website can display:

  • Recent blog updates on product features
  • Rotating customer testimonials
  • Promotional content or event recaps

Result: Boosts trust and keeps the homepage fresh without manual updates every week.

News Publisher Highlighting Breaking Stories

For media websites, keeping dynamic content front and center is crucial. With filtering by category or tags, you can:

  • Display top headlines from specific sections (like Politics, Tech, or Sports)
  • Feature “Editor’s Picks” or regional news
  • Auto-scroll content in a ticker-style slider

Result: A futuristic, professional news experience highlighting content at a glance.

Creative Portfolio Displaying Projects

Photographers, designers, and artists can visually exhibit:

  • Featured projects or case studies
  • Design blog posts or behind-the-scenes content
  • Testimonials and creative process write-ups

Result: Adds movement and storytelling without relying on third-party portfolio builders.

Developer Building Client Sites With Custom Needs

Whether working with CPTs or filtering custom post sets, developers can:

  • Create client-specific sliders for events, courses, team members, or FAQs
  • Reuse the plugin across multiple projects with different needs
  • Extend functionality with custom hooks

Result: Speedy deployment with in-depth customization when needed.

The Bottom Line: Any Post Slider adapts to every workflow and content strategy, from bloggers and publishers to marketers and developers. It’s a creative canvas to spotlight what matters most on your website. 

WordPress Post Slider

Conclusion

In the digital world flooded with content, it’s not the loudest voices that win;  it’s the cleverest presentations. Your WordPress site might already have valuable, engaging content, but if it’s buried beneath cluttered layouts or outdated designs, it’s simply not getting the attention it deserves. That’s where the Any Post Slider plugin steps in as a game-changer in how you spotlight your stories, updates, and ideas.

Throughout the blog, we’ve discussed what makes this plugin a powerhouse, from responsive design and dynamic filtering to its simplicity, speed, and developer-friendly flexibility. 

But what truly sets it apart is the experience it creates. Visitors aren’t just scrolling; they’re exploring, discovering, and engaging. You’re not just sharing content but showcasing it with intent and elegance.

Whether you’re a blogger looking to feature trending posts, a marketer promoting key messages, or a designer curating visual impact, Any Post Slider offers a sleek, customizable, and high-performing solution built to evolve with your goals.

So here’s your next step: don’t let your best content go unnoticed. Give it the stage it deserves. Install Any Post Slider, and see your website transformed into a gripping, scroll-stopping experience your audience will remember and return to. 

FAQ

Is Any Post Slider Compatible With Page Builders Like Elementor Or Beaver Builder?

Yes, Any Post Slider works seamlessly with illustrious page builders. You can easily insert sliders via shortcode or Gutenberg block, making it fully compatible with Elementor, Beaver Builder, WPBakery, and more.

Does The Plugin Support Scheduled Posts Or Future-Dated Content?

While the plugin does not directly display future posts, you can use WordPress’s native scheduling and filtering tools to automatically include new posts in your slider once published.

Can I Translate The Plugin Into My Language?

Yes, Any Post Slider is translation-ready and supports multilingual plugins like WPML and Loco Translate. You can effortlessly localize the plugin to match your website’s language preferences.

Will Using Multiple Sliders Affect My Website’s Loading Speed?

No, the plugin is lightweight and built with performance in mind. It uses optimized code and sequential loading techniques to ensure multiple sliders do not slow down your website.

Is There A Way To Add Custom Styling or CSS To My Sliders?

Absolutely! Developers can use custom CSS or the plugin’s developer-friendly hooks and filters to fully customize the slider’s appearance to match any theme or brand style.

Elementor vs. Gutenberg: Choosing The Ideal WordPress Editor For 2025

Introduction

Do you know that nearly 43% of websites use WordPress as their core platform? Sounds like a fascinating number. You will be surprised that thousands of businesses still struggle to choose the right WordPress editor for their website. 

If you face the same dilemma or want to avoid this confusion and make a confident selection, continue reading. This blog is designed to help you make that one critical choice that can either make or break your website design experience, performance, and creative control. 

Two prominent WordPress editors, Gutenberg and Elementor, dominate the market worldwide at present. Hence, this blog will provide a roadmap for working wisely, designing rapidly, and building websites that actually convert. 

You’ll discover the real strengths, hidden limitations, and latest updates that separate Gutenberg’s clean efficiency from Elementor’s design muscle.

Whether you’re a blogger looking to publish seamlessly, a small business wanting speed, or a creative agency chasing bold visuals, the clarity lies in this blog. 

Stop guessing and uncover the answers. 

WordPress Editors In 2025: Evolution And Trends

Gone are the days when websites were static and slow. Today, whether you are building a blogging website, an eCommerce store, or a portfolio, choosing the right WordPress editor plays a significant role in shaping both the creative process and user experience.

The WordPress ecosystem in 2025 is clever, quicker, and more design-forward than ever before. It has made the selection battle between Elementor and Gutenberg more relevant than ever.

Gutenberg, the default WordPress editor, has matured beyond mere “blocks.” It now supports global styles, offers reusable templates, and has intuitive drag-and-drop blocks constantly updated for performance and accessibility.

Elementor, on the other hand, has become a designer’s playing field. Because of its live editing, flexible layouts, and AI-powered enhancements, it gives users visual freedom without touching a single line of code.

What is propelling both editors forward? An increasing demand for responsive design, faster page speeds, mobile-first experiences, and seamless integrations with third-party tools like CRM platforms, AI assistants, and analytics.

Key Takeaway: WordPress editors in 2025 are no longer just tools; they are design ecosystems. Whether you prioritize speed, control, or creativity, understanding the evolution of Elementor and Gutenberg helps you pick the ideal one confidently. 

Understanding Gutenberg WordPress Editor

Gutenberg is a WordPress built-in block editor known for its neat, straightforward, and purpose-built content creation. It was launched with WordPress 5.0 and has redefined how users build web pages by introducing a block-based editing system. 

Instead of relying on shortcodes or custom HTML, you can use drag-and-drop blocks for text, images, video, and more, all within the native WordPress dashboard.

It is designed to keep things fast and functional. Whether you’re writing SEO-friendly blog posts or creating high-converting landing pages, Gutenberg gives you an exceptional experience with minimal distractions. The best part is that you don’t need extra plugins.

Moreover, Gutenberg is not limited to beginners. Developers and content teams can also leverage its performance-first approach. It generates lightweight code, which helps your pages load swiftly. It is a massive advantage to boost SEO and keep mobile users hooked to the website. 

Guess what? You can extend Gutenberg with custom blocks and plugins personalized to your workflow.

Your Quick Recap: Gutenberg is suitable for content-driven websites that value speed, simplicity, and clean design. It is built into WordPress, easy to use, and perfect for users who want to stay focused on content creation. 

Understanding Elementor WordPress Editor

Elementor is a visual that gives complete design control into your hands without requiring coding skills. It was launched in 2016 and has transformed how users build websites by introducing a true drag-and-drop, front-end editing experience. It means you will precisely see what your visitors get.

Elementor gives you the tools to build bold, interactive websites, from animations to advanced layout options. With its intuitive user interface and real-time editing, you can tweak every detail. It includes colors, fonts, spacing, and buttons while instantly previewing your changes.

Even at its free level, Elementor offers dozens of widgets and pre-designed templates. But when you upgrade to Elementor Pro, the creative possibilities broaden even further with cutting-edge features like dynamic content, custom headers and footers, pop-ups, motion effects, and form builders.

Elementor brings flexibility for designers, freelancers, and marketers who want their websites to feel custom and futuristic without friction.

In a Nutshell: Elementor is a powerful, design-focused page builder ideal for users who want pixel-perfect control and live editing freedom. It is also practical for custom projects where visual storytelling matters as much as functionality.

Detailed Comparison Of Gutenberg & Elementor: Key Aspects

When it comes to building a WordPress website, the editor you select can shape the entire experience, from design flexibility to site performance. Hence, we will walk you through how they stack up across crucial factors that matter most to website owners, designers, and developers.

Ease Of Use

Gutenberg is built into WordPress, and it feels natural for anyone familiar with the platform. The best part is its straightforward block-based system. You just need to pick a block, place it, and customize. This keeps things organized, quick, intuitive, and no design experience needed.

Elementor, on the other hand, puts visual design front and center. You build pages in real-time with a drag-and-drop interface and live previews. Though it takes a bit more time to master than Gutenberg, the payoff is superior creative control and a transparent visual editing process.

What This Means For You: Gutenberg is perfect for rapid content creation and a clean workflow. Elementor is practical if you aim for pixel-perfect layouts and a visually dynamic website.

Customization And Flexibility

Gutenberg keeps things minimal by design. You can add third-party block plugins for extra features, but it is focused on performance and structured layouts. This makes it an outstanding pick for blogs, news sites, or content-first platforms.

Elementor offers in-depth customization. From futuristic layout controls to interactive animations, you can fine-tune nearly every detail. It is a viable fit for creative professionals, brands, and agencies that need full visual freedom.

In a Nutshell: Gutenberg delivers simplicity with essential personalization. Elementor gives you the keys to build complex, interactive designs with style.

Performance And Page Speed

Since Gutenberg is part of WordPress core, it is lightweight and optimized. Fewer dependencies and minimal bloat result in swift load times.

Elementor, with its rich feature set, naturally adds some weight. You can keep your website responsive using built-in performance tools like script control and optimization settings. Also, you can turn off unused features to maintain speed.

Why It Matters: The Gutenberg editor is built for speed. Elementor offers powerful design tools, and you can enjoy sharp performance with thoughtful tuning.

Pricing And Investment Value

Gutenberg is completely free. You don’t need subscriptions or premium versions. It is updated alongside WordPress and suits anyone wanting the entire functionality at no extra cost.

Elementor follows a freemium model. The free version offers core tools, but Elementor Pro unlocks advanced widgets, design kits, and theme building. It is a worthwhile investment for high-end websites or design-driven businesses.

Decision Point: If cost is your biggest concern, Gutenberg wins hands down. If you want cutting-edge design tools and enhanced functionality, Elementor Pro brings solid value.

Ecosystem And Compatibility

Gutenberg integrates seamlessly with most WordPress themes and plugins. As WordPress evolves, so does Gutenberg, making it a reliable pick for compatibility and long-term use.

Elementor has a thriving third-party ecosystem. From add-ons to custom templates, there is no shortage of design tools and integrations. It works well with popular themes and supports creative website-building beyond the basics.

Something To Note: Gutenberg is stable and smooth. Elementor offers more design possibilities through its broader, creative ecosystem.

Developer And Community Perspectives

Developers value Gutenberg for native integration, consistent code structure, and content-focused approach. It is suited for projects where efficient editing and long-term stability matter.

Elementor has built a strong creative community. Designers, freelancers, and agencies share resources, tutorials, and templates, constantly pushing their potential forward.

From Both Worlds: Gutenberg appeals to developers needing structured code. Elementor fuels creativity through a design-focused, collaborative community.

Real-Time Editing And Visual Control

Gutenberg lets you preview content as you build with blocks. It is effective for systematically managing written content and layouts.

Elementor excels in real-time editing. You can see changes in real-time, speeding up the design process and reducing guesswork. The visual builder is a boon for users preferring a more hands-on, graphical experience.

Here’s The Catch: Gutenberg keeps editing simple and organized. In contrast, Elementor gives complete control with instant visual feedback.

Accessibility, Security, And Future Trends

Both tools take accessibility seriously. Gutenberg uses WordPress standards to promote accessible content layouts. Elementor ensures that designs are mobile-responsive and user-friendly.

Security-wise, Gutenberg is supported by the WordPress core team with frequent updates. Elementor also receives regular patches and improvements. Both are adapting rapidly to design trends and future-ready tech like AI.

Why This Counts: Whether you want accessibility or future-proofing, both editors tick the right boxes in their own way.

AI Integration And Machine Learning

AI is now shaping how websites are made. Gutenberg is rolling out AI suggestions for layout adjustments and writing assistance. It helps speed up content creation without sacrificing quality.

Elementor uses AI to suggest design improvements and performance optimizations. With more updates planned, it is stepping into innovative, faster workflows backed by automation.

Next-Level Insight: Gutenberg and Elementor are adopting AI to enhance user productivity. The future of web design is intelligent, and both editors are getting ready for it.

Gutenberg vs. Elementor: Feature Comparison At A Glance

Before moving to the use cases, here is a quick table summarizing pivotal metrics:

AspectGutenberg (Block Editor)Elementor (Page Builder)
Ease Of UseNative to WordPress, minimal learning curve, intuitive for content creators.Drag-and-drop interface, live preview, slightly steeper learning curve, but highly visual.
Customization & FlexibilityModular blocks, extendable with plugins, make it best for content-driven websites.Extensive design options, templates, and animations make it ideal for creative freedom.
Performance & SpeedLightweight, minimal code, swifter load times, SEO-friendly.Rich features may slow performance slightly, but Elementor offers AI optimization tools.
Pricing & ValueCompletely free with WordPress core, no extra cost.Freemium model with advanced features unlocked in Elementor Pro.
Ecosystem & CompatibilitySeamless theme integration, broad plugin support, stable updates.Strong third-party plugin ecosystem, highly compatible with design tools.
Developer & Community SupportWell-documented, developer-friendly, widely adopted in content-heavy projects.Vibrant creative community, ongoing innovation through user feedback and case studies.
Real-Time EditingBasic live preview for block-based editing.Full WYSIWYG editing, real-time design feedback, ideal for visual builders.
Accessibility & SecurityCode structure supports accessibility, which is secured through WordPress core updates.Responsive, accessible design is updated regularly to address vulnerabilities.
AI IntegrationBasic AI suggestions for layout and content flow.Smart design tips and layout improvements powered by machine learning.

Use Cases And Real-World Applications

Not every website needs all the bells and whistles. Some thrive on simplicity, while others demand immersive, interactive experiences. That’s where understanding the practical applications of Gutenberg and Elementor becomes critical.

Gutenberg shines in content-centric websites where clarity, speed, and consistency are paramount. Blogging and editorial websites, educational platforms, and news portals benefit from Gutenberg’s uncomplicated structure and swift loading times. Its minimalistic approach keeps readers focused on the content.

In contrast, Elementor is a go-to tool for websites that prioritize design, engagement, and visual storytelling. Portfolios, marketing & agency websites, landing pages, and even eCommerce stores succeed using Elementor’s dynamic features. From animations to popups and cutting-edge layout controls, it enables standout user experiences without extensive coding.

In the real world, many web creators blend both tools. For instance, a digital magazine may use Gutenberg for article publishing and Elementor for sleek landing pages and sales funnels. 

Freelancers often prefer Elementor for its drag-and-drop speed, while developers and publishers lean on Gutenberg for its stability and streamlined performance.

Whether you are building an elegant online journal or a striking brand experience, choosing the right editor depends on your project’s personality and not just its functionality.

Final Thought From This Section: Gutenberg powers structure and content clarity, while Elementor delivers visual impact and design flair. Remember, your project’s goals will help you determine the best fit. 

Smart Strategies To Blend Gutenberg And Elementor For Best Results

Why choose just one when you can get the best of both worlds? Some of the most effective WordPress websites today don’t stick to either Gutenberg or Elementor. They use a blend of both to leverage each editor’s maximum advantage.

A hybrid approach is becoming a go-to strategy for developers, designers, and content creators. 

Here’s how it works: use Gutenberg for content-heavy sections like blog posts, knowledge bases, and internal static pages where speed, simplicity, and SEO performance are top priorities. Then, bring in Elementor for pages needing rich visuals like homepages, landing pages, product portfolios, and sales funnels.

This method offers the perfect balance between performance and polished presentation. Gutenberg keeps your website fast and organized, while Elementor gives you the creative freedom to craft standout visuals without complex coding. 

The key to making this strategy work in your favor is thoughtfully planning your content structure before development begins. Decide which pages need design flexibility and where creativity should shine. This keeps your workflow systematic and your website easy to maintain over time.

Crucial Insights: Combining Gutenberg’s simplicity with Elementor’s design power creates a flexible, growth-friendly workflow that adapts to nearly any website need. It makes your WordPress site smarter, quicker, and future-ready without sacrificing performance. 

Final Verdict And Expert Recommendations

Choosing between Gutenberg and Elementor isn’t about which tool is best. It’s about which option fits your website goals, team capabilities, and future scalability.

Gutenberg is your go-to pick if your website thrives on neat content, SEO performance, and swift load times. Its native integration with WordPress and minimal overhead make it practical for blogs, online magazines, news portals, and content-heavy platforms. Writers, editors, and developers prioritizing structure and speed will feel right at home.

If your project demands custom designs, animations, and high-impact visuals, Elementor wins. Its drag-and-drop flexibility, extensive widget library, and real-time editing experience cater to creative professionals, agencies, and entrepreneurs building landing pages, portfolios, or branded websites.

Working with a team or offering client services? A hybrid approach often works best. 

Use Gutenberg for managing blog content and standard pages, and call on Elementor for visually stunning marketing sections or pages that need a design edge. This strategy keeps the website lightweight while still allowing standout visual features.

Lastly, keep an eye on updates. Both tools are evolving rapidly, especially in AI-powered design and performance optimization. Choosing one today doesn’t lock you in forever. The best strategy is to stay informed, test regularly, and adapt based on what works for your audience.

Smart Summary: Gutenberg offers simplicity and speed if you are a content creator or small business owner. Designers and freelancers crafting unique client experiences will find Elementor the crowning glory. Choose what supports your workflow and not just what looks fancy.

Conclusion

Selecting between Gutenberg and Elementor isn’t about picking a winner. It’s more about determining what works best for you. Whether you’re involved in creating content-rich blogs, designing visual-first landing pages, or doing both, your editor should support your creativity, speed, and workflow.

Gutenberg shines when simplicity, rapidity, and flawless WordPress integration are key. It is practical for content creators who value clarity and control. In comparison, Elementor is your go-to if you love designing visually striking pages with freedom and flair, especially for brands, portfolios, or custom websites.

The smartest approach? Know your goals, test both tools, and don’t shy away from blending them when needed. As WordPress continues to evolve, flexibility will be your biggest strength. 

Remember, whichever route you choose, one thing is certain: Gutenberg and Elementor aren’t just tools; they are creative companions. Use them wisely, and your website will not only function, it will stand out from competitors. 

So, build with purpose and design with confidence. Let your editor be the launchpad, not a limitation. 

Stripe.js Integration: Displaying Errors And Notice Responses In Multiple Languages

Introduction

Here is an interesting stat: nearly 72% of users are more likely to complete a purchase if the content is in their native language. Now, imagine a user confidently filling out your multilingual payment form only to get hit with an English error message at checkout. That tiny inconsistency could cost you trust, conversions, and credibility.

So, here is a question: What if your Stripe.js payment errors and system responses could instantly reflect the visitor’s native language automatically?

Whether you are a WordPress developer, WooCommerce integrator, or building multilingual platforms for global clients, this guide is for you. It is thoughtfully curated to help you deliver a streamlined, language-aware payment experience that adapts in real-time without any plugin bloat or clunky workarounds.

You will obtain insights regarding: 

  • Dynamically pass and apply user language preferences from the server to the client. 
  • Display Stripe.js validation messages in multiple languages like Korean, Japanese, French, and more.
  • Keep your payment flow polished, localized, and conversion-ready without breaking your existing setup.

Continue reading to uncover the blueprint for making Stripe.js speak their language, too. 

Understanding Stripe.js Integration

Whether you’re running a global eCommerce store or a donation platform serving a multilingual community, a one-size-fits-all payment solution simply won’t help you break through. That’s where Stripe.js integration comes in. It goes beyond a mere payment processor by serving as a powerful bridge between your website’s design, security, and international user experience. 

Before diving straightaway into the code, let’s unpack what Stripe.js actually does and why its multilingual capabilities can be a game-changer for your website.

What Is Stripe.js Integration?

Stripe.js is a powerful JavaScript library provided by Stripe that empowers developers to securely gather and transmit payment information without ever touching sensitive card data. 

By integrating Stripe.js, websites can create seamless, secure payment forms using customizable Stripe Elements like card inputs. Guess what? All this while meeting PCI compliance. It’s an advanced, developer-friendly way to handle payments directly on your site with confidence and superior control.

Why Stripe.js Integration Matters For Multilingual Sites

Payment clarity becomes as crucial as payment security, especially when your target audience spans across borders and languages. That’s where Stripe.js shines as a front-runner. It lets you customize error messages, placeholder texts, and on-screen notices to match the user’s preferred language: automatically or dynamically. 

This level of localization bolsters user trust and significantly lowers hassle during the checkout process, which can boost conversions. Whether your visitors speak Korean, Japanese, French, or English, Stripe.js ensures they feel like shopping at their native place when entering payment details.

Key Takeaway: Stripe.js doesn’t just process payments; it personalizes them. Its ability to display native-language responses nurtures trust and simplifies user experience, especially on multilingual websites.

Step-By-Step Stripe.js Integration For A Seamless Multilingual Checkout

When you’re building a payment experience, clarity isn’t a luxury; it’s a necessity. But throw in a multilingual audience. And suddenly, a tiny oversight can lead to significant confusion. That’s why integrating Stripe.js with dynamic language support is vital. 

From capturing card details to displaying error messages in the appropriate language, every element of the checkout flow should feel like a personalized experience for the user. Hence, we will walk you through the complete integration process – neat, efficient, and built to speak your users’ language.

Step 1: Initialize Stripe With Locale Support

Stripe allows you to specify the `locale` when creating the Stripe instance. This ensures that all error messages and placeholders are displayed in the desired language.

### Example Code:

“`javascript

// Set the language dynamically based on user preference or site configuration

var lang = ‘en’; // Default to English

if (typeof wpjs !== ‘undefined’ && wpjs.wpml_lang) {

    lang = wpjs.wpml_lang; // Use the language passed from the server

}

// Initialize Stripe with the locale

var stripe = Stripe(‘YOUR_PUBLISHABLE_KEY’, {

    locale: lang // Set the language for Stripe error messages

});

### Explanation:

– **`locale` Option**: Stripe supports various locales such as `en`, `ja`, `ko`, `fr`, etc. You can find the full list of supported locales in the [Stripe documentation](https://stripe.com/docs/js/initializing#stripe-js-options).

– **Dynamic Language**: The `lang` variable is set dynamically based on the user’s preference or site configuration.

Step 2: Create Stripe Elements

Stripe Elements are customizable input fields for collecting payment details. You can style these fields and mount them to your form.

### Example Code:

“`javascript

// Create an instance of elements

var elements = stripe.elements();

// Define the style for Stripe Elements

var style = {

    base: {

        fontWeight: 400,

        fontFamily: ‘Arial, sans-serif’,

        fontSize: ’16px’,

        lineHeight: ‘1.4’,

        color: ‘#121212’,

        ‘::placeholder’: {

            color: ‘#888’,

        },

    },

    invalid: {

        color: ‘#eb1c26’,

    }

};

// Create and mount the card number element

var cardElement = elements.create(‘cardNumber’, {

    style: style,

    placeholder: ‘Enter your card number’

});

cardElement.mount(‘#card_number’);

// Create and mount the expiry and CVC elements

var exp = elements.create(‘cardExpiry’, { style: style });

exp.mount(‘#card_expiry’);

var cvc = elements.create(‘cardCvc’, { style: style });

cvc.mount(‘#card_cvc’);

“`

Step 3: Handle Errors In The User’s Language

Stripe provides error messages when users enter invalid payment details. These messages will now appear in the language specified by the `locale`.

### Example Code:

“`javascript

// Validate input of the card elements

var resultContainer = document.getElementById(‘paymentResponse’);

cardElement.addEventListener(‘change’, function(event) {

    if (event.error) {

        resultContainer.innerHTML = ‘<p class=”error-message”>’ + event.error.message + ‘</p>’;

    } else {

        resultContainer.innerHTML = ”;

    }

});

“`

Step 4: Create A Token And Handle The Response

When the user submits the payment form, create a token using Stripe and handle the response.

### Example Code:

“`javascript

// Get the payment form element

var form = document.getElementById(‘paymentFrm’);

var btn = document.getElementById(‘submit-payment-btn’);

// Create a token when the form is submitted

form.addEventListener(‘submit’, function(e) {

    e.preventDefault();

    createToken();

});

function createToken() {

    // Update button text based on language

    var btnText = lang === ‘ko’ ? ‘처리 중…’ : ‘Processing…’;

    btn.disabled = true;

    btn.textContent = btnText;

    stripe.createToken(cardElement).then(function(result) {

        if (result.error) {

            // Display error message

            resultContainer.innerHTML = ‘<p class=”error-message”>’ + result.error.message + ‘</p>’;

            btn.disabled = false;

            btn.textContent = ‘Submit Payment’;

        } else {

            // Send the token to your server

            stripeTokenHandler(result.token);

        }

    });

}

“`

Step 5: Submit The Token To Your Server

Send the token to your server for processing. You can also display success or failure messages in the user’s language.

### Example Code:

“`javascript

function stripeTokenHandler(token) {

    // Insert the token ID into the form so it gets submitted to the server

    var hiddenInput = document.createElement(‘input’);

    hiddenInput.setAttribute(‘type’, ‘hidden’);

    hiddenInput.setAttribute(‘name’, ‘stripeToken’);

    hiddenInput.setAttribute(‘value’, token.id);

    form.appendChild(hiddenInput);

    // Submit the form via AJAX

    var formData = new FormData(form);

    fetch(form.action, {

        method: ‘POST’,

        body: formData

    })

    .then(response => response.json())

    .then(data => {

        if (data.status === ‘success’) {

            resultContainer.innerHTML = ‘<p class=”success-message”>’ + data.msg + ‘</p>’;

            window.location.href = data.redirect_page_url;

        } else {

            resultContainer.innerHTML = ‘<p class=”error-message”>’ + data.msg + ‘</p>’;

            btn.disabled = false;

            btn.textContent = ‘Submit Payment’;

        }

    })

    .catch(error => {

        resultContainer.innerHTML = ‘<p class=”error-message”>An error occurred. Please try again.</p>’;

        btn.disabled = false;

        btn.textContent = ‘Submit Payment’;

    });

}

“`

Step 6: Pass Language From Server To JavaScript

For a multilingual site, you can pass the user’s language preference from the server to JavaScript using a global variable.

### Example PHP Code:

“`php

<script>

    var wpjs = {

        wpml_lang: ‘<?php echo defined(‘ICL_LANGUAGE_CODE’) ? ICL_LANGUAGE_CODE : ‘en’; ?>’

    };

</script>

<script src=”path/to/stripe.js”></script>

“`

### Explanation: – **`wpml_lang`**: Retrieves the current language code from WPML or defaults to `’en’`.

Quick Recap: By following a streamlined Stripe.js integration process that adapts to your users’ preferred language, you create a frictionless, globally friendly checkout experience that cultivates trust, reduces errors, and boosts successful transactions. 

Multilingual website's payment process

Stripe Locale Language Error Handling

When building global websites, your focus shouldn’t be limited to processing payments. You need to communicate clearly, especially when something goes wrong. 

Stripe.js offers built-in support for multilingual error messages based on the locale you set during initialization. This means your users see error prompts in their native language, creating a seamless and localized experience.

How It Works

Stripe dynamically translates error messages like “Your card number is incorrect” or “This field is required” according to the language specified in the Stripe instance:

javascript

CopyEdit

var stripe = Stripe(‘YOUR_PUBLISHABLE_KEY’, {

    locale: lang // Automatically renders localized error responses

});

Here, lang could be ‘en’ for English, ‘ja’ for Japanese, ‘ko’ for Korean, and so on. Stripe supports over 30 locales, making it ideal for multilingual WordPress sites, WooCommerce stores, or custom checkout pages.

Displaying Localized Errors

Once initialized, error messages from Stripe Elements, like invalid card numbers, incorrect expiry dates, or missing CVCs are returned in the selected locale automatically:

javascript

CopyEdit

cardElement.addEventListener(‘change’, function(event) {

    if (event.error) {

        resultContainer.innerHTML = ‘<p class=”error-message”>’ + event.error.message + ‘</p>’;

    } else {

        resultContainer.innerHTML = ”;

    }

});

You don’t have to write custom translations, as Stripe handles this out of the box.

Best Practices

  • Fallback to English: If the selected locale isn’t supported, Stripe defaults to English. Consider showing a soft message for unsupported languages.
  • Sync with site language: Pass the website’s active language (e.g., from WPML or Polylang) to your JavaScript to maintain consistency.
  • Test multilingual error flows: Try triggering common validation errors in various locales to verify correct translations.

Key Takeaway: By setting the correct locale and letting Stripe handle the rest, you can ensure error feedback that speaks the user’s language. This creates clarity, trust, and a frustration-free checkout experience for global audiences. 

Essential Stripe.js Implementation Techniques

Once you have initialized Stripe with multilingual support, it’s time to bring your payment form to life. This section covers the core implementation practices, from mounting Stripe Elements to real-time error handling and AJAX submissions. It ensures your checkout experience is both functional and user-friendly.

Whether you’re aiming for pixel-perfect design or smooth processing, these techniques form the backbone of a responsive and multilingual-ready payment integration.

Mounting Stripe Elements

Mounting refers to attaching Stripe’s secure input fields (card number, expiry, and CVC) to your frontend form. It ensures sensitive card data never touches your server, maintaining PCI compliance. 

var elements = stripe.elements();

var cardElement = elements.create(‘cardNumber’);

cardElement.mount(‘#card_number’);

var exp = elements.create(‘cardExpiry’);

exp.mount(‘#card_expiry’);

var cvc = elements.create(‘cardCvc’);

cvc.mount(‘#card_cvc’);

Pro Tip: Use precise HTML IDs (#card_number, etc.) and make sure the container elements are visible before mounting.

Styling Card Fields For UX Consistency

Customizing the appearance of Stripe Elements lets you maintain brand consistency and elevate the user interface experience. 

var style = {

  base: {

    color: ‘#121212’,

    fontSize: ’16px’,

    ‘::placeholder’: { color: ‘#888’ },

  },

  invalid: {

    color: ‘#eb1c26’,

  },

};

var styledCard = elements.create(‘cardNumber’, { style: style });

styledCard.mount(‘#card_number’);

UX Tip: Highlight invalid fields with a red border or color change to captivate user attention quickly.

Real-Time Error Feedback Handling

Stripe Elements emits events like change, which allow real-time error detection. This ensures users get instant feedback when entering invalid card details. 

cardElement.addEventListener(‘change’, function(event) {

  const resultContainer = document.getElementById(‘paymentResponse’);

  if (event.error) {

    resultContainer.innerHTML = ‘<p class=”error-message”>’ + event.error.message + ‘</p>’;

  } else {

    resultContainer.innerHTML = ”;

  }

});

Localization Benefit: Error messages auto-display in the language set via the locale option, making your form globally friendly.

Submitting Payment Securely via AJAX

Submitting the form via AJAX keeps the user on the same page and avoids unnecessary reloads, accelerating the checkout experience. 

form.addEventListener(submit’, function(e) {

  e.preventDefault();

  stripe.createToken(cardElement).then(function(result) {

    if (result.error) {

      // Show localized error

    } else {

      stripeTokenHandler(result.token);

    }

  });

});

Best Practice: Always disable the submit button during processing to prevent duplicate submissions.

Your Smart Summary: Stripe.js implementation isn’t just about connecting inputs to payments; it’s about creating a swift, secure, and intuitive checkout experience. By mastering these techniques, you will ensure your payment form is flawless, sleek, and multilingual-ready. 

A Quick Glance At Stripe.js Implementation Techniques

TechniquePurposeKey BenefitDeveloper Tip
Mounting Stripe ElementsEmbeds secure fields (Card, CVC, Expiry) into the frontendPCI-compliant and secure card data handlingEnsure container elements exist before mounting
Styling Card FieldsCustomizes the design of card input fieldsConsistent brand experience and improved UI/UXUse brand fonts/colors; highlight invalid states clearly
Real-Time Error FeedbackProvides immediate validation and error messagesInstant feedback in the user’s languageUse the change event to detect and display errors
Submitting via AJAXSends payment token without reloading the pageQuicker, smoother checkout experienceDisable the submit button during token creation

Multilingual payments

Conclusion

In the global digital marketplace, one-size-fits-all simply isn’t a standard solution for elevating user experience. By leveraging Stripe.js’s powerful locale configuration and integrating it with multilingual support, you ensure your payment process feels native, intuitive, and human, irrespective of the language your users speak.

Whether your audience is in Seoul, Paris, or Tokyo, error messages and payment notices that “speak their language” eliminate unnecessary hassle, instill trust, and boost conversion rates. When your payment form speaks your visitors’ language, you are not just making sales; you’re fostering connections.

Remember, a thoughtfully implemented multilingual Stripe integration does more than translate the content and crucial elements. It transforms the payment journey into a trouble-free, user-friendly experience personalized to diverse audiences. 

We wish you Good Luck in creating a payment experience that feels personal, professional, and powerful.